Category: Gardening Guide

Welcome to the “Garden Guide” section of our urban gardening website! If you’re looking to transform your urban space into a beautiful and functional garden, you’re in the right place. This category is dedicated to providing you with creative and practical design ideas that cater to the unique challenges of urban gardening.


  • Garden Rescue: Transforming Your Outdoor Space with Smart Planning

    Garden Rescue: Transforming Your Outdoor Space with Smart Planning

    When it comes to maintaining a flourishing garden, few challenges are as persistent and unpredictable as managing the impact of chickens on delicate borders. “Garden rescue” is not just a catchy phrase—it represents the careful, strategic process of reclaiming your outdoor space and restoring balance between flora and fauna. This is especially true for those following garden rescue season 10, where innovative solutions for garden restoration are demonstrated for both amateur and experienced gardeners. In this article, we’ll explore a comprehensive approach to tackling garden chaos, from relocating chicken coops to reshaping garden borders, and show you exactly how a well-planned strategy can turn a chaotic outdoor area into a thriving sanctuary.

    The charm of a garden lies in its vibrancy and diversity, but it can quickly vanish when chickens are introduced. Their natural behaviors—scratching, pecking, and dust bathing—can decimate newly planted flowers and disturb carefully cultivated soil. Witnessing a garden destroyed overnight is disheartening, but with the right planning, recovery is not only possible but rewarding. By the end of this guide, you will be equipped with practical strategies, backed by experience, to achieve impressive garden rescue before and after results.

    Assessing the Impact: Understanding Chicken Damage

    Chickens are entertaining and beneficial in many ways, but they can transform a pristine garden into a bare, dusty plot faster than you anticipate. The first step in any garden rescue project is a thorough assessment of the damage.

    Observing Chicken Behavior

    Spend time monitoring your flock. Chickens tend to scratch in consistent patterns, often focusing on soft soil and tender shoots. Documenting these paths is crucial. Not only does it inform where fences should be placed, but it also helps anticipate future damage. From experience, even a small group of bantams can completely strip a flower border in a matter of weeks if left unchecked.

    Documenting Destruction

    Before making any changes, capture the current state of your garden. Photos or videos provide a baseline for measuring improvement and can be particularly useful if you are following tips from garden rescue season 10. Seeing the “before” image emphasizes the transformation that is possible with proper planning and effort.

    Clearing Temporary Obstacles

    Once the damage is assessed, prepare the site for intervention. Remove bricks, rocks, and debris that may obstruct construction or planting. Uneven surfaces not only make gardening difficult but can also create hiding spots for pests. A clean, leveled area ensures that any new structures, like a relocated chicken coop, sit firmly and last longer.

    Managing Invasive Weeds

    Nettles and other aggressive weeds are common along garden borders, especially near fences or water channels. Attempting to remove these without proper preparation can be dangerous. Focus on easily accessible clusters first, using gloves and clippers to trim them safely. For larger or riskier patches, seek assistance. Mapping these zones on a garden plan ensures that future plantings are protected and the weeds do not spread into newly rescued areas.

    Relocating the Chicken Coop for Optimal Space

    A key component of garden rescue is redefining space for both plants and poultry. Moving the chicken coop to a permanent, strategic location can prevent further destruction while improving the welfare of your flock.

    Choosing the Right Spot

    Select a location that provides a balance of sunlight and shade. Chickens need warmth in the morning and cool shelter during the afternoon. In my experience, placing the coop along a back fence line works well—it creates a clear boundary between the garden beds and the birds’ roaming area. Ensure the ground is leveled and, if possible, cement the base to enhance durability.

    Safe Relocation

    Relocating a coop is a team effort. Heavy lifting requires at least one strong helper to avoid injury. Slide the structure carefully onto the prepared site, checking that it is level and stable. The new position should allow chickens to access their dust bath and roaming area without interfering with flower or vegetable beds.

    Creating Defined Zones

    Zoning is essential for maintaining harmony between your plants and poultry. Designate a specific area for the chickens to roam and dig, separate from the flower borders. Incorporate a dust bath with a mix of sand and soil to meet the chickens’ natural grooming needs. Providing cover and shade, such as a trellis or small shelter, ensures the birds can enjoy the outdoors safely.

    Managing Flock Dynamics

    Transitioning chickens to a new coop requires understanding their social hierarchy. Larger hens can bully smaller ones, causing stress and chaos in the garden.

    Observing and Dividing

    Allow chickens to roam in shifts or separate runs to minimize conflicts. Watch how they interact and adjust zones accordingly. Even three bantams can cause significant damage if the fencing is inadequate. Testing the layout before full release is a practical way to ensure both plants and chickens remain protected.

    Maintaining Peace

    Secure fences and boundaries, particularly along high-traffic paths or near water. A mix of low wire barriers and physical reinforcements, like bricks or mesh, prevents escapes while keeping the birds safe. Regular monitoring ensures that the flock adapts to the new environment without reverting to destructive behaviors.

    Soil Remediation: Turning Chicken Waste into Gold

    Chickens provide a hidden benefit to any garden—fertile soil. However, to fully capitalize on this, proper handling is essential.

    Sifting and Reusing Soil

    Chicken droppings enrich soil, but care is needed to avoid spreading weeds or pests. Use a sieve or screen to sift soil collected from previously damaged areas. Removing roots and debris ensures the resulting soil is safe for planting in new beds. I have found that this process not only improves soil texture but also provides a cost-effective source of fertilizer.

    Salvaging Existing Plants

    Rescuing plants before they succumb to damage is a vital step. For instance, hostas can be divided and repotted, while overlooked seedlings like Sweet William can be relocated to safe zones. Transplanting immediately into fresh soil and providing adequate shade allows these plants to recover and thrive.

    Securing Garden Edges

    Future-proofing the garden against chicken encroachment is essential. Stack bricks or install low walls along vulnerable borders. Incorporate fencing that is both sturdy and removable for easy maintenance. This approach reduces repeated damage and saves time on continuous repairs.

    Redefining Garden Borders: Integrating Perennials and Edibles

    Transforming the long garden border is one of the most rewarding aspects of a garden rescue. By blending flowers with edibles, you create a space that is both beautiful and productive.

    Creating a Kitchen Garden

    Shift some perennial flower beds to accommodate herbs and vegetables. Carrots, beans, and herbs can be interspersed among blooms, creating a symbiotic environment where flowers deter pests from your food crops. Strategic placement of plants based on sunlight requirements maximizes both aesthetics and yield.

    Protecting New Plantings

    Chickens are naturally curious, so protecting new beds is crucial. Use low wire fences or brick edging to deter early digging. Test the layout with a few plants before expanding the garden, ensuring the borders are safe and plants establish quickly.

    Maintaining Boundary Integrity

    Fence maintenance is not just about protection—it also prevents neighbor disputes and keeps your garden secure. Reinforce weak points, check for gaps after storms, and trim vegetation along edges. These small measures prevent escapes and preserve the garden’s integrity.

    Project Tidy Up: A Foundation for Seasonal Growth

    A well-planned tidy up, as demonstrated in garden rescue season 10, lays the groundwork for ongoing success. From moving coops and zoning spaces to sifting enriched soil and planting mixed borders, each step contributes to a sustainable garden ecosystem. By thoughtfully combining flowers and vegetables, protecting borders, and managing the flock, you set the stage for a vibrant garden year-round.

    The satisfaction of seeing a previously chaotic garden transformed into a well-ordered, thriving space is unmatched. Each stage—from soil preparation to planting—is an opportunity to blend creativity with practicality, achieving both beauty and functionality.

    Pros and Cons of Garden Rescue Strategies

    ProsCons
    Efficient use of space for both plants and chickensInitial setup requires significant time and labor
    Cost-effective soil enrichment using chicken wasteRequires ongoing monitoring of flock behavior
    Protection of delicate plants from damagePotential neighbor conflicts if boundaries are not secure
    Opportunity to mix flowers and edibles for a productive gardenSeasonal adjustments may be necessary for extreme weather
    Long-term sustainability with strategic zoningFencing and coop relocation may require investment

    Frequently Asked Questions (FAQs)

    Q1: How often should I relocate my chicken coop?
    A1: Permanent relocation is ideal, but minor adjustments can be made seasonally to balance sun exposure and protect sensitive plants.

    Q2: Can chickens and flowers coexist in the same garden?
    A2: Yes, with careful zoning and fencing, chickens can coexist without damaging flowers, as demonstrated in garden rescue projects.

    Q3: How do I prevent invasive weeds from spreading after garden rescue?
    A3: Remove surface roots, use gloves for manual trimming, and bag waste. For tough patches, seek help or use physical barriers.

    Q4: What is the best soil mix for chicken dust baths?
    A4: A blend of sand and loose garden soil works well. Ensure the area is dry, shaded, and protected from waterlogging.

    Q5: How do I protect small or young chickens during the garden transition?
    A5: Separate runs, stagger free-range periods, and observe flock dynamics. Adjust fencing to prevent bullying and escapes.

    Conclusion

    A successful garden rescue is a combination of observation, planning, and execution. By assessing damage, relocating the chicken coop, managing flock behavior, enriching soil, and redefining borders, you can achieve remarkable garden rescue before and after results. Integrating flowers and edibles maximizes both beauty and productivity, while careful zoning and boundary management ensure harmony between plants and poultry. Whether inspired by garden rescue season 10 or starting your first tidy-up project, the steps outlined here provide a structured approach to reclaiming and rejuvenating any garden space.

    Transforming a garden is not just about plants; it’s about creating a balance between life, beauty, and practicality. Start small, plan strategically, and watch your garden evolve into a space that is both vibrant and resilient.

  • Great Garden Plants: The Ultimate Guide to Building a Beautiful and Functional Garden

    Great Garden Plants: The Ultimate Guide to Building a Beautiful and Functional Garden

    Gardening is a timeless hobby that allows individuals to connect with nature, enjoy tranquility, and even create a haven of beauty right in their own backyard. Whether you are an experienced gardener or just beginning to explore this fulfilling activity, choosing the right plants can make all the difference. The variety of great garden plants available today ensures that you can find the perfect options to fit your space, climate, and personal aesthetic. In this guide, we’ll explore a variety of plant options, design strategies, and garden essentials that will help you transform your outdoor space into a beautiful, thriving environment.

    The Importance of Selecting the Right Plants for Your Garden

    When it comes to creating a garden that not only looks stunning but also thrives, plant selection is key. The foundation of a beautiful garden begins with understanding the environmental factors at play—such as climate, soil conditions, and sunlight. Choosing the right plants for your garden involves considering the needs of each plant species and ensuring they align with the growing conditions of your area.

    There are many great garden plants to choose from, ranging from colorful flowers to leafy shrubs, climbing vines, and even trees. When selecting plants, it’s important to keep in mind your garden’s purpose. Are you looking for aesthetic appeal, privacy, or perhaps an edible garden? For instance, if you’re designing a tranquil retreat, incorporating flowering plants like roses, lavender, or peonies can add a touch of serenity and color. On the other hand, if you’re focusing on functional plants, edible species such as tomatoes, herbs, or leafy greens could be great choices.

    Designing a Garden with Great Garden Plants

    Now that you understand the importance of selecting the right plants, it’s time to consider garden design. How you arrange your plants will have a significant impact on the overall look and feel of your garden. A well-planned garden layout ensures that your plants receive adequate sunlight and air circulation while also making your garden space visually appealing.

    For an elegant touch, consider creating focal points with larger plants like trees or tall shrubs. This can help structure the garden, making it feel more organized and purposeful. Surrounding these focal points with smaller plants, such as perennials or ornamental grasses, can create layers and textures that add depth to the design. Additionally, mixing different types of plants—such as flowering, leafy, and evergreens—can provide year-round beauty and interest.

    Incorporating pathways and seating areas into your garden design can also enhance its functionality. If you plan to spend a lot of time in your garden, adding a garden bench or creating a cozy sitting area will allow you to fully appreciate your outdoor space. Be sure to complement the seating with a stylish garden umbrella from Amazon, which can provide much-needed shade during the warmer months.

    Exploring the Dallas Arboretum and Botanical Garden

    If you’re seeking inspiration for your garden design, there’s no better place to visit than the Dallas Arboretum and Botanical Garden. Located in the heart of Texas, the Dallas Arboretum is a lush, expansive botanical garden that showcases a wide variety of plant species in beautifully curated landscapes. From manicured flower beds to serene water features, the garden offers endless design ideas for garden enthusiasts.

    One of the highlights of the Dallas Botanical Garden is its seasonal displays, which change throughout the year. Whether you’re visiting during the spring when vibrant flowers bloom or in the fall when colorful foliage takes center stage, the garden’s ever-changing beauty offers fresh inspiration for garden planning.

    Walking through the Dallas Arboretum is an immersive experience that allows you to connect with nature while gaining insight into different types of plants and how they interact with their environment. Many of the plants displayed are well-suited for Texas climates, making them great options for homeowners in the region looking to create their own piece of paradise.

    Gardening Tips for Beginners: Start Simple, Grow Strong

    For those new to gardening, starting with simple plants can help you gain confidence and understanding of the process. A successful garden doesn’t require an extensive range of rare or expensive plants. Instead, focusing on easy-to-care-for varieties will allow you to learn the basics and grow your gardening skills over time.

    Consider starting with great garden plants that are known for their resilience. Plants like sunflowers, marigolds, and zinnias are not only colorful but also hard to kill. These plants thrive in a variety of conditions and are perfect for new gardeners who want to experience the joy of seeing their efforts come to life. As you become more experienced, you can gradually introduce more complex plant species that require specific care.

    For beginners in urban settings, visiting local botanical gardens like the botanical garden Dallas or the Dallas Arboretum and Botanical Garden can be invaluable. These places offer educational resources and gardening classes where you can learn about soil health, plant care, and sustainable gardening practices.

    Creating a Sustainable Garden with Great Garden Plants

    In today’s world, sustainability is at the forefront of many gardening decisions. Creating a garden that is both beautiful and eco-friendly is not only better for the environment but can also lead to lower maintenance costs. The right choice of great garden plants can help you conserve water, support local wildlife, and reduce the need for harmful chemicals.

    For example, drought-resistant plants are excellent choices for sustainable gardens. Native plants, such as Texas Bluebonnets or Black-eyed Susans, are well-suited for local climates and require less water and care. Additionally, by planting a variety of species that attract pollinators like bees and butterflies, you can help support the local ecosystem and promote biodiversity.

    If you’re looking for inspiration, visiting the Dallas Arboretum and Botanical Garden provides a first-hand look at how sustainable gardening practices can be incorporated into a large-scale garden design. From rainwater harvesting systems to native plant beds, the Arboretum shows how sustainability and beauty can go hand in hand.

    Incorporating Modern Features into Your Garden Design

    As technology continues to advance, modern features are becoming increasingly popular in garden design. Smart gardening tools and systems, such as automated irrigation or weather-responsive garden lighting, can make maintaining your garden more convenient while also ensuring optimal plant health.

    A garden umbrella from Amazon is a great example of modern garden furniture that combines form and function. It provides shade during hot weather and can also be a stylish addition to your garden’s aesthetic. If you have a patio or outdoor seating area, investing in a high-quality umbrella is an easy way to upgrade your space while ensuring comfort for family and friends.

    The Role of Garden Structures in Enhancing Your Garden Design

    Garden structures such as trellises, arbors, and pergolas play an essential role in enhancing the aesthetic appeal and functionality of a garden. These structures not only provide vertical interest but also support climbing plants like vines and roses. A carefully placed structure can transform an ordinary garden into a whimsical retreat.

    Additionally, using garden structures to create different zones within your garden can increase the sense of space. For example, an arbor leading into a flower garden can create a sense of anticipation, drawing visitors into a beautiful and intimate corner of the garden.

    Creating a Beautiful Garden for Every Season

    One of the most rewarding aspects of gardening is the ability to enjoy your plants year-round. By selecting a mix of great garden plants, you can ensure that your garden remains beautiful regardless of the season. For instance, early bloomers like tulips and daffodils provide vibrant color in the spring, while perennials like echinacea and daylilies offer blooms that return year after year.

    Incorporating evergreen shrubs and trees can also ensure that your garden maintains its structure and beauty during the colder months. As the seasons change, you can also switch out annual plants to reflect the colors and moods of the time of year, keeping your garden fresh and inviting.

    Wrapping Up: Your Dream Garden Awaits

    Creating a garden filled with great garden plants is an ongoing journey that combines planning, patience, and creativity. Whether you’re looking for a peaceful retreat, an edible garden, or a space to entertain, the right selection of plants, along with thoughtful design, can transform your outdoor space into a beautiful sanctuary.

    Whether you’re gathering ideas from places like the Dallas Botanical Garden, adding new features like a garden umbrella from Amazon, or learning from expert gardeners at local botanical gardens, the possibilities are endless. By taking the time to design a garden that meets both your aesthetic and practical needs, you can cultivate a space that brings joy, beauty, and harmony into your life.

  • Discover the Secret to a Lush, Thriving Urban Garden!

    Ready to Transform Your Space into a Green Paradise?

    Ready to Transform Your Space into a Green Paradise?

    1. What’s your main interest in urban gardening?

    A) DIY projects and hacks
    B) Gardening tools & gear
    C) Plant care & maintenance
    D) Gardening guide

    2. How experienced are you with gardening?

    A) Beginner
    B) Intermediate
    C) Expert
    D) Newbie

  • The Ultimate Guide to Urban Air Winter Gardens: A Comprehensive Overview

    The Ultimate Guide to Urban Air Winter Gardens: A Comprehensive Overview

    As urban environments continue to grow, the need for incorporating nature into our living spaces becomes more crucial. One such solution that has gained popularity in recent years is the “urban air winter garden.” This innovative design approach allows individuals in cities to cultivate lush, healthy plants even in the colder months. Whether you’re living in an apartment or a townhouse, transforming your indoor space into a winter garden can significantly enhance your home’s aesthetic and air quality. In this guide, we’ll explore everything you need to know about creating a stunning urban air winter garden, with tips on urban winter garden design, indoor winter garden ideas, and air-purifying plants for winter gardens.

    The Concept of an Urban Air Winter Garden

    An urban air winter garden is more than just a space for plants—it’s a sanctuary that brings nature indoors during the cold winter months. As cities grow and urbanization continues, finding green spaces can be challenging. A winter garden setup for small spaces is the perfect solution for those living in tight quarters or urban areas. These gardens provide an escape from the concrete jungle, offering a breath of fresh air and a sense of tranquility.

    Creating such a space involves carefully selecting plants that thrive indoors during winter, designing your garden with air-purifying plants, and utilizing clever space-saving techniques. Whether you have a balcony, a small nook by the window, or a dedicated indoor space, an urban air winter garden can be adapted to fit any area.

    Urban Winter Garden Design: Maximizing Your Space

    Urban winter garden design is all about transforming your living space into a vibrant, breathable area, even when temperatures drop outside. When planning the design of your garden, there are several factors to consider, such as lighting, plant selection, and layout.

    Lighting

    In the winter months, natural light can be scarce, making it essential to maximize the light available for your plants. Placing your urban air winter garden near windows that receive the most sunlight is crucial. For spaces that lack natural light, consider using grow lights to ensure your plants get the necessary light to thrive. LED grow lights are an excellent choice because they are energy-efficient and provide the spectrum of light that plants need for photosynthesis.

    Plant Selection

    The plants you choose for your winter garden will play a significant role in its success. Opting for air-purifying plants for winter gardens not only enhances the beauty of the space but also improves the air quality. Popular choices include spider plants, peace lilies, and aloe vera, which thrive in indoor conditions and are known for their ability to remove toxins from the air. Additionally, plants like succulents and ferns are well-suited to indoor environments and require minimal maintenance.

    Vertical Gardening

    For smaller spaces, vertical gardening is a game-changer. Installing shelves or wall-mounted planters can help you maximize your space while creating a beautiful display of greenery. This approach allows you to grow more plants in a compact area and adds a touch of vertical greenery to your urban air winter garden.

    Indoor Winter Garden Ideas: Personalizing Your Green Space

    Indoor winter garden ideas focus on making the most of your indoor environment. Whether you’re working with limited space or want to create a grandiose winter garden, there are plenty of ways to bring your vision to life.

    Herb Garden

    An indoor herb garden is a fantastic addition to any urban air winter garden. Herbs like basil, thyme, and rosemary not only add a delightful aroma to your home but are also perfect for cooking. Placing them near your kitchen or on a windowsill where they can receive ample light will ensure they thrive throughout the winter months.

    Tropical Plants for a Lush Look

    If you’re longing for a more tropical feel, consider incorporating tropical plants like palms, ferns, and bromeliads into your winter garden setup for small spaces. These plants add a vibrant pop of green to your indoor space and thrive in warmer, humid conditions. Grouping tropical plants together can also help create a mini indoor jungle.

    Aquatic Plants

    For a unique touch, consider adding aquatic plants such as water lilies or peace lilies in decorative pots with water-filled bases. These plants add an element of serenity to your garden and require minimal effort to care for, making them a great option for beginners.

    Air-Purifying Plants for Winter Gardens: A Breath of Fresh Air

    Indoor air quality can often suffer during the winter months due to closed windows and limited ventilation. Incorporating air-purifying plants into your urban air winter garden can significantly improve your indoor environment. These plants not only add beauty to your space but also help remove toxins from the air.

    Top Air-Purifying Plants for Winter Gardens

    1. Spider Plant (Chlorophytum comosum): Known for its ability to remove harmful chemicals like formaldehyde and xylene, the spider plant is an excellent addition to any winter garden.
    2. Peace Lily (Spathiphyllum): Peace lilies are highly effective at removing toxins such as benzene, ammonia, and formaldehyde from the air. They also thrive in low-light conditions, making them perfect for winter gardens.
    3. Aloe Vera: Apart from its medicinal properties, aloe vera is an excellent air purifier, removing formaldehyde and benzene from your home.
    4. Snake Plant (Sansevieria): This hardy plant is perfect for indoor winter gardens, as it can survive with minimal sunlight and water. It also absorbs toxins like formaldehyde and benzene.

    The Benefits of Air-Purifying Plants

    The benefits of incorporating air-purifying plants into your urban air winter garden are numerous. These plants not only purify the air but also promote better sleep, reduce stress, and increase productivity. Additionally, plants like peace lilies and aloe vera release oxygen at night, making them ideal for improving air quality in your home.

    Winter Garden Setup for Small Spaces: Practical Tips

    If you’re working with limited space, don’t worry—there are plenty of ways to create a stunning urban air winter garden in smaller areas. Whether you live in an apartment or have a cozy urban home, these winter garden setup for small spaces ideas will help you make the most of your available space.

    Use of Multi-Functional Furniture

    Incorporating multi-functional furniture, such as a bench with built-in planters or a table with a green top, can help you save space while adding greenery to your home. This setup allows you to grow plants while utilizing furniture that serves a practical purpose, such as seating or storage.

    Hanging Planters

    Hanging planters are a great way to add vertical height to your winter garden setup without taking up floor space. You can use macrame plant hangers or ceiling hooks to suspend your plants from above. This technique is ideal for growing trailing plants or small potted plants that require minimal maintenance.

    Compact Planters

    For small spaces, using compact planters is a practical solution. These planters come in various sizes and styles, allowing you to customize your winter garden setup to fit your space. Opt for sleek, modern planters that complement your home’s décor, or use rustic wooden planters for a more organic look.

    FAQs: Urban Air Winter Gardens

    1. What are the best plants for an urban air winter garden?

    The best plants for an urban air winter garden are those that thrive indoors during winter, such as spider plants, peace lilies, aloe vera, and succulents. These plants are not only easy to care for but also purify the air and enhance the overall ambiance of your home.

    2. Can I create a winter garden in a small apartment?

    Yes, you can create a winter garden in a small apartment by using space-saving techniques like vertical gardening, compact planters, and hanging planters. Choose plants that thrive in low-light conditions and make sure to maximize natural light whenever possible.

    3. How do I maintain my winter garden during the colder months?

    To maintain your winter garden during the colder months, ensure that your plants receive enough light, either from natural sunlight or grow lights. Keep the temperature in your home stable, and avoid placing plants near drafts or heaters. Additionally, water your plants sparingly, as they tend to need less water during the winter.

    4. How do air-purifying plants work in winter gardens?

    Air-purifying plants work by absorbing harmful toxins like formaldehyde, benzene, and ammonia from the air. They purify the indoor environment by releasing oxygen and improving air quality. These plants are especially beneficial in winter, when ventilation is limited due to closed windows.

    Pros and Cons of an Urban Air Winter Garden

    ProsCons
    Enhances air quality by purifying indoor airRequires attention to lighting and watering
    Provides a sense of tranquility and natureSome plants may require specialized care
    Space-saving options for small areasMay need artificial lighting in darker months
    Improves overall aesthetics and moodCan be costly to set up initially
    Low-maintenance plants like succulentsMay take time to get the right plant balance

    Conclusion: Creating Your Perfect Urban Air Winter Garden

    An urban air winter garden is a wonderful way to introduce nature into your living space during the colder months. By choosing the right plants, using creative space-saving designs, and considering air-purifying plants, you can create a beautiful, functional garden that enhances your home’s air quality and aesthetic. Whether you have a small apartment or a larger home, there are countless ways to personalize your winter garden, ensuring it meets both your design preferences and practical needs.

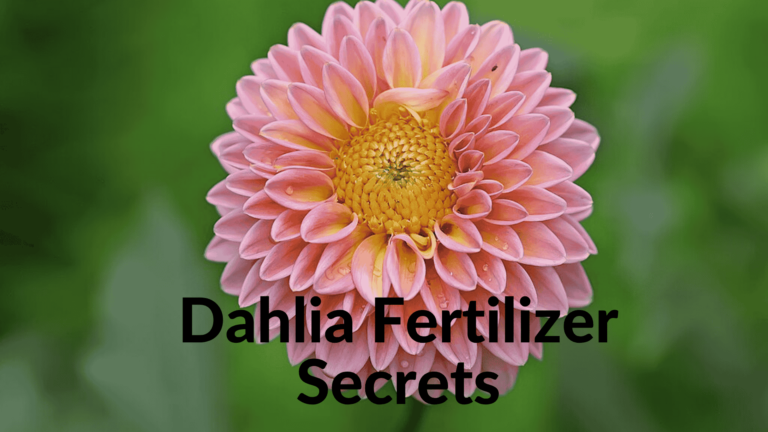
  • Dahlia Fertilizer Secrets: Boost Your Blooms Like a Pro!

    Dahlia Fertilizer Secrets: Boost Your Blooms Like a Pro!

    Introduction

    Dahlia Fertilizer are known for their vibrant blooms and striking foliage, but to achieve the healthiest plants and most stunning flowers, you need to provide them with the right care. Fertilizing is a crucial part of the process, and selecting the appropriate fertilizer can make all the difference in ensuring your dahlias thrive. In this guide, we will cover everything you need to know about dahlia fertilizer, including tips on choosing the best fertilizer, managing nutrient needs, and using cow/steer manure, commercial fertilizers, and more.

    Understanding the Importance of Fertilization for Dahlias

    Fertilizing your dahlias properly is essential for their overall health and success. Fertilizers provide the necessary nutrients for growth, allowing plants to develop strong stems, vibrant foliage, and impressive blooms. Without the right nutrition, your dahlias could suffer from weak growth or fewer flowers. It’s essential to recognize the vital roles that nitrogen, phosphorus, and potassium play in the fertilization process.

    Key Nutrients for Dahlia Growth: Nitrogen, Phosphorus, and Potassium

    When it comes to fertilizing dahlias, understanding the NPK ratio is key. This stands for nitrogen (N), phosphorus (P), and potassium (K), which are the three primary nutrients that plants need to thrive:

    • Nitrogen (N) helps promote green, leafy growth.
    • Phosphorus (P) supports healthy root development and encourages flower production.
    • Potassium (K) aids overall plant health and flower strength.

    An ideal fertilizer for dahlias should have a low nitrogen content, particularly during the blooming phase. While nitrogen is essential during vegetative growth, excess nitrogen can lead to weak stems, small blooms, and tuber rot.

    Low Nitrogen Dahlia Fertilizer

    For optimal results, dahlias benefit most from low nitrogen fertilizers. These fertilizers typically have a high percentage of phosphorus and potassium, which are crucial for encouraging flowering and promoting tuber health. A good rule of thumb is to look for fertilizers with a nitrogen content that’s half or less than the phosphorus and potassium levels.

    Best Fertilizers for Dahlias

    When choosing a fertilizer for your dahlias, look for bloom food, commercial fertilizers, or processed/bagged steer manure. These options are excellent choices for ensuring your plants receive the right nutrients throughout the growing season. It’s also recommended to combine both cow manure and commercial fertilizers to provide a well-rounded nutrient mix.

    Cow/Steer Manure: A Natural Fertilizer

    Why Cow Manure is Perfect for Dahlias

    Cow or steer manure is one of the best organic options for enriching the soil and fertilizing dahlias. It helps improve soil structure, making it lighter and better aerated. Applying processed steer manure before or during planting provides valuable nutrients like nitrogen, phosphorus, and potassium. However, it’s important to ensure that the manure is processed properly, as fresh manure can burn the plants due to its high nitrogen content.

    • Soil Enrichment: Cow manure improves soil fertility by adding organic matter.
    • Balanced Nutrient Delivery: It provides a balanced mix of nitrogen, phosphorus, and potassium, essential for dahlia growth.
    • Manure Application Tips: Apply steer manure in the fall to allow it time to break down before planting in the spring.

    Risks of Fresh Manure

    Avoid using fresh manure right before planting, as it may be too high in nitrogen, potentially leading to tuber rot. It’s better to add fresh manure in the fall, giving it time to decompose and integrate into the soil for the next planting season.

    Commercial Dahlia Fertilizer

    If you’re looking for a more convenient option, commercial fertilizers offer an easy way to deliver the essential nutrients dahlias need. These fertilizers come in a variety of NPK ratios, allowing you to choose the one that fits your plants’ needs best.

    Choosing the Right Commercial Fertilizer

    Look for commercial fertilizers with low nitrogen content, such as 2-4-4, 3-9-4, 4-10-7, or 5-10-10. These fertilizers have high potassium and phosphorus, making them ideal for supporting dahlia growth and flowering. Ensure the fertilizer has a balance that supports blooming and tuber development.

    The Importance of Fertilizer Timing

    When and How Often to Dahlia Fertilizer

    Dahlias require consistent fertilization to reach their full potential. The first application should be around 30 days after planting, followed by regular applications every 3-4 weeks. If growing in containers, it’s crucial to fertilize every 2-3 weeks as nutrients are washed through the soil more quickly.

    • Fertilizing Schedule: Apply fertilizer throughout the growing season, especially during periods of extreme heat or stress.
    • Application Tips: Follow the manufacturer’s guidelines on fertilizer dosage to avoid overfeeding.

    Avoiding High Nitrogen Fertilizers

    Why You Should Avoid Overfeeding Dahlias with Nitrogen

    Excessive nitrogen can lead to various problems with your dahlias, including weak stems, small blooms, and even tuber rot. Avoid using high nitrogen fertilizers like Miracle-Gro or 16-16-16 for regular feeding. These formulas can cause over-fertilizing consequences, where the plants focus on lush green growth at the expense of blooming.

    Instead, opt for fertilizers that promote a balance of nutrients, focusing on phosphorus and potassium to encourage blooming and strong tubers.

    Managing Fertilizer Use Throughout the Season

    Fertilizing at Different Stages of Dahlia Growth

    Dahlias go through different growth stages, and their nutrient needs change as they develop. Here’s a breakdown of the fertilizing schedule for each stage:

    • Early Season (Vegetative Growth): Use a higher nitrogen fertilizer like 10-10-10 or 14-14-14 to support green foliage and strong stems.
    • Mid to Late Season (Blooming): Switch to fertilizers rich in phosphorus and potassium (e.g., 0-20-20, 10-20-20) to support flower development and enhance blooming.
    • End of Season: Use zero nitrogen fertilizers, such as 0-10-10, to help strengthen tubers and prevent excessive green growth that can weaken them for winter storage.

    Expert Fertilizing Tips for Dahlias

    To ensure your dahlias grow healthy and produce beautiful flowers, here are some expert tips to follow:

    1. Regular Soil Testing

    Conduct soil tests regularly to understand your soil’s nutrient profile. This helps you avoid both over-fertilizing and under-fertilizing, ensuring that your plants receive the right amount of nutrients.

    2. Managing Nitrogen Balance

    Be mindful of nitrogen balance. Too much nitrogen can lead to tall, floppy plants with weak flowers, while too little can result in poor growth and minimal blooms.

    3. Watering and Fertilizing Together

    Fertilize your dahlias along with a deep watering session to ensure the nutrients are properly absorbed by the roots. Avoid shallow watering, as it doesn’t penetrate deep enough to support the plant’s root system.

    Common Mistakes to Avoid When Fertilizing Dahlias

    When fertilizing dahlias, avoid these common mistakes:

    • Over-fertilizing: Applying too much fertilizer can burn the plants and lead to poor growth.
    • Using the Wrong Fertilizer: Stick to low-nitrogen formulas for blooming and tuber development.
    • Ignoring Soil Health: Without good soil, even the best fertilizer won’t work. Amend your soil regularly with cow manure or other organic matter.

    FAQs

    1. What is the best fertilizer for dahlias?

    The best fertilizer for dahlias is one that is low in nitrogen and high in phosphorus and potassium, such as 2-4-4, 3-9-4, or 0-20-20. These fertilizers promote healthy flowering and tuber growth.

    2. How often should I fertilize dahlias?

    Dahlias should be fertilized every 3-4 weeks during the growing season. If grown in containers, fertilize every 2-3 weeks.

    3. Can I use fresh cow manure for dahlias?

    Fresh cow manure should be avoided, as it can burn the plants due to its high nitrogen content. It’s best to use processed or bagged steer manure.

    4. What happens if I use too much nitrogen on dahlias?

    Excess nitrogen can cause dahlias to grow tall and weak with poor blooms. It can also lead to tuber rot and shriveled tubers during storage.

    Conclusion

    Fertilizing your dahlias correctly is the key to achieving healthy plants and stunning blooms. By selecting the right low nitrogen fertilizer, using cow/steer manure, and following a well-planned fertilizing schedule, you can help your dahlias thrive throughout the growing season. Be mindful of the right nutrient ratios and avoid overfeeding with high nitrogen fertilizers. With proper care, your dahlias will reward you with vibrant, beautiful flowers and strong, healthy tubers.

  • Unlock the Secret to Stunning White Wax Flower Growth

    Unlock the Secret to Stunning White Wax Flower Growth

    Introduction to White Waxflower: Beauty That Inspires

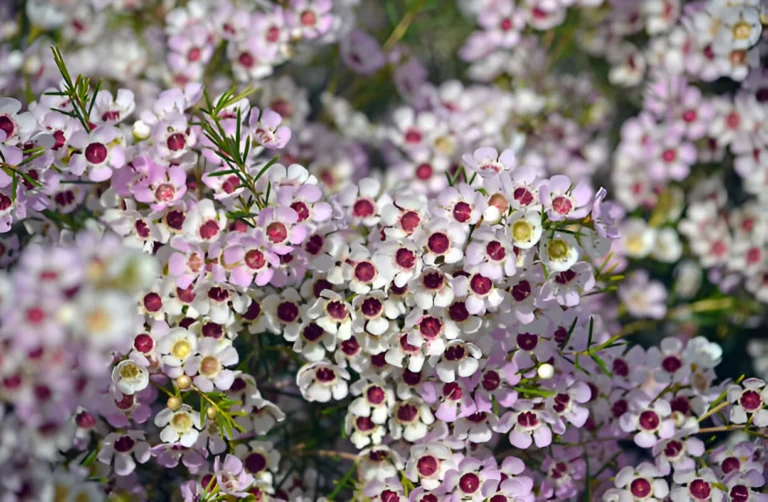
    The white waxflower is a beloved waxy wild flower that blooms beautifully during the dead season of late winter to early spring. Its delicate white flowers and subtle lemony scent make it a favorite among gardeners and florists alike. This evergreen shrub, often found along the coastline of Western Australia, offers consistent blossoms that last up to three weeks, making it perfect for cut flower arrangements, bouquets, and even corsages.

    A Brief History of the White Waxflower

    The journey of the waxflower began in 1819 near the coast of Western Australia during a dark, stormy night. It was first discovered by the famous French botanist Rene Louiche Desfontaines and was originally named Geraldton Wax after the small town of Geraldton near Champion Bay. This area is close to the Geelvink Channel and the Houtman Abrolhos Islands, offering the perfect temperament for this lovely plant to thrive. Geraldton itself has a rich history as a military post near the Murchinson goldfield, declared a town in 1871, and even served as an Allied amphibious airbase during World War II.[su_note note_color=”#ff6669″ radius=”20″]Final Thoughts: Why White Waxflower is a Gardener’s Delight

    With its reliable, non-stop blooms, tolerant nature, and subtle fragrance, the white waxflower truly is a lazy gardener’s dream. It offers a touch of elegance throughout the seasons when properly cared for and supported. Whether grown as a landscape shrub or cut flower, it provides lasting beauty and joy.[/su_note]

    Understanding Waxflower Varieties and Hybrids

    There are several hybrid species of waxflower identified, including:

    • Album: known for its white flowers
    • Bundara Excelsior: produces large pink flowers
    • Purple Pride: with striking reddish-purple flowers
    • University: features red stems and rose-purple flowers that transform into full purple

    Each variety adds unique charm and color to gardens and floral displays.

    Ideal Growing Conditions for White Waxflower

    To cultivate healthy waxflowers, it’s important to mimic their natural habitat:

    • Prefer organic soil with a depth of 8-10 inches
    • Require good drainage and consistent draining to avoid root issues
    • Thrive in sandy soil with gritty material to enhance water percolation
    • Favor sunny locations with low humidity and sparse moisture, similar to the Australian coast
    • Can withstand long periods of drought once established

    Avoid using commercial fertilizers excessively as they can harm these delicate plants.

    Watering and Maintenance Tips:

    White waxflowers are relatively low maintenance. Here are some tips from experience:

    • Water sparingly, especially in winter months; allow the compost to dry out between waterings
    • During growth seasons (spring to autumn), keep the soil moist but not soggy
    • Feed monthly with a general liquid fertilizer to encourage blooms
    • Prune lightly in winter to expose branching and remove dead wood, which promotes fresh growth
    • Use sharp secateurs to cut thick, woody stems carefully and avoid crushing

    Supporting Your Wax flower:

    Waxflowers can grow quite tall, reaching 4-6 feet in height and width, developing into thick, colorful shrubbery. Because of their intense height, they tend to fall over if unsupported. Using stakes or supports helps keep the dense shrubs upright, maintaining their elegant shape and ensuring they continue to bloom reliably.

    Caring for Cut Wax flowers:

    When using waxflowers as cut flowers:

    • Always cut stems underwater at a 2-3 inch angle to improve water uptake and reduce air bubbles in stems
    • Use a clean container with warm water and a flower preservative if available
    • Remove any foliage below the waterline to prevent rot
    • Place flowers in a cool location, away from direct sunlight and air vents to avoid drying out
    • Recut stems every 4-5 days to lengthen vase life and keep blooms fresh

    This care routine will help your waxflowers stay vibrant and fragrant for up to three weeks.

    Common Pests, Diseases, and Prevention

    While waxflowers are generally trouble-free, watch out for:

    • Root rot, especially if growing conditions are too moist
    • Signs of pests and diseases, which can occur if plants are overcrowded or improperly cared for

    Regularly check your plants, especially if grown indoors or in conservatories, to catch any issues early.

    These sources often supply quality plants that will thrive with the right care.

    FAQs

    Q1: When does the white wax flower bloom?
    A1: It blooms during the dead season, from late winter to early spring.

    Q2: How tall do white waxflowers grow?
    A2: They can reach heights and widths of 4 to 6 feet.

    Q3: How often should I water my waxflower?
    A3: Water sparingly, keeping soil moist during growth seasons and allowing it to dry out in winter.

    Q4: Can waxflowers withstand drought?
    A4: Yes, mature plants can tolerate long periods without water.

    Q5: How do I keep cut waxflowers fresh longer?
    A5: Cut stems underwater at an angle, change water regularly, remove foliage below waterline, and keep flowers in a cool place away from sunlight.

    Conclusion

    Growing and caring for the white waxflower is a rewarding experience that combines a bit of history, science, and simple gardening wisdom. By providing the right soil conditions, watering, and maintenance, you can enjoy these lovely, fragrant blooms year after year. Whether for your garden or floral arrangements, white waxflowers bring a natural charm and vibrant life that’s hard to match.

  • What Trees Grow Near Rivers? Your Guide to Beautiful, Resilient Riverbank Treeswhat tree grows near rivers

    What Trees Grow Near Rivers? Your Guide to Beautiful, Resilient Riverbank Treeswhat tree grows near rivers

    Introduction:what tree grows near rivers

    If you’ve ever strolled along a river, you might have noticed some trees thriving right by the water’s edge—standing tall, their roots gripping the soil, somehow flourishing where other plants might struggle. But have you ever wondered what kinds of trees grow best near rivers and why they’re so special?

    As someone who’s spent plenty of time gardening near creeks and streams, I’ve learned that trees by rivers aren’t just lucky—they’re specially adapted to their watery neighborhoods. Let’s dive into the world of riverbank trees, uncovering their secrets, and maybe inspire you to bring some of that natural beauty to your own garden.

    [su_note note_color=”#ff6669″ radius=”20″]My Personel Experience From gardening by a creek, I learned that trees like birch and willow thrive near water and help prevent erosion. Choosing the right species truly transforms a riverbank into a beautiful, stable space.[/su_note]

    Why Do Some Trees Prefer Growing Near Rivers?

    Trees growing along rivers deal with wet soil, shifting ground, and sometimes flooding. To survive, they develop deep and strong roots that anchor them securely. Plus, riverbanks provide rich, moist soil, perfect for trees that love water.

    But heads up! Because these roots are so strong and extensive, it’s wise not to plant these trees too close to your underground pipes or paved areas. Trust me, you don’t want roots disrupting your home infrastructure.

    HostGator Web Hosting

    Meet the Riverbank Trees: Nature’s Water Lovers

    Here are some of the most common trees you’ll find thriving along rivers, especially in Europe and parts of North America.

    Birch: The Elegant White-Barked Tree

    Birch trees are stunning with their bright white bark and slender trunks. They love moist soil and can grow up to 18 meters tall. These trees handle cold weather well (down to about -20°C), making them perfect for cooler river climates. I’ve always been fascinated by the delicate contrast of their bark against lush river landscapes.

    Horse Chestnut: The Giant with a Grand Crown

    Imagine a tree towering up to 30 meters with huge, palmate leaves that turn vibrant reds and yellows in autumn—that’s the horse chestnut. It prefers moist but well-drained soil and can tolerate quite cold winters. This tree adds a majestic feel to any riverbank.

    White Poplar: The Silvery-Leaved River Guardian

    White poplars can grow nearly 30 meters tall and have leaves with a silvery underside that shimmers in the breeze. They thrive in temperate climates and withstand both flooding and frost. If you want a tree that protects riverbanks and looks graceful doing it, the white poplar is a top pick.

    Swamp Cypress: The Aquatic Wonder

    This towering tree, often found in southern U.S. wetlands, grows “knees” — special roots that stick up from the soil to help it breathe in swampy areas. It’s a conifer that loses its needles in fall, turning golden before dropping them. If you love unique trees, swamp cypress will catch your eye.

    Narrow-Leaf Ash: The Fast-Growing Shade Maker

    With a wide crown and orange leaves in fall, the narrow-leaf ash is fast-growing and hardy. It can take freezing temperatures and grows along southern European and North African rivers. I appreciate how quickly it adds shade and character to a riverbank.

    Other Riverbank Favorites You Should Know

    • Common Beech: Slow-growing but long-lived and elegant, beech trees prefer moist yet well-drained soil.
    • Weeping Willow: Famous for its drooping branches, this tree demands constant moisture and adds graceful movement beside rivers and ponds.
    • Common Linden: A large tree with a twisting trunk and ovate leaves, ideal for slightly acidic soils near water.

    Planting Tips for Your Riverbank Garden

    Many people imagine a neat lawn by the river, but grass often requires fertilizers and chemicals that can harm water quality. Instead, consider native trees and plants that naturally thrive near water. They’re easier to care for, support local wildlife, and help prevent erosion.

    Adding a mix of:

    • Flowering plants like cardinal flower and wild geranium for color,
    • Shrubs like witch hazel and viburnum for year-round interest,
    • Groundcovers like marsh marigold and swamp buttercup to stabilize soil,

    can create a lush, healthy riverside garden that feels alive all year round.

    Final Thoughts: Creating a Lasting Riverbank Oasis

    Planting trees by the river is more than beautifying your landscape—it’s about nurturing an ecosystem. Strong-rooted trees like birch, horse chestnut, and swamp cypress don’t just survive near water—they thrive, protecting soil and offering shelter to wildlife.

  • Don’t Let Snow on Plant Crush Your Garden: Expert Winter Tips

    Don’t Let Snow on Plant Crush Your Garden: Expert Winter Tips

    Understanding Snow on Plant

    Winter is fast approaching, and many gardeners start worrying about how snow will affect their plants. Snow has a surprising double nature—it can act as a natural insulator, protecting roots from freezing temperatures, but heavy or prolonged snowfall may harm delicate foliage and even snap branches. Knowing the effects of snow on your plants is the first step in learning how to protect them effectively.[su_note note_color=”#ff6669″ radius=”20″]

    My Take on Snow and Plants

    Gardening in cold climates taught me snow isn’t just a threat—it’s a natural protector. With the right prep, plants survive winter’s harshness and thrive come spring.[/su_note]

    How Effect Snow on Plant

    Snow forms an insulating layer by trapping air between flakes, which helps keep soil temperatures steadier and protects roots. This is especially helpful for newly planted seeds and perennials. However, thick snow accumulation may weigh down branches, flatten shrubs, or cause damage to tender plants not suited for heavy snow. The key is understanding which plants in your garden are resilient and which need extra care.

    Preparing Your Garden Before the First Snowfall

    Pruning for Snow Resistance

    One of the best ways to reduce snow damage is to prune weak or dead branches. This lessens the chance of breakage when snow piles up. Cleaning up fallen leaves and debris from beds also reduces risks of pests and diseases that thrive in cold, damp environments.

    Mulching: Nature’s Winter Blanket

    Apply a 2 to 3-inch layer of organic mulch around plant bases, trees, and shrubs. Mulch shields roots from temperature fluctuations and helps keep soil moist. Just be sure to leave a small gap between mulch and plant stems to avoid rot.

    Watering Before Freeze

    It might seem odd, but watering plants before the ground freezes can protect them. Moist soil holds heat better than dry soil, helping prevent frost from penetrating deeply. Just water early enough so the soil can absorb the moisture before freezing temperatures arrive.

    Winter Care: Protecting Plants from Snow Damage

    Covering Plants for Extra Shielding

    When snow falls heavily, covering vulnerable plants is a practical solution. Use breathable materials like burlap, frost cloth, or even old bedsheets. Build a frame with stakes around plants, drape the material over it without touching the foliage, and secure the edges to prevent wind damage. Don’t forget to remove covers during sunny days for air circulation to avoid overheating.

    Creating Snow Screens

    For larger shrubs or clusters of plants, build simple teepee structures with wooden stakes and burlap to deflect snow and allow airflow. This keeps snow from piling directly on plants and minimizes damage.

    Gently Removing Snow

    If snow weighs down your plants, gently brush it off by sweeping upward with a broom or using your hands to avoid breaking branches. Removing excess snow prevents structural damage but be cautious not to harm the plants.

    Special Tips for Container Plants

    Moving Containers Indoors or Sheltered Areas

    Potted plants are particularly vulnerable to cold and snow. Whenever possible, move them to a garage, porch, or shed to keep them safe from freezing temperatures and snow.

    Insulating Stationary Pots

    For heavy containers that can’t be moved, wrap pots with bubble wrap or burlap to insulate the roots and prevent pots from cracking in freezing weather.

    Long-Term Strategies for Winter-Proof Gardens

    Choose Cold-Hardy Plant Varieties

    When planning your garden, select plants native to your climate or those known for cold tolerance. These hardy plants naturally withstand snow and harsh winter conditions.

    Plant in Protected Locations

    Place sensitive plants near buildings, fences, or larger plants to provide a natural barrier against snow and wind, reducing the risk of damage.

    Build Permanent Winter Structures

    In regions with heavy snowfall, consider constructing cold frames or small greenhouses to provide ongoing protection for delicate plants during winter.

    Embracing Winter While Caring for Your Garden

    Winter can be a season of rest and resilience for your garden. Many plants benefit from cold exposure, which strengthens them for spring growth. By following practical protective measures, your garden can thrive despite snow and freezing temperatures.

    Additional Expert Tips for Snowy Seasons

    • Water Evergreens Well: Dry cold winds can desiccate broadleaf evergreens, so ensure they are well-watered before freezing.
    • Apply Protective Sprays: Products like Wilt Stop® help prevent leaf burn caused by cold winds.
    • Prepare Outdoor Faucets: Remove hoses, cover faucets, and drain hoses to prevent winter damage.
    • Monitor Snow on Evergreens: Remove heavy snow from branches only if they risk breaking; otherwise, snow acts as insulation.
    • Feed the Birds: Snow can cover natural food sources, so providing bird feeders supports local wildlife.

    Conclusion: Get Ready for Winter with Confidence

    Protecting your plants from snow doesn’t have to be overwhelming. By pruning, mulching, watering wisely, and using simple covers, you create a winter shield for your garden. Remember, snow can be both friend and foe. Use these tips to make sure your garden flourishes, no matter how frosty the season.

  • Why White Wax Flower Is Every Florist’s Secret Star

    Why White Wax Flower Is Every Florist’s Secret Star

    Introduction:

    White Wax Flowers may be small in size, but their impact is massive. These dainty blooms offer an airy feel and timeless elegance that elevate any floral arrangement. Whether used in weddings, DIY crafts, or home decor, their crisp white blooms and classic look make them a go-to for florists and enthusiasts alike. Let me walk you through why these flowers are such a staple in both professional and amateur floral designs.

    [su_note note_color=”#ff6669″ radius=”50″]

    Personal Recommendation
    From my hands-on experience planning weddings and floral events, White Wax Flowers are a dream to work with. They’re affordable, dependable, and truly versatile. Whether you’re creating delicate boutonnieres, lush centerpieces, or whimsical hairpieces, these blooms make every project feel effortless yet elegant.[/su_note]

    What Makes White Wax Flowers So Special?

    60kg Bearing Lamb Spit Roaster With Electric Motor Grill

    A Touch of Natural Charm

    There’s a certain charm and sophistication to White Wax Flowers. Their hardy texture and sweet scent make them a unique flower with visual interest, offering effortless beauty to any space they occupy.

    Versatility Like No Other

    From boutonnieres and corsages to big installations and arch arrangements, their versatility is unmatched. You can use them in rustic weddings or glamorous wedding setups, depending on your wedding theme and desired aesthetic.

    Ideal for DIY Brides and Wedding Enthusiasts

    DIY Wedding Flowers Made Simple

    You don’t need to be a professional florist to pull off stunning wedding decor. With wax flowers, even those with basic DIY skill can create beautiful centerpieces, floral crowns, and aisle decor.

    Colors That Complement Every Theme

    More Than Just White

    While white waxflower is beloved for its innocence and purity, these blooms also come in lavender, pink, and even purple waxflower—each with its own symbolism like romance, luxury, and royalty.

    Coordinate with Soft-Hued Flowers

    Soft lavender tones, bright pink accents, or even Fuschia waxflowers blend beautifully with peonies, roses, and baby’s breath. This helps create lush arrangements that radiate joy and happiness.

    Budget-Friendly, High-Impact Flower for Large Events

    Great for All Occasions

    White Wax Flowers are a hit not just at weddings, but also at holiday parties, baby showers, Quinceañeras, wedding showers, and retirement parties. They help celebrate big without breaking the budget.

    Plentiful Supply and Easy to Source

    They’re affordable, easy to source, and often available in bulk quantities. Whether you’re decorating tables or ceremony spaces, these flowers provide creative freedom despite budget constraints.

    Floral Arrangements with Personality

    DIY Wedding Decorations that Reflect You

    From rustic wedding themes with burlap and wooden boxes to modern vibes using mason jars and succulents, the style arrangement possibilities are endless.

    Add a Romantic Look with Minimal Effort

    Weave waxflowers into hair flowers or floral crowns for a one-of-a-kind look. Their sweet corsage-like structure adds romance to any wedding hairstyle.

    Care Tips for Long-Lasting Blooms

    Prep and Processing Steps

    Whether fresh or naturally dried flowers, waxflowers are typically shipped in flower boxes, wrapped in paper wrap for protection during transit. Upon arrival, remove packaging and re-cut stems before placing them in fresh water.

    Hydration and Maintenance

    Always use clean water and avoid allowing leaves to sit below the water line, as this can rot and contaminate the arrangement. Change water and re-cut stems every 2 to 3 days for longevity.

    Storage and Display

    Store flowers in a cool location away from direct sunlight or heat sources. Properly cared for, they can last 5 to 10 days.

    Using White Wax Flowers in Crafts and Home Decor

    Beyond the Bouquet

    Waxflowers aren’t just for weddings. Use them in home décor, crafts, garlands, or simply in a vase to bring an airy feel and elegance to your living space.

    Naturally Dried Flowers for Longevity

    They also dry beautifully, making them perfect for long-lasting decor arrangements that retain their beauty and texture over time.

    Expert Tips from My Personal Experience

    Creative Combos

    I’ve personally paired white waxflower with soft pastels for spring weddings and used vibrant colors for bold statement arrangements. The results were always stunning—my clients loved the sweet, eye-catching results.

    Easy Learning Curve

    Even without prior floral design experience, I found waxflowers easy to work with thanks to their textured flower form and naturally structured stems.

    FAQs

    Are White Wax Flowers Expensive?

    No, they are quite affordable, especially when purchased in bulk. Retail cost per stem drops significantly with bulk purchase.

    Can I Use White Wax Flowers for a Rustic Wedding?

    Absolutely! Pair them with burlap, greenery, and wooden boxes for that perfect rustic look.

    How Long Do They Last?

    With proper care, fresh-cut waxflowers last 5 to 10 days. Naturally dried flowers can last much longer.

    Do They Have a Fragrance?

    Yes, they have a subtle, sweet fragrance that adds to their appeal.

    Are They Available in Every Color?

    They are available in many shades including white, lavender, pink, Fuschia, and purple.

    Conclusion:

    White Wax Flowers prove that simplicity can be stunning. Whether you’re a DIY bride working within budget constraints or a professional florist aiming for a grand floral design, this versatile flower offers everything: affordability, beauty, and endless creative potential. With proper planning, a little DIY skill, and the right tools, you can turn your dream wedding or event into a breathtaking reality.

    So celebrate big—with charm, elegance, and the timeless appeal of White Wax Flowers.

  • Colour Peony Varieties Exposed – Grow Like a Pro!

    Colour Peony Varieties Exposed – Grow Like a Pro!

    Peonies have long captured the hearts of gardeners, florists, and flower lovers alike. Their large, ruffled blooms, rich history, and exceptional range of colors make them standout stars in any garden. But when it comes to understanding the different types of colour peony, there’s more than meets the eye. From deeply saturated crimsons to powdery pastels, peonies exhibit one of the most captivating color spectrums in the floral world. In this comprehensive guide, we’ll explore these hues and dive into the classifications, bloom forms, popular cultivars, and essential growing tips—so you can choose the right peonies for your backyard, cutting garden, or ornamental flower bed.

    [su_note note_color=”#95B9C7″ radius=”50″]

    Personal Experience:
    The first time I encountered a ‘Coral Charm’ Itoh hybrid, it was planted in a compact mound right outside a local botanical garden. The bloom began as a vivid coral pink and transitioned beautifully into a peachy yellow with a creamy center. Its upright stems, large flowers, and crepe-like petals made it impossible not to stop and admire. I’ve since planted it alongside ‘Shirley Temple’ and ‘Karl Rosenfield’ in my own cutting garden. Their different bloom periods extend the flower show from mid-spring into summer.[/su_note]

    The Diversity of Peony Types and Colors

    60kg Bearing Lamb Spit Roaster With Electric Motor Grill

    Peonies come in three major forms: herbaceous, tree (woody), and Itoh (intersectional hybrids). Each form has its own growth habit and offers a kaleidoscope of colors and flower forms, from single blooms to lush double blossoms.

    Herbaceous Peonies like Paeonia lactiflora die back in the winter and re-emerge in spring. Their bloom period is typically mid-to-late spring. They thrive in USDA Zones 3-8 and are often used in cutting gardens for their long vase life and showy, fragrant flowers.

    Tree Peonies (Paeonia suffruticosa) are deciduous sub-shrubs with woody stems that don’t die back in winter. They produce large, crepe paper-like blossoms with vivid color patterns—think purple flares, scarlet streaks, creamy yellow centers, and even blue overtones. Best suited for Zones 4-9, they bloom in mid-spring and are prized for their stunning, ornamental quality.

    Itoh or Intersectional Hybrids (Paeonia cvs.) combine the best of herbaceous and tree peonies. These compact mound-forming plants boast sturdy upright stems, making them excellent for flower competitions and backyard gardening alike. They flourish in USDA Zones 3a-8a.

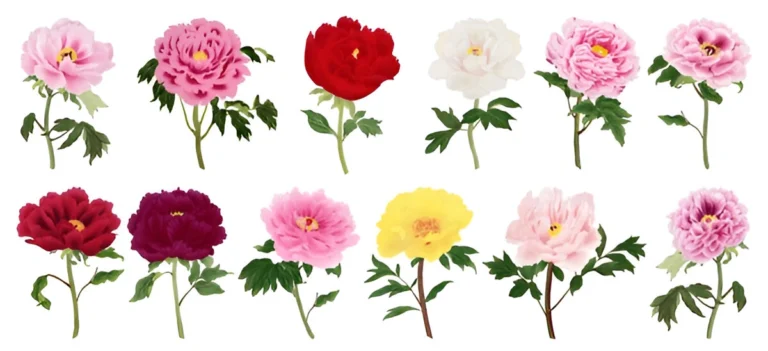
    A Parade of Peony Colors

    Let’s walk through the stunning variety of colour peony, one petal at a time.

    White Peonies: Classic and elegant, often with a creamy or yellow center. Popular cultivars include ‘Festiva Maxima’ and ‘Shirley Temple.’

    Pink Peonies: Ranging from pale blush to hot magenta. Cultivars like ‘Minnie Shaylor’ and ‘Edulis Superba’ stand out.

    Red & Crimson Peonies: Bold and dramatic, including ‘Big Ben’ and ‘Karl Rosenfield,’ known for their rich hues and fragrant double blooms.

    Coral & Peachy Shades: Cultivars like ‘Coral Charm’ offer a transition color experience, starting deep coral and fading to peach or ivory.

    Yellow Peonies: Rare but striking, often found in Itoh hybrids. They offer a golden center or full bright bloom, with excellent heat resistance.

    Lavender, Purple & Blue Tones: More common in tree peonies, displaying purple flares, blue overtones, and rose-pink petals with a silver edge.

    Understanding Flower Forms

    Peony blooms come in several distinct forms:

    • Single Blooms: One or two rows of petals with visible stamens and anthers.
    • Semi-Double Blooms: More petal layers but still a visible center.
    • Double Blooms: Fully packed with petals, often rounded and large.
    • Bomb Form: A dense ball of petals atop a flatter petal base.

    Each form enhances the visual diversity and appeal of different colour peony in the garden.

    Seasonal Peony Appeal

    Peonies bring beauty in every season:

    • Spring: The main bloom season. Expect mid-spring and late-spring flowering.
    • Summer: Foliage stays fresh and adds greenery to the landscape.
    • Fall: Some peonies offer vibrant foliage in shades of crimson and gold.
    • Winter: Dormant, but herbaceous types die back while woody tree peonies maintain their structure.

    Tips for Planting & Care

    Peonies are perennial shrubs that love full sun, well-drained soil, and cool winters.

    • Planting Time: Best in fall, though spring planting is also possible.
    • Soil: Rich, loamy, and slightly acidic. Add compost for nutrients.
    • Spacing: Allow 3-4 feet between plants to ensure airflow.
    • Staking: Essential for large blooms like ‘Philippe Rivoire’ to prevent drooping.
    • Watering: Regular, especially in dry seasons. Avoid wet foliage to prevent rust.
    • Fertilizing: Use a balanced fertilizer in spring to support strong growth.

    Peony Foliage and Dormancy

    Peony foliage is lush, often with a fernlike or finely cut appearance, particularly in woodland peonies like P. japonica and P. obovata. This adds year-round visual interest. In cold climates, foliage removal after dormancy helps prevent fungal issues.

    Quick Table: Peony Types, Bloom Time & USDA Zones

    Peony TypeBloom TimeUSDA ZonesNotable Traits
    HerbaceousLate Spring3-8Fragrant, cutting garden
    TreeMid-Spring4-9Large flowers, woody stems
    Itoh/IntersectionalLate Spring3a-8aCompact, long bloom, vibrant

    FAQ – All About Colour Peony

    Q1: What is the best time to plant peonies?
    A: Fall is ideal. Roots establish before winter dormancy.

    Q2: Do peonies need full sun?
    A: Yes, they thrive with at least 6 hours of sunlight daily.

    Q3: Which peonies are best for cutting?
    A: Herbaceous types like ‘Karl Rosenfield’ and ‘Shirley Temple.’

    Q4: How long do peonies bloom?
    A: Each plant blooms for 7–10 days, but planting varieties with staggered bloom times can extend display to 6 weeks.

    Q5: Do different colors require different care?
    A: Generally no, though lighter blooms may fade faster in full sun.

    Conclusion

    Colour peony isn’t just a visual marvel—it’s an experience of seasonal evolution, botanical diversity, and sensory delight. Whether you’re drawn to soft pinks, vibrant corals, or dramatic crimsons, there’s a peony cultivar waiting to enchant your garden. Their long-lasting blooms, rich symbolism, and low maintenance make them ideal for any gardener. As trends shift toward sustainable, perennial-heavy gardens, peonies—especially those in diverse hues and hybrid forms—are regaining their rightful place at the forefront of garden design.