Category: Gardening Guide

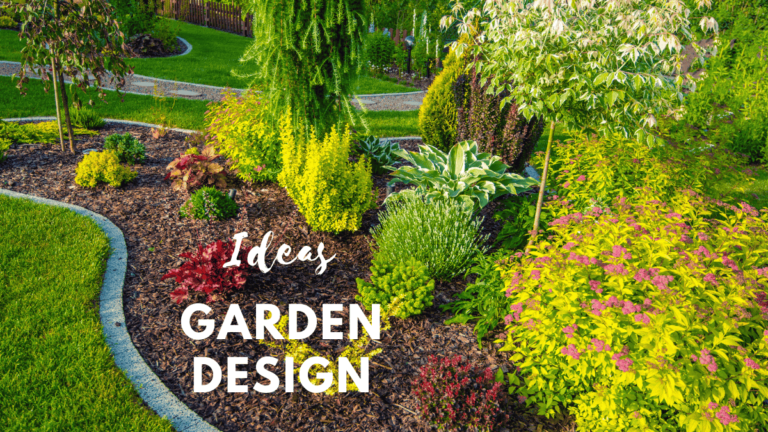
Welcome to the “Garden Guide” section of our urban gardening website! If you’re looking to transform your urban space into a beautiful and functional garden, you’re in the right place. This category is dedicated to providing you with creative and practical design ideas that cater to the unique challenges of urban gardening.


  • 5 Jade Plant Benefits That Will Blow Your Mind!

    5 Jade Plant Benefits That Will Blow Your Mind!

    In this article main 5 Jade plant benefits which are scientifically known as Crassula ovata, is discussed ,making it a popular choice for indoor gardening. If you’re new to the world of plants or just looking for a low-maintenance addition to your home, this succulent is an excellent option. With its thick, fleshy, oval-shaped leaves and sturdy stem, the Jade plant thrives in dry conditions and requires minimal watering. Whether you’re a seasoned gardener or a beginner, this botanical wonder from Africa is easy to care for, making it perfect for anyone looking to enjoy the beauty of plants without much effort.

    The Jade plant is often referred to as Money Plant, Dollar Plant, Lucky Plant, or even the Friendship tree. These names reflect its symbolism in various cultures, where it is believed to bring prosperity, wealth, and good fortune to its owner. It’s no surprise that this houseplant is favored by many, considering its aesthetic appeal and cultural significance.

    Jade Plant Benefits

    1. A Breath of Fresh Air: Purifying Your Indoor Space

    One of the most notable benefits of the Jade plant is its ability to improve indoor air quality. Research has shown that the air inside homes can be just as polluted, if not more so, than the air outside. Harmful chemicals like formaldehyde, acetone, benzene, and toluene are common in indoor environments, often emitted by household products such as paints, glues, and fire retardants. The Jade plant acts as a natural air purifier, absorbing these volatile organic compounds (VOCs) and helping to reduce pollution indoors.

    This air-purifying ability is crucial, as exposure to these toxins can lead to symptoms like dizziness, headache, nausea, and even Sick Building Syndrome. By placing a Jade plant in your home, you can help reduce the harmful effects of these pollutants, promoting a healthier and more comfortable living environment. With its ability to purify the air, the Jade plant is a simple yet effective solution for enhancing the quality of your indoor space.

    2. The Humidity Boost You Didn’t Know You Needed

    Another great feature of the Jade plant is its ability to help increase humidity in your home. Many of us struggle with dry indoor air, especially during the winter months when the cold air outside and the heater inside dry out the atmosphere. This can lead to issues like dry skin, flaky lips, and an itchy throat. On top of that, low humidity can make bacteria and viruses more resilient, increasing the risk of colds and flu.

    By having a Jade plant indoors, you can contribute to maintaining an ideal humidity level of 30 to 60 percent, which is optimal for both comfort and health. The Jade plant utilizes Crassulacian Acid Metabolism (CAM), which allows it to absorb moisture even in the dark, thus supporting humidity throughout the day and night. This unique trait helps to keep the air around you more balanced, making the Jade plant a great addition to any home, especially in areas with fluctuating humidity.

    3. The Feng Shui Connection: A Symbol of Prosperity and Luck

    In Feng Shui, the Jade plant is more than just a decorative piece; it is believed to bring positive energy and good luck. Its evergreen nature represents consistency and renewal, qualities that are deeply valued in Feng Shui principles. Placing the Jade plant in certain areas of your home can help attract prosperity and wealth, especially when positioned in the Southeast corner or near the entrance of your business or home.

    The Jade plant is also seen as a symbol of growth and harmony, making it an excellent choice for boosting the positive vibes in your living space. Whether you place it on your coffee table, office desk, or as a housewarming gift, the Jade plant brings both beauty and symbolic meaning to your home.

    4. A Plant That’s Easy to Care For

    One of the most appealing aspects of the Jade plant is how easy it is to maintain. As a slow-growing succulent, it doesn’t require frequent pruning, fertilizing, or repotting. Simply make sure the plant gets indirect sunlight and water it only when the soil is dry. Because it’s so drought-tolerant, you can enjoy the beauty of this plant without having to worry about it wilting from lack of care. It’s the perfect option for anyone with a busy lifestyle or those who may not have a “green thumb.”

    Another advantage of the Jade plant is its adaptability. It thrives in a range of lighting conditions, from low-light environments to areas with partial shade. This makes it a versatile addition to nearly any space, whether it’s in your living room, office, or even your bedroom.

    5. Medicinal Benefits of the Jade Plant

    In addition to its aesthetic and symbolic qualities, the Jade plant also offers some medicinal benefits. In various cultures, including Chinese and KhoiKhoi traditions, the Jade plant is used as a natural remedy for ailments like wounds, stomach upset, and even diabetes. The sap and leaf extract have been traditionally applied for their healing properties, making this plant not only a beauty enhancer but also a wellness booster.

    Though it should not replace professional medical treatment, the Jade plant has been used for stress reduction and immune boost in folk medicine. Its natural healing abilities further enhance its value, making it a multifunctional plant to have in your home.

    6. A Touch of Beauty and Style

    Visually, the Jade plant adds a touch of elegance and charm to any space. With its glossy, rich green leaves and compact size, it fits seamlessly into any home décor style, whether it’s minimalistic or more ornate. Some varieties of the Jade plant, such as the Crassula arborescens, feature flat leaves with a unique silvery blue tint, while others have stunning red edges. Its decorative appeal makes it an excellent choice for indoor décor, whether placed on a coffee table, office desk, or as part of a fairy garden arrangement.

    The Jade plant also boasts beautiful seasonal flowers, such as pink or white blossoms, which bloom in late winter or early spring, further enhancing its visual appeal.

    Conclusion

    The Jade plant, or Crassula ovata, is not just a decorative addition to your home, but a versatile and beneficial houseplant that offers a variety of advantages. From purifying indoor air and boosting humidity to bringing good luck and positive energy, the Jade plant stands out as a low-maintenance, highly rewarding plant. Whether you’re looking to improve your home’s air quality, add a touch of beauty, or even enjoy its medicinal properties, the Jade plant is a perfect fit for any living space. Its adaptability and symbolism make it a favorite among both seasoned gardeners and beginners alike.

    With its many benefits and easy care, the Jade plant is more than just a plant—it’s a companion for your home and a symbol of prosperity and health.

  • How to Care for african violet (2025)

    How to Care for african violet (2025)

    African violet are beloved houseplants that brighten any space with their colorful blooms and lush green foliage. Known for their compact size and easy-care nature, they can thrive indoors with the right care. Whether you’re a seasoned plant enthusiast or a newcomer to the world of houseplants, learning how to care for African violet is essential for ensuring they grow strong, healthy, and bloom beautifully year-round. In this guide, we’ll delve into the vital aspects of African violet care, from lighting and watering to soil and temperature preferences.

    Understanding African Violets

    Native to tropical regions of East Africa, African violets (Saintpaulia) are hardy plants that thrive in warm, humid conditions. They are known for their vibrant flowers that can range from purple to pink, blue, and even white. These plants are often seen in homes and offices because of their low-maintenance needs and long-lasting blossoms. However, like all plants, African violets require specific care to flourish. This article will provide comprehensive guidance on everything from soil requirements to common pests that may affect them.

    Light Requirements for African Violets

    The first thing to consider when caring for African violets is light. These plants thrive in moderate light, but direct sunlight can be harmful. Too much direct sunlight will burn the delicate leaves, causing them to yellow and wilt. On the other hand, insufficient light will result in poor growth and few flowers.

    A bright, indirect light source is ideal for African violets. Place them near windows with sheer curtains, or use grow lights designed for indoor plants to give them the light they need without the risk of sunburn. Keep in mind that African violets need about 12-14 hours of light per day to bloom properly. If you live in a region with long winters, a grow light will be particularly beneficial.

    Watering African Violets

    Watering is one of the most important aspects of African violet care. These plants require consistent moisture but are prone to root rot if overwatered. The key is to maintain the right balance. It’s best to water African violets from the bottom, as this helps prevent water from sitting on the leaves, which can cause them to rot.

    To water properly, place the pot in a shallow tray filled with water for 10-15 minutes. Let the plant absorb the water through the drainage holes at the bottom of the pot. Afterward, discard any excess water that remains in the tray. It’s essential to ensure that the plant is not sitting in water for too long, as this can lead to waterlogged soil and root rot.

    When watering, always use room temperature water. Cold water can shock the plant, and hot water can cause the roots to burn. Watering once every 5-7 days is generally sufficient, but always check the soil’s moisture level by sticking your finger about an inch into the soil. If it feels dry, it’s time to water.

    Soil and Potting for African Violets

    African violets prefer a light, well-draining soil mix that allows water to move freely without becoming soggy. Specially formulated African violet potting mixes are available, but if you prefer to make your own, a good mixture includes equal parts of peat moss, perlite, and vermiculite. This combination ensures that the soil is airy and retains just the right amount of moisture.

    When selecting a pot, choose one with good drainage. African violets do not like to sit in stagnant water, so it’s essential to ensure that excess moisture can escape. A small, shallow pot works best for African violets, as their roots are relatively compact.

    Temperature and Humidity

    African violets thrive in temperatures between 65-75°F (18-24°C), making them perfect for indoor environments. These plants are sensitive to sudden temperature fluctuations, so avoid placing them near drafty windows, air conditioning units, or heating vents. Additionally, they prefer humidity levels of 50% or higher. If you live in a dry climate, you may want to use a humidity tray or a humidifier to create a more suitable environment.

    Fertilizing African Violets

    To encourage healthy growth and vibrant blooms, regular feeding is essential. African violets benefit from a balanced, water-soluble fertilizer that is high in phosphorus. You can use a special African violet fertilizer or any balanced fertilizer diluted to about one-quarter of the recommended strength. Fertilize every 4-6 weeks during the growing season (spring and summer) and reduce feeding in the fall and winter when the plant is dormant.

    It’s important not to over-fertilize, as this can lead to leggy growth and reduced flowering. If the leaves begin to turn yellow or the plant’s growth slows, this may be a sign that it’s not getting enough nutrients.

    Common Problems and Solutions

    Even though African violets are relatively low-maintenance, they can still face a few challenges. Common issues include:

    • Yellowing Leaves: This could indicate overwatering or inadequate light. Adjust watering habits and ensure the plant is getting enough light.
    • Leggy Growth: If your African violet is growing tall with few flowers, it may be lacking light. Consider moving it to a brighter location.
    • Pests: Common pests that affect African violets include aphids, mealybugs, and spider mites. If you notice any signs of pests, treat the plant with an insecticidal soap or a mild, homemade solution of water and dish soap.

    Are African Violets Poisonous to Cats?

    This is a common question among pet owners who are concerned about the safety of their plants. Fortunately, African violets are non-toxic to cats and other pets. Unlike some plants that can cause harm if ingested, African violets are safe to have around your furry friends. However, it’s always a good idea to keep plants out of reach of pets to avoid any potential chewing.

    How to Propagate African Violets

    Propagating African violets is a rewarding and relatively simple process. The best way to propagate African violets is through leaf cuttings. To do this, select a healthy, mature leaf and cut it at the base using a clean, sharp knife. Place the leaf in a glass of water, ensuring that only the base of the leaf is submerged. After a few weeks, tiny roots will begin to form. Once the roots are long enough, you can transplant the leaf cutting into a small pot with fresh African violet soil.

    FAQs About African Violet Care

    1. How often should I water my African violet?

    Water your African violet when the top inch of soil feels dry. This is usually about once every 5-7 days, but it can vary depending on your environment.

    2. Can African violets be grown in low light?

    While African violets prefer moderate to bright indirect light, they can survive in low light conditions. However, they may not bloom as frequently or as vibrantly.

    3. Why are my African violet leaves turning yellow?

    Yellowing leaves are often a sign of overwatering, insufficient light, or a lack of nutrients. Check your watering schedule, light levels, and consider fertilizing if necessary.

    4. Can I use regular potting soil for African violets?

    It’s best to use a soil mix designed for African violets, as it is light and well-draining. Regular potting soil can become too heavy and lead to poor root health.

    5. Are African violets safe for pets?

    Yes, African violets are non-toxic to cats and other pets, making them a safe option for households with animals.

    Pros and Cons of African Violets

    ProsCons
    Non-toxic to petsRequire specific care (light, humidity)
    Easy to propagateCan be susceptible to pests
    Compact size, perfect for indoor spacesNeed consistent watering practices
    Long-lasting bloomsSensitive to temperature changes

    Conclusion

    Caring for African violets may seem like a delicate task, but with the right knowledge and attention, these beautiful plants can thrive in your home for years to come. By providing the correct light, water, soil, and temperature, you will enjoy their vibrant flowers season after season. Additionally, with proper care, African violets can easily be propagated, allowing you to grow even more of these charming plants.

    Whether you’re a plant enthusiast or just beginning your gardening journey, African violets are a fantastic choice. Their beauty, ease of care, and pet-friendly nature make them a perfect addition to any home. With the information provided in this guide, you’re now ready to ensure your African violets receive the care they deserve.

  • 30 Lovely Small Balcony Ideas

    30 Lovely Small Balcony Ideas

    Introduction

    When it comes to transforming a balcony into a personal haven, the possibilities are endless. Whether you’re working with a small balcony or a more spacious apartment balcony, maximizing the available space while ensuring it remains functional and visually appealing is key. Balcony ideas can range from vertical gardens to creative furniture solutions, each one designed to enhance the aesthetic of your outdoor space. This guide will provide you with innovative ideas to make the most of every square inch, whether you’re looking to relax, entertain, or simply add some greenery to your home.

    1. Maximizing Space with Vertical Gardens

    One of the most popular solutions for small balconies is vertical gardening. This concept not only maximizes the limited space available but also brings a sense of lush greenery into your living environment. You can install wall-mounted planters or even repurpose old pallets to create a beautiful vertical garden that doesn’t take up valuable floor space. Combine ornamental plants, herbs, and flowers to add layers of color and texture to your balcony. The vertical garden can act as both a decorative piece and a functional element, such as growing fresh herbs for cooking.

    Pros and Cons:

    ProsCons
    ✔️ Maximizes space by using vertical surfaces.❌ May require frequent watering and maintenance.
    ✔️ Adds greenery without taking up floor space.❌ Not suitable for all plant types.
    ✔️ Can create a diverse, sensory-rich environment.❌ Needs a stable wall or surface to mount planters.

    2. Railing-Mounted Flower Pots for a Touch of Green

    A simple yet effective way to add vibrancy to your balcony is by installing flower or plant pots that hook directly to the railing. This option allows you to introduce plants without occupying the floor, freeing up space for other furniture. Railing-mounted pots are a great way to introduce colorful flowers, herbs, or even vines that can climb up and add more vertical interest to your balcony. This idea not only enhances the balcony’s aesthetics but also provides privacy and a fresh, natural atmosphere.

    Pros and Cons:

    ProsCons
    ✔️ Easy to install and maintain.❌ May require frequent watering.
    ✔️ Adds greenery without occupying floor space.❌ May not fit all balcony types or railings.
    ✔️ Enhances privacy and aesthetics.❌ Can be heavy depending on plant selection.

    3. Ambient Lighting with Fairy Lights and Lanterns

    Lighting plays a crucial role in setting the ambiance of your balcony. Fairy lights or lanterns can create a warm, inviting glow that transforms your outdoor space into a cozy retreat. These lighting solutions are perfect for the evening, allowing you to enjoy your balcony long after the sun sets. The soft light from fairy lights, in particular, highlights plants, architectural features, and furniture, adding a magical touch to your space. You can hang them along railings or drape them over plants for a whimsical effect.

    Pros and Cons:

    ProsCons
    ✔️ Creates a warm and inviting atmosphere.❌ May require electrical outlets or battery replacements.
    ✔️ Enhances outdoor space after sunset.❌ Can be damaged by weather elements.
    ✔️ Easy to install and cost-effective.❌ Needs to be hung or draped carefully to avoid clutter.

    4. Space-Saving Furniture for Small Balconies

    Furniture is essential for making your balcony comfortable, but when space is limited, you need pieces that are both functional and compact. Opt for foldable or stackable furniture, which allows you to adjust the space based on your needs. For example, foldable chairs or tables can be tucked away when not in use, maximizing the balcony’s floor space. The key is to choose furniture that complements the overall design and doesn’t overcrowd the area, maintaining a balance between functionality and style.

    Pros and Cons:

    ProsCons
    ✔️ Maximizes space and flexibility.❌ May not provide as much comfort as larger, non-foldable furniture.
    ✔️ Easy to store when not in use.❌ Can appear minimal or less stylish if not chosen carefully.
    ✔️ Ideal for small or multifunctional spaces.❌ Durability may vary depending on material and brand.

    5. Creating a Cozy Dining Space on Your Balcony

    Imagine enjoying a meal outdoors on your balcony surrounded by greenery. Creating a cozy dining nook is one of the best ways to utilize your balcony space. By incorporating small, intimate dining furniture, such as a bistro table and chairs, you can enjoy alfresco dining in the comfort of your home. Enhance the atmosphere with soft lighting, such as string lights or candles, to create a welcoming environment. Adding plants around the dining area adds privacy and natural beauty, making the space feel like an extension of your home.

    Pros and Cons:

    ProsCons
    ✔️ Ideal for outdoor dining and entertaining.❌ Requires additional cleaning after meals.
    ✔️ Creates an intimate and cozy atmosphere.❌ May not be practical for very small balconies.
    ✔️ Can be personalized with decor and lighting.❌ Limited seating capacity in small spaces.

    6. Pollinator-Friendly Plants for a Sustainable Balcony

    Incorporating pollinator-friendly plants is a sustainable and eco-conscious way to decorate your balcony. These plants attract bees, butterflies, and other beneficial insects, helping to pollinate your plants and contribute to a healthier environment. Choose flowers such as lavender, marigolds, and zinnias, which are popular with pollinators. Not only do they add beauty to your balcony, but they also support biodiversity. This idea is particularly beneficial if you’re looking to enhance the ecological health of your urban space.

    Pros and Cons:

    ProsCons
    ✔️ Supports local pollinators and biodiversity.❌ May require specialized care for certain plants.
    ✔️ Adds vibrant and colorful flowers.❌ Not all pollinator-friendly plants thrive in all climates.
    ✔️ Contributes to a sustainable, eco-friendly environment.❌ Can attract unwanted pests, like bees and insects.

    7. Multifunctional Furniture with Hidden Storage

    Multifunctional furniture is ideal for small balconies, where space is a precious commodity. Look for furniture pieces with built-in storage compartments, such as benches or tables that hide cushions, gardening tools, or other essentials. These pieces serve a dual purpose, offering both seating and a storage solution that helps keep your balcony organized. When choosing multifunctional furniture, ensure it complements the overall style and layout of your balcony.

    Pros and Cons:

    ProsCons
    ✔️ Maximizes space while keeping the area organized.❌ Can be more expensive than standard furniture.
    ✔️ Provides additional storage for outdoor items.❌ Storage capacity may be limited.
    ✔️ Keeps your balcony tidy and clutter-free.❌ Might be heavy or bulky for smaller spaces.

    8. Adding Comfort and Style with Outdoor Rugs

    Outdoor rugs can help define different areas on your balcony, adding a touch of comfort and color. They are especially useful for creating a soft, inviting surface for lounging or dining. Choose weather-resistant rugs that can withstand the elements and are easy to clean. A vibrant rug can act as a focal point in your outdoor space, complementing the color scheme and enhancing the overall ambiance. Rugs also add warmth and comfort underfoot, making your balcony feel more like an outdoor room.

    Pros and Cons:

    ProsCons
    ✔️ Adds warmth and comfort to outdoor spaces.❌ May require frequent cleaning, especially in high-traffic areas.
    ✔️ Available in various colors, patterns, and materials.❌ Can wear out quickly due to weather exposure.
    ✔️ Helps define different zones or areas.❌ Requires proper maintenance to stay in good condition.

    9. Selecting Plants for Your Balcony’s Microclimate

    The key to a thriving balcony garden is choosing plants that are suited to your balcony’s specific microclimate. Each balcony experiences different levels of sunlight, wind exposure, and temperature variations throughout the day. For sunny balconies, succulents, geraniums, or petunias are great options. In shadier spots, plants like ferns, hostas, and begonias thrive. Assess your balcony’s unique conditions and select plants that will flourish in these environments, ensuring low-maintenance gardening.

    Pros and Cons:

    ProsCons
    ✔️ Ensures your plants thrive with minimal effort.❌ Requires knowledge of your balcony’s conditions.
    ✔️ Low-maintenance once plants are selected.❌ May require trial and error to determine the best plants.
    ✔️ Adds vibrant, tailored greenery to your space.❌ Not all plants are suitable for every climate.

    10. Hanging Mirrors to Visually Expand Your Balcony’s Space

    Hanging mirrors on your balcony can significantly enhance its spatial perception, creating an illusion of depth and expansiveness in a limited area. Mirrors reflect light and scenery, which can make your outdoor space feel more open and airy. For instance, a mirror placed opposite a container garden can double the greenery’s visibility, enhancing the vibrancy of your space. Additionally, using mirrors to reflect the sky or surrounding landscape can blur the boundaries between your balcony and the outdoors, further amplifying the sense of space.

    Pros and Cons:

    ProsCons
    ✔️ Creates the illusion of more space.❌ Mirrors can be fragile and may need frequent cleaning.
    ✔️ Reflects natural light, brightening the space.❌ Not suitable for windy areas where mirrors can easily fall.
    ✔️ Adds a modern and stylish touch to your decor.❌ May require careful placement to avoid glare.

    11. Set Up a Narrow, Wall-Mounted Bar for Dining and Drinks

    A narrow, wall-mounted bar offers a chic and space-efficient solution for dining and enjoying drinks on your small balcony. This versatile feature serves as a compact dining area, a spot for your morning coffee, or an evening cocktail station, all without consuming valuable floor space. Select a bar that complements your balcony’s décor, ensuring it’s durable and weather-resistant to withstand outdoor conditions.

    Pros and Cons:

    ProsCons
    ✔️ Saves space while offering a functional dining spot.❌ Can only accommodate a limited number of people.
    ✔️ Great for small gatherings or solo use.❌ Needs to be securely mounted to avoid accidents.
    ✔️ Ideal for enjoying drinks and snacks outdoors.❌ Might not provide as much seating as a traditional table.

    12. Use Soft Textiles to Add Comfort and Style

    By adding items like outdoor cushions, throws, and curtains, you can create a cozy, inviting atmosphere that reflects your personal style. Vibrant cushions and throws can add a pop of color and provide additional comfort for seating areas. Consider also incorporating outdoor curtains for added privacy and protection from the sun. They can soften the space and add a touch of elegance, all while being functional.

    Pros and Cons:

    ProsCons
    ✔️ Adds comfort and a personalized touch.❌ Requires maintenance to keep clean, especially in outdoor conditions.
    ✔️ Easy to change to match seasons or moods.❌ Textiles can fade over time due to sun exposure.
    ✔️ Provides an inviting, cozy atmosphere.❌ Needs to be weather-resistant for outdoor use.

    13. Display Weather-Resistant Art or Decor Items

    Incorporating weather-resistant art or decorative items can significantly enhance the aesthetic appeal and personalization of your small balcony. When selecting art or decor for your balcony, pick materials designed to withstand outdoor conditions, such as metal, treated wood, or waterproof canvases. Consider wall sculptures, weatherproof paintings, or decorative tiles that can add visual interest and withstand sun, rain, and wind.

    Pros and Cons:

    ProsCons
    ✔️ Enhances visual appeal with personalized decor.❌ May require regular cleaning to prevent weather damage.
    ✔️ Adds a unique touch to your outdoor space.❌ Some art pieces can be expensive.
    ✔️ Durable and long-lasting in outdoor environments.❌ Might not fit all themes or decor preferences.

    14. Use Folding Screens for Shade or Privacy

    Folding screens can serve multiple functional and aesthetic purposes on your balcony. They can offer privacy, provide shade, and add a decorative element to your outdoor space. You can strategically use these elements to block unwanted views, create a more intimate setting, or provide relief from the sun. For a touch of greenery, consider screens that double as plant trellises, allowing you to intertwine climbing plants and flowers.

    Pros and Cons:

    ProsCons
    ✔️ Provides privacy and shade without permanent fixtures.❌ May need to be moved or adjusted to suit changing weather.
    ✔️ Adds a decorative element to the space.❌ Can be bulky, requiring more space to move around.
    ✔️ Versatile, with options to incorporate plants.❌ Might not offer complete privacy in all situations.

    15. Install a Tabletop Water Fountain to Introduce a Calming Element

    Adding a tabletop water fountain to your small balcony can introduce a serene and tranquil element, transforming your outdoor space into a calming retreat. The gentle sound of flowing water not only creates a relaxing ambiance but also masks city noise, making your balcony an ideal place for unwinding or meditating. In addition to their aesthetic and auditory benefits, water fountains can also add a touch of humidity to the air, which can be pleasant during hot, dry weather.

    Pros and Cons:

    ProsCons
    ✔️ Provides a calming, soothing atmosphere.❌ Requires regular cleaning and maintenance.
    ✔️ Masks unwanted background noise.❌ May attract pests or mosquitoes in warmer weather.
    ✔️ Adds a unique element to your decor.❌ Can be noisy if not maintained properly.

    16. Use Transparent Glass Railings to Create a Sense of Openness

    Transparent glass railings can modernize the exterior facade of your balcony while also creating a sense of openness. They allow maximum penetration of natural light, making your balcony feel more expansive and inviting. Glass railings offer a sleek, contemporary look that complements any architectural style, while ensuring safety and durability.

    Pros and Cons:

    ProsCons
    ✔️ Maximizes natural light and space.❌ Requires frequent cleaning to maintain clarity.
    ✔️ Sleek and modern aesthetic.❌ More expensive than traditional railings.
    ✔️ Enhances the view from your balcony.❌ May not be ideal for windy environments due to safety concerns.

    17. Use Candles for Natural Light

    Incorporating candles into your balcony decor introduces a natural, warm light that creates a serene and inviting ambiance, perfect for relaxing evenings or intimate gatherings. Use soy or beeswax candles, which burn cleaner than paraffin, reducing soot and toxins. Scented candles can add a delightful aroma, enhancing the sensory experience of your outdoor space.

    Pros and Cons:

    ProsCons
    ✔️ Creates a natural, warm light.❌ May require constant monitoring, especially in windy conditions.
    ✔️ Adds a cozy, intimate ambiance.❌ Can be a fire hazard if left unattended.
    ✔️ Scented candles enhance the sensory experience.❌ Limited lighting output compared to electric options.

    18. Design Your Balcony Around a Specific Theme

    Whether you’re drawn to a Mediterranean oasis, a Zen garden, or a vibrant tropical paradise, adopting a thematic approach to your balcony design can create a focused and immersive environment. When designing your theme, consider the sensory experiences—textures, scents, sounds, and colors—that reinforce the theme and make your balcony an engaging and harmonious space.

    Pros and Cons:

    ProsCons
    ✔️ Creates a cohesive and immersive atmosphere.❌ Requires careful planning and consideration.
    ✔️ Reflects personal style and preferences.❌ Can be expensive depending on the theme chosen.
    ✔️ Makes your balcony feel like a unique retreat.❌ Might not be versatile enough for all seasons.

    19. Hang a Hammock for Relaxation

    A hammock hanging from one corner of your small balcony to another can transform it into a tranquil retreat, perfect for relaxation, reading, or simply enjoying the outdoors. Surround your hammock with potted plants, soft lighting, and perhaps a small side table to place a book or a refreshing drink. These additions will create a cozy, inviting atmosphere.

    Pros and Cons:

    ProsCons
    ✔️ Provides a comfortable spot for relaxation.❌ May not be suitable for balconies with limited space.
    ✔️ Creates a laid-back, vacation-like vibe.❌ Needs proper installation to ensure safety.
    ✔️ Adds a unique and cozy element to your space.❌ Requires periodic maintenance to keep the hammock in good condition.

    20. Use Adhesive Hooks to Hang Decor Items or Lights

    Utilize adhesive hooks on your balcony to hang decor items or lights without causing permanent damage to walls, perfect for renters or those who prefer not to drill holes. Select adhesive hooks that can support the weight of your decor or lighting. Adhesive hooks are great for hanging string lights, lightweight planters, wind chimes, or decorative items, adding personality and charm to your balcony space.

    Pros and Cons:

    ProsCons
    ✔️ Easy to install without drilling.❌ May not hold up under the weight of heavier items.
    ✔️ Ideal for renters or temporary setups.❌ Might lose stickiness in extreme weather.
    ✔️ Doesn’t damage walls or surfaces.❌ Limited in the types of items they can support.

    21. Set Up a Cozy Reading Corner

    A cozy reading corner on your balcony can offer a peaceful escape to immerse yourself in your favorite books. Infuse the area with elements that enhance your reading experience. A small rug can add warmth and texture, while plants or flowers contribute to a calming environment. Include a weather-resistant shelf or storage box to keep your current reading materials and essentials handy and organized.

    Pros and Cons:

    ProsCons
    ✔️ Creates a quiet and relaxing atmosphere.❌ May not be comfortable in extreme weather conditions.
    ✔️ Provides a perfect spot for reading or relaxing.❌ Can take up space if the balcony is very small.
    ✔️ Combines functionality with comfort.❌ Needs proper lighting to make it suitable for evening reading.

    22. Install a Bird Feeder to Attract Birds

    Installing a bird feeder on your balcony can bring the joy and beauty of birdwatching right to your doorstep, creating a lively and engaging natural spectacle. Tube feeders are great for small birds like finches and chickadees, while platform feeders can accommodate larger birds. Position the feeder where you can easily view it from indoors but also where it’s safe for birds.

    Pros and Cons:

    ProsCons
    ✔️ Attracts beautiful wildlife to your balcony.❌ Can attract unwanted pests like squirrels.
    ✔️ Provides a relaxing, natural experience.❌ Needs to be refilled regularly.
    ✔️ Engages both you and your guests with birdwatching.❌ Can cause a mess from seeds and bird droppings.

    23. Use Scented Plants to Fill Your Balcony with Aroma

    Incorporate scented plants on your balcony to transform it into a fragrant oasis, providing a multi-sensory experience that enhances relaxation and enjoyment of your outdoor space. Select plants known for their strong and pleasant scents, such as lavender, jasmine, gardenia, and scented geraniums. Herbs like rosemary, basil, mint, and thyme also offer delightful fragrances and the added benefit of being edible.

    Pros and Cons:

    ProsCons
    ✔️ Adds a soothing and aromatic atmosphere.❌ Some scented plants may not thrive in all climates.
    ✔️ Enhances the overall sensory experience.❌ May attract insects or bees.
    ✔️ Provides both aesthetic and practical benefits.❌ Requires regular maintenance to stay healthy.

    24. Create a Mini Workspace

    Establishing a mini workspace on your balcony can provide a refreshing change of scenery, boosting creativity and productivity. Select a small, weather-resistant desk and a comfortable chair that fit your balcony’s dimensions. Use a patio umbrella, retractable awning, or privacy screens to reduce glare on your laptop screen and create a comfortable work environment.

    Pros and Cons:

    ProsCons
    ✔️ Offers a productive outdoor workspace.❌ Exposure to weather conditions can be a challenge.
    ✔️ Ideal for working or studying in fresh air.❌ Limited space for larger desks or equipment.
    ✔️ Provides a change of environment for improved focus.❌ Needs proper weather protection for equipment.

    25. Install a Retractable Awning for Shade

    A retractable awning can significantly enhance your outdoor comfort, providing essential shade and protection from the elements while maintaining the flexibility of enjoying open skies. Choose a color and pattern that complements your balcony’s décor. Decide between a manual or motorized retractable awning.

    Pros and Cons:

    ProsCons
    ✔️ Offers adjustable shade and weather protection.❌ Can be expensive depending on size and features.
    ✔️ Maintains an open and airy feeling when retracted.❌ Requires installation and may need regular maintenance.
    ✔️ Protects furniture and plants from direct sunlight.❌ Can be bulky when extended and may block views.

    26. Make Your Balcony Pet-Friendly

    Create a pet-friendly balcony to ensure a safe and enjoyable outdoor environment for your furry friend. Ensure the balcony railings are secure and have no gaps that a pet could squeeze through or get stuck in. Choose pet-safe plants, provide shaded areas where your pet can relax, and add features like pet-friendly cushions or a small pet bed.

    Pros and Cons:

    ProsCons
    ✔️ Provides a safe outdoor environment for pets.❌ Requires additional safety measures for pet-proofing.
    ✔️ Allows pets to enjoy the outdoors with you.❌ Might require extra effort to keep pets secure.
    ✔️ Adds comfort and functionality for both pets and owners.❌ Limited space for larger pets or multiple animals.

    27. Use Designer Tiles to Beautify the Floor

    Enhance your balcony floor with designer tiles to dramatically transform the look and feel of your outdoor space. From intricate patterns to bold colors, there’s a wide range of options to suit any aesthetic. Porcelain tiles are a popular choice due to their durability and low water absorption rate.

    Pros and Cons:

    ProsCons
    ✔️ Adds elegance and sophistication to your balcony.❌ Installation can be time-consuming and expensive.
    ✔️ Durable and weather-resistant.❌ Heavy, which may require professional installation.
    ✔️ Easy to clean and maintain.❌ Can be slippery when wet.

    28. Hang a Crystal Chandelier for Luxury

    Adding a crystal chandelier to your balcony infuses it with a touch of luxury and elegance, transforming an ordinary space into a sophisticated retreat. Choose a chandelier that fits the scale of your balcony. It should be proportionate to the space, complementing the design without overwhelming it.

    Pros and Cons:

    ProsCons
    ✔️ Adds luxury and elegance to your balcony.❌ Can be too large or heavy for smaller balconies.
    ✔️ Creates an eye-catching focal point.❌ Needs to be installed securely and maintained.
    ✔️ Provides ample lighting for evening use.❌ Expensive compared to regular outdoor lighting options.

    29. Plant an Edible Garden

    Create an edible garden on your balcony to not only bring the joy of gardening closer to home but also produce fresh, organic food right at your doorstep. Choose plants like basil, lettuce, spinach, and small fruits such as strawberries that thrive in container environments.

    Pros and Cons:

    ProsCons
    ✔️ Provides fresh, homegrown food.❌ Requires regular care and attention.
    ✔️ Encourages sustainable living.❌ Limited space for larger plants or vegetables.
    ✔️ Adds a practical and functional element to your balcony.❌ Some plants may need specific conditions to thrive.

    30. Lounge in an Egg Chair

    An egg chair provides a stylish and comfortable seating option for your balcony, combining modern aesthetics with a cozy, enveloping design. Choose an egg chair that complements your balcony’s size and décor, and add plush cushions and throws for extra comfort.

    Pros and Cons:

    ProsCons
    ✔️ Stylish, modern, and comfortable.❌ May not fit in small or crowded spaces.
    ✔️ Provides a cozy lounging area for relaxation.❌ Expensive compared to regular seating options.
    ✔️ Adds a unique and trendy touch to your space.❌ Needs proper installation or support to be safe.

    Conclusion

    Transforming your balcony into a functional and aesthetically pleasing outdoor space is an exciting project that requires thoughtful planning and creative solutions. Whether you have a small apartment balcony or a more spacious one, the key lies in maximizing your available space while maintaining comfort and style. From vertical gardens and multi-functional furniture to decorative elements like fairy lights and mirrors, there are countless ways to personalize your balcony to suit your needs and preferences. By incorporating plants, cozy furniture, and unique décor pieces, you can turn your balcony into a serene retreat, a lively entertainment area, or even a productive workspace.

    FAQ (Frequently Asked Questions)

    1. How can I maximize the space on my small balcony?
    To make the most of a small balcony, consider using vertical gardening, foldable furniture, and wall-mounted décor. You can also integrate multifunctional items with hidden storage to save space while adding functionality.

    2. What are the best plants for a small balcony?
    Choose plants that thrive in containers and suit your balcony’s microclimate. For sunny spaces, succulents, geraniums, and petunias are great options. For shaded areas, try ferns, hostas, or begonias.

    3. Can I create an outdoor dining area on a small balcony?
    Yes, you can create a cozy dining nook with compact bistro furniture or foldable tables and chairs. Enhance the space with soft lighting and plants for added privacy and ambiance.

    4. How do I make my balcony pet-friendly?
    To make your balcony pet-friendly, ensure that the railings are secure, use pet-safe plants, and provide shaded areas where your pet can relax. Consider adding comfy seating or pet beds.

    5. How can I create a relaxing atmosphere on my balcony?
    Incorporate soft furnishings, such as cushions and throws, add fairy lights or lanterns for gentle lighting, and consider a tabletop water fountain to create a soothing environment.

    6. What type of furniture is ideal for small balconies?
    Space-saving furniture like foldable or stackable chairs and tables is ideal for small balconies. Multifunctional furniture with storage options can help keep your space organized and functional.

  • 20 Evergreen Shrubs To Grow for Year-Round Interest

    20 Evergreen Shrubs To Grow for Year-Round Interest

    Introduction: The Importance of Evergreen Shrubs in Urban Gardens

    Urban gardens are becoming more popular as people look for ways to connect with nature in bustling city environments. Whether you have a small balcony, a rooftop garden, or a larger urban space, evergreen shrubs play a crucial role in enhancing the aesthetic appeal and functionality of your garden. Evergreen plants are invaluable because they retain their foliage throughout the year, offering structure, texture, and color even during the colder months when most plants are dormant.

    In urban gardens, where space can be limited, selecting the right evergreen shrubs can transform your garden into a vibrant and sustainable outdoor haven. These shrubs provide year-round visual interest, create privacy, and can even act as sound barriers or windbreaks. This article will delve into the various evergreen shrubs that are perfect for urban gardens, including their features, benefits, and considerations for proper care.

    Why Choose Evergreen Shrubs for Urban Gardens?

    Evergreen shrubs are an essential element of urban garden design, offering many benefits beyond just their aesthetic appeal. These plants are especially useful in urban environments where gardeners often seek ways to create low-maintenance, durable, and visually interesting landscapes.

    Year-Round Greenery

    One of the most significant advantages of evergreen shrubs is their ability to retain their foliage all year long. While other plants may lose their leaves in the winter, evergreen shrubs provide consistent greenery, maintaining the visual appeal of your garden even during the colder months. This is particularly valuable in urban spaces where green areas may be sparse.

    Privacy and Screening

    Urban gardens often face challenges when it comes to privacy. With buildings, streets, and neighbors in close proximity, evergreen shrubs can help create a sense of seclusion. Tall, bushy evergreens such as arborvitae or holly can act as natural screens, blocking out unwanted views and providing a peaceful retreat.

    Low Maintenance

    Most evergreen shrubs are hardy and require minimal upkeep once established. They are typically well-suited to urban conditions, where water and soil quality may not always be ideal. Additionally, many evergreen varieties are resistant to pests and diseases, making them a practical choice for busy gardeners.

    Best Evergreen Shrubs for Urban Gardens

    There is a wide range of evergreen shrubs that can thrive in urban gardens. These shrubs vary in size, shape, and color, allowing you to find the perfect plant for your garden’s needs. Below are some of the top recommendations, each offering distinct qualities that cater to different urban garden requirements.

    1. SprinterBoxwood (Buxus microphylla)

    Buxus microphylla

    Boxwood is a popular evergreen shrub that adds a formal touch to urban landscapes. The Sprinter Boxwood variety is known for its fast growth and glossy, year-round foliage. This shrub has a compact rounded habit, making it an excellent choice for low hedges, edging along pathways, or as a container plant. Hardy in zones 5-9, the Sprinter Boxwood can thrive in both full sun and partial shade. It grows to a height of 2-4 feet, making it ideal for small spaces in urban gardens.

    2. Gold Splash Wintercreeper (Euonymus fortunei)

    Gold Splash

    The Gold Splash Wintercreeper is a broadleaf evergreen with a shrubby, vining habit that adds dynamic visual interest to urban gardens. Its leaves are green with bright golden edges, creating a vibrant contrast that stands out throughout the year. This shrub is particularly useful as a ground cover or for mass plantings in urban gardens. It is also versatile, capable of being sheared to size or grown in containers. Hardy in zones 5-8, it thrives in full sun to partial sun and grows to a height of 18-24 inches.

    3. Castle Keep Blue Holly (Ilex x meserveae)

    Castle Keep

    Castle Keep Blue Holly is a stunning broadleaf evergreen shrub that offers fine texture with its small, leathery, glossy green leaves. This holly variety retains its rounded shape with little to no pruning required, making it an excellent choice for low-maintenance urban gardens. Its upright, dense growth habit makes it ideal for hedging, foundation plantings, or as a stand-alone specimen in mixed borders. Hardy in zones 5-7, it grows to 3-5 feet tall and 3-4 feet wide.

    4. Gem Box Inkberry Holly (Ilex glabra)

    Gem Box

    For those looking for a shrub that thrives in shady conditions, the Gem Box Inkberry Holly is a fantastic choice. This broadleaf evergreen has a dense, rounded habit, and its small, dark green leaves give it a refined, polished appearance. It is particularly suitable for use as low hedging, along borders, or in containers. This variety is hardy in zones 5-9 and grows to a height of 2-3 feet with a width of 2-3 feet. It is also deer-resistant, making it an excellent addition to any garden.

    5. Sky Box Japanese Holly (Ilex crenata)

    Sky Box

    Sky Box Japanese Holly is a narrow, columnar evergreen shrub that adds vertical interest to urban gardens. Its glossy dark green foliage provides a soft texture that contrasts beautifully with other plants. This shrub is perfect for screening, dividing garden spaces, or as a focal point in mixed borders. Hardy in zones 6-8, it grows to a height of 4-5 feet and a width of 2-3 feet, making it ideal for narrow spaces in urban environments.

    6. North Pole Arborvitae (Thuja occidentalis)

    North Pole

    The North Pole Arborvitae is a conical evergreen shrub that makes a striking focal point in urban gardens. With its upright, narrow habit, it is an excellent choice for narrow spaces or as a privacy screen along fences and property lines. Its dense foliage also offers year-round interest and is exceptionally hardy in colder climates. This arborvitae grows to 10-15 feet tall and 3-5 feet wide, making it an ideal choice for urban gardens where space is limited but privacy is needed. Hardy in zones 3-8, it thrives in full sun to partial sun.

    7. Tator Tot Arborvitae (Thuja occidentalis)

    Tator TotFor smaller urban gardens, the Tator Tot Arborvitae is one of the best dwarf evergreen shrubs. Its rounded, compact form makes it perfect for small spaces, containers, or as a decorative accent in borders. This shrub grows only 1-2 feet tall and wide, and its fine-textured foliage provides an elegant backdrop to other plants in the garden. Hardy in zones 3-8, Tator Tot Arborvitae thrives in full sun to partial sun, making it a versatile choice for urban gardens of all sizes.

    8. Perfecto Mundo Red Reblooming Azalea (Rhododendron x)

    Perfecto MundoAzaleas are renowned for their colorful flowers, and the Perfecto Mundo Red Reblooming Azalea takes it a step further by offering vibrant, lipstick-red blooms twice a year. This broadleaf evergreen shrub is a popular choice for urban gardens because of its beautiful flowers and compact size, growing to a height of 30 inches and a width of 3-4 feet. Hardy in zones 6-9, it thrives in full sun to partial sun and provides continuous color throughout the growing season. It’s a fantastic addition to foundation plantings, borders, or containers.

    9. Dandy Man Purple Rhododendron (Rhododendron x)

     Dandy ManThe Dandy Man Purple Rhododendron offers deep purple, bell-shaped flowers in spring, adding a touch of elegance to any garden. This variety is more cold-hardy than most rhododendrons, thriving in zones 4-8. It can grow up to 4-8 feet tall and wide, making it suitable for larger urban gardens or as a focal point. The Dandy Man Purple rhododendron is ideal for foundation plantings or mixed borders, where its colorful blooms can be appreciated for months.

    10. Stonehenge Yew (Taxus x media)

    stonehengeThe Stonehenge Yew is a versatile conifer that can be used as a tree or shrub, depending on the desired effect. It has a narrow columnar shape, making it perfect for tight spaces, screens, or as a vertical element in mixed borders. The yew is also one of the best evergreen shrubs for shade, thriving in both full sun and full shade. Hardy in zones 4-7, it grows up to 8-10 feet tall and 2-4 feet wide, making it ideal for urban gardens with limited space.

    11. Gin Fizz Juniper (Juniperus chinensis)

    Gin FizzThe Gin Fizz Juniper is a tall, conical evergreen shrub that produces attractive blue-green berries against aromatic, soft green foliage. This variety is perfect for screening, mass plantings, or as a standalone feature in your garden. The Gin Fizzjuniper is hardy in zones 4-8, growing up to 10-18 feet tall and 7-10 feet wide. It thrives in full sun and is resistant to deer, making it a low-maintenance choice for urban gardens.

    12. Tortuga Juniper (Juniperus communis)

    TortugaThe Tortuga Juniper is a tough evergreen shrub that can withstand extreme weather conditions, including drought, sun, and cold. This hardy shrub grows as a low-mounded groundcover with emerald-green foliage, making it an excellent choice for edging or as a ground cover in urban gardens. Hardy in zones 2-7, Tortuga Juniper grows up to 2 feet tall and 3-4 feet wide, making it ideal for small gardens or containers.

    13. Steady as She Goes Gardenia (Gardenia jasminoides)

    SteadyKnown for its intensely fragrant, snow-white blooms, the Steady as She Goes Gardenia is an evergreen shrub that brings both beauty and fragrance to your urban garden. This variety is more heat and cold-tolerant than traditional gardenias, making it suitable for a wider range of climates. Hardy in zones 7-10, it grows 3-5 feet tall and 4-7 feet wide. The glossy, evergreen foliage provides year-round interest, while the blooms add a burst of fragrance in the spring and summer.

    14. Soft Serve False Cypress (Chamaecyparis pisifera)

    Soft ServeThe Soft Serve False Cypress is a dwarf evergreen shrub that offers soft, cedar-like foliage in a conical shape. Its gently weeping habit creates a striking visual effect in the garden, making it ideal for hedging, screening, or as a specimen plant. Hardy in zones 4-8, it grows to 6-10 feet tall and 5-6 feet wide. This shrub is deer resistant, making it an excellent choice for urban gardens where deer are a concern.

    15. Interstella Lily of the Valley Shrub (Pieris japonica)

    InterstellaThe Interstella Lily of the Valley Shrub is a broadleaf evergreen that produces clusters of deep ruby-red, bell-shaped flowers in early spring. It is one of the best small evergreen shrubs, growing 3-4 feet tall and wide, making it ideal for smaller urban gardens or as a focal point in a mixed border. Hardy in zones 5-8, Interstella thrives in full sun to full shade, making it versatile for different garden conditions.

    16. Waxwing Lime Mirror Bush (Coprosma repans)

    WaxwingThe Waxwing Lime Mirror Bush is a unique broadleaf evergreen shrub with glossy leaves in a striking combination of yellow, lime green, and deep purple. This plant thrives in full sun to partial sun and is perfect for use as a low-growing hedge, ground cover, or edging plant in urban gardens. Hardy in zones 9-11, it can be overwintered indoors in colder climates, making it adaptable for different growing conditions.

    17. Sweet Talker Fragrant Viburnum (Viburnum)

    Sweet TalkerThe Sweet Talker Fragrant Viburnum is a broadleaf evergreen that offers trumpet-shaped pink flowers in late winter and early spring, filling your garden with honey-scented fragrance. Hardy in zones 7-8, it grows to 8-10 feet tall and 3-5 feet wide, making it suitable for hedging, screening, or as part of a mixed border. Its textured green foliage takes on burgundy hues in winter, providing year-round interest.

    18. Sunjoy Todo Barberry (Berberis x)

    Sunjoy TodoThe Sunjoy Todo Barberry is a semi-evergreen shrub that features deep purple foliage, small yellow flowers, and bright red berries in fall. This variety is non-invasive and is ideal for low hedging, mass plantings, or as part of a mixed border. Hardy in zones 6-8, it grows to 18-24 inches tall and wide, making it perfect for smaller urban gardens.

    19. Peppy Le Pom Pomegranate (Punica granatum)

    Peppy Le PomThe Peppy Le Pom Pomegranate is a dwarf variety that features bright orange flowers resembling dangling earrings. This evergreen shrub grows 3-4 feet tall and 3 feet wide, making it an excellent choice for urban gardens or containers. Hardy in zones 7-10, it produces small ornamental fruits after flowering and is deer resistant.

    20. Juke Box Pyracomeles (x Pyracomeles sp.)

    Juke BoxThe Juke Box Pyracomeles is a hybrid evergreen shrub with shiny green leaves and finely textured growth. Similar to boxwood, it is a low-maintenance option for ground cover, hedging, or edging borders and pathways. Hardy in zones 7-9, it grows 12-36 inches tall and wide, providing a lush, dense backdrop to other plants in the landscape.

    Care Tips for Evergreen Shrubs in Urban Gardens

    Caring for evergreen shrubs in urban gardens is relatively simple, but there are a few essential guidelines to ensure that they thrive. Urban environments can present unique challenges, such as pollution, compacted soil, and limited sunlight. By following these tips, you can help your evergreen shrubs flourish year-round.

    Soil and Fertilization

    Evergreen shrubs generally prefer well-drained soil. In urban settings, where soil quality may be compromised, it is essential to improve soil conditions before planting. Adding organic matter such as compost can help enrich the soil and promote healthy root development. For fertilization, use a balanced fertilizer in the early spring to encourage robust growth throughout the growing season.

    Watering

    Although evergreen shrubs are typically drought-resistant once established, they still require regular watering, especially during the initial planting phase. Ensure the soil remains moist but not waterlogged, as excess moisture can lead to root rot. It’s best to water deeply and infrequently to encourage deep root growth.

    Pruning

    While many evergreen shrubs require minimal pruning, occasional trimming may be necessary to maintain their shape and health. Prune dead or damaged branches and lightly trim the shrub to shape it if needed. Always prune during the dormant season to prevent stressing the plant.

    Protection from Extreme Conditions

    Urban gardens often experience extreme weather conditions, such as heat islands or cold winds. In regions with harsh winters, protect your evergreen shrubs by mulching around their base to insulate the roots. In areas with intense heat, provide shade during the hottest part of the day to prevent sunburn on the leaves.

    Pros and Cons of Evergreen Shrubs for Urban Gardens

    Certainly! Below is a table format with the Pros and Cons of each evergreen shrub from serial 1 to 23:

    ShrubProsCons
    Sprinter Boxwood (Buxus microphylla)Fast-growing, deer resistant, suitable for low hedging, glossy year-round foliageMay require regular pruning to maintain shape, sensitive to overwatering in clay soils
    Gold Splash Wintercreeper (Euonymus fortunei)Compact, vibrant golden foliage, easy to maintain, can be grown in containersCan become invasive if not controlled, needs regular trimming
    Castle Keep Blue Holly (Ilex x meserveae)Low maintenance, attractive year-round, deer resistant, rounded shape with little pruning requiredDoes not tolerate heavy shade well, may need supplemental watering in dry conditions
    Gem Box Inkberry Holly (Ilex glabra)Thrives in shade, dense growth, deer resistant, ideal for small spaces and low hedgingSlow-growing, may need extra watering in dry periods
    Sky Box Japanese Holly (Ilex crenata)Ideal for narrow spaces, minimal pruning required, attractive glossy foliageNot very drought-tolerant, sensitive to harsh winds in exposed areas
    North Pole Arborvitae (Thuja occidentalis)Narrow, upright form, great for privacy screening, hardy in cold climatesNeeds regular watering in dry conditions, can be prone to wind damage in exposed areas
    Tator Tot Arborvitae (Thuja occidentalis)Compact, low maintenance, deer resistant, perfect for small gardensLimited height, may not provide much screening, requires well-drained soil
    Perfecto Mundo Red Reblooming Azalea (Rhododendron x)Reblooming flowers for extended color, compact size, vibrant lipstick-red bloomsMay need extra watering in dry periods, sensitive to harsh winter winds
    Dandy Man Purple Rhododendron (Rhododendron x)Cold-hardy, colorful flowers, low maintenance, attractive all year roundNeeds regular watering, prone to root rot if overwatered
    Stonehenge Yew (Taxus x media)Tolerates full sun to shade, versatile in landscape design, low maintenanceToxic to pets, requires regular trimming to maintain shape
    Gin Fizz Juniper (Juniperus chinensis)Aromatic foliage, deer resistant, low maintenance, tall, conical shape for vertical interestNeeds well-drained soil, requires occasional pruning to control size
    Tortuga Juniper (Juniperus communis)Extremely hardy, drought-tolerant, deer and rabbit resistant, great for ground coverNeeds well-drained soil, may not tolerate foot traffic well
    Steady as She Goes Gardenia (Gardenia jasminoides)Fragrant white blooms, heat and cold-tolerant, glossy foliageRequires acidic, well-drained soil, needs protection from harsh winds
    Soft Serve False Cypress (Chamaecyparis pisifera)Soft, visually appealing form, deer resistant, suitable for screening and hedgingRequires regular trimming, sensitive to prolonged drought
    Interstella Lily of the Valley Shrub (Pieris japonica)Beautiful ruby-red flowers, compact size, deer resistantNeeds extra watering in dry conditions, needs protection from extreme cold
    Waxwing™ Lime Mirror Bush (Coprosma repans)Unique and vibrant foliage, great for low hedging and ground cover, can be overwintered indoorsNot suitable for regions with harsh winters, requires regular pruning
    La Vida Grande™ Indian Hawthorn (Rhapiolepsis indica)Showy spring blooms, glossy foliage, compact size, ideal for smaller urban gardensRequires regular watering, sensitive to frost in colder climates
    Sweet Talker Fragrant Viburnum (Viburnum)Fragrant early spring flowers, attractive foliage with seasonal color changes, deer and rabbit resistantRequires protection from harsh winds, needs consistent moisture
    Funshine Abelia (Abelia grandiflora)Colorful foliage throughout the year, fragrant flowers, deer resistantNeeds well-drained soil, may require regular pruning
    Sunjoy Todo Barberry (Berberis x)Non-invasive, colorful foliage and berries, deer resistantCan be thorny, needs protection from strong winds
    Austin Pretty Limits Oleander (Nerium oleander)Nonstop bright pink blooms, disease-resistant, deer and rabbit resistantToxic if ingested, requires protection in colder climates
    Peppy Le Pom™ Pomegranate (Punica granatum)Bright, attractive flowers, compact size, deer resistantRequires full sun, may not tolerate freezing temperatures in colder climates
    Juke Box Pyracomeles (x Pyracomeles sp.)Low-maintenance, disease-resistant, suitable for ground cover or hedgingNeeds regular trimming to maintain shape, not ideal for very wet soil

    Conclusion: Elevate Your Urban Garden with Evergreen Shrubs

    Evergreen shrubs are a game-changer for urban gardens, offering consistent beauty, privacy, and functionality throughout the year. Whether you’re aiming to create a serene retreat, a vibrant display of greenery, or a low-maintenance outdoor space, evergreen shrubs can meet all of these needs. From the compact SprinterBoxwood to the tall and stately North Pole Arborvitae, the variety of evergreen shrubs available today makes it easy to find the perfect plant for your garden.

    Incorporating evergreen shrubs into your urban garden not only enhances the overall aesthetic but also ensures that your outdoor space remains functional and attractive, even during the colder months. With proper care and thoughtful selection, these resilient plants can thrive in urban environments and provide lasting beauty for years to come.

    FAQ

    What are the most popular evergreen shrubs?
    Some of the most popular evergreen shrubs include arborvitae, boxwood, false cypress, holly, juniper, wintercreeper, azalea, and rhododendron.

    What kind of bushes stay green all year?
    Evergreen shrubs, including conifers (with needles) and broadleaf evergreens (with foliage), stay green all year round.

    What shrubs stay green in winter?
    Conifers and certain broadleaf evergreen shrubs like azalea and rhododendron remain green in winter.

    Which flowering shrubs are evergreen?
    Some evergreen flowering shrubs include camellia, daphne, lily of the valley shrub, mahonia, azalea, and rhododendron.

    What evergreen shrubs stay small?
    Dwarf evergreen shrubs, such as Tater Tot Arborvitae and Tortuga Juniper, are perfect for small urban gardens.

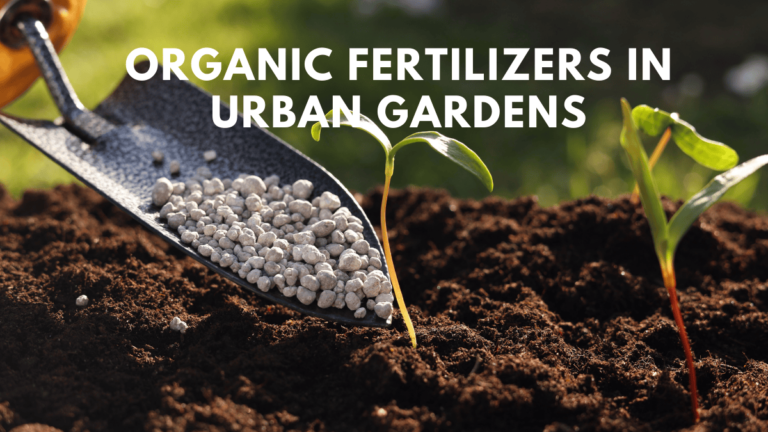
  • The Power of Organic Fertilizers in Urban Gardens

    The Power of Organic Fertilizers in Urban Gardens

    Introduction: Why Organic Fertilizers are a Game-Changer in Urban Gardens

    Urban gardens have become a sanctuary for city dwellers seeking a connection to nature and a way to grow their own food. As these urban spaces expand, so does the demand for sustainable gardening practices that not only provide a healthy yield but also protect the environment. One of the most significant shifts in urban gardening is the adoption of organic fertilizers.

    When compared to synthetic alternatives, organic lawn fertilizer and organic liquid fertilizer offer several notable advantages that contribute to healthier plants, richer soil, and a more sustainable gardening approach. Whether you’re growing vegetables in small containers or cultivating a lush green lawn, incorporating organic fertilizers into your gardening routine ensures that you’re not just creating beauty but also nurturing the earth beneath your feet. In this article, we will explore the benefits of using organic fertilizers in urban gardens and how they can transform your gardening experience.

    What Are Organic Fertilizers?

    Organic fertilizers are derived from natural sources, such as plant-based materials, animal manure, or mineral deposits. Unlike synthetic fertilizers, which are chemically processed, organic fertilizers work in harmony with nature. They provide nutrients to the soil in a slow-release manner, improving the long-term health of your plants and the environment.

    In urban gardens, where space is limited, and soil quality can be poor, these fertilizers play an essential role in restoring balance and promoting growth. Organic fertilizers not only nourish plants but also support soil organisms that are crucial for maintaining a healthy ecosystem.

    The Environmental Benefits of Organic Fertilizers

    One of the main reasons organic fertilizers have gained popularity in urban gardens is their minimal environmental impact. Unlike synthetic fertilizers, which can leach harmful chemicals into the soil and water, organic fertilizers promote soil health without polluting the environment. Here are a few key environmental advantages:

    1. Reduced Chemical Runoff: Synthetic fertilizers often lead to the leaching of nitrates and phosphates into nearby water bodies, contributing to water pollution. Organic fertilizers, on the other hand, release nutrients gradually, minimizing the risk of nutrient runoff.
    2. Soil Health and Biodiversity: Organic fertilizers improve soil structure by adding organic matter, which increases soil moisture retention, aeration, and microbial activity. This results in a healthier soil ecosystem, supporting a diverse range of beneficial organisms such as earthworms and microbes.
    3. Lower Carbon Footprint: Organic fertilizers have a lower carbon footprint than synthetic fertilizers, as they are typically produced with fewer industrial processes and transport emissions. This makes them a more sustainable option for urban gardeners concerned about climate change.
    4. Reduction of Soil Erosion: By improving soil structure and fostering a healthy ecosystem, organic fertilizers help prevent soil erosion, which is especially important in urban areas where green spaces are limited.

    Benefits of Organic Fertilizers for Plant Growth

    Urban gardeners can benefit greatly from the use of organic fertilizers, as they directly influence plant growth in multiple ways. Here are some of the key benefits:

    1. Improved Soil Fertility: Over time, organic fertilizers enhance the soil’s nutrient content, making it more fertile and capable of supporting a variety of plants. These fertilizers release a balanced mix of nutrients, including nitrogen, phosphorus, and potassium, which are essential for healthy plant growth.
    2. Stronger Root Development: The slow-release nature of organic fertilizers ensures that plants receive a steady supply of nutrients, encouraging deeper and more robust root systems. This makes plants more resilient to drought, pests, and diseases.
    3. Enhanced Nutrient Absorption: Unlike synthetic fertilizers, which often provide nutrients in a form that can be rapidly absorbed by plants (and potentially washed away), organic fertilizers are broken down by microorganisms in the soil. This slow process allows plants to absorb nutrients over time, preventing nutrient imbalances and promoting healthier growth.
    4. Reduced Plant Stress: Organic fertilizers are less likely to cause fertilizer burn, a common issue with synthetic fertilizers. As a result, plants are less stressed and can focus their energy on growth rather than recovering from nutrient overload.
    5. Better Fruit and Vegetable Yields: For urban gardeners growing fruits and vegetables, organic fertilizers can significantly improve yields. The nutrients released from organic fertilizers are crucial for producing high-quality crops, especially when using organic fertilizer for vegetables.

    Organic Fertilizers and Vegetable Gardening

    For urban gardeners who focus on growing their own food, organic fertilizers for vegetables are a critical component of a successful gardening strategy. Unlike synthetic fertilizers, which can sometimes leave harmful residues on crops, organic fertilizers provide a safe and natural way to grow vegetables. Here’s how they benefit vegetable gardens:

    1. Healthier Vegetables: Organic fertilizers help vegetables grow without the risk of harmful chemicals, ensuring that they are both safe to eat and full of essential nutrients.
    2. Better Soil Structure: By enriching the soil with organic matter, these fertilizers improve drainage, reduce compaction, and increase the soil’s ability to retain moisture. This creates optimal conditions for vegetable growth.
    3. Increased Biodiversity: Organic fertilizers support soil biodiversity, which leads to better pollination and a more balanced ecosystem, essential for growing a variety of vegetables.
    4. Sustainable Gardening: By using organic fertilizers, gardeners can maintain a sustainable, eco-friendly approach to food production, reducing the need for harmful chemical inputs.

    The Role of Organic Lawn Fertilizers in Urban Landscaping

    Urban gardeners are not just limited to vegetable patches; many city dwellers maintain beautiful lawns as well. Organic lawn fertilizers provide an excellent way to create a lush, green lawn while ensuring the health of both the grass and the surrounding ecosystem. Here’s how organic fertilizers benefit lawns:

    1. Healthier Grass Growth: Organic fertilizers provide grass with a steady, consistent supply of nutrients, which encourages strong, healthy growth. Over time, this results in a thick, lush lawn that is more resistant to pests, diseases, and environmental stressors like drought and extreme temperatures.
    2. Environmental Safety: Traditional chemical lawn fertilizers can be harmful to the environment, often leading to contamination of nearby water sources or harming beneficial insects and wildlife. Organic lawn fertilizers, however, are made from natural materials and are far less likely to cause environmental harm.
    3. Reduction of Pesticides: Organic fertilizers help improve the natural resilience of the grass, reducing the need for chemical pesticides. This creates a safer and healthier environment for pets, children, and local wildlife.
    4. Soil Health and Sustainability: By improving soil quality, organic lawn fertilizers encourage a more sustainable lawn. Healthy soils support a balanced ecosystem that benefits the entire garden, from the smallest microbes to the tallest trees.

    Pros and Cons of Using Organic Fertilizers in Urban Gardens

    ProsCons
    Environmentally friendlySlower nutrient release compared to synthetic fertilizers
    Improves soil health and biodiversityMay require more frequent applications
    Reduces chemical runoff and pollutionOrganic fertilizers can be more expensive
    Supports plant resilience and growthSome organic fertilizers may have an odor
    Enhances nutrient availability over timeMay take longer to see results compared to chemical alternatives
    Safe for edible plants and vegetablesCan be challenging to find the right mix for specific plant needs

    Conclusion: Embracing Organic Fertilizers for a Sustainable Future

    In conclusion, the benefits of using organic fertilizers in urban gardens are clear. From promoting sustainable gardening practices to improving plant health and protecting the environment, organic fertilizers offer numerous advantages over synthetic options. Whether you’re focused on growing vegetables, maintaining a lush lawn, or simply enhancing the beauty of your garden, organic fertilizers are a key tool in creating a healthier, more sustainable garden space.

    By choosing organic fertilizers, urban gardeners can contribute to the overall health of the planet while reaping the rewards of a thriving garden. The shift towards organic fertilizers represents a growing movement toward sustainability, healthier living, and responsible gardening practices. In urban areas where space is limited, organic fertilizers provide the ideal solution for nurturing plants and soil without harming the environment. Embrace the power of organic fertilizers and watch your urban garden thrive.

  • Easy Steps for Setting Up a Compost Bin in Your Apartment

    Easy Steps for Setting Up a Compost Bin in Your Apartment

    Composting is a simple yet transformative process that turns everyday organic waste into a nutrient-rich mixture, perfect for enhancing soil health and promoting plant growth. By utilizing both green waste, such as fruit peels, vegetable scraps, and coffee grounds, and brown waste, like dry leaves, cardboard, and newspaper, you can create a sustainable cycle of waste reduction and soil enrichment. The key to successful composting lies in choosing the right DIY compost bin that suits your space and needs.The choice of materials for your DIY compost bin can significantly influence its effectiveness and ease of use. Common materials include pallets, wire fencing, plastic totes, trash bins, straw bales, buckets, and even barrels for creating compost tumblers. Each material offers distinct advantages, allowing you to customize your compost bin to fit your specific requirements and available space.

    1. 5-Gallon Bucket Compost Bin: Compact and Efficient

    For those with limited space, a 5-gallon bucket compost bin is an excellent choice. This compact solution is perfect for small yards or apartments and requires minimal investment. To create this bin, gather a couple of five-gallon buckets, a drill, shredded paper, kitchen scraps, and worms. The process is straightforward, taking less than an hour to complete. This method not only saves space but also provides an efficient way to manage organic waste.

    2.Trash Can Compost Bin: A Budget-Friendly Option

    Transforming a trash can into a compost bin is an easy and economical way to start composting. This method is ideal for beginners and requires only a plastic trash can with a lid and a few additional materials. The entire project can be completed in under an hour, making it a quick and accessible option for those looking to reduce food waste and create nutrient-rich compost.

    3.Pallet Compost Bin: Durable and Cost-Effective

    For a more permanent composting solution, consider building a pallet compost bin. This option is both affordable and durable, providing a designated area for composting without breaking the bank. By using wood pallets and some basic hardware, you can construct a sturdy compost bin that will last for years. This method is perfect for those who want a reliable and long-lasting composting solution.

    4.Wooden Compost Bin: Sturdy and Long-Lasting

    If you’re serious about composting and want a bin that will withstand the elements, a wooden compost bin is an excellent choice. This DIY project involves using cut lumber and a hinged lid to create a robust and functional compost bin. Features like hardware cloth for air circulation and hinged access to the bottom of the bin make it easy to manage and harvest finished compost.

    5.Wire Fence Compost Bin: Simple and Adaptable

    A wire fence compost bin is one of the most inexpensive and adaptable options available. By using chicken wire and posts, you can create a secure composting area that can be easily adjusted to fit your space. This method is ideal for those who want a flexible and cost-effective composting solution.

    6.Tote Compost Bin: Kid-Friendly and Easy to Build

    A plastic tote can be transformed into a compost bin with just a few simple modifications. By drilling holes in the tote to promote air circulation, you can create an effective composting system that is low to the ground and perfect for involving children in the composting process. This method is straightforward and requires minimal materials, making it an excellent choice for families.

    7.Straw Bale Compost Bin: Natural and Insulating

    Using straw bales to create a compost bin is a natural and customizable option. This method allows you to adjust the size of your compost pile as needed and provides insulation to speed up the composting process. As the straw breaks down, it can be incorporated into the compost, adding additional nutrients to the mixture.

    8.DIY Rotating Compost Bin Tumbler: Efficient and Odor-Controlled

    A DIY compost tumbler is an efficient way to manage compost, allowing you to easily turn the pile and control odors. By using an old barrel and some sawhorses, you can create a rotating compost bin that ensures even decomposition. This method is perfect for those who want a hands-on approach to composting and are willing to invest a little extra effort.

    9.Plastic Storage Container Compost Bin: Rodent-Proof and Practical

    For those concerned about pests, a plastic storage container compost bin offers a rodent-proof solution. By reinforcing the container with wire mesh or hardware cloth, you can keep unwanted visitors out while still allowing for proper air circulation. This method is practical and effective, providing a secure environment for composting.

    10.In-Ground Compost Method: Simple and Direct

    The in-ground compost method is a straightforward approach that requires minimal materials and effort. By digging a hole in your garden and adding compostable materials directly into it, you can enrich the soil without the need for a traditional compost bin. This method is ideal for those who want a quick and easy way to improve soil quality and support plant growth. Simply cover the composting materials with soil, and over time, they will decompose and nourish the surrounding plants.

    11.Trench Composting: Ideal for Row Gardens

    Trench composting is an extension of the in-ground method, particularly beneficial for gardens with rows of plants. By digging a trench alongside your plants and filling it with compostable materials, you create a nutrient-rich environment that supports healthy plant development. This method is especially useful in vegetable gardens, where crops are often planted in evenly spaced rows. Once the trench is filled, cover it with soil, and let nature take its course.

    12.Hot Composting: Accelerated Decomposition

    Hot composting is a technique that optimizes microbial activity to speed up the decomposition process. By creating a compost bin that is at least 4 feet by 4 feet and positioning it in full sun, you can generate the heat necessary for rapid composting. This method requires more effort and attention, such as regular turning and monitoring of moisture levels, but results in faster compost production. It’s ideal for those who need compost quickly and are willing to invest the time to maintain the pile.

    13.Old Dresser Drawer: Creative Indoor Composting

    For those unable to compost outdoors, repurposing an old dresser drawer offers a creative indoor composting solution. By covering the top with a hinged piece of wood or heavy fabric, you can create a compact composting vessel that fits easily in small spaces. This method is perfect for apartment dwellers or anyone looking to compost on a smaller scale. Ensure proper ventilation and moisture control to prevent odors and promote effective decomposition.

    14.Bokashi Bucket: Microorganism-Driven Composting

    Bokashi composting is a unique method that uses microorganisms to quickly break down organic materials. While bokashi kits are available for purchase, you can easily make your own composter using two 5-gallon buckets and a drill. Drill holes in the bottom of one bucket, place it inside the other, and add your composting materials along with bokashi bran. This method is efficient and effective, providing a fast way to produce compost even in limited spaces.

    15.DIY Compost Screen: Refining Your Compost

    Regardless of the type of compost bin you use, a DIY compost screen can help you refine your compost by sifting out large chunks that haven’t fully decomposed. By constructing a simple frame out of lumber and attaching hardware cloth, you can create a practical tool for ensuring your compost is ready for use in the garden. This step is crucial for achieving a fine, crumbly texture that is easy to incorporate into soil.

    Tips for Successful Composting

    To make the most of your DIY compost bin, it’s important to understand the basics of composting. Start by including the right materials, such as crushed eggshells, grass clippings, coffee grounds, and vegetable peels. Avoid adding meat, seafood, dairy products, and other items that can attract pests or disrupt the composting process. Maintain a proper balance of green and brown materials, and layer them correctly to promote efficient decomposition. Additionally, consider the benefits of hot versus cold composting and decide which method best suits your needs.

    Pros and Cons of DIY Compost Bins

    ProsCons
    Cost-effectiveRequires time and effort
    CustomizableMay attract pests if not managed properly
    Reduces wasteNeeds regular maintenance
    Improves soil qualitySpace limitations for some methods

    FAQs

    How often should compost be turned?

    For actively decomposing materials, turn the compost every three to four days. For tumblers, turning twice a week is recommended for optimal results.

    How long does it take to make compost in a 5-gallon bucket?

    If properly maintained and kept moist, compost in a 5-gallon bucket can be ready in about six weeks.

    Do you water compost every day?

    No, daily watering is not necessary. However, in hot and dry weather, more frequent watering may be required to maintain moisture levels.

    Conclusion

    Creating a DIY compost bin is a rewarding endeavor that not only reduces waste but also enriches your garden soil. By choosing the right materials and method for your space and needs, you can efficiently transform organic waste into valuable compost. Whether you opt for a simple in-ground method or a more complex rotating tumbler, the benefits of composting are clear: healthier plants, improved soil, and a more sustainable lifestyle. Embrace the art of composting and watch your garden thrive.

  • How to Harvest Rainwater at home ?

    How to Harvest Rainwater at home ?

    Introduction:

    In today’s world, where environmental consciousness is on the rise, learning how to harvest rainwater at home has become a pivotal step towards sustainable living. Not only does it help conserve precious water resources, but it also offers a practical way to reduce your monthly water bills. Whether you’re a homeowner aiming to cut down on water usage or someone passionate about eco-friendly practices, setting up a rainwater collection system can be both rewarding and beneficial.

    In this comprehensive guide, we’ll delve into the essentials of rainwater harvesting, explore its benefits, and provide a step-by-step approach to setting up your own system. We’ll also address common pitfalls and maintenance tips to ensure your system remains efficient. Let’s dive in!

    Understanding to harvest rainwater

    Rainwater harvesting involves collecting and storing rainwater that would otherwise flow off your roof and into storm drains. Instead of letting this valuable resource go to waste, you can capture, filter, and utilize it for various purposes, such as gardening, flushing toilets, and even drinking, provided it’s properly treated. While the concept might seem complex, it’s surprisingly straightforward once you grasp the basics.

    Why Consider to harvest rainwater?

    Before embarking on your rainwater harvesting journey, it’s essential to understand the compelling reasons behind it:

    1. Environmental Impact: By collecting rainwater, you reduce reliance on groundwater and municipal sources, which are often overused and can lead to droughts.
    2. Cost Savings: Utilizing rainwater for non-potable purposes like irrigation and toilet flushing can significantly lower your water bills.
    3. Self-Sufficiency: A rainwater system reduces dependence on public water supplies, especially in areas prone to water restrictions.
    4. Enhanced Garden Health: Rainwater is naturally soft and free from chemicals, making it ideal for nurturing plants and gardens.

    Types of to harvest rainwater Systems

    Choosing the right system depends on your water usage needs and preferences.

    Here are some common types:

    1. Simple Barrel System: This basic setup involves connecting a barrel to your gutters to collect rainwater. It’s cost-effective but may have limited storage capacity.
    2. Dry System: In this system, water is directed from the roof into a large storage tank, with pipes emptying after each rain. It’s suitable for larger storage needs.
    3. Wet System: Pipes remain full and transport water to a storage tank located away from the house. This setup is ideal for larger properties or when the tank isn’t adjacent to downspouts.

    Getting Started: Essential Components

    To set up a basic rainwater harvesting system, you’ll need the following components:

    • Catchment Area: Typically, your roof serves as the catchment area for collecting rainwater.
    • Gutters and Downspouts: These channel rainwater from the roof into the storage system.
    • First-Flush Diverter: This device diverts the initial, debris-laden rainwater away from the storage tank.
    • Storage Tank: Depending on your needs, this could be a barrel, tank, or cistern. Ensure it has adequate storage capacity.
    • Filter System: A basic mesh filter removes large debris, while advanced systems purify water for drinking.
    • Pump (Optional): If you plan to use the water for irrigation or household purposes, a pump may be necessary.

    Step-by-Step Guide to Setting Up Your Rainwater Harvesting System

    Let’s walk through the process of setting up a simple barrel-based rainwater harvesting system:

    1. Choose the Right Location for Your Barrel or TankPosition your storage tank or barrel near a downspout. Opt for a shaded area to keep the water cool and inhibit bacterial growth. Ensure the ground is level and stable to support the tank’s weight.
    2. Set Up Your Gutters and DownspoutsInstall gutters along the roof’s edge to collect rainwater and direct it to the downspouts. Regularly clear them of debris like leaves and twigs to maintain water flow. Consider adding gutter guards or leaf screens for easier maintenance.
    3. Install the First-Flush DiverterAttach a first-flush diverter to the downspout. This device diverts the initial, dirtier rainwater away from the storage tank. It’s readily available at most hardware stores and easy to install.
    4. Connect Your Downspout to the Storage TankSecurely connect the downspout to your barrel or tank to prevent leaks. For a barrel system, consider using a downspout diverter kit, which allows water to flow into the barrel when it rains and back into the drain when the barrel is full.
    5. Add a Filtration System Place a mesh filter on top of the barrel to keep out leaves, insects, and large debris.

    Certainly! Let’s continue with the setup and maintenance of your rainwater harvesting system, along with additional insights and a conclusion.

    1. Install a Spigot or Pump

    For easy access to the collected water, install a spigot near the bottom of the barrel. This allows you to fill watering cans or connect a hose. If your storage tank is larger or located far from where you need the water, consider installing a pump. Choose a pump size based on your intended water usage, whether for irrigation or household needs.

    Maintenance Tips for Your to harvest rainwater System

    To keep your system running efficiently, regular maintenance is crucial. Here’s a checklist to help you maintain your rainwater harvesting setup:

    • Clean Gutters Regularly: Every two months, clear gutters of leaves, twigs, and debris. This is especially important in the fall when leaves can quickly clog the system.
    • Inspect the First-Flush Diverter: Clean the diverter every couple of months to ensure it functions properly. It reduces the amount of debris entering your tank by diverting the first, dirtier water from your roof.
    • Check the Filter System: Regularly clean mesh screens to remove larger debris. For drinking water systems, replace filter cartridges as needed to maintain water quality.
    • Test for Algae: If your tank is exposed to sunlight, check for algae growth. If algae are present, clean the tank interior and consider relocating it to a shadier spot or covering it.
    • Flush the System: Every few months, completely empty the tank to remove sediment and contaminants. Many systems have a “tank drain” option to facilitate this process.

    Common Mistakes to Avoid

    While to harvest rainwater is relatively straightforward, beginners may encounter some common pitfalls. Avoid these to save time, money, and frustration:

    • Underestimating Tank Size: Many start with a small barrel only to find it fills quickly. Estimate your water needs carefully and opt for a larger tank if possible.
    • Ignoring Local Regulations: Check with local authorities to ensure there are no restrictions on rainwater harvesting in your area before setting up a system.
    • Neglecting Maintenance: Regular maintenance is essential to prevent system contamination or blockages. Keep your system in top shape with routine checks.
    • Placing the Tank in Direct Sunlight: Sunlight can promote algae growth, making the water unsuitable for use. Choose a shaded location or cover the tank to prevent this.

    Long-Term Benefits of to harvest rainwater

    While setting up a rainwater harvesting system requires some initial effort, the long-term benefits are substantial:

    • Eco-Friendly Living: Rainwater harvesting reduces the demand on natural resources, making it an excellent choice for environmentally conscious individuals.
    • Lower Water Bills: Over time, the savings on your water bills will accumulate, helping you reduce household expenses.
    • Improved Plant Growth: Rainwater is naturally soft, pH-balanced, and free of salts and chlorine, making it ideal for plants.
    • Emergency Backup: In case of water shortages or emergencies, having a reserve of collected rainwater can be invaluable.

    FAQs

    1. Is rainwater safe to drink?
      • Rainwater can be safe to drink if properly filtered and treated. Use a multi-stage filtration system and consider UV or chemical treatments for safety.
    2. How much rainwater can I collect?
      • The amount depends on your roof size and local rainfall. On average, a 1,000-square-foot roof can collect about 600 gallons of water per inch of rain.
    3. Do I need a permit for to harvest rainwater?
      • Regulations vary by location. Check with local authorities to determine if permits are required in your area.
    4. Can I use rainwater for all household needs?
      • Rainwater is suitable for non-potable uses like irrigation and toilet flushing. For potable uses, ensure proper filtration and treatment.
    5. How do I prevent mosquitoes in my rainwater tank?
      • Use fine mesh screens on tank openings and ensure all connections are sealed to prevent mosquito entry.

    Pros and Cons of to harvest rainwater

    ProsCons
    Reduces water billsInitial setup cost
    Environmentally friendlyRequires regular maintenance
    Improves plant healthLimited by local rainfall
    Provides emergency water supplyPotential for algae growth
    Promotes self-sufficiencyMay require permits or regulations

    Conclusion: A Step Towards Sustainable Living

    Implementing to harvest rainwater system at home is a significant step towards sustainable living. By capturing and utilizing rainwater, you not only contribute to environmental conservation but also enjoy practical benefits like reduced water bills and improved garden health. Whether you’re motivated by cost savings, environmental concerns, or a desire for self-sufficiency, rainwater harvesting offers a viable solution.As you embark on this journey, remember that the key to a successful to harvest rainwater system lies in careful planning, proper installation, and regular maintenance. By avoiding common pitfalls and adhering to best practices, you can ensure that your system remains efficient and effective for years to come.Moreover, rainwater harvesting fosters a sense of community sustainability. By setting an example, you can inspire neighbors and friends to adopt similar practices, collectively contributing to a more sustainable future. As more individuals embrace rainwater harvesting, the cumulative impact on water conservation and environmental preservation can be substantial.In conclusion, learning how to harvest rainwater at home is not just about saving money or water; it’s about making a conscious choice to live in harmony with our environment. By taking this step, you become part of a growing movement towards sustainable living, ensuring that future generations inherit a healthier planet. So, gather your materials, follow the steps outlined in this guide, and start reaping the benefits of rainwater harvesting today. Your garden, wallet, and the planet will thank you.

  • Composting at Home: A Step-by-Step Guide

    Composting at Home: A Step-by-Step Guide

    Composting at home is a transformative practice that not only enriches your garden but also significantly reduces household waste. If you’ve yet to dive into the world of composting, you’re missing out on a sustainable way to enhance your garden’s health and contribute positively to the environment. In this comprehensive guide, we’ll explore the benefits of composting, various composting methods, and provide a detailed, step-by-step process to start composting at home.

    What is Composting?

    At its core, composting is the natural decomposition of organic materials like plant and food waste. This process is facilitated by microorganisms such as bacteria, fungi, and worms, which break down the materials with the help of oxygen. The result is compost, a nutrient-rich material that can be added to soil to promote plant growth. While you can purchase compost, creating your own from household waste is both economical and environmentally friendly.

    Why Compost at Home?

    Composting at home offers numerous benefits. It reduces the amount of waste sent to landfills, enriches your garden soil, and decreases the need for chemical fertilizers. By turning organic waste into valuable compost, you contribute to a healthier environment and a more sustainable lifestyle.

    Backyard Composting: A Simple and Effective Method

    Backyard composting is a convenient way to manage organic waste. Despite common misconceptions, composting is not complicated, nor does it have to be messy or smelly. By following the right methods, you can create a compost pile that efficiently turns waste into humus, a rich soil amendment.

    Step-by-Step Guide to Composting at Home

    Step 1: Choose the Right Location

    Select a site for your compost pile or bin that is slightly hidden but accessible. Ensure the spot has good airflow, access to water, partial shade in summer, and full sun in winter.

    Step 2: Create a Base Layer

    Start by laying twigs or straw a few inches deep at the bottom of your compost pile. This layer aids in drainage and airflow, essential for the composting process.

    Step 3: Add Compost Ingredients

    Layer your compost ingredients, alternating between moist and dry materials. Moist components include food scraps and plant waste, while dry materials consist of straw, sawdust, and ashes.

    Step 4: Incorporate Manure

    Add manure to your compost pile as a nitrogen source. This addition accelerates the composting process by activating the decomposition of organic materials.

    Step 5: Maintain Moisture

    Keep your compost pile moist by watering it occasionally. The right moisture level is crucial for the decomposition process.

    Step 6: Cover the Pile

    Covering your compost pile helps retain moisture and heat, both vital for composting. It also prevents the pile from becoming too wet from rain.

    Step 7: Turn the Pile

    Every few weeks, turn your compost pile with a pitchfork. This action aerates the pile, introducing oxygen that speeds up decomposition.

    What Can You Compost?

    Understanding what materials are suitable for composting is essential. Here’s a quick guide:

    Compostable Materials:

    • Pine needles
    • Sawdust
    • Dried leaves and grass
    • Straw
    • Eggshells
    • Shredded cardboard and paper
    • Citrus rinds
    • Coffee grounds and filters
    • Fruit and vegetable waste
    • Teabags
    • Young weeds
    • Wilted flowers

    Non-Compostable Materials:

    • Animal products (fish, bones, meat, fat)
    • Dairy products
    • Treated wood sawdust
    • Diseased plants
    • Human waste
    • Seed-bearing weeds

    Types of Composting

    There are three primary types of composting, each with its own benefits and methods:

    1. Hot Composting

    Hot composting is ideal for those who want quick results. By maintaining the right balance of air, water, nitrogen, and carbon, you can produce compost in as little as one to three months. This method is particularly effective in warm weather.

    2. Cold Composting

    Cold composting is the simplest method, requiring only the collection of biodegradable waste in a pile or bin. This method takes longer, typically a year or two, but requires less effort.

    3. Vermiculture (Worm Composting)

    Vermiculture involves using worms, specifically redworms, to break down organic waste. The worms produce nutrient-rich castings, which are excellent for soil enrichment. This method is efficient and can be done indoors or outdoors.

    Benefits of Composting at Home

    Composting offers numerous advantages, both for your garden and the environment:

    1. Waste Reduction

    Composting significantly reduces the amount of waste sent to landfills. By turning organic waste into compost, you save money on landfill fees and reduce your carbon footprint.

    2. Soil Enrichment

    Compost is a natural soil enhancer, providing essential nutrients like nitrogen, phosphorus, and potassium. It also supplies micronutrients such as iron, zinc, and copper, which are vital for plant health. By improving soil structure, compost increases water retention and reduces erosion, leading to healthier plants and more robust gardens.

    3. Environmental Preservation

    Composting reduces the need for chemical fertilizers, which can harm the environment. By recycling organic materials, composting conserves landfill space and promotes a healthier ecosystem. It also supports beneficial soil organisms, such as earthworms, which help maintain soil balance.

    4. Convenience and Versatility

    Composting is adaptable to various lifestyles and spaces. Whether you have a large backyard or a small apartment, there’s a composting method that suits your needs. Vermiculture, for example, is perfect for indoor composting, while backyard composting is ideal for those with outdoor space.

    Additional Tips for Successful Composting

    • Choose the Right Method: Select a composting method that fits your lifestyle, space, and time commitment. Consider how much compost you need and when you need it.
    • Balance Ingredients: Maintain a good balance of green (nitrogen-rich) and brown (carbon-rich) materials to ensure efficient decomposition.
    • Monitor Moisture and Temperature: Keep your compost pile moist but not waterlogged, and ensure it stays warm to facilitate microbial activity.
    • Aerate Regularly: Turning your compost pile introduces oxygen, which is crucial for the decomposition process.

    FAQs About Composting at Home

    Q: How long does it take to make compost?
    A: The time varies depending on the method. Hot composting can take 1-3 months, while cold composting may take up to 2 years.

    Q: Can I compost in an apartment?
    A: Yes, vermiculture is an excellent option for indoor composting in small spaces.

    Q: What should I do if my compost pile smells bad?
    A: A foul odor usually indicates too much moisture or a lack of oxygen. Turn the pile and add dry materials to balance it out.

    Q: Can I compost in winter?
    A: Yes, composting can continue in winter, though the process may slow down. Insulating your pile can help maintain warmth.

    Pros and Cons of Composting at Home

    ProsCons
    Reduces household wasteRequires time and effort
    Enriches garden soilMay attract pests if not managed
    Decreases need for chemical fertilizersNeeds space for a compost bin or pile
    Supports environmental sustainabilityCan be slow without proper management

    Conclusion

    Composting at home is a rewarding practice that benefits both your garden and the environment. By transforming organic waste into nutrient-rich compost, you contribute to a more sustainable lifestyle and healthier ecosystem. Whether you choose hot composting, cold composting, or vermiculture, the key is to find a method that fits your needs and space. With patience and care, you’ll soon enjoy the fruits of your labor in a thriving, vibrant garden. So, get started today and turn your waste into a valuable resource for your home and the planet.

  • How to Start an Urban Garden in Small Spaces?

    How to Start an Urban Garden in Small Spaces?

    Urban gardening has rapidly gained popularity in recent years as city dwellers are looking for ways to reconnect with nature, grow their food, and make the most of limited spaces. But what exactly is urban gardening? In short, it’s the practice of growing plants in an urban setting, whether on a rooftop, balcony or even in a small yard. But urban gardening isn’t just about plants. It’s about community, sustainability, and personal well-being. This comprehensive guide will walk you through the essentials of urban gardening and how to create your urban garden, no matter how much space you have.

    What is Urban Gardening?

    Urban gardening refers to cultivating plants in an urban environment, such as growing flowers, vegetables, or herbs in city spaces. With the growth of city populations and an increasing interest in sustainability, urban gardening has become a widespread practice. It helps individuals reconnect with nature, provides fresh produce, and offers benefits such as stress reduction and fostering a sense of community.

    Urban gardens can take many forms, including:

    • Container Gardens: Using pots, barrels, or any available containers to grow plants on balconies, windowsills, or even indoor spaces.
    • Community Gardens: Shared gardening spaces where neighbours or communities come together to grow food and connect.
    • Vertical Gardens: Utilizing vertical space on walls or trellises to maximize limited areas for plant growth.
    • Rooftop Gardens: A modern urban gardening trend where unused rooftop spaces are transformed into gardens.

    Urban gardening enhances the aesthetic appeal of urban spaces and reduces environmental impacts by lowering the carbon footprint. It helps combat food insecurity, especially in densely populated areas and promotes healthier living. Additionally, it allows individuals to grow their food, reducing dependency on store-bought produce.

    What is Urban Farming?

    While urban gardening and urban farming share similarities, they differ in scale. Urban farming involves growing food on a larger scale, often for commercial purposes and may include raising animals or growing crops such as fruits, vegetables, and herbs. Urban farming addresses the growing demand for locally sourced food in urban areas, aiming to reduce the reliance on long-distance transportation and increase food accessibility in cities.

    Cities like Tokyo, Hong Kong, Singapore, and major urban centres in the U.S., like Los Angeles and New York, have embraced urban farming in creative ways. From using rooftops to vacant lots, these cities are finding innovative ways to turn unused spaces into sources of fresh, local food.

    Why Urban Gardening Matters?

    Urban gardening is more than just growing plants; it is about creating a healthier and more sustainable urban environment. It can reduce environmental pollution, contribute to better air quality, and provide communities with fresh food. Moreover, it fosters well-being, as gardening has been shown to lower stress, improve mental health, and create strong community bonds.

    Benefits of Urban Gardening:

    • Improves Well-being: Spending time gardening has been shown to reduce stress levels and improve mental health.
    • Saves Money: Growing your food can cut down on grocery bills, especially for fresh produce.
    • Environmental Impact: Reduces food miles and the carbon footprint associated with transporting food long distances.
    • Enhances Community: Urban gardens help neighbours collaborate, share knowledge, and improve social connections.

    How to Get Started with Urban Gardening

    Starting an urban garden may seem intimidating, but it is easy to begin, even in small spaces. Whether you have a balcony, a small backyard, or a windowsill, urban gardening offers an opportunity to create a green space in your life. Here’s a step-by-step guide to help you get started.

    Step 1: Choose Your Space

    The first step in creating an urban garden is finding the right space. You don’t need a lot of room to get started; even a tiny balcony, windowsill, or shared community garden can be a perfect spot. Here are some space options:

    • Balcony or Patio: If you live in an apartment or condo, your balcony or patio can be a great place to start.
    • Rooftops: If you have access to a rooftop, it can be a prime space for a garden.
    • Shared Spaces: You can collaborate with neighbours to transform unused areas into a community garden.
    • Window Boxes: If you don’t have much outdoor space, window boxes are perfect for growing small plants or herbs.

    Be sure to measure your available space, as this will help you decide how much you can grow. If you’re in a shared space, it’s essential to ask for permission from building owners or local authorities before starting your garden.

    Step 2: Choose Your Containers

    Once you’ve chosen your space, it’s time to pick containers for your plants. While decorative pots are an option, they can often be expensive and not as practical. Here are some affordable alternatives:

    • Buckets and Plastic Containers: These can be bought cheaply at garden stores or repurposed from home.
    • Raised Beds: These can be purchased or made from wooden planks. Raised beds are ideal for growing plants in small spaces.
    • Upcycled Containers: Use old crates, wooden boxes, or even discarded toys to create creative containers for your garden.

    Tip: To maximize space, consider using vertical planters such as stackable planters, hanging baskets, or railing planters.

    Step 3: Choose Your Plants

    When selecting plants for your urban garden, think about the available sunlight, the type of plants, and the space constraints. Urban gardens often have limited space, so opt for plants that thrive in confined areas. Some great options include:

    • Vegetables: Leafy greens like lettuce, spinach, and kale thrive in smaller spaces. Tomatoes, peppers, and beans also do well in containers.
    • Herbs: Basil, mint, thyme, and parsley are perfect for container gardening and grow well in small spaces.
    • Flowers: Marigolds, petunias, and sunflowers are colourful additions to any garden and are easy to maintain.

    Ensure that your plants have the proper requirements for sunlight and water. Some plants may need more sunlight, while others might thrive in shadier spots.

    Step 4: Sow Seeds or Plant Seedlings

    After choosing your plants, you can either sow seeds or use seedlings for quicker results. If you decide to start from seeds, you can begin growing them indoors in small containers or egg cartons. Once the seedlings are ready, you can transplant them into larger pots or garden beds.

    If you opt for seedlings, you can buy them from a local nursery or garden centre. When planting, ensure your containers have drainage holes to avoid waterlogging. Fill the bottom with gravel or rocks to improve drainage, then add soil and plant your seedlings.

    Step 5: Water and Care for Your Garden

    Watering your garden is crucial, as plants in containers dry out faster than those planted directly in the ground. Water your plants regularly, but avoid overwatering, as this can lead to root rot. Depending on the weather and the type of plants, you may need to water once or twice a week.

    Consider investing in automatic watering systems or using self-watering containers if you’re often busy or away from home.

    Vertical Gardening: A Space-Saving Solution

    Urban spaces are often limited, but that doesn’t mean you can’t grow plenty of plants. Vertical gardening is an excellent option for maximizing your space and increasing plant yields. You can use various methods for vertical gardening:

    • Vertical Planters: These are stackable pots that allow you to grow plants on top of each other.
    • Wall Planters: Attach planters to your walls for an eye-catching display.
    • Trellises: Use trellises for climbing plants such as beans or tomatoes.

    By going vertical, you can use your walls, fences, and even window frames to grow plants efficiently.

    Urban Gardening Pros and Cons

    Urban Gardening Pros and Cons

    ProsCons
    Reduces food costsLimited space may restrict the number of plants
    Improves mental health and well-beingNeeds regular maintenance
    Helps reduce environmental impactRequires time and commitment
    Promotes sustainability and communitySome plants require specific conditions (sunlight, water)
    Enhances urban aestheticsPests may become a problem in small spaces

    Frequently Asked Questions (FAQs)

    1. Can I start an urban garden in an apartment? Yes! You can start an urban garden in small spaces like balconies, windowsills, or even indoors using containers.

    2. What plants are best for urban gardens? Vegetables like peppers, tomatoes, and salad greens, as well as herbs like basil and thyme, are great choices for urban gardening.

    3. How much time does urban gardening require? It depends on the plants and the setup. On average, expect to spend a few hours a week tending to your garden.

    4. Can I grow flowers in an urban garden? Yes! Flowers like sunflowers, petunias, and marigolds thrive in urban gardens and add vibrant color to your space.

    5. What is the difference between urban gardening and urban farming? Urban gardening is typically done on a smaller scale, often for personal use, while urban farming involves larger-scale food production, often for community consumption or commercial purposes.

    Conclusion

    Urban gardening is an excellent way to bring nature into your life, no matter where you live. Whether you’re looking to grow your own food, create a peaceful green space, or foster a sense of community, starting an urban garden is the perfect solution. With just a little planning, creativity, and dedication, you can turn any small space into a thriving garden that provides both beauty and fresh, homegrown food. So why wait? Start your urban garden today and watch your city space bloom with life!

  • Top 10 Small Garden Design Ideas

    Top 10 Small Garden Design Ideas

    When designing a small garden, every choice you make counts. From selecting plants to deciding on furniture and layout, the goal is to create a space that feels expansive, functional, and beautiful. Whether working with a compact courtyard, a narrow backyard, or a small balcony, there are numerous ways to maximize your outdoor area without overcrowding. In this guide, we’ll dive into some essential small garden design tips, and I’ll share my insights to help you transform your space into a stunning garden that feels bigger than it is.

    In this article, we’ll explore a wide range of strategies to help you make the most of your small garden design, from plant choices to layout techniques, all aimed at creating a functional and visually appealing space. So, if you’re eager to maximize your garden’s potential, read on to discover ideas that can elevate your outdoor space.

    1. Never Underestimate Plant Growth

    When you first plant a garden, it’s easy to get carried away with filling the space to immediately make it look full and lush. However, plants—especially perennials—can grow much more than you expect in a single growing season. In my early gardening days, I planted things close together to create a fuller look, but I soon realized I didn’t need to do this. Overcrowding plants can lead to unnecessary resource competition, leaving some plants suffocated as they try to grow.

    To avoid this, I recommend starting with young plants and giving them room to grow. If you find that some plants are overcrowding others, don’t worry—there are always solutions. When the soil has warmed up, you can move perennials like asters, Erysimum, or rudbeckias to another spot in early spring. For plants that have outgrown their space, like the Carex ‘Everest’ grass, you can lift and divide them in the spring to reduce their size.

    The key is to avoid overplanting and allow your plants the space they need to flourish.

    2. The Effectiveness of Roses

    Roses are often considered outdated, but they can be incredible assets in a small garden. Modern, repeat-flowering varieties can offer multiple flushes of flowers in one season, adding beauty and charm to any garden.

    I’ve found roses to be one of the most reliable plants in my garden, especially varieties like ‘Princess Anne,’ which grows to about 4 feet tall and features large clusters of dark purple to plum red flowers. It also has glossy, healthy leaves, making it a fantastic addition to small spaces. Another variety I love is ‘Maid Marion,’ a fragrant rose with frilly pink flowers. The scent is powerful, and the plant stays compact, making it perfect for smaller gardens.

    Roses are also easy to control. If they take up too much space, prune back unwanted stems at the base. Choosing the right variety and caring for them allows you to enjoy roses year-round without overwhelming your garden.

    3. A Lick of Paint Goes a Long Way

    When designing a small garden from scratch, you’ll inevitably need some time for the plants to grow and fill the space. However, that doesn’t mean you must leave your garden looking bare during the waiting period. One tip I swear by is painting the wooden surfaces of your garden with colored wood stains. This adds an immediate pop of color and structure, helping to define the space as the plants gradually mature.

    In my own garden, I initially chose a cool green paint to complement the soft purples and variegated greens of my plants. In the following year, I opted for a bolder cornflower blue to make sure the painted furniture wouldn’t get lost among the larger, more developed plants. Adding color to your garden not only improves its aesthetic but also helps unify different elements, making the space feel cohesive.

    4. There’s Power in Repeat Planting

    In a small garden, repetition can work wonders. Planting the same plant in multiple areas can create unity throughout your space, even in small doses. I use the evergreen Carex ‘Everest’ and its cousin ‘Eversheen’ throughout my garden, and it’s been incredibly effective in creating a cohesive, well-planned look.

    Repeat planting doesn’t have to mean overdoing it. I usually limit myself to no more than three instances of the same plant to avoid a monotonous effect. The repetition of certain plants, especially evergreen varieties, gives the garden a consistent framework, ensuring that it remains visually appealing throughout the year.

    5. Raised Beds for Effective Edging

    One of my favorite tricks for enhancing the look of a small garden is using raised beds. These beds don’t just help with growing vegetables—they also make a perfect setting for ornamental plants. Raised beds have several advantages: the soil warms up faster in the spring, the plants are easier to access and maintain, and they offer a clear definition of garden spaces.

    In my own design, I’ve used raised beds to showcase various edging plants, like variegated ivies, grasses, and fleabane. The colorful painted backgrounds of the raised beds make these plants pop and add texture and interest to the space. Raised beds are an excellent way to elevate both the plants and the visual appeal of a small garden.

    6. Maximizing Space with Compact Plants

    When working with a small garden design, it’s crucial to focus on plants that won’t overwhelm the space. Compact plants are perfect for small gardens because they don’t take up too much space and often feature a more refined aesthetic. For added vertical appeal, consider incorporating columnar trees that provide height without the width.

    When choosing plants, focus on those that can provide year-round interest, such as those with colorful leaves, unique textures, or vibrant bark. Mixing trees, shrubs, and perennials will help keep your small garden fresh and interesting throughout the seasons.

    7. Think Outside the Box

    Vertical gardens, railing planters, and hanging baskets can be a game-changer for small spaces. These creative additions allow you to make the most of the limited ground area, using height and vertical space to your advantage. If you have a small garden and want to add a touch of greenery, consider growing plants like strawberries in hanging baskets or creating a vertical succulent garden.

    Adding a water feature to your garden is also an excellent way to maximize space. A simple recirculating wall fountain or a tabletop bubbling pot can be a beautiful and low-maintenance solution that brings both visual and auditory appeal to your garden.

    8. Add Privacy and Order

    In a small garden, privacy can be a challenge, but there are ways to work around this. Columnar trees or well-behaved climbers like jasmine on a vertical trellis can provide seasonal screening without taking up too much space. These plants offer height and privacy while maintaining a tidy, minimalist appearance.

    Another design tip is to create a sense of order in the garden. Clean lines and structured designs can make a garden feel more organized and expansive. Using a diagonal axis can also help alter the perception of space in a small garden, making it look larger than it is.

    9. Use Outdoor Furniture Wisely

    Outdoor furniture plays a critical role in the overall feel of a small garden. It’s important to choose pieces that are appropriately sized for the space. Opt for sleek, simple designs over bulky, deep-seated chairs. More miniature, more compact furniture will ensure that your garden doesn’t feel overcrowded.

    10. Incorporate Lighting for Added Drama

    Lighting can transform your garden into a magical space, especially in the evenings. Outdoor lighting extends the use of your garden well beyond daylight hours. Simple string lights, lanterns, or solar-powered path lights can add ambiance and highlight key features of your garden design.

    Pros and Cons of Small Garden Design

    ProsCons
    Maximizes limited space effectivelyCan require careful planning
    Easy to manage and maintainMay need more frequent maintenance
    Creates a cozy, inviting atmosphereLimited room for larger plants
    Can be personalized with furnitureLack of privacy in some designs
    Suitable for growing a variety of plantsMay feel cramped without proper design

    Conclusion: Transforming Your Small Garden into a Stylish Oasis

    Designing a small garden doesn’t have to be a daunting task. By carefully considering your plant choices, furniture, and layout, you can create a space that feels both expansive and welcoming. Incorporating tips like repeat planting, raised beds, and vertical gardens will help you maximize your space while maintaining visual appeal. Don’t forget the power of color and the soothing presence of water features, which can bring tranquility to any garden, no matter how small.

    With the right planning and a little creativity, your small garden can become an extraordinary space that reflects your style, provides functionality, and creates a peaceful retreat. So roll up your sleeves, get planning, and enjoy the process of creating a small garden that feels big on beauty and charm.