Welcome to the “Plant Care and Maintenance” section of our urban gardening website! Whether you’re a beginner or a seasoned gardener, understanding how to care for your plants is crucial to maintaining a healthy and vibrant garden. This category is dedicated to providing you with practical tips and expert advice to ensure your urban garden thrives.
Here we’ll walk you through Why Should aloe vera be cloned makes sense, how to do it, and what benefits it offers—both for your plant collection and the environment. We’ll dig deep into reliable, sustainable propagation methods, and include tips based on hands-on experience.thriving aloe vera plant and thought, “Wouldn’t it be great to have more just like this one?” Well, cloning aloe vera is not only possible, it’s incredibly rewarding.
Why Should aloe vera be cloned?
[su_note note_color=”#ffd966″ radius=”20″]
Why It is Important Cloning aloe vera is a simple and sustainable way to multiply healthy plants while preserving their unique medicinal and air-purifying benefits.[/su_note]
The Basics of Plant Propagation
Propagation is the process of creating new plants from an existing one. When you clone aloe vera, you’re essentially making genetically identical copies of a healthy plant—without using seeds.
Why Clone Instead of Grow from Seed?
Seeds can be unpredictable.
Cloning maintains desired traits.
It’s faster and more reliable, especially for beginners.
The Most Popular Aloe Vera Cloning Methods
1.Offsets or Pups – Nature’s Ready-Made Clones
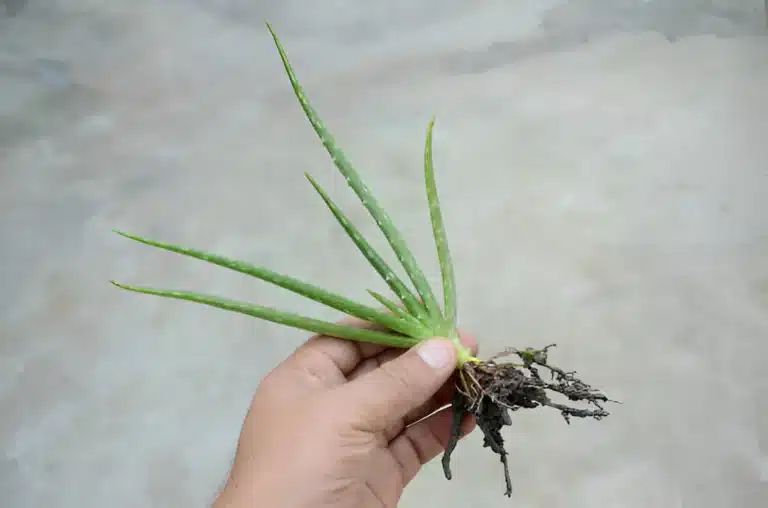
Offsets, also called pups or offshoots, are small plants that grow at the base of the main plant.
Go for a cactus mix or add gardening lime to balance pH between 6.0 to 8.0.
Light, Water, and Climate Requirements
Finding the Ideal Location
Place your aloe in a bright, warm area with indirect sunlight.
South-facing or west-facing windows are ideal for indoor settings.
Watering the Right Way
Allow the soil to dry completely between waterings.
Soak thoroughly when watering, then let the soil dry again.
Avoid letting it sit in damp or soaked conditions.
Recognizing Signs of Healthy and Unhealthy Growth
Healthy Aloe Vera Indicators
Leaves are plump, upright, and straight.
Color is vibrant green.
No visible bugs or fungus.
Signs of Trouble
Curly or drooping leaves can indicate too little light or too much water.
Mealy bugs and scale appear as white fuzz or sticky spots.
Feeding Your Aloe Vera: Fertilizer and Growth Tips
When and How to Fertilize
Use a low-strength, phosphorus-rich fertilizer.
Apply once during spring and again in summer.
Avoid feeding in winter dormancy.
Why Cloning Aloe Vera Is Eco-Friendly and Sustainable
Less Waste, More Plants
Cloning lets you create multiple plants from one, minimizing waste and reliance on chemical propagation agents.
Share the Green
You can share your clones with friends, expand your indoor garden, or even donate to a nursery or garden shop like Artemisia Nursery with their permission.
Care-Taking After Propagation
Step-by-Step Aftercare
Water only when dry.
Keep in a warm, bright location.
Watch for signs of infection or rot.
Be patient—root development takes a few weeks to months.
FAQ
Conclusion
Cloning aloe vera is more than just a fun gardening experiment—it’s a sustainable, eco-friendly, and effective way to expand your plant collection, share with others, and enjoy the many medicinal properties and air-purifying benefits of this resilient plant.From using offsets, cuttings, or division, to proper watering, soil, and light management—each step plays a part in ensuring your cloned aloe plants thrive.
A lush, green grass lawn care is more than just a pretty view—it’s a sign of good care and smart planning. Whether you’re part of a small family-run, independentbusiness or simply love spending time outdoors, proper green grass lawn care helps you enjoy your space all year round. With the right lawn treatments, like weed and feed, and consistent efforts through every growing season, you can keep your yard weed free, healthy, and vibrant.
[su_note note_color=”#ac66ff” radius=”20″]Caution Always follow the manufacturer’s instructions when applying lawn care products to avoid damage to your lawn. Use protective gear, and avoid applying products during extreme weather conditions, as it may reduce effectiveness or cause harm to your grass.[/su_note]
12 Ways to Keep Your Lawn Green
Maintaining a healthy, lush green lawn requires consistent effort, but with the right strategies, you can ensure your grass thrives throughout the year. Here are some practical tips for keeping your lawn looking its best, focusing on methods that will help your grass grow strong and healthy.
1. Prevent Weeds Before They Appear
One of the most important steps in lawn care is preventing weeds from germinating in the first place. Using a pre-emergent herbicide can be incredibly effective in stopping stubborn weeds like crabgrass from sprouting. Applying it early in the spring gives your lawn a head start, ensuring that the seeds don’t take root and disrupt the healthy grass growth.
2. Take Care of Broadleaf Weeds
Sometimes, weeds are already present and can be tough to remove. Broadleaf weeds such as dandelions, plantain, and clover can stand out in your lawn. You can address these with granular weed control products. If there are only a few offenders, you can remove them by hand using simple garden tools. Be sure to follow the product’s directions for best results and avoid over-watering the lawn before applying the treatment.
3. Mow Regularly, but Don’t Cut Too Short
Mowing your lawn regularly is essential, but cutting it too short can cause more harm than good. Keeping your grass at the proper height allows it to develop deeper roots, making it more resistant to damage from pests, drought, and disease. A general rule of thumb is to never cut more than one-third of the grass blade at once. This will help maintain the health of the grass and keep it lush.
4. Keep Your Mower Blade Sharp
Using a dull mower blade can damage your grass, causing ragged edges that make your lawn look brown and unhealthy. A sharp blade cuts the grass cleanly, which promotes faster recovery and better overall lawn health. Check your blade’s condition regularly, and replace or sharpen it if it shows signs of wear.
5. Water Your Lawn in the Morning
The best time to water your lawn is in the early morning, when the sun will help dry the grass and prevent moisture from sitting too long on the blades. Night watering can promote disease by keeping the grass damp for too long. It’s important to water deeply but infrequently to encourage strong root growth. Aim for about an inch of water each time, which you can check with a simple test using a can.
[su_note note_color=”#ac66ff” radius=”20″]Good to Know
For best results, water your lawn deeply but less frequently, allowing the soil to soak in moisture several inches down. Also, remember to sharpen your mower blade regularly—this helps make clean cuts and keeps the grass healthy. Lastly, applying granular weed control products during a dewy morning helps them stick to the leaves for better results.[/su_note]
6. Aerate to Combat Soil Compaction
Soil compaction can prevent water, nutrients, and air from reaching the grass roots. Aerating your lawn helps to alleviate this issue by creating small holes in the soil. This process allows your lawn to breathe and lets moisture and nutrients penetrate deeper into the roots. You can aerate your lawn using a push aerator, riding mower attachment, or hire a professional. It’s best to aerate in the autumn for cool-season grasses and late spring for warm-season varieties.
7. Feed Your Lawn with Proper Fertilizer
Your lawn needs the right nutrients to grow thick and healthy. Nitrogen is the most important nutrient in grass fertilizers, promoting green, lush growth. Look for a fertilizer with a mix of fast- and slow-release components. Apply fertilizer during the right season—spring and fall for northern lawns, and spring and summer for southern lawns. Avoid fertilizing dormant grass, as it won’t be able to absorb the nutrients.
8. Spot-Train Your Dog to Protect Your Lawn
If you have a dog, their urine can cause unsightly yellow or brown spots in your lawn. To minimize this, train your dog to use a specific spot in the yard. You can create a gravel or mulch area for them to go, helping to protect the rest of your lawn from damage.
9. Dethatch Your Lawn for Better Growth
Thatch is a layer of organic material that builds up on top of the soil and can suffocate your grass if it becomes too thick. If you notice brown patches in your lawn, it could be due to excessive thatch. To address this, use a dethatcher to remove the buildup. For smaller areas, a rake will suffice, but for larger spaces, a dethatching attachment for your riding mower will do the job more efficiently.
10. Reseed Sparse Areas
If your lawn is looking thin or sparse in some areas, reseeding can help bring it back to life. The best time to reseed cool-season grasses is in the fall, while warm-season grasses should be reseeded in late spring. Make sure to aerate and dethatch the area before spreading new grass seed, as this will improve seed-to-soil contact and promote healthy growth.
11. Edge Your Lawn for a Tidy Appearance
Edging your lawn along curbs, driveways, and walkways helps keep your lawn looking neat and well-maintained. Use an edging tool or a trimmer to create clean, sharp lines that separate your lawn from other landscaping elements like flower beds or pathways. This will give your lawn a polished, tidy appearance.
12. Mulch for Nutrients and Weed Control
Instead of raking up dead leaves in the fall, consider using a mulching attachment on your mower to shred the leaves and leave them on the lawn. This provides valuable organic material that helps nourish your grass over the winter months. Mulching can also prevent weeds by blocking sunlight from reaching the soil.
Conclusion
Maintaining a green and healthy lawn is a rewarding effort that requires regular care and attention. By following these 12 essential steps, from preventing weeds before they appear to using proper watering and fertilizing techniques, you can ensure your lawn thrives throughout the seasons. Taking the time to aerate, dethatch, and reseed when necessary will keep your grass lush and vibrant, while regular mowing and edging will give it a neat, tidy appearance. Whether you’re a seasoned lawn care pro or just getting started, these tips will help you create the beautiful, green lawn you’ve always wanted.
Introduction: Overcoming the Challenges of Growing Herbs in Hot Climates
Growing herbs in hot climates can be a challenging but highly rewarding experience. Whether you’re in a Mediterranean region like Mesa, Arizona, or experiencing intense summer heat, it’s possible to grow a thriving herb garden with the right knowledge and preparation. From rosemary to mint, thyme, and basil, herbs are some of the most versatile and beneficial plants to grow, enhancing both your meals and your garden. In this article, I’ll share my experience and the top tips to help you succeed in hot climates and get the most out of your herb-growing journey.
Why Growing Herbs in Hot Climates Can Be Tough
In regions with hot, dry summers, and rocky soil, herbs may struggle to thrive due to the heat and lack of moisture. High temperatures can cause many plants to go into survival mode, slowing their growth and possibly leading to dormant periods. However, with the right care, even in challenging conditions, it is possible to grow good, flavorful herbs that will prosper.
The Best Herbs to Grow in Hot Climates
Some herbs are better suited to hot environments due to their perennial nature, meaning they return each year. Rosemary, thyme, oregano, sage, and lavender are all Mediterranean herbs that naturally thrive in hot, dry conditions. These plants require minimal water once established and can withstand the harsh sun of summer without too much difficulty. Annual herbs such as basil, parsley, cilantro, and chamomile can also be grown successfully in hot climates with the right care. These herbs may need more attention and water than perennials, but they still flourish in sunny, well-drained soil.
Tips for Growing Herbs in Hot Climates
1. Choose the Right Spot for Your Herb Garden The location of your herb garden is crucial to its success. Choose a spot that gets plenty of sunlight throughout the day. Most herbs, like basil and rosemary, love full sun, but you also need to provide some afternoon shade for more delicate varieties such as parsley and mint, which can struggle in intense heat.
2. Opt for Raised Beds or Containers for Better Drainage If you’re struggling with soggy soil or poor drainage, a raised bed or container gardening might be the best option. Herbs like oregano, thyme, and garlic need well-drained soil to prevent root rot. A container will allow you to control soil quality and moisture levels more effectively.
3. Amend Your Soil with Organic Matter In hot, dry climates, the soil can often be too dry or compacted. Adding compost or organic matter to your garden bed can improve drainage and make the soil more nutrient-rich. This also ensures that your herbs get the good nutrients they need to thrive.
4. Water Regularly, but Avoid Overwatering Herbs like rosemary and sage don’t require as much water once they’re established, but in hot climates, they still need consistent moisture. However, be careful not to overwater, as this can cause roots to rot. Watering deeply but less frequently will encourage deep root growth, helping your herbs survive hot summers.
5. Mulch to Retain Moisture and Keep Roots Cool Using mulch, such as straw or wood chips, around your herb plants will help retain moisture and keep the roots cool. Mulching is particularly important in hot climates where water evaporation happens quickly. It also prevents weeds from competing with your herbs for nutrients and water.
6. Prune and Harvest Regularly to Promote Healthy Growth Regular pruning helps your herbs stay healthy and productive. Remove dead or damaged growth and regularly harvest leaves for cooking or drying. Pruning will also prevent your plants from becoming too leggy and encourage them to produce fresh, new growth, even during hot months.
7. Protect Against Pests and Insects Insects and pests can be a common problem for herb gardeners in hot climates. The presence of pollinators like ladybugs can help control harmful insects. Use natural pest control methods, such as planting garlic, rosemary, or basil near your other herbs to deter unwanted guests.
8. Provide Some Afternoon Shade While most herbs love the sun, the intense afternoon sun can be too much for some plants, especially in the peak of summer. Consider shading your herb garden during the hottest part of the day, particularly for more sensitive herbs like cilantro and parsley. This can help them continue to grow without going into dormant mode.
9. Use Fertilizer Sparingly In hot climates, too much fertilizer can overwhelm your herbs and cause excessive leaf growth with little flavor. Use a balanced fertilizer sparingly, and be sure to choose one that promotes strong, healthy roots rather than just lush top growth.
10. Plan for Seasonal Changes As temperatures drop in fall and winter, some herbs will go dormant, while others may struggle to survive. Be prepared by planting perennial herbs that can withstand frost and replanting annual herbs in the spring. You may also consider bringing certain herbs like mint, thyme, or parsley into a container for the cooler months.
Additional Considerations for Growing Herbs in Hot Climates
Companion Planting for Pest Control and Healthy Growth Certain herbs work well together and can help each other thrive. For example, basil planted next to tomatoes can deter pests, while rosemary can help protect carrots and lettuce from insects. Companion planting is an excellent strategy for creating a healthier, more resilient garden.
Native Herbs to Grow in Hot Climates Native herbs, such as bay laurel and lemon verbena, are already adapted to the dry, hot conditions of certain regions. By choosing native varieties, you’ll reduce the need for extra care and maintenance, as these herbs are naturally suited to their environment.
Conclusion:
Growing herbs in hot climates may seem challenging, but with the right knowledge and care, it’s possible to create a thriving herb garden. By selecting the best plants for your climate, ensuring good soil and water practices, and managing pests naturally, you can enjoy fresh, flavorful herbs all year long. Whether you’re growing rosemary, mint, basil, or even more exotic herbs like ginger or turmeric, your herb garden can flourish with a little time, effort, and love.
FAQs:
What herbs thrive in hot climates?
Some of the best herbs for hot climates include rosemary, thyme, sage, lavender, oregano, and basil. These are all Mediterranean herbs that do well in dry, sunny conditions.
How often should I water herbs in hot climates?
Herbs in hot climates should be watered deeply but less frequently. Ensure that the soil is moist, but not soggy, to avoid root rot. Once established, perennial herbs need less water.
Can I grow herbs in containers in hot climates?
Yes! Container gardening is an excellent choice for hot climates as it provides better drainage and allows you to control soil conditions more easily.
How do I protect my herbs from pests in hot climates?
Use natural pest control methods such as planting garlic or rosemary to deter insects. Additionally, companion planting and encouraging pollinators like ladybugs can help keep harmful pests at bay.
Which herbs need afternoon shade in hot climates?
Herbs like parsley, mint, and cilantro prefer some afternoon shade in hot climates, as intense afternoon sun can stress these plants.
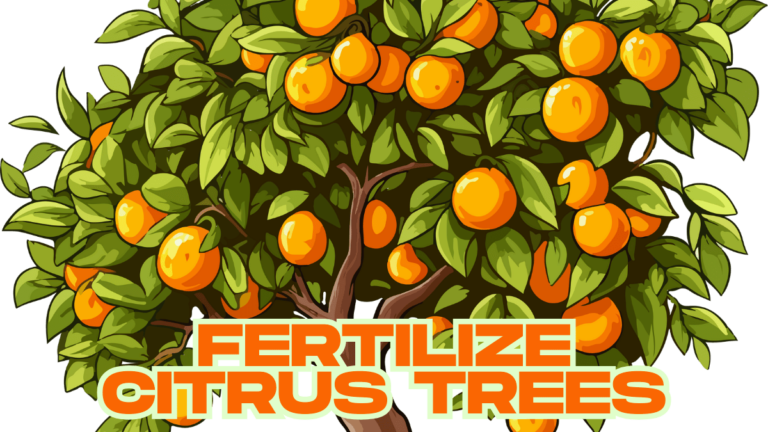
When to Fertilize Citrus Trees: A Comprehensive Guide to Ensuring Healthy Growth
Citrus trees, with their aromatic blossoms and vibrant fruits, have become a cornerstone of many gardens. Whether you’re a novice gardener or a seasoned horticulturist, knowing when and how tofertilize citrus trees is key to keeping these plants thriving. Proper fertilization not only enhances the tree’s overall health but also ensures you harvest abundant, sweet fruits each year. In this detailed guide, we will explore the optimal times to fertilize citrus trees, the best fertilizers to use, and how to spot signs that your tree may need extra nutrients. Let’s dig into the essential care tips that will help your citrus tree reach its fullest potential.
Understanding the Nutritional Needs of Citrus Trees
Citrus trees are among the most nutrient-demanding plants you can grow in your garden. They require a regular and well-balanced supply of nutrients to stay healthy and productive. Unlike many other trees, citrus trees have a rapid growth cycle, and their fruits require ample nutrients to develop properly. The main nutrients that citrus trees need are nitrogen, phosphorus, potassium, and magnesium, in addition to trace elements such as iron, manganese, and zinc.
The roots of citrus trees are relatively shallow, which means they have limited access to deep soil nutrients. This is why regular fertilization is crucial to ensure that the tree’s growth remains robust and its fruit production is maximized. If these trees don’t get enough of the nutrients they need, they might show signs of deficiency, such as yellowing leaves, poor fruit quality, or stunted growth. On the flip side, improper fertilization can lead to nutrient burn or other forms of stress. The key to healthy citrus trees is to strike a balance between providing enough nutrients without overwhelming the roots.
How Often Should You Fertilize Citrus Trees?
Fertilizing your citrus trees on a regular schedule ensures they receive a steady supply of nutrients throughout the growing season. But how often should you be fertilizing? The answer depends on several factors, including the age of the tree, the type of fertilizer you’re using, and the climate in which your citrus trees are growing. While some general rules apply, it’s important to adjust the schedule based on the specific needs of your tree.
Spring Fertilization: Kickstart the Growth Cycle
The first application of fertilizer should occur early in the spring. This is the time when your citrus trees are waking up from their winter dormancy and preparing to enter their active growing phase. At this stage, the tree’s roots begin absorbing nutrients again, and the tree starts to push out new growth, including fresh leaves and flowers. Early spring fertilization will help jumpstart this growth phase and ensure the tree has enough energy to produce robust shoots and a healthy canopy.
If you are using a slow-release citrus tree fertilizer, now is the time to apply it. Slow-release fertilizers are designed to break down over time, providing a steady flow of nutrients to the tree throughout the growing season. Be sure to apply the fertilizer evenly around the base of the tree, taking care not to place it too close to the trunk, as this can cause burning. It’s also a good idea to water the tree well before and after applying the fertilizer to ensure it reaches the roots effectively.
Summer Fertilization: Supporting Fruit Production
As the growing season progresses into summer, your citrus trees will begin to form fruit. This is a critical time for fertilization, as the tree needs additional nutrients to support fruit growth and development. By mid to late summer, the tree is using a lot of energy to produce fruit, so another round of fertilization is necessary to keep it strong and healthy.
In the summer, focus on fertilizers that provide extra potassium, as this nutrient is essential for fruit production. Potassium helps citrus trees produce strong, juicy fruits and improves the overall quality of the fruit. Additionally, if you notice that your tree’s leaves are starting to look a little yellow or the growth seems sluggish, you can apply a nitrogen-rich fertilizer to give it a boost. Just be cautious not to over-fertilize, as too much nitrogen can lead to excess foliage growth, which may result in fewer fruits.
Fall and Winter Fertilization: Avoid Overfeeding
When the cooler months arrive, most citrus trees will begin to slow down their growth and may even enter a dormant state in colder climates. This is not the time to feed them heavily, as their nutrient demands decrease significantly. Fertilizing citrus trees in the fall can cause the tree to produce unnecessary growth when it should be resting.
However, if you’re in a mild climate where your tree does not experience true dormancy, you may want to apply a light, low-nitrogen fertilizer in the fall. This will help the tree maintain a healthy root system without stimulating excessive growth. The key here is to avoid using high-nitrogen fertilizers, as they can encourage new growth at the expense of the tree’s natural dormancy.
Timing is Everything: Fertilizing Citrus Trees for Optimal Health
Fertilizing citrus trees at the wrong time can have negative consequences. Too early or too late in the season can result in poor growth, nutrient burn, or stress to the tree. Knowing the right timing for applying citrus tree fertilizer will ensure that your tree receives the nutrients it needs at the correct stage of its growth cycle.
For the best results, apply fertilizers in early spring and again in mid-summer, adjusting for your local climate. Pay close attention to any signs of nutrient deficiencies or excessive growth and adjust your fertilization schedule accordingly. In the following sections, we’ll discuss how to spot these signs and troubleshoot potential issues.
How to Identify Nutrient Deficiencies in Citrus Trees
Just as important as knowing when to fertilize citrus trees is knowing how to identify when your tree is lacking nutrients. Here are some common signs to look for:
ellowing Leaves
One of the most common signs of a nutrient deficiency in citrus trees is yellowing leaves. If the leaves turn yellow but the veins remain green, this typically indicates a nitrogen deficiency. Nitrogen is essential for healthy leaf development and overall growth. If your tree is showing this sign, it’s time to apply a fertilizer high in nitrogen to encourage new leaf growth and restore the tree’s green foliage.
Stunted Growth
If your citrus tree isn’t growing as vigorously as expected, it might be lacking in essential nutrients, such as potassium or phosphorus. These nutrients are vital for root development and fruit production. In cases of stunted growth, a well-balanced citrus tree fertilizer can help remedy the issue by supplying the tree with the nutrients it needs to kickstart growth.
Small or Poor Quality Fruit
Sometimes, a citrus tree will produce fruit that is small, underdeveloped, or of poor quality. This can be a sign that the tree is not receiving enough of the necessary nutrients for fruit development, especially potassium. Potassium is particularly important for fruit ripening and quality. Fertilizing your citrus trees with a potassium-rich formula will help improve fruit size, flavor, and color.
Choosing the Best Fertilizer for Citrus Trees
The right citrus tree fertilizer can make all the difference in your tree’s health and productivity. But with so many options available, how do you know which one is best?
When choosing a fertilizer, look for a formula designed specifically for citrus trees. These fertilizers typically have a balanced mix of macronutrients (nitrogen, phosphorus, potassium) and micronutrients that citrus trees require for healthy growth. In addition to synthetic fertilizers, you can also choose organic options, which are often gentler on the tree and the environment. Organic fertilizers like compost, chicken manure, or fish emulsion can provide slow-release nutrients that nourish the tree over time.
If you want to get the best results, consider using a slow-release granular fertilizer or a liquid fertilizer, depending on your tree’s needs. Liquid fertilizers tend to work faster, but slow-release granules provide longer-lasting results, making them a great option for trees that need consistent feeding throughout the growing season.
Pros and Cons of Fertilizing Citrus Trees
When fertilizing your citrus trees, there are several benefits and some drawbacks to consider. Below is a table summarizing the pros and cons:
Pros
Cons
Supports healthy growth and vibrant foliage
Over-fertilization can cause nutrient burn
Increases fruit yield and quality
Excess nitrogen may cause too much foliage growth, reducing fruit production
Provides necessary nutrients for sustained tree health
Fertilizer runoff can pollute nearby water sources
Enhances the tree’s ability to resist pests and diseases
Improper fertilization timing can stress the tree
Stimulates strong root development and fruit production
High nitrogen in fall and winter can disrupt dormancy
Frequently Asked Questions (FAQs) About Fertilizing Citrus Trees
How often should I fertilize my citrus trees? Fertilize your citrus trees about 3-4 times a year, including early spring, early summer, and possibly a light application in the fall if you’re in a warm climate.
Can I fertilize my citrus tree in winter? In most climates, it’s best to avoid fertilizing citrus trees in winter, as they are either dormant or significantly less active during this time. However, light, low-nitrogen fertilization may be appropriate for trees in mild climates.
What is the best fertilizer for citrus trees? The best fertilizer for citrus trees contains a balanced mix of nitrogen, phosphorus, and potassium with added micronutrients like magnesium, iron, and manganese. Organic options like compost or fish emulsion are also great choices.
How do I know if my citrus tree needs fertilizer? Common signs that your citrus tree needs fertilizer include yellowing leaves, stunted growth, and poor fruit development. Fertilizing with the right mix of nutrients will help address these issues.
Conclusion: Keep Your Citrus Trees Thriving
Knowing when and how to fertilize citrus trees is essential for keeping them healthy and productive. By following the guidelines in this article, you can ensure that your tree receives the proper nutrients it needs throughout the year. Whether you are looking to increase fruit yield, improve quality, or simply maintain a healthy, thriving tree, understanding the right fertilization schedule is key to success. Always keep an eye out for any signs of nutrient deficiencies, and make sure you choose the right type of fertilizer to meet your tree’s specific needs.
By giving your citrus trees the proper care they deserve, you’ll enjoy an abundant harvest and vibrant trees that will thrive for years to come.
The purple passion plant (Gynura aurantiaca), also known as the velvet plant, captivates gardeners with its vibrant purple foliage and unique velvety texture. Native to Southeast Asia, this evergreen perennial is cherished as a houseplant in many regions. Proper care ensures that your purple passion plant remains healthy and continues to enhance your indoor space.
Understanding thePurple Passion Plant Care
The purple passion plant is renowned for its striking dark green leaves adorned with soft purple hairs, giving them a velvety appearance. While it can produce clusters of yellow, orange, or red flowers, these blooms are often removed due to their strong odor and the plant’s tendency to flower prolifically, which can detract from its ornamental value.
Optimal Growing Conditions
To cultivate a thriving purple passion plant, it’s essential to replicate its native tropical environment. This involves careful attention to light, temperature, humidity, soil, and watering practices.
Light Requirements
Purple passion plants flourish in bright, indirect light. Exposure to direct sunlight, especially during the afternoon, can scorch their delicate leaves. Inadequate light may lead to leggy growth and a reduction in the vibrancy of the purple coloration. Positioning the plant near a north or east-facing window, or using sheer curtains to diffuse intense sunlight, is ideal.
Temperature and Humidity
These plants thrive in temperatures ranging from 60°F to 75°F (16°C to 24°C). It’s crucial to keep them away from cold drafts and sudden temperature fluctuations, as these can cause stress and hinder growth. While they can adapt to average indoor humidity, maintaining higher humidity levels can enhance their appearance and overall health.
Soil Composition
A well-draining potting mix is vital for the health of the purple passion plant. A recommended blend includes potting soil, peat moss, and perlite, which together provide the necessary drainage and moisture retention. Ensuring the soil doesn’t become waterlogged helps prevent root rot, a common issue with this species.
Watering Practices
Maintaining consistent soil moisture is key. Water the plant regularly during its active growing season, ensuring the soil feels slightly moist to the touch but not soggy. Overwatering can lead to root rot, so it’s important to let the top inch of soil dry out between waterings. During the winter months, reduce watering frequency as the plant’s growth slows.
Fertilization
To support vigorous growth, fertilize the purple passion plant every two weeks during the spring and summer months using a balanced, water-soluble fertilizer diluted to half strength. This regimen provides essential nutrients without the risk of over-fertilization.
Pruning and Maintenance
Regular pruning encourages a bushier growth habit and prevents the plant from becoming leggy. Pinching back stems and removing spent flowers can also help maintain its attractive appearance. Additionally, removing flower buds before they bloom can prevent the release of the plant’s strong-smelling pollen and maintain its ornamental appeal.
Common Issues and Troubleshooting
Despite best efforts, gardeners may encounter challenges when growing purple passion plants. Being aware of potential problems allows for prompt and effective solutions.
Pest Infestations
Common pests include aphids, whiteflies, mealybugs, spider mites, and scale. Regularly inspecting the plant and using appropriate treatments, such as insecticidal soap or neem oil, can help manage infestations.
Leaf Discoloration
If the leaves lose their vibrant purple hue and appear green, it may indicate insufficient light. Increasing light exposure, while avoiding direct sunlight, can help restore the plant’s color. citeturn0search10
Root Rot
Overwatering or poor drainage can lead to root rot, characterized by wilting and yellowing leaves. To address this, ensure the pot has adequate drainage holes, use a well-draining soil mix, and adjust watering practices to allow the soil to dry out between waterings.
Propagation Techniques
Purple passion plants can be propagated through stem cuttings. Select healthy stems, cut them to about 4-6 inches in length, and remove the lower leaves. Place the cuttings in water or directly into moist soil, ensuring they receive indirect light. Roots typically develop within a few weeks, after which the new plants can be potted individually.
Pros and Cons of Growing Purple Passion Plant
Understanding the advantages and potential drawbacks of cultivating this plant can aid gardeners in making informed decisions.
Pros
Cons
Aesthetic Appeal: Vibrant purple foliage adds a unique touch to indoor spaces.
Short Lifespan: Typically lives for 2-3 years, requiring regular propagation.
Low Maintenance: Relatively easy to care for with proper conditions.
Pest Susceptibility: Prone to infestations if not monitored regularly.
Non-Toxic: Safe for households with pets and children.
Flower Odor: Blooms have a strong scent that some may find unpleasant.
Air Purification: Like many houseplants, contributes to improved indoor air quality.
Humidity Sensitivity: Requires higher humidity levels, which may not be suitable for all environments.
Conclusion
Caring for the purple passion plant is a rewarding experience for those who enjoy adding a touch of vibrant beauty to their home or garden. With its rich, purple foliage and unique texture, this plant can become a stunning focal point in any indoor space. However, it requires specific care to thrive and maintain its appearance over time.
By providing the right amount of light, water, and soil, along with regular pruning and pest management, you can enjoy the beauty of the purple passion plant for years to come. Remember that this plant, while hardy in the right conditions, can suffer from common problems such as overwatering, insufficient light, and pest infestations, but with the right care, these issues can be managed effectively.
Moreover, propagation can be a fun and easy way to expand your collection and share the beauty of this unique plant with friends and family. So, if you’re looking for an ornamental plant that adds a pop of color and a touch of exotic flair to your home, the purple passion plant is an excellent choice.
With proper care and attention, the purple passion plant will reward you with its stunning foliage and contribute to a healthy, beautiful living space. Whether you’re an experienced gardener or a novice plant enthusiast, this plant is sure to make an impression.
FAQs about Purple Passion Plant Care
How often should I water my purple passion plant?
Water the plant when the top inch of soil feels dry. During the growing season (spring and summer), this might be once every 5-7 days. In winter, reduce watering as the plant’s growth slows.
Can I grow a purple passion plant in direct sunlight?
No, the purple passion plant prefers bright, indirect light. Direct sunlight can scorch the leaves, so place it near a window with filtered light.
What temperature is ideal for purple passion plant growth?
Purple passion plants thrive in temperatures ranging from 60°F to 75°F (16°C to 24°C). They should be kept away from cold drafts or areas with fluctuating temperatures.
How do I prune my purple passion plant?
Regular pruning involves cutting back any leggy growth and removing dead or faded flowers. This helps the plant maintain a compact, bushy form and encourages healthy growth.
How can I propagate my purple passion plant?
Propagation is typically done through stem cuttings. Take a healthy stem cutting, remove the lower leaves, and either place it in water or directly into moist soil. After a few weeks, roots should develop, and the cutting can be potted into its own container.
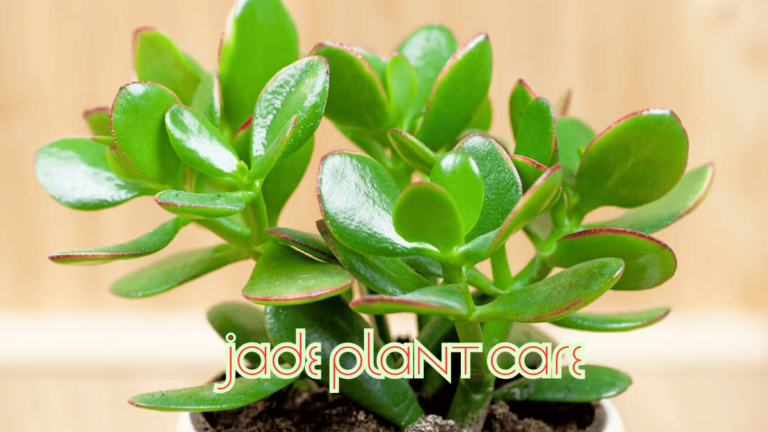
If you’re new to indoor gardening or looking to enhance the greenery in your home, the jade plant is a perfect choice. Known for its resilience and ease of care, the jade plant, or Crassula ovata, thrives with minimal attention, making it ideal for busy individuals or beginners. In this guide, we’ll explore everything you need to know about jade plant care—from ideal growing conditions to common mistakes to avoid. Whether you’re wondering how to take care of a jade plant or seeking to improve its growth, this article provides a comprehensive approach to maintaining a healthy jade plant indoors.
Understanding the Jade Plant’s Basics
The jade plant is a succulent that stores water in its thick, fleshy leaves. Native to South Africa, it can grow into a small tree under the right conditions. It’s often associated with good luck and prosperity, making it a popular choice for homes and offices alike. However, before you can truly benefit from its beauty and symbolism, it’s essential to understand how to care for jade plant properly.
Choosing the Right Location for Your Jade Plant
When it comes to jade plant care, location is key. The jade plant thrives in bright, indirect light, making it perfect for windowsills that receive a good amount of sunlight without exposing the plant to harsh direct rays. While it can tolerate some low light, the plant’s growth will be slower, and it may become leggy. If you plan on keeping your jade plant indoors, ensure it’s placed near a sunny window where it can receive several hours of light each day.
Optimal Temperature for Jade Plant Care
The jade plant is a fan of warmth, and it prefers temperatures ranging from 65°F to 75°F (18°C to 24°C). It’s not frost-tolerant, so if you live in an area with cold winters, be sure to bring your plant indoors during the colder months. Conversely, jade plants can also tolerate a few degrees above 75°F as long as they’re not exposed to extreme heat or air-conditioning drafts.
Soil Requirements for a Thriving Jade Plant
When thinking about how to care for jade plant, one of the most important factors is the soil. The jade plant thrives in well-draining, sandy soil that mimics its natural arid habitat. Using a cactus or succulent mix is ideal because it helps prevent overwatering, which can lead to root rot. If you prefer to make your own mix, combine potting soil with perlite or sand to increase drainage.
Watering: One of the Most Critical Aspects of Jade Plant Care
Overwatering is one of the most common mistakes when it comes to jade plant care indoors. Since jade plants are succulents, they store water in their leaves, which means they can go for extended periods without needing water. A general rule of thumb is to water your jade plant when the soil has completely dried out. This typically happens once every two weeks during the warmer months, but you should reduce the frequency in the winter, when the plant is dormant.
Before watering, always check the soil’s moisture level by inserting your finger about an inch into the soil. If it feels dry, it’s time to water; if it feels moist, wait a few more days. Water the plant thoroughly, ensuring that excess water drains out of the pot to prevent waterlogging.
How to Take Care of Jade Plant: Feeding and Fertilization
Although jade plants are low-maintenance, they do appreciate occasional feeding. During the growing season, typically spring and summer, feed your jade plant once a month with a balanced, water-soluble fertilizer diluted to half strength. Avoid fertilizing during the winter months when the plant is not actively growing, as it can lead to nutrient burn.
If you notice the leaves turning yellow or the plant becoming leggy, this could be a sign of nutrient deficiency, and a mild fertilizer could help rejuvenate it.
Pruning and Shaping Your Jade Plant
Pruning helps maintain the jade plant’s attractive shape and prevents it from becoming too leggy. You can prune your jade plant by trimming back any long or unwanted stems with clean, sharp scissors or pruning shears. Cutting back the stems encourages new growth and helps the plant maintain its compact, bushy appearance. Additionally, removing dead or damaged leaves will help the plant stay healthy.
Repotting Your Jade Plant
As your jade plant grows, it will eventually outgrow its pot. To ensure your plant continues to thrive, you’ll need to repot it every 2 to 3 years. When repotting, choose a pot that is only slightly larger than the current one, as too much space can lead to overwatering issues. Make sure the new pot has drainage holes, as jade plants are sensitive to water retention.
Pests and Diseases to Watch Out For
While jade plants are generally resilient, they can fall victim to pests like aphids, mealybugs, and scale insects. Regularly inspect your plant for any signs of infestation. If you notice tiny insects or a sticky residue on the leaves, gently wipe the plant with a damp cloth or rinse it under a stream of water to remove the pests. In case of severe infestations, you can use insecticidal soap to treat the plant.
Root rot, often caused by overwatering, is another concern. Be sure to avoid leaving the plant in soggy soil, and always ensure the pot has good drainage.
How to Take Care of Jade Plant Indoors During Winter
Winter can be a challenging time for indoor plants, but the jade plant can survive with minimal care during this season. It’s important to reduce watering frequency, as the plant enters a dormant phase and requires less moisture. Keep the plant in a well-lit spot and ensure it’s not exposed to drafts or temperature fluctuations. If your home gets too cold, consider placing the plant in a more protected area, like near a heat source, but not directly on top of a heater.
FAQs About Jade Plant Care
How often should I water my jade plant? Jade plants prefer to dry out completely between waterings. Water your plant every 2-3 weeks, or when the top of the soil feels dry to the touch.
Can jade plants survive in low light? While jade plants can survive in low light, they prefer bright, indirect sunlight. Without enough light, the plant may become leggy and its growth will slow down.
Why are the leaves of my jade plant turning yellow? Yellowing leaves can indicate overwatering or poor drainage. Ensure the soil dries out completely before watering again, and make sure the pot has drainage holes.
Can I prune my jade plant? Yes, pruning helps shape the plant and encourage fuller growth. Trim back leggy or damaged stems using sharp scissors or pruning shears.
Is it okay to keep a jade plant outside during summer? Jade plants can tolerate outdoor conditions, but ensure they are placed in a shaded, but bright area. Avoid direct, harsh sunlight, which can cause leaf burn.
Pros and Cons of Jade Plant Care
Pros
Cons
Easy to care for and low-maintenance
Sensitive to overwatering
Perfect for beginners and busy individuals
May become leggy if not properly pruned
Known for good luck and positive energy
Needs proper sunlight for optimal growth
Can live for many years with proper care
Vulnerable to pests like aphids and mealybugs
Conclusion: A Simple yet Rewarding Plant to Care For
Caring for a jade plant may seem daunting at first, but with a little patience and attention, it can thrive beautifully in your home. By following the basics of jade plant care—choosing the right location, watering wisely, and providing enough light—you’ll be able to enjoy its lush green leaves and the prosperity it symbolizes. Just remember to avoid overwatering, ensure proper drainage, and provide occasional pruning, and your jade plant will reward you with many years of beauty.
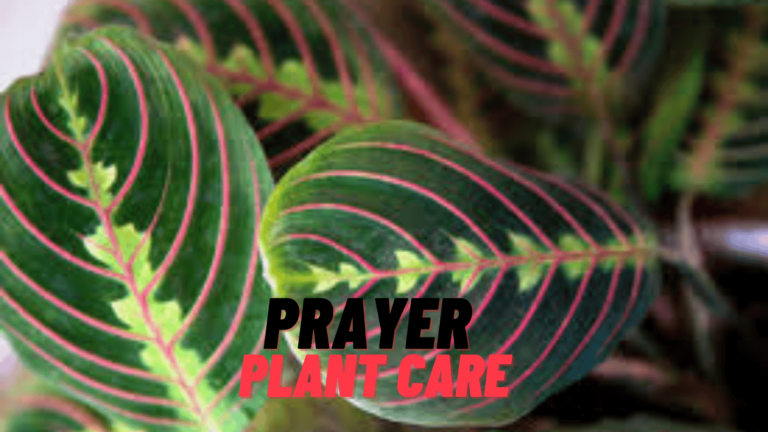
The prayer plant (Maranta leuconeura) is a captivating species from the family Marantaceae, renowned for its striking foliage and remarkable ability to fold its leaves upwards at night, mimicking hands in prayer. In this comprehensive guide, we will explore the essential aspects of prayer plant care, including watering, lighting, humidity, soil, temperature, fertilization, pruning, propagation, and pest management.This unique characteristic is called nyctinasty, a form of circadian rhythm that allows the plant to protect itself from excess moisture and light during nighttime. The leaves themselves are a work of art, with intricate patterns that often display various shades of green, red, and purple depending on the variety.
However, this beauty comes with specific care requirements. By understanding the plant’s natural habitat and replicating it as closely as possible in your home, you can enjoy a healthy, thriving prayer plant.
Lighting: How to Get It Right
Prayer plants are adapted to grow under the canopy of taller trees in the wild, meaning they naturally experience dappled sunlight. In your home, it’s crucial to mimic this environment by placing your plant in a spot that gets bright, indirect light. Direct sunlight can scorch the delicate leaves, causing them to develop brown spots or edges.
The best location for your prayer plant is near a north or east-facing window, where it will get soft morning sunlight. If you’re unsure, you can always test the light levels by holding your hand above the plant—if the shadow is clear and defined, the light is too strong, and you may need to move the plant further away.
Alternatively, if your home doesn’t have ample natural light, you can use a grow light to provide the necessary intensity without the risk of burning the leaves. Ensure the light is positioned a few feet above the plant to prevent damage.
Watering: The Key to Health
Watering is one of the most critical aspects of prayer plant care, and getting it right is essential for the overall health of your plant. Prayer plants require consistent moisture but should never sit in water logged soil, as this can lead to root rot.
Frequency of Watering: Water the plant when the top 1-2 inches of soil feel dry. During warmer months, your prayer plant may need more frequent watering, perhaps once a week. In the colder months, it may need less frequent watering as the plant’s growth slows down.
Watering Technique: Always water evenly around the base of the plant, ensuring that the entire root system receives moisture. Ensure the pot has drainage holes, and allow any excess water to drain out. Never let your prayer plant sit in standing water.
Water Quality: Tap water, especially hard water that contains high levels of minerals like fluoride and chlorine, can harm the plant over time. Distilled water or rainwater is the best choice for watering. If you must use tap water, let it sit out overnight to allow the chemicals to dissipate.
Signs of Overwatering or Underwatering: Overwatering leads to yellowing leaves and mushy stems, while underwatering will cause the leaves to wilt, curl, and become crispy, particularly at the edges.
Humidity: A Crucial Element
Prayer plants are native to the humid environments of Brazil’s tropical forests, where the humidity levels can reach 60% or higher. To replicate these conditions indoors, it’s essential to keep the air around your plant moist.
Ideal Humidity: Prayer plants prefer a humidity level between 50% to 60%. Anything below 40% can lead to brown tips on the leaves and general poor health.
How to Increase Humidity: If your indoor air is dry, especially during the winter months when heating systems dry out the air, consider using a humidifier to boost moisture levels. Another simple trick is to place a pebble tray beneath the plant’s pot. Fill the tray with water and small stones, ensuring the pot itself does not sit in the water. As the water evaporates, it will increase the humidity around the plant.
Misting: While misting can provide temporary relief, it’s not a long-term solution. Misting your prayer plant a few times a week can help, but it should be done early in the day to avoid fungal issues.
Soil: Perfecting the Base
The soil you use for your prayer plant is crucial for proper root development and moisture retention. You’ll want a soil mix that is well-draining yet retains enough moisture to keep the roots hydrated without becoming waterlogged.
Ideal Soil Type: A light, well-draining mix is key. The best mixture for a prayer plant includes:
Two parts sphagnum peat moss
One part perlite or vermiculite
One part well-draining potting soil or coconut coir
This blend allows for proper aeration around the roots, preventing the dreaded root rot while providing enough moisture retention for the plant’s growth.
Repotting: Prayer plants do not require frequent repotting. However, every 1 to 2 years, when the plant becomes root-bound or the soil begins to deplete in nutrients, it’s time to move the plant to a slightly larger pot. When repotting, gently loosen the roots and avoid disturbing them too much to minimize stress.
Temperature: Ideal Conditions for Growth
Prayer plants prefer warm environments, so you should aim to keep them in a room with temperatures between 65°F and 80°F (18°C to 27°C). They are sensitive to temperature fluctuations and drafts, which can cause leaf curling and stress.
Avoid Cold Drafts: Keep your prayer plant away from air conditioners, heating vents, or windows that open frequently, as these temperature fluctuations can harm the plant.
Seasonal Adjustments: In colder months, the plant’s growth may slow down due to lower light levels and cooler temperatures, so reduce the watering frequency accordingly.
Fertilizing: Boosting Growth
Prayer plants grow actively in the spring and summer months, and during this time, they benefit from regular fertilization. Fertilization encourages healthy, vibrant foliage.
Type of Fertilizer: Use a balanced, water-soluble fertilizer with equal proportions of nitrogen (N), phosphorus (P), and potassium (K) to support the plant’s overall health.
Application Frequency: During the growing season (spring through summer), fertilize your prayer plant once every 2 weeks. In the fall and winter, reduce fertilization to once a month, as the plant’s growth slows significantly.
Signs of Over-fertilization: Over-fertilizing can cause the leaves to become scorched or have burnt edges. If you notice this, reduce the frequency of fertilizing and flush the soil with clean water to remove excess nutrients.
Pest and Disease Management
While prayer plants are relatively pest-resistant, they can occasionally attract spider mites, mealybugs, and aphids. Regularly inspect the undersides of leaves for signs of pests.
Dealing with Pests: Treat infestations promptly with neem oil or insecticidal soap. For mild infestations, wiping the leaves with a damp cloth can help remove pests.
Diseases: Root rot is a major concern for prayer plants, especially when the plant is overwatered or the soil does not drain well. To prevent root rot, always ensure proper drainage, and avoid allowing water to stagnate at the bottom of the pot.
Pros and Cons of Growing Prayer Plants
Pros
Cons
Attractive Foliage: Prayer plants are known for their striking, patterned leaves that add an elegant and exotic touch to any space.
Humidity Sensitivity: Prayer plants require high humidity levels to thrive, which can be challenging to maintain, especially in dry climates or during winter.
Non-Toxic: These plants are safe for pets and humans, making them an excellent choice for households with animals or small children.
Sensitive to Overwatering: Prayer plants are highly susceptible to root rot if they are overwatered, requiring careful monitoring of watering habits.
Unique Leaf Movement: The leaves fold up at night, resembling hands in prayer, adding an intriguing, dynamic aspect to their care and appearance.
Requires Frequent Attention: Due to their specific care needs (water, light, humidity), prayer plants can require more attention than other houseplants.
Low Light Tolerance: Prayer plants can grow well in medium to low-light environments, making them versatile for various indoor settings.
Pest-Prone: While generally resistant, prayer plants can attract common pests like spider mites, mealybugs, and aphids, which can be a hassle to manage.
Aesthetic Appeal: With their colorful and patterned foliage, prayer plants enhance the décor of any room, becoming a statement piece.
Slow Growth: These plants can grow slowly, particularly in low light conditions or when not given optimal care, which can be frustrating for some plant enthusiasts.
Air Purification: Like many indoor plants, prayer plants help purify the air, improving the overall environment in your home.
Prone to Leaf Damage: Prayer plants are sensitive to extreme temperature fluctuations and drafts, which can cause their leaves to curl or discolor.
Conclusion: A Beautiful Journey of Care
Caring for a prayer plant may seem like a lot of effort, but it’s a highly rewarding experience. By paying attention to its needs for indirect light, consistent watering, high humidity, and well-draining soil, your prayer plant can flourish and add beauty to your home for years to come. Remember, each plant is unique, so observe your plant’s individual needs and adjust care routines accordingly.
Elephant ear plants are an exotic and visually striking addition to any garden or home. Known for their large, heart-shaped leaves, they are often favored by gardeners and plant enthusiasts for their impressive appearance. However, proper care is essential to ensure these plants remain healthy and vibrant. If you’ve ever wondered how to care for elephant ear plants, this guide will walk you through everything you need to know, from ideal growing conditions to maintenance tips. Whether you’re growing them indoors or outdoors, understanding the right approach to watering, sunlight, and soil is key to achieving success.
In this article, we will explore elephant ear plant care, providing insights on how to care for elephant ear plants in various environments. Whether you are a seasoned gardener or a beginner, this guide will offer actionable tips that will help your plant flourish.
Understanding Elephant Ear Plants
Before diving into the care specifics, it’s essential to understand what makes elephant ear plants so unique. These plants are part of the Araceae family, with a variety of species, including Colocasia and Alocasia. Both species are known for their lush, large leaves that can grow up to three feet long. Their bold and dramatic appearance makes them ideal for adding an exotic flair to any landscape.
While elephant ear plants are generally easy to grow, they do require specific care to ensure they thrive. These plants typically prefer a warm climate, abundant water, and nutrient-rich soil. Now, let’s explore how to properly care for your elephant ear plant to help it grow strong and healthy.
1. Choosing the Right Location
One of the first and most crucial steps in caring for an elephant ear plant is choosing the right location. Elephant ear plants thrive in areas that receive indirect sunlight. Direct sunlight can scorch their large leaves, leading to brown spots or damaged foliage. If you are growing them indoors, place them near a window with bright, filtered light, but avoid direct exposure to the sun.
For outdoor elephant ear plants, select a spot that is partly shaded. This will protect the plant from intense midday heat while still providing the light it needs for optimal growth.
2. Watering Your Elephant Ear Plant
Watering is a critical component of elephant ear plant care. These plants prefer consistently moist soil but are sensitive to both drought and waterlogging. You should water your elephant ear plant regularly, ensuring the soil remains damp but not soggy. A good rule of thumb is to water deeply whenever the top inch of soil feels dry to the touch.
However, it’s essential to avoid water pooling around the roots, as this can lead to root rot. Using a well-draining pot or ensuring good drainage in the garden will prevent water from accumulating at the bottom. In hotter climates, elephant ear plants may require more frequent watering to prevent drying out.
3. Soil and Fertilization
The soil quality plays an integral role in the health of your elephant ear plant. These plants thrive in rich, well-draining soil that retains moisture without becoming waterlogged. A mix of peat moss, compost, and perlite can offer the perfect balance of nutrients and drainage.
Fertilization is another key element in how to care for an elephant ear plant. During the growing season (spring and summer), feed your plant with a balanced, water-soluble fertilizer every two weeks. This provides the necessary nutrients to support strong leaf growth and vibrant foliage. During the fall and winter months, reduce the frequency of fertilization as the plant’s growth slows down.
4. Temperature and Humidity
Elephant ear plants are tropical plants, meaning they prefer warm, humid environments. To ensure healthy growth, aim to maintain temperatures between 65°F and 75°F (18°C – 24°C). If the temperature drops below 50°F (10°C), your plant may suffer from cold stress and could die.
Humidity is another factor to consider when caring for an elephant ear plant. These plants thrive in environments with high humidity. If you’re growing your plant indoors, consider using a humidifier or placing the pot on a tray filled with pebbles and water to help increase humidity. Regular misting can also help, especially in dry climates.
5. Pruning and Maintenance Pruning is an essential part of maintaining the health and appearance of your elephant ear plant. As the plant grows, it may produce dead or yellowing leaves. Regularly remove these leaves to improve air circulation and keep the plant looking tidy. Additionally, if the plant starts to outgrow its space, you can trim back the longer stems to encourage more compact growth.
Be sure to use clean, sharp pruning shears to avoid damaging the plant. After pruning, clean the shears with rubbing alcohol to prevent the spread of diseases.
6. Dealing with Pests and Diseases
Like any plant, elephant ear plants are susceptible to pests and diseases. Common issues include aphids, spider mites, and slugs. These pests can damage the leaves and stunt the plant’s growth. If you notice any pests, treat your plant promptly with an organic insecticide or by spraying it with a mixture of water and dish soap.
Root rot is another common issue, especially when the plant is overwatered or the soil doesn’t drain well. To prevent root rot, always ensure the plant is in a well-draining pot and avoid overwatering.
7. Winter Care for Elephant Ear Plants
Elephant ear plants are sensitive to frost, so in colder climates, it’s important to bring them indoors before the first frost. If you have elephant ear plants in the ground, dig up the bulbs and store them in a cool, dry place over the winter. You can replant them in the spring when the temperature warms up.
For indoor plants, reduce watering during the winter months and place the plant in a cooler room. Make sure it still receives adequate light and humidity to survive until spring.
Pros and Cons of Elephant Ear Plant Care
Pros
Cons
Large, attractive foliage that adds drama to any space
Requires high humidity, which may be challenging in dry environments
Low-maintenance once established
Sensitive to frost, making it unsuitable for cold climates without extra care
Can be grown indoors or outdoors
Prone to pest infestations, which require vigilant care
Grows quickly, providing instant impact in the garden
May need regular pruning to maintain an appealing appearance
FAQs About Elephant Ear Plant Care
Q: How often should I water my elephant ear plant? A: Water your elephant ear plant whenever the top inch of the soil feels dry. Ensure the soil stays consistently moist but not soggy.
Q: Can I grow an elephant ear plant indoors? A: Yes, elephant ear plants can be grown indoors, provided they receive indirect sunlight and are placed in a humid environment.
Q: Why are the leaves on my elephant ear plant turning yellow? A: Yellowing leaves could be a sign of overwatering, nutrient deficiencies, or a pest issue. Ensure proper watering practices and check for pests.
Q: Do elephant ear plants need direct sunlight? A: No, elephant ear plants prefer bright, indirect sunlight. Direct sun can scorch their leaves.
Q: Can I grow elephant ear plants in cold climates? A: Elephant ear plants are not frost-tolerant. In colder climates, you will need to bring them indoors during the winter or store their bulbs.
Conclusion
Caring for an elephant ear plant is a rewarding experience, as these striking plants bring beauty and drama to any setting. With the right care, including proper watering, sunlight, and humidity, your elephant ear plant can thrive and grow into a stunning specimen. Regular maintenance, such as pruning and pest control, will ensure it remains healthy throughout the year.
Whether you’re looking to add a tropical flair to your home or garden, knowing how to care for an elephant ear plant can help you achieve a lush, vibrant display. With the tips shared in this guide, you’ll be equipped to give your plant the best care possible, ensuring it remains a standout in your plant collection for years to come.
Monstera deliciosa, commonly known as the Swiss cheese plant or split-leaf philodendron, is a popular and striking houseplant. With its large, glossy, heart-shaped leaves and unique fenestrations (the holes and splits in the leaves), it’s no wonder that this tropical beauty is a favorite among plant enthusiasts. Not only is the Monstera a visually appealing addition to any space, but it is also relatively easy to care for, making it an ideal choice for beginners and experienced gardeners alike.
In this article, we’ll dive deep to how to care for a monstera plant , types of monstera plants, propagation methods, and troubleshooting tips to keep your Monstera thriving. Whether you’re a novice or a seasoned plant parent, this guide will help you nurture your Monstera into a lush and healthy beauty.
Understanding How to Care for a Monstera Plant
Monstera plants thrive in humid, tropical environments, and they need specific conditions to grow to their full potential. They are native to Central America and prefer warm temperatures, indirect light, and well-draining soil. Here’s a breakdown of the essential care factors for a healthy Monstera deliciosa:
Sunlight Requirements
The Monstera deliciosa does best in bright, indirect sunlight. Direct sunlight can scorch its delicate leaves, so it’s important to find a spot with filtered light. If you’re growing your Monstera indoors, place it near a window with sheer curtains or use artificial grow lights if natural light is insufficient.
In outdoor spaces, the Swiss cheese plant can grow under the canopy of larger trees, making it perfect for shaded or partially shaded areas. However, too little light can lead to leggy growth and fewer fenestrations (holes in the leaves).
Soil and Potting Needs
Monstera plants require well-draining soil to prevent root rot. A mix of peat-based soil with added perlite or shredded bark is ideal. This combination promotes aeration and drainage while providing the necessary nutrients. When choosing a pot for your Monstera, ensure it has ample drainage holes to allow excess water to escape.
As your Monstera grows, it will eventually outgrow its pot. When this happens, repot your plant every couple of years into a larger container, increasing the pot size by a few inches to accommodate its expanding root system.
Watering Your Monstera
One of the most common mistakes people make when caring for Monstera plants is overwatering. These plants prefer to dry out between waterings, so it’s important to check the soil moisture regularly. Stick your finger into the soil; if the top 2-3 inches are dry, it’s time to water.
During the growing season (spring and summer), Monstera may need watering once a week, but in the winter, when the plant is dormant, watering every couple of weeks should suffice. Always water deeply, ensuring that water runs out from the drainage hole at the bottom of the pot.
Temperature and Humidity
Monstera plants flourish in warm environments, typically between 65°F and 85°F. They are sensitive to cold temperatures and should be kept away from drafts and air conditioners. In terms of humidity, these plants prefer a humid environment, ideally around 60%. To boost humidity, you can mist the leaves or use a humidifier, particularly in dry indoor conditions.
Propagating Monstera: Easy Methods for Growing New Plants
Monstera deliciosa is relatively easy to propagate, whether by stem cuttings or air layering. Here’s a detailed guide on how to propagate your Monstera successfully:
Stem Cutting Method
Stem cuttings are the most common way to propagate Monstera. Follow these simple steps:
Using clean, sharp scissors or pruning shears, cut a stem with a node (the bump where roots will grow) and at least one leaf.
Place the cutting in a glass of water, ensuring the node is submerged. Change the water every 3-5 days.
After a few weeks, you’ll see roots developing. Once the roots are a few inches long, transplant the cutting into fresh soil.
Air Layering Method
For a more advanced and risk-free propagation method, you can use air layering. Here’s how:
Choose a healthy stem with a node.
Cut a small notch in the stem below the node.
Wrap sphagnum moss around the notch and moisten it. Cover it with plastic to keep the moss humid.
After a few months, when roots have developed, cut the stem below the roots and plant the new Monstera in soil.
Both methods are effective, but air layering tends to have a higher success rate, as it allows the roots to form while still attached to the parent plant.
How to Get Monstera Leaves to Split
Monstera leaves are famous for their unique splits, or fenestrations, which develop as the plant matures. To encourage the leaves to split, it’s important to provide optimal conditions for growth:
Light: Ensure the plant receives plenty of bright, indirect light. A grow light can also help promote the formation of fenestrations.
Watering: Maintain consistent watering, letting the soil dry out slightly between waterings.
Fertilizing: Feed your Monstera with a balanced fertilizer every few months during the growing season. This helps provide essential nutrients for healthy leaf development.
If your Monstera is growing slowly or not developing splits, it may not be receiving enough light or nutrients. Increasing light intensity or adding fertilizer can help stimulate new growth.
Types of Monstera Plants: A Quick Overview
Monstera deliciosa is just one of many species in the Monstera genus. Here are a few notable types of Monstera plants:
Monstera albo: This rare, variegated form of Monstera deliciosa has beautiful white splashes on its green leaves. It is often more expensive due to its scarcity and slower growth rate.
Monstera obliqua: Known for its delicate, airy leaves with large holes, Monstera obliqua is one of the rarest and most expensive varieties.
Monstera adansonii: Commonly called the Swiss cheese plant, it has larger leaves than the standard Monstera with more pronounced holes.
Monstera dubia: This vining species has small, round leaves with silvery markings and is commonly grown as a groundcover or climbing plant.
Troubleshooting Common Monstera Problems
Despite being relatively low-maintenance, Monstera plants can face a few issues. Here are some common problems and how to address them:
Brown Leaf Tips: This often indicates dry soil or inconsistent watering. Regularly water your Monstera, making sure the soil doesn’t dry out completely.
Yellow Leaves: If your Monstera’s leaves are turning yellow, it might be a sign of overwatering or insufficient light. Ensure proper drainage and provide adequate light.
Wilting or Curling Leaves: This can occur due to overwatering or low humidity. Check the soil for moisture levels and consider using a humidifier if the air is too dry.
FAQs about Monstera Care
Q: How often should I water my Monstera? A: Water your Monstera once the top 2-3 inches of soil dry out. During the growing season, it may need watering once a week, but in winter, it may only require water every few weeks.
Q: Can I grow Monstera outside? A: Yes, Monstera can be grown outside in USDA zones 10-12, where temperatures remain warm. It thrives in shaded or partially shaded areas.
Q: How can I encourage Monstera leaves to split? A: To encourage leaf splits, provide bright, indirect light, and maintain consistent watering and fertilizing.
Conclusion
Caring for a Monstera deliciosa is straightforward once you understand its basic needs. With the right environment, watering routine, and occasional maintenance, your Monstera will reward you with beautiful, large, split leaves that add a tropical touch to your space. Whether you’re a beginner or an experienced plant enthusiast, this low-maintenance beauty is a perfect addition to any home.
With the proper care, your Monstera can thrive for years, growing larger and more stunning as time goes on. So, take the time to nurture it, and you’ll enjoy its lush foliage and exotic charm in your home or garden.
Plants absorb their nutrients from the soil or potting medium they grow in. Most plants arrive from the greenhouse with some fertilizer mixed in already, but as they grow, these nutrients are absorbed and depleted, requiring replenishment.In this article we will discuss the Best Fertilizers for Indoor Plants.Fertilizers come with an N-P-K ratio, representing the balance of Nitrogen, Phosphorus, and Potassium. Each element plays a crucial role in plant health:
Nitrogen (N): Fuels leafy growth and is essential for chlorophyll production.
Phosphorus (P): Supports root development, bud formation, and fruiting.
Potassium (K): Helps regulate water balance, prevents excessive moisture loss, and enhances overall plant health.
Pro Tip: A balanced fertilizer with an equal N-P-K ratio (e.g., 10-10-10) is suitable for most houseplants. However, some plants may require more specific ratios, such as high-nitrogen for foliage plants or high-phosphorus for flowering plants.
Choosing the Right Fertilizer
With so many fertilizers on the market, selecting the right one can be daunting. Here are some factors to consider:
Plant type:Different plants have unique nutritional needs. For example, succulents require less fertilizer than flowering plants.
Growth stage: Plants in the active growing season (spring-summer) require more nutrients than those in dormancy (fall-winter).
Soil type: The type of potting mix used can affect fertilizer choice. For instance, organic potting mixes may require less fertilizer.
Personal Experience: I once used a high-nitrogen fertilizer on my peace lily, thinking it would promote healthy growth. However, it ended up causing more harm than good, leading to weak and leggy stems. Now, I opt for a balanced fertilizer and monitor my plants’ responses to adjust as needed.
Why Fertilizers Matter
Indoor plants depend on you to replenish their soil’s nutrients. Over time, even premium potting mixes lose their vitality. Fertilizers restore essential elements like nitrogen (N), phosphorus (P), and potassium (K), ensuring robust growth and resilience.
How to Fertilize Indoor Plants
Fertilizing is beneficial during the active growing season, typically from spring to summer. During this time, plants are actively using resources and nutrients for new growth and reproduction. Here’s a step-by-step guide on how to fertilize:
Choose the right fertilizer: Select a fertilizer that matches your plant’s needs, considering factors like N-P-K ratio and growth stage.
Dilute the fertilizer: Follow the instructions on the label to dilute the fertilizer to the recommended strength.
Water your plants: Water your plants as you normally would, using the diluted fertilizer solution.
Monitor and adjust: Observe your plants’ responses to the fertilizer and adjust as needed.
Pro Tip: Fertilize your plants in the morning, allowing them to absorb the nutrients throughout the day.
When to Fertilize: Seasonal Timing
Spring-Summer: Feed every 4-6 weeks during active growth.
Fall-Winter: Pause unless your plant shows new growth (common in tropical species like fiddle leaf figs).
Exception: My bird of parad
3 Critical Signs Your Plant Needs Nutrients
Yellow Leaves with Green Veins: Magnesium deficiency. Fix with Epsom salt spray (1 tsp/gallon water).
Purple Undersides: Phosphorus shortage. Use bone meal or bloom booster.
Here are three common signs that your plant needs fertilizer:
Yellowing leaves: If your plant’s leaves are turning yellow, it may be a sign of nitrogen deficiency.
Slow growth: If your plant is not growing as quickly as expected, it may be due to a lack of phosphorus or potassium.
Pale foliage: If your plant’s leaves are pale or washed out, it may indicate a magnesium deficiency.
Pro Tip: Before fertilizing, ensure you’ve ruled out other potential causes of these symptoms, such as overwatering or underwatering.
Organic vs. Synthetic Fertilizers
The debate between organic and synthetic fertilizers is ongoing. Here’s a brief comparison:
Aspect
Organic
Synthetic
Speed
Slow-release (weeks)
Fast-acting (days)
Soil Health
Improves microbiome
Can harm beneficial microbes
Safety
Non-toxic for edibles
Risk of salt buildup
Eco-Impact
Sustainable
Chemical runoff risks
Expert Insight: Horticulturist Tim Flood notes, “Organic fertilizers are a better choice for the environment and can provide long-term benefits for soil health.”
Soil pH and Fertilizer
Soil pH plays a crucial role in nutrient availability. Most houseplants prefer a slightly acidic to neutral soil pH (6.0-7.0). However, some plants like acid-loving species (e.g., azaleas, blueberries) require a more acidic soil pH (5.5-6.5).
Soil testing: Regular soil testing can help determine the optimal fertilizer for your plants.
pH adjustment: If necessary, adjust the soil pH using lime or sulfur to create an optimal environment for your plants.
Pro Tip: Use a soil test kit to determine your soil’s pH and nutrient levels before fertilizing.
Fertilizers for Specific Plants
Different plants have unique fertilizer requirements. Here are some examples:
Succulents: Use a low-nitrogen, water-soluble fertilizer (e.g., 2-7-7) during the growing season.
Orchids: Feed with a balanced, water-soluble fertilizer (e.g., 10-10-10) every 2-3 weeks.
Tomatoes: Use a high-phosphorus fertilizer (e.g., 5-10-5) to promote fruiting.
Pro Tip: Research the specific fertilizer needs of your plants to ensure you’re providing the best nutrition.
Special Cases: Edibles & Delicate Plants
Herbs (Basil, Mint): Use compost tea every 3 weeks.
Tomatoes: Opt for 5-10-5 fertilizer to prioritize fruit over leaves.
Orchids: Mist with diluted fish emulsion (1/4 strength) monthly.
Eco-Hack: I use homemade worm castings
FAQs
Q: Can I use outdoor fertilizer for indoor plants? A: No, outdoor fertilizers are too concentrated and may harm indoor plants. Q: How often should I fertilize my indoor plants? A: Fertilize every 2-4 weeks during the growing season, depending on the plant’s needs. Q: Are organic fertilizers better than synthetic ones? A: Organic fertilizers are generally safer for the environment and can provide long-term benefits for soil health.
Q: Can I use outdoor fertilizer indoors? A: No! They’re too concentrated and may burn roots.
Q: How often should I fertilize succulents? A: Every 8-10 weeks in summer with a cactus-specific mix.
Q: Are eggshells good fertilizer? A: Yes! Crush and steep in water for a calcium-rich brew.
Pro Tip: Consider a balanced fertilizer as a starting point and adjust based on your plant’s response.
Conclusion
Fertilizing your indoor plants is an essential part of their care. By understanding the different types of fertilizers, their benefits, and how to use them, you can create a thriving indoor garden. Remember to choose the right fertilizer for your plants, follow the instructions, and monitor their responses. With the right nutrients, your plants will flourish, and you’ll enjoy the many benefits of indoor gardening.