Category: Plant Care and Maintenance

Welcome to the “Plant Care and Maintenance” section of our urban gardening website! Whether you’re a beginner or a seasoned gardener, understanding how to care for your plants is crucial to maintaining a healthy and vibrant garden. This category is dedicated to providing you with practical tips and expert advice to ensure your urban garden thrives.

  • How to Care for Indoor Plants?(50 Plants)

    How to Care for Indoor Plants?(50 Plants)

    Indoor plants are more than just decorative elements; they bring life, color, and a sense of tranquility to any space. However, caring for indoor plants can sometimes feel like a daunting task, especially if you’re new to the world of indoor gardening. In this guide, we’ll explore how to care for indoor plants, focusing on popular varieties like peace lilies, orchids, and succulents. Whether you’re a seasoned plant enthusiast or a beginner, these tips will help you maintain a thriving indoor garden.

    Understanding Care For Indoor Plants

    Caring for indoor plants involves understanding their specific needs, including light, water, soil, and temperature. Each plant species has unique requirements, and meeting these needs is crucial for their growth and health.

    Light Requirements

    Most indoor plants thrive in bright, indirect light. However, some plants, like snake plants and ZZ plants, can tolerate low-light conditions. It’s essential to place your plants in a location that matches their light preferences. For instance, a south-facing window is ideal for light-loving plants, while north-facing windows are better for those that prefer less light.

    Watering Techniques

    Overwatering is a common mistake in care for indoor plants. It’s important to let the soil dry out between waterings for most plants. Use a pot with drainage holes to prevent water from accumulating at the bottom. A good rule of thumb is to water when the top inch of soil feels dry. Remember, it’s easier to revive a dry plant than one that’s been overwatered.

    Soil and Potting

    The right soil mix is vital for indoor plants. A well-draining potting mix is ideal for most species. Repotting every couple of years can also help refresh the soil and provide more space for root growth. When repotting, choose a pot that’s slightly larger than the current one to allow for growth.

    Temperature and Humidity

    Indoor plants generally prefer temperatures between 60-75°F (15-24°C). Humidity levels can vary, but many tropical plants benefit from higher humidity. Consider using a humidifier or placing a tray of water near your plants to increase moisture in the air. Avoid placing plants near drafts or heat sources, as sudden temperature changes can stress them.

    Below, I’ve curated care tips for 20+ popular plants. Let’s get specific!

    1. Peace Lily

    • Light: Low to medium indirect light.
    • Water: Keep soil moist but not soggy. Use filtered water to avoid leaf browning.
    • Pro Tip: Wipe leaves monthly to boost photosynthesis.

    2. Orchid

    • Light: Bright, indirect light (east-facing windows).
    • Water: Soak weekly, then drain completely.
    • Pro Tip: Mist aerial roots to mimic tropical humidity.

    3. Snake Plant

    • Light: Thrives in low light.
    • Water: Water every 3–4 weeks. Drought-tolerant!
    • Pro Tip: Perfect for forgetful waterers.

    4. Succulents & Cacti

    • Light: Direct sunlight (south-facing windows).
    • Water: Soak soil, then let it dry completely.
    • Pro Tip: Use terracotta pots to prevent root rot.

    5. Basil

    • Light: 6+ hours of direct sun.
    • Water: Keep soil consistently moist.
    • Pro Tip: Pinch off flowers to encourage leaf growth.

    6. Poinsettia

    • Light: Bright, indirect light.
    • Water: Water when soil feels dry.
    • Pro Tip: Keep away from cold drafts to prolong blooms.

    7. Spider Plant

    • Light: Indirect light.
    • Water: Water weekly in summer, biweekly in winter.
    • Pro Tip: Propagate “spiderettes” for free plants!

    8. Aloe Vera

    • Light: Bright, indirect light.
    • Water: Water every 3 weeks.
    • Pro Tip: Harvest gel from mature leaves for burns.

    9. Kalanchoe

    • Light: Bright, indirect light. Tolerates some direct sun.
    • Water: Let soil dry between waterings. Reduce watering in winter.
    • Humidity: Low humidity preferred.
    • Pro Tip: Deadhead spent blooms to encourage new flowers.

    10. Indoor Bamboo (Lucky Bamboo)

    • Light: Bright, indirect light. Avoid direct sun.
    • Water: Keep roots submerged in water (if grown hydroponically) or keep soil moist.
    • Pro Tip: Use filtered water to prevent chlorine damage.

    11. Ivy Plant

    • Light: Bright, indirect light. Tolerates low light.
    • Water: Water when the top inch of soil is dry.
    • Pro Tip: Trim leggy stems to encourage bushier growth.

    12. Christmas Cactus

    • Light: Bright, indirect light.
    • Water: Keep soil slightly moist. Reduce watering after blooming.
    • Pro Tip: Provide 12–14 hours of darkness in fall to trigger blooms.

    13. Hibiscus

    • Light: Direct sunlight (6+ hours daily).
    • Water: Keep soil consistently moist.
    • Pro Tip: Mist leaves to combat dry indoor air.

    14. Rosemary

    • Light: Full sun (south-facing window).
    • Water: Let soil dry slightly between waterings.
    • Pro Tip: Rotate the pot weekly for even growth.

    15. Hydrangea (Indoor)

    • Light: Bright, indirect light.
    • Water: Keep soil moist but not waterlogged.
    • Pro Tip: Use acidic soil (pH 5.5–6.5) for blue blooms.

    16. Jade Plant

    • Light: Direct sunlight (4–6 hours daily).
    • Water: Water deeply, then let soil dry completely.
    • Pro Tip: Avoid frequent repotting—jade plants enjoy being root-bound.

    17. Lavender (Indoor)

    • Light: Full sun (6–8 hours daily).
    • Water: Water sparingly—let soil dry between waterings.
    • Pro Tip: Prune regularly to prevent legginess.

    18. Monstera (Swiss Cheese Plant)

    • Light: Bright, indirect light.
    • Water: Water when the top 2 inches of soil are dry.
    • Pro Tip: Wipe leaves with a damp cloth to remove dust.

    19. Amaryllis

    • Light: Bright, indirect light during growth; low light during dormancy.
    • Water: Water sparingly until the flower stalk appears.
    • Pro Tip: After blooming, cut the stalk but keep leaves to recharge the bulb.

    20. Venus Fly Trap

    • Light: Full sun (6+ hours daily).
    • Water: Use distilled or rainwater only. Keep soil damp.
    • Pro Tip: Feed insects occasionally (no fertilizer needed).

    21. ZZ Plant

    • Light: Low to bright indirect light.
    • Water: Water every 3–4 weeks. Drought-tolerant!
    • Pro Tip: Wipe leaves with a microfiber cloth for shine.

    22. Pothos

    • Light: Tolerates low light but thrives in bright, indirect light.
    • Water: Water when soil is dry to the touch.
    • Pro Tip: Trim vines to encourage fuller growth.

    23. Money Tree

    • Light: Bright, indirect light.
    • Water: Water when the top 2 inches of soil are dry.
    • Pro Tip: Braid trunks gently for a decorative touch.

    24. Pineapple Plant

    • Light: Full sun (6–8 hours daily).
    • Water: Water moderately; avoid soggy soil.
    • Pro Tip: Harvest fruit when golden and fragrant.

    25. Gardenia

    • Light: Bright, indirect light.
    • Water: Keep soil consistently moist.
    • Pro Tip: Use acidic soil and fertilize monthly during growth.

    26. Anthurium

    • Light: Bright, indirect light.
    • Water: Water weekly; keep soil slightly moist.
    • Pro Tip: Boost humidity with a pebble tray.

    27. Majesty Palm

    • Light: Bright, indirect light.
    • Water: Keep soil evenly moist.
    • Pro Tip: Mist fronds weekly to prevent browning.

    28. Calla Lily

    • Light: Bright, indirect light.
    • Water: Keep soil moist during growth; reduce in dormancy.
    • Pro Tip: Plant bulbs shallowly to avoid rot.

    29. Jasmine

    • Light: Direct sun (4–6 hours daily).
    • Water: Keep soil slightly moist.
    • Pro Tip: Provide a trellis for climbing growth.

    30. Hyacinth

    • Light: Bright, indirect light.
    • Water: Keep soil moist but not waterlogged.
    • Pro Tip: Chill bulbs before planting for better blooms.

    31. Lily Plant (Indoor)

    • Light: Bright, indirect light.
    • Water: Keep soil consistently moist. Avoid waterlogging.
    • Humidity: Moderate humidity.
    • Pro Tip: Remove pollen from flowers to prolong bloom life.

    32. Corn Plant (Dracaena fragrans)

    • Light: Low to bright indirect light.
    • Water: Water when top inch of soil is dry.
    • Pro Tip: Wipe leaves to prevent dust buildup.

    33. Mint Plant

    • Light: Bright, indirect light or partial sun.
    • Water: Keep soil moist. Mint loves water but hates soggy roots.
    • Pro Tip: Grow in a separate pot to control spreading.

    34. Air Plants (Tillandsia)

    • Light: Bright, indirect light.
    • Water: Soak in water for 20 minutes weekly. Shake off excess water.
    • Pro Tip: Mist between soakings in dry climates.

    35. Areca Palm

    • Light: Bright, indirect light.
    • Water: Keep soil evenly moist. Reduce watering in winter.
    • Pro Tip: Mist fronds to maintain humidity.

    36. Parlor Palm

    • Light: Low to medium indirect light.
    • Water: Water when top inch of soil is dry.
    • Pro Tip: Ideal for low-light corners.

    37. Rubber Plant

    • Light: Bright, indirect light. Tolerates medium light.
    • Water: Water when the top 2 inches of soil are dry.
    • Pro Tip: Wipe leaves with a damp cloth to enhance photosynthesis.

    38. Fiddle Leaf Fig

    • Light: Bright, indirect light. Avoid direct sun.
    • Water: Water thoroughly, then let soil dry halfway.
    • Pro Tip: Rotate the plant weekly for even growth.

    39. String of Pearls

    • Light: Bright, indirect light.
    • Water: Water every 2–3 weeks. Let soil dry completely.
    • Pro Tip: Hang near a window for cascading growth.

    40. Philodendron

    • Light: Low to bright indirect light.
    • Water: Water when the top inch of soil is dry.
    • Pro Tip: Trim yellow leaves to redirect energy to healthy growth.

    41. Bird of Paradise

    • Light: Bright, direct light (south-facing window).
    • Water: Water when the top 2 inches of soil are dry.
    • Pro Tip: Wipe leaves monthly to remove dust and boost growth.

    42. Calathea (Prayer Plant)

    • Light: Medium, indirect light. Avoid direct sun.
    • Water: Keep soil lightly moist. Use distilled water to prevent leaf crisping.
    • Pro Tip: Thrives in bathrooms due to high humidity.

    43. Peperomia

    • Light: Bright, indirect light.
    • Water: Water every 1–2 weeks. Let soil dry slightly between waterings.
    • Pro Tip: Compact size makes it perfect for shelves or desks.

    44. Chinese Evergreen

    • Light: Low to medium indirect light.
    • Water: Water when the top inch of soil is dry.
    • Pro Tip: Tolerates fluorescent lighting—ideal for offices.

    45. Schefflera (Umbrella Plant)

    • Light: Bright, indirect light.
    • Water: Water when the top 2 inches of soil are dry.
    • Pro Tip: Prune leggy stems to maintain a bushy shape.

    46. Croton

    • Light: Direct sunlight for vibrant leaf colors.
    • Water: Keep soil consistently moist.
    • Pro Tip: Sudden leaf drop? Check for drafts or temperature changes.

    47. Dracaena Marginata

    • Light: Bright, indirect light. Tolerates low light.
    • Water: Water every 2–3 weeks. Let soil dry between waterings.
    • Pro Tip: Remove brown leaf tips with clean scissors.

    48. English Ivy

    • Light: Bright, indirect light.
    • Water: Keep soil slightly moist.
    • Pro Tip: Hang in baskets for trailing foliage.

    49. Ponytail Palm

    • Light: Bright, direct light.
    • Water: Water every 3–4 weeks. Stores water in its bulbous trunk.
    • Pro Tip: Perfect for sunny, dry rooms.

    50. Begonia

    • Light: Bright, indirect light.
    • Water: Water when the top inch of soil is dry.
    • Pro Tip: Avoid wetting leaves to prevent mildew.

    Advanced Troubleshooting Tips

    1. Yellow Leaves: Often caused by overwatering or poor drainage. Check soil moisture and adjust watering habits.
    2. Brown Tips: Low humidity or fluoride in water. Use filtered water and increase humidity.
    3. Leggy Growth: Insufficient light. Move the plant closer to a window or use grow lights.
    4. Pests: Isolate affected plants and treat with neem oil or insecticidal soap.

    FAQs

    Q: Can I use tap water for my indoor plants?
    A: It depends! Some plants (e.g., spider plants, peace lilies) are sensitive to chemicals like chlorine. Use filtered water or let tap water sit overnight.

    Q: How do I revive a dying plant?
    A: Trim dead foliage, check for root rot, repot in fresh soil, and adjust light/water. Patience is key!

    Q: What’s the best fertilizer for indoor plants?
    A: A balanced, water-soluble fertilizer (e.g., 10-10-10) diluted to half strength. Apply monthly during spring/summer.

    Q: Can I grow herbs indoors year-round?
    A: Absolutely! Basil, mint, and rosemary thrive with 6+ hours of sunlight. Use grow lights in darker months.

    Q: How do I know if my plant is root-bound?
    A: Roots growing through drainage holes or circling the pot’s surface signal it’s time to repot.

    Q: Are coffee grounds good for indoor plants?
    A: Yes! Mix into compost for acid-loving plants like African violets or hydrangeas.

    Conclusion

    Caring for indoor plants is a journey of discovery, patience, and joy. Whether you’re nurturing a resilient snake plant or a finicky fiddle leaf fig, each plant teaches you something new. Remember, even the most experienced plant parents have faced a few casualties—it’s all part of the process!

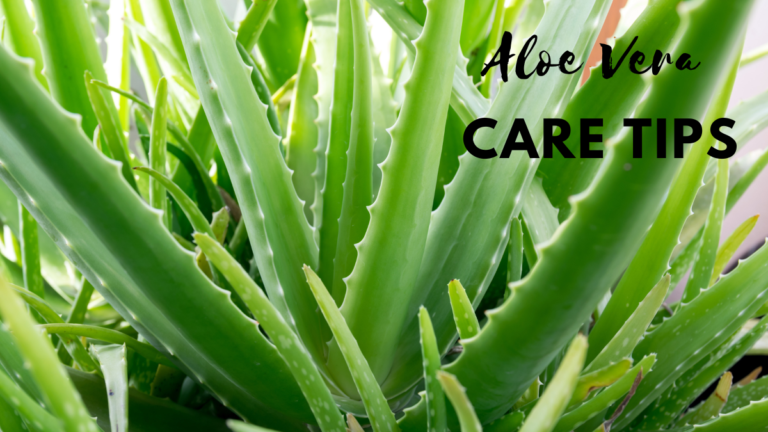
  • How to Care for Aloe Vera Plant: Expert Tips

    How to Care for Aloe Vera Plant: Expert Tips

    Aloe vera, also known as the “plant of immortality,” has been revered for centuries for its healing properties and striking beauty. Whether you’re a beginner or an experienced plant parent, learning how to care for aloe vera plant is essential to keeping it healthy and vibrant.

    This hardy succulent is not just visually appealing, but it also offers a plethora of benefits. From soothing skin burns to purifying the air, aloe vera is a versatile plant that thrives with minimal care. So, if you’re ready to embrace this amazing plant in your home or garden, keep reading for expert tips on how to keep your aloe vera plant healthy and thriving.

    Why Aloe Vera is a Perfect Plant for You

    Before diving into the specifics of how to care for aloe vera plant, let’s first take a moment to understand why aloe vera is so popular. Aloe vera is a succulent, meaning it stores water in its fleshy leaves, allowing it to survive with less frequent watering. This makes it an ideal plant for busy people, beginners, or anyone who may not have a green thumb.

    Native to the Arabian Peninsula, aloe vera is now grown all over the world. It’s a resilient plant that can handle diverse conditions but thrives in specific environments. Aloe vera’s long, spiky leaves and striking green color add a touch of elegance to any space. The gel inside its leaves has been used for centuries in skincare and medicinal treatments, making it an invaluable addition to any home.

    How to Care for Aloe Vera Plant

    1. Light Requirements for Aloe Vera

    Aloe vera plants love light, but they’re not fans of direct sunlight. Too much sunlight can cause the leaves to burn, leaving behind brown or orange spots. To ensure your aloe vera thrives, place it in a bright spot with indirect sunlight. Think of a south or west-facing window where the plant gets plenty of light, but isn’t exposed to the harsh midday sun.

    If growing aloe vera outdoors, aim for a location that gets 2-3 hours of sunlight per day. Avoid placing it in an area where it is exposed to hot afternoon rays. In fact, placing aloe vera under the shade of taller plants or next to a wall that reflects light can provide the perfect amount of indirect sunlight.

    2. Watering Aloe Vera: Less is More

    One of the most common mistakes people make when caring for aloe vera is overwatering. Aloe vera plants are drought-tolerant and can easily survive in dry soil. The key is to wait until the soil is completely dry before watering. To check, insert your finger into the soil about 2 inches deep. If it feels dry, it’s time to water. If it still feels moist, wait a few more days before checking again.

    During the warmer months, aloe vera may need watering every 7-14 days, depending on the temperature and humidity levels. In the winter, watering can be reduced to once every 3-4 weeks as the plant enters a dormant period.

    3. Choosing the Right Soil for Aloe Vera

    Aloe vera needs well-draining soil to thrive. Cactus and succulent mixes are perfect for aloe vera as they allow excess water to flow through, preventing root rot. When planting aloe vera in a pot, make sure there are drainage holes at the bottom of the pot. This ensures that water doesn’t accumulate at the bottom and keeps the roots from getting waterlogged.

    If you’re planting aloe vera outdoors, ensure the soil is sandy or gravelly and drains quickly. Aloe vera doesn’t like to sit in water, so it’s essential to plant it in a location with good drainage.

    4. Temperature Needs for Aloe Vera

    Aloe vera is relatively low-maintenance when it comes to temperature. It thrives in warm environments, typically between 59°F to 77°F (15°C to 25°C). If growing it indoors, your typical home temperature should be ideal. However, make sure to avoid placing your aloe vera near cold drafts, air conditioners, or heaters. These fluctuations can stress the plant.

    In areas with freezing temperatures, it’s essential to bring aloe vera indoors during the winter months. Aloe vera is hardy to around 28°F (-2°C), but anything colder than that can damage the plant.

    5. Potting and Repotting Aloe Vera

    When choosing a pot for your aloe vera, opt for a sturdy one with drainage holes. Concrete or ceramic pots are ideal as they’re heavy enough to prevent the plant from toppling over as it grows. Aloe vera plants can become top-heavy, especially when they’re large and mature, so it’s important to use a pot that supports its weight.

    Aloe vera doesn’t need frequent repotting, and they do well in pots that are a little snug. Typically, you can repot your aloe vera every 1-2 years or when it outgrows its pot.

    How to Propagate Aloe Vera

    Aloe vera is a plant that loves to multiply. It naturally produces offsets or “pups” that grow at the base of the mother plant. These pups can be carefully separated and repotted to grow into new aloe vera plants.

    To propagate aloe vera:

    • Gently remove the pup from the soil.
    • Let the pup dry out for a day or two to form a callus over the cut surface.
    • Plant the pup in a small pot with well-draining soil.
    • Water sparingly until the pup begins to show signs of new growth.

    Common Aloe Vera Issues and How to Solve Them

    Aloe vera is a tough plant, but like all plants, it can face a few issues from time to time. Let’s go over some common problems and their solutions:

    IssueSolution
    Yellow or Brown LeavesThis can indicate too much sunlight or overwatering. Move to a more shaded area and reduce watering.
    Soft, Mushy LeavesOften caused by overwatering. Make sure the soil dries out between waterings and check for root rot.
    Pests (e.g., Mealybugs, Aphids)Use a cotton swab dipped in rubbing alcohol to remove pests, or gently spray the plant with a hose.
    Root RotEnsure proper drainage, and never let the plant sit in water. If roots are rotting, prune them before repotting.

    Can You Use Aloe Vera Gel?

    Aloe vera gel is famous for its soothing properties, especially for skin burns and irritation. You can safely cut mature leaves from your aloe vera plant to extract the gel. Simply slice the leaf open, and scoop out the gel inside. This gel can be applied directly to minor burns, cuts, or insect bites.

    Important Note: While the gel is safe for external use, it’s not recommended to consume the gel. It can be mildly toxic to humans and pets if ingested.

    Benefits of Aloe Vera Plant

    Aloe vera is not just a decorative houseplant – it offers several health and wellness benefits, such as:

    • Natural Skin Care: Aloe vera gel is known for its ability to hydrate and heal the skin. It can help reduce the appearance of scars and promote wound healing.
    • Air Purification: Like many houseplants, aloe vera helps purify the air by removing toxins and producing oxygen.
    • Medicinal Uses: Aloe vera has been used in traditional medicine for centuries to treat digestive issues, skin problems, and inflammation.

    Pros and Cons of Aloe Vera Plant Care

    ProsCons
    Low-maintenance, perfect for busy peopleSensitive to overwatering
    Can be used for skin treatments and first aidNeeds bright light, but not direct sun
    Ideal for both indoor and outdoor gardeningCan be toxic to pets if ingested
    Helps purify the airLeaves can become heavy as the plant matures
    Drought-tolerant, doesn’t require frequent wateringNeeds well-draining soil to avoid root rot

    Conclusion: Growing Aloe Vera Made Easy

    Caring for an aloe vera plant doesn’t have to be complicated. With just a little attention to light, water, and soil, you can enjoy a thriving aloe vera plant that brings both beauty and health benefits to your space. By following these simple tips, you’ll ensure that your aloe vera thrives, whether it’s growing in your home, garden, or as a decorative piece in your living room.

    So, if you’re looking for a plant that’s stylish, easy to maintain, and beneficial to your health, aloe vera is the perfect choice. Start small, follow these tips, and watch your aloe vera flourish into a beautiful and functional plant.

  • Ultimate Spider Plant Care Guide

    Ultimate Spider Plant Care Guide

    Spider plants are among the most beloved houseplants, adored for their low maintenance, attractive foliage, and easy-going nature. Whether you’re a beginner or a seasoned plant enthusiast, caring for a spider plant is both rewarding and simple. Known for their ability to thrive on minimal attention, these plants are perfect for busy individuals or anyone who might struggle to remember plant care routines. In this detailed guide, we’ll cover everything you need to know about spider plant care, ensuring your plant thrives in your home or office.

    Why Spider Plants are So Popular

    Spider plants, or Chlorophytum comosum, are well-known for their charming appearance and health benefits. They are versatile, adaptable, and resilient, making them an excellent choice for nearly any space. Unlike many plants that require consistent pampering, spider plants thrive on neglect. They are known for being beginner-friendly, easy to propagate, and safe for pets, making them a must-have for any plant lover.

    But what exactly makes them stand out among other indoor plants?

    • Low-maintenance: These plants don’t need constant care. They require occasional watering, light, and a bit of fertilizing during their growing season. That’s about it.
    • Air-purifying qualities: Spider plants have been shown to remove harmful toxins from indoor air, improving your environment.
    • Pet-friendly: Unlike many popular houseplants, spider plants are non-toxic to cats, dogs, and other pets.

    In this article, we’ll dive into spider plant care, covering everything from watering and light needs to propagation tips and dealing with pests. By the end of this guide, you’ll be a spider plant expert!

    Spider Plant Care: Key Factors to Keep in Mind

    Let’s explore the essential components of caring for your spider plant, ensuring it remains healthy and vibrant.

    1. Watering Your Spider Plant

    Spider plants are relatively tolerant when it comes to watering. However, they do prefer their soil to remain slightly moist. Here’s a quick breakdown of how to water your spider plant properly:

    • Frequency: During the warmer months (spring and summer), water your spider plant about once a week. In the cooler months (fall and winter), you can reduce the watering frequency.
    • How to Check: Stick your finger about two inches into the soil. If it feels dry, it’s time to water. Avoid overwatering, as it can lead to root rot.
    • Water Quality: If possible, use distilled or rainwater for your plant. Spider plants are sensitive to fluoride and chlorine in tap water, which can cause browning on the tips of the leaves.

    Pro Tip: Keep a consistent watering schedule but avoid letting the plant sit in water, as this can cause root rot.

    2. Lighting Conditions for Spider Plants

    While spider plants are forgiving when it comes to lighting, they do thrive best in bright, indirect light. Here’s what you need to know:

    • Ideal Light: Place your spider plant near a window where it receives indirect light. Avoid direct sunlight, as this can scorch the leaves.
    • Low Light: Although spider plants tolerate low light conditions, they will grow slower and may not produce as many plantlets.
    • Signs of Too Much Sun: If the tips of the leaves start to turn brown, your plant might be getting too much direct sunlight.

    3. Temperature and Humidity Requirements

    Spider plants are tropical plants, so they prefer warmer temperatures and a moderate level of humidity. Here’s the lowdown:

    • Ideal Temperature: Spider plants thrive in temperatures between 60°F and 75°F (16°C to 24°C). Protect them from drafts and avoid placing them in areas with temperatures below 50°F (10°C).
    • Humidity Needs: These plants enjoy moderate humidity levels, ideally between 40% and 60%. If your home is dry, consider placing your spider plant on a humidifier tray or grouping it with other plants to increase the humidity.

    4. Fertilization: Do Spider Plants Need Extra Nutrients?

    Spider plants do benefit from occasional feeding, but they don’t require a lot of fertilizer. Here’s how to go about it:

    • Frequency: Fertilize your spider plant once a month during its active growing period (spring and summer).
    • Type of Fertilizer: Use a balanced liquid fertilizer or an all-purpose plant food. Be careful not to over-fertilize, as this can result in brown tips and weak growth.
    • Winter Dormancy: During the colder months, when your plant enters a semi-dormant state, avoid fertilizing.

    5. Pruning and Maintenance

    Although spider plants are low-maintenance, a little bit of attention can go a long way in keeping your plant healthy and looking its best. Here’s how to prune and maintain it:

    • Remove Dead Leaves: As your spider plant grows, it’s normal for some leaves to turn brown or yellow. Simply snip them off at the base.
    • Trimming Plantlets: If you notice a lot of “spidettes” (the small offshoots of the plant), you can trim them to redirect the plant’s energy to the main plant.

    Propagation: How to Grow More Spider Plants

    One of the best things about spider plants is how easy they are to propagate. If you’re looking to expand your collection or share the love, here’s how you can do it:

    1. When to Propagate: Wait until the spidettes have long roots (about 1-2 inches) before cutting them off.
    2. Potting the Plantlets: Place the rooted spidettes in well-draining soil and keep the soil moist (but not soggy) until the plant becomes established.
    3. Alternative Method (without roots): If the plantlets haven’t formed roots, place them in a small pot with moist soil. Once they develop roots, cut them off and repot them.

    Common Issues with Spider Plants and How to Fix Them

    Despite their hardiness, spider plants can face a few common problems. Below, we address some of these issues and offer solutions:

    ProblemSolution
    Browning Leaf TipsOften caused by over-fertilizing, fluoride, or too much sun. Move plant to indirect light and use filtered water.
    Leggy GrowthCut back plantlets to redirect energy to the main plant or repot if root-bound.
    Yellowing LeavesMay indicate overwatering. Ensure good drainage and water only when soil is dry.
    Pests (Aphids, Mites)Rinse the plant with water, or use neem oil or insecticidal soap for severe infestations.

    FAQs about Spider Plant Care

    Q1: How often should I water my spider plant?
    A1: Water your spider plant once a week during warmer months. In cooler months, reduce watering but keep the soil moist.

    Q2: Can spider plants grow in low light?
    A2: Yes, spider plants tolerate low light but grow better with indirect light. Avoid direct sunlight, which can burn the leaves.

    Q3: What’s the best way to propagate a spider plant?
    A3: Cut the plantlets once they have developed roots and pot them in moist soil. Alternatively, place the plantlet in a new pot to allow roots to grow before snipping.

    Q4: Are spider plants safe for pets?
    A4: Yes, spider plants are non-toxic to pets, making them a great choice for households with animals.

    Conclusion: A Plant That’s Here to Stay

    Spider plants continue to be a favorite in homes and offices for good reason. Their easy-going nature, coupled with their air-purifying qualities, makes them the perfect plant for any space. With simple care tips like occasional watering, avoiding direct sunlight, and occasional pruning, your spider plant can thrive for years.

    Whether you’re a new plant owner or a seasoned gardener, the spider plant offers a wonderful opportunity to add greenery and life to your environment. The best part? You don’t have to be an expert to keep it thriving. Just follow the tips in this guide, and your spider plant will reward you with lush, vibrant foliage and even new plantlets to propagate. Happy planting!

  • Money Tree Plant How to Care: Complete Guide

    Money Tree Plant How to Care: Complete Guide

    The Money Tree plant, also known as Pachira aquatica, is an exquisite indoor plant that has become a popular choice for adding a tropical touch to homes and offices. Its unique braided trunk and glossy green leaves give it a palm-like appearance, making it a visually striking addition to any space. Native to Central and South America, the Money Tree is also widely recognized in East Asian cultures, particularly in Taiwan, where it is believed to bring good luck and positive energy according to Feng Shui principles.

    In this guide, we’ll walk you through everything you need to know about money tree plant how to care, from watering and sunlight needs to pruning and propagation. Whether you’re a seasoned plant enthusiast or a beginner, this easy-to-follow guide will help your Money Tree thrive.

    1. Introduction to the Money Tree

    The Money Tree is more than just a houseplant—it’s a symbol of good fortune, positive energy, and prosperity. Whether you’re interested in its Feng Shui benefits or its ability to add greenery to your home, the Money Tree is sure to bring charm and vibrance to any room. With its fast growth rate (up to 24 inches a year) and easy-to-care-for nature, it’s an excellent choice for both beginner gardeners and experienced plant lovers alike.

    As the plant matures, it can reach impressive heights of 6 to 8 feet. It’s a forgiving plant that thrives with minimal care, as long as you meet its basic requirements. Now, let’s dive into the specifics of money tree plant how to care and ensure it remains healthy and happy.

    2. Why Should You Care for a Money Tree?

    Taking care of your Money Tree plant isn’t just about having a pretty plant in your home. It’s about providing the right conditions for it to flourish and bring positive energy into your life. Many people believe that having a Money Tree in their home can help attract wealth and success, as it’s often seen as a symbol of good fortune. Additionally, this plant is known for its stress-relieving qualities, making it a great addition to any room where relaxation and calmness are essential.

    Health Benefits:

    • Stress Reduction: Spending time with plants, including Money Trees, has been linked to lowered stress levels.
    • Air Purification: Like many indoor plants, the Money Tree helps purify the air by absorbing carbon dioxide and releasing oxygen.

    3. Essential Money Tree Care Tips

    Proper care is essential to keeping your Money Tree healthy. Here are the main care requirements for this resilient plant:

    Light Requirements

    Money Trees thrive in bright, indirect sunlight. This helps the plant grow strong and healthy. However, too much direct sunlight can scorch the leaves and cause them to turn yellow or brown. Place your Money Tree near a window with filtered light or use grow lights if natural sunlight is insufficient.

    If you have limited light, the Money Tree can tolerate medium light, but its growth may slow down.

    Soil Preferences

    A Money Tree needs a well-draining potting mix. The ideal mix should be peat-moss-based or a cactus soil mix to provide excellent drainage. This helps avoid the risk of root rot, a common problem when the roots are left sitting in water. You can also add perlite to the mix to further improve drainage.

    Watering Guidelines

    Watering is one of the most crucial aspects of caring for your Money Tree. These plants prefer to be kept evenly moist, but not soggy. You should water when the top inch of the soil feels dry to the touch. During the growing season (spring and summer), you’ll need to water more frequently. In the fall and winter, reduce watering to avoid overwatering.

    Always ensure that the pot has drainage holes to prevent water from collecting at the bottom.

    Temperature and Humidity

    Money Trees thrive in temperatures between 65°F and 75°F (18°C to 24°C). They should be kept away from drafts, hot air vents, and cold windows. In terms of humidity, Money Trees appreciate moisture but can tolerate average household humidity levels. If the air in your home is very dry, you can increase humidity by placing your plant on a pebble tray with water or using a room humidifier.

    Fertilization Needs

    To encourage strong growth, fertilize your Money Tree once a month during the growing season in spring and summer. A balanced, general-purpose liquid fertilizer diluted to half strength works well. Avoid fertilizing in the fall and winter, as the plant’s growth slows during these months.

    4. How to Braid a Money Tree

    The braided trunk of the Money Tree is one of its most distinguishing features. Here’s how you can create a beautiful braided trunk:

    1. Select Healthy Stems: Choose young, flexible stems that are at least 12 inches long.
    2. Loosely Braid the Stems: Carefully braid the stems together without pulling too tightly, as this could harm the plant.
    3. Tie the End: Use a twist tie or string to secure the braid.
    4. Repot the Tree: After braiding, repot the Money Tree and stabilize it with a stake if needed.
    5. Let It Recover: Place the braided plant in a partially shaded area for a month to help it recover from the stress of braiding.

    5. How to Propagate Your Money Tree

    Propagating a Money Tree is simple and can be done through stem cuttings. Here’s how:

    1. Choose a Healthy Stem: Take a cutting that’s at least 4 inches long, making sure it has a couple of nodes.
    2. Place in Water: Put the cutting in a jar of water, ensuring that the nodes are submerged.
    3. Wait for Roots to Form: After a few weeks, the cutting will begin to root.
    4. Pot the Cutting: Once the cutting has established roots, pot it in a well-draining soil mix.

    6. Potting and Repotting Your Money Tree

    Money Trees need space to grow, so they should be repotted every couple of years. When repotting, use a pot that’s one size larger than the current one, and ensure it has adequate drainage. If you want to keep your plant small, you can avoid repotting it too frequently.

    7. Common Pests and DiseasesWhile Money Trees are generally resilient, they can be prone to a few pests:

    • Mealybugs: These pests can be controlled with insecticidal soap or neem oil.
    • Scale: These pests attach themselves to the plant’s stem and leaves. Treat them with horticultural oil.

    8. Troubleshooting Common Problems

    Problem: Yellow or Brown Leaves
    Cause: This can be a sign of overwatering or underwatering. Check the soil moisture and adjust watering as needed.

    Problem: Leggy Plant
    Cause: Insufficient light can lead to a leggy appearance. Move your plant to a brighter spot.

    Problem: Soft, Mushy Stems
    Cause: Overwatering can cause the stems to become mushy. Ensure your plant has proper drainage and reduce watering frequency.

    9. Money Tree FAQs

    How long do Money Trees live?

    With proper care, a Money Tree can live for a decade or more.

    Does the Money Tree flower?

    Money Trees only flower when grown outdoors in their native environment. Indoors, they do not bloom, as they require pollination by bats.

    Can I put my Money Tree outside?

    Yes, you can move your Money Tree outdoors during the summer, but ensure nighttime temperatures don’t fall below 50°F. Gradually acclimate the plant to outdoor conditions.

    10. Conclusion

    Caring for a Money Tree is relatively simple, and with the right attention to its light, soil, and watering needs, it can grow into a thriving, long-lasting plant. Not only does it enhance the beauty of your indoor space, but it’s also believed to bring positive energy and good fortune. By following the tips outlined in this guide, you can enjoy the benefits of this gorgeous plant for years to come.

    Pros and Cons of Money Tree Care

    ProsCons
    Easy to care for, perfect for beginnersSusceptible to root rot if overwatered
    Attractive, with a unique braided trunkCan grow tall and may need repotting
    Believed to bring good luck and positive energyCan attract pests like mealybugs and scale
    Tolerates medium light and dry airNeeds proper humidity in dry environments
    Helps reduce stress and purifies the airCan become leggy if not given enough light

    By following these simple care tips and addressing any common issues that arise, you’ll be well on your way

    to ensuring your Money Tree thrives in your home. Happy gardening!