Author: jan

  • Easy Steps for Setting Up a Compost Bin in Your Apartment

    Easy Steps for Setting Up a Compost Bin in Your Apartment

    Composting is a simple yet transformative process that turns everyday organic waste into a nutrient-rich mixture, perfect for enhancing soil health and promoting plant growth. By utilizing both green waste, such as fruit peels, vegetable scraps, and coffee grounds, and brown waste, like dry leaves, cardboard, and newspaper, you can create a sustainable cycle of waste reduction and soil enrichment. The key to successful composting lies in choosing the right DIY compost bin that suits your space and needs.The choice of materials for your DIY compost bin can significantly influence its effectiveness and ease of use. Common materials include pallets, wire fencing, plastic totes, trash bins, straw bales, buckets, and even barrels for creating compost tumblers. Each material offers distinct advantages, allowing you to customize your compost bin to fit your specific requirements and available space.

    1. 5-Gallon Bucket Compost Bin: Compact and Efficient

    For those with limited space, a 5-gallon bucket compost bin is an excellent choice. This compact solution is perfect for small yards or apartments and requires minimal investment. To create this bin, gather a couple of five-gallon buckets, a drill, shredded paper, kitchen scraps, and worms. The process is straightforward, taking less than an hour to complete. This method not only saves space but also provides an efficient way to manage organic waste.

    2.Trash Can Compost Bin: A Budget-Friendly Option

    Transforming a trash can into a compost bin is an easy and economical way to start composting. This method is ideal for beginners and requires only a plastic trash can with a lid and a few additional materials. The entire project can be completed in under an hour, making it a quick and accessible option for those looking to reduce food waste and create nutrient-rich compost.

    3.Pallet Compost Bin: Durable and Cost-Effective

    For a more permanent composting solution, consider building a pallet compost bin. This option is both affordable and durable, providing a designated area for composting without breaking the bank. By using wood pallets and some basic hardware, you can construct a sturdy compost bin that will last for years. This method is perfect for those who want a reliable and long-lasting composting solution.

    4.Wooden Compost Bin: Sturdy and Long-Lasting

    If you’re serious about composting and want a bin that will withstand the elements, a wooden compost bin is an excellent choice. This DIY project involves using cut lumber and a hinged lid to create a robust and functional compost bin. Features like hardware cloth for air circulation and hinged access to the bottom of the bin make it easy to manage and harvest finished compost.

    5.Wire Fence Compost Bin: Simple and Adaptable

    A wire fence compost bin is one of the most inexpensive and adaptable options available. By using chicken wire and posts, you can create a secure composting area that can be easily adjusted to fit your space. This method is ideal for those who want a flexible and cost-effective composting solution.

    6.Tote Compost Bin: Kid-Friendly and Easy to Build

    A plastic tote can be transformed into a compost bin with just a few simple modifications. By drilling holes in the tote to promote air circulation, you can create an effective composting system that is low to the ground and perfect for involving children in the composting process. This method is straightforward and requires minimal materials, making it an excellent choice for families.

    7.Straw Bale Compost Bin: Natural and Insulating

    Using straw bales to create a compost bin is a natural and customizable option. This method allows you to adjust the size of your compost pile as needed and provides insulation to speed up the composting process. As the straw breaks down, it can be incorporated into the compost, adding additional nutrients to the mixture.

    8.DIY Rotating Compost Bin Tumbler: Efficient and Odor-Controlled

    A DIY compost tumbler is an efficient way to manage compost, allowing you to easily turn the pile and control odors. By using an old barrel and some sawhorses, you can create a rotating compost bin that ensures even decomposition. This method is perfect for those who want a hands-on approach to composting and are willing to invest a little extra effort.

    9.Plastic Storage Container Compost Bin: Rodent-Proof and Practical

    For those concerned about pests, a plastic storage container compost bin offers a rodent-proof solution. By reinforcing the container with wire mesh or hardware cloth, you can keep unwanted visitors out while still allowing for proper air circulation. This method is practical and effective, providing a secure environment for composting.

    10.In-Ground Compost Method: Simple and Direct

    The in-ground compost method is a straightforward approach that requires minimal materials and effort. By digging a hole in your garden and adding compostable materials directly into it, you can enrich the soil without the need for a traditional compost bin. This method is ideal for those who want a quick and easy way to improve soil quality and support plant growth. Simply cover the composting materials with soil, and over time, they will decompose and nourish the surrounding plants.

    11.Trench Composting: Ideal for Row Gardens

    Trench composting is an extension of the in-ground method, particularly beneficial for gardens with rows of plants. By digging a trench alongside your plants and filling it with compostable materials, you create a nutrient-rich environment that supports healthy plant development. This method is especially useful in vegetable gardens, where crops are often planted in evenly spaced rows. Once the trench is filled, cover it with soil, and let nature take its course.

    12.Hot Composting: Accelerated Decomposition

    Hot composting is a technique that optimizes microbial activity to speed up the decomposition process. By creating a compost bin that is at least 4 feet by 4 feet and positioning it in full sun, you can generate the heat necessary for rapid composting. This method requires more effort and attention, such as regular turning and monitoring of moisture levels, but results in faster compost production. It’s ideal for those who need compost quickly and are willing to invest the time to maintain the pile.

    13.Old Dresser Drawer: Creative Indoor Composting

    For those unable to compost outdoors, repurposing an old dresser drawer offers a creative indoor composting solution. By covering the top with a hinged piece of wood or heavy fabric, you can create a compact composting vessel that fits easily in small spaces. This method is perfect for apartment dwellers or anyone looking to compost on a smaller scale. Ensure proper ventilation and moisture control to prevent odors and promote effective decomposition.

    14.Bokashi Bucket: Microorganism-Driven Composting

    Bokashi composting is a unique method that uses microorganisms to quickly break down organic materials. While bokashi kits are available for purchase, you can easily make your own composter using two 5-gallon buckets and a drill. Drill holes in the bottom of one bucket, place it inside the other, and add your composting materials along with bokashi bran. This method is efficient and effective, providing a fast way to produce compost even in limited spaces.

    15.DIY Compost Screen: Refining Your Compost

    Regardless of the type of compost bin you use, a DIY compost screen can help you refine your compost by sifting out large chunks that haven’t fully decomposed. By constructing a simple frame out of lumber and attaching hardware cloth, you can create a practical tool for ensuring your compost is ready for use in the garden. This step is crucial for achieving a fine, crumbly texture that is easy to incorporate into soil.

    Tips for Successful Composting

    To make the most of your DIY compost bin, it’s important to understand the basics of composting. Start by including the right materials, such as crushed eggshells, grass clippings, coffee grounds, and vegetable peels. Avoid adding meat, seafood, dairy products, and other items that can attract pests or disrupt the composting process. Maintain a proper balance of green and brown materials, and layer them correctly to promote efficient decomposition. Additionally, consider the benefits of hot versus cold composting and decide which method best suits your needs.

    Pros and Cons of DIY Compost Bins

    ProsCons
    Cost-effectiveRequires time and effort
    CustomizableMay attract pests if not managed properly
    Reduces wasteNeeds regular maintenance
    Improves soil qualitySpace limitations for some methods

    FAQs

    How often should compost be turned?

    For actively decomposing materials, turn the compost every three to four days. For tumblers, turning twice a week is recommended for optimal results.

    How long does it take to make compost in a 5-gallon bucket?

    If properly maintained and kept moist, compost in a 5-gallon bucket can be ready in about six weeks.

    Do you water compost every day?

    No, daily watering is not necessary. However, in hot and dry weather, more frequent watering may be required to maintain moisture levels.

    Conclusion

    Creating a DIY compost bin is a rewarding endeavor that not only reduces waste but also enriches your garden soil. By choosing the right materials and method for your space and needs, you can efficiently transform organic waste into valuable compost. Whether you opt for a simple in-ground method or a more complex rotating tumbler, the benefits of composting are clear: healthier plants, improved soil, and a more sustainable lifestyle. Embrace the art of composting and watch your garden thrive.

  • 5 Methods Indoor Hydroponic System

    5 Methods Indoor Hydroponic System

    Introduction: The Rise of Indoor Hydroponic Systems

    In recent years, the indoor hydroponic system has emerged as a revolutionary method for cultivating plants, especially for those living in urban environments with limited space. This innovative approach to gardening allows enthusiasts to grow a variety of plants, from leafy greens to aromatic herbs, without the need for traditional soil. By leveraging hydroponic gardening indoor, individuals can enjoy fresh produce all year round, making it an ideal solution for apartment dwellers and those without access to outdoor gardens.

    Understanding Hydroponic Gardening

    Hydroponic gardening is a method of growing plants using a nutrient-rich water solution instead of soil. The term “hydroponics” is derived from the Greek words “hydro,” meaning water, and “ponos,” meaning labor, highlighting the role of water in this gardening technique. This system offers several advantages over traditional soil-based gardening, including faster plant growth and greater control over environmental conditions. By utilizing an indoor hydroponic garden, gardeners can cultivate plants in a controlled environment, free from the challenges posed by outdoor weather conditions.

    How Indoor Hydroponic Systems Work

    At the core of an indoor hydroponic system is the delivery of essential nutrients directly to the plant roots through water. This method eliminates the need for soil, allowing nutrients to be absorbed more efficiently. The absence of soil also reduces the risk of pests and diseases, making hydroponic indoor gardens a cleaner and more sustainable option. By using various growing mediums such as vermiculite, perlite, or coconut coir, gardeners can provide additional support to the plants while ensuring optimal nutrient absorption.

    Benefits and Challenges of Hydroponic Systems

    Higher Yield: Hydroponic systems often result in higher yields compared to traditional gardening methods, as plants receive nutrients directly and consistently.

    • Space Efficiency: Plants can be grown closer together, making it ideal for small spaces.
    • Water Conservation: Hydroponic systems use less water than conventional gardening, as water is recirculated and reused.
    • Year-Round Growth: Indoor hydroponic gardens can be maintained throughout the year, regardless of external weather conditions.

    Challenges:

    • Initial Cost: Setting up a hydroponic system can be expensive, requiring investment in equipment and materials.
    • Learning Curve: Beginners may need to educate themselves on the intricacies of hydroponic gardening to ensure success.
    • Maintenance: Regular monitoring is necessary to maintain the system’s functionality and prevent issues such as waterborne diseases.
    • Vulnerability: Without soil, plant roots are more exposed and may require additional care to prevent damage.

    Best Plants for Indoor Hydroponic Gardens

    While almost any plant can be grown hydroponically, certain varieties thrive particularly well in an indoor hydroponic garden. Leafy greens such as lettuce, spinach, Swiss chard, and kale are excellent choices for beginners, providing a continuous supply of fresh produce. Herbs like basil, parsley, oregano, cilantro, and mint are also well-suited for hydroponic systems, offering a convenient way to enhance culinary creations. For those with more space, fruiting plants such as tomatoes, strawberries, and hot peppers can be successfully cultivated indoors.

    Building Your Indoor Hydroponic System

    Creating an indoor hydroponic system involves selecting the right setup based on your gardening goals and available space. Here are some popular systems to consider:

    1. Wick System

    Overview: The wick system is a passive hydroponic method, meaning it doesn’t require pumps or electricity. It’s ideal for beginners due to its simplicity and low cost. This system uses a wick to draw nutrient solution from a reservoir to the plant roots.

    Detailed Setup:

    1. Materials Needed:
      • A container or basin for the water reservoir.
      • Hydroponic fertilizer (liquid or dry).
      • Cotton or nylon wicks.
      • A growing tray with holes for the wicks.
      • A growing medium (e.g., vermiculite, perlite).
      • Seedlings.
    2. Prepare the Reservoir:
      • Fill the reservoir with water and mix in the hydroponic fertilizer according to the instructions. The reservoir should be placed below the growing tray to allow the wicks to draw up the solution.
    3. Connect the Wicks:
      • Insert one or more wicks through the holes in the bottom of the growing tray. The wicks should be long enough to reach the bottom of the reservoir and extend into the growing medium.
    4. Set Up the Growing Tray:
      • Fill the tray with the growing medium, ensuring it can effectively utilize the capillary action of the wick. Plant your seedlings in the medium, making sure the roots are in contact with the wick.
    5. Lighting:
      • If natural light is insufficient, set up a light fixture above the growing tray. Incandescent bulbs should be placed 24 inches away, while LED and fluorescent lights can be closer.

    Advantages:

    • Simple and inexpensive to set up.
    • No moving parts, reducing the risk of mechanical failure.

    Limitations:

    • Not suitable for water-intensive plants like tomatoes or lettuce.
    • Limited nutrient delivery speed compared to active systems.

    2. Water Culture (Lettuce Raft) System

    Overview: The water culture system, also known as the lettuce raft system, involves floating plants on a Styrofoam platform above a nutrient solution. It’s particularly effective for growing fast-growing, water-loving plants like lettuce.

    Detailed Setup:

    1. Materials Needed:
      • An opaque container for the reservoir.
      • Hydroponic fertilizer.
      • An air stone and pump for aeration.
      • A Styrofoam sheet for the raft.
      • Net pots and a growing medium.
      • Seedlings.
    2. Set Up the Reservoir:
      • Fill the container with water and add the appropriate amount of fertilizer. The container should be at least 12 inches deep to allow for root growth.
    3. Aerate the Water:
      • Place an air stone in the reservoir and connect it to an air pump. The air stone will create bubbles, distributing oxygen throughout the solution, which is crucial for root health.
    4. Create the Growing Raft:
      • Cut the Styrofoam sheet to fit the top of the reservoir. Cut holes in the sheet to hold the net pots. The net pots should contain seedlings and a growing medium, with roots extending into the nutrient solution.
    5. Lighting:
      • If using artificial light, position the fixture above the growing tray, following the same guidelines as the wick system.

    Advantages:

    • Simple and effective for leafy greens.
    • Provides excellent oxygenation to roots.

    Limitations:

    • Limited to plants with short growth cycles.
    • Not suitable for larger or long-lived plants.

    3. Ebb and Flow System

    Overview: The ebb and flow system, also known as the flood and drain system, periodically floods the plant roots with a nutrient solution before draining it back into the reservoir. This system is versatile and suitable for a wide range of plants.

    Detailed Setup:

    1. Materials Needed:
      • A reservoir for the nutrient solution.
      • Hydroponic fertilizer.
      • A submersible pump with a timer.
      • Fill and drain tubes.
      • A flood tray and stand.
      • Perforated pots and a growing medium.
      • Seedlings.
    2. Prepare the Reservoir:
      • Place the reservoir directly below the flood tray stand and fill it with water and fertilizer. The reservoir should be large enough to accommodate the volume of the flood tray.
    3. Connect Tubes:
      • Attach a fill tube to the submersible pump, which will control the flow of water into the flood tray. Connect a drain tube to allow water to return to the reservoir after flooding.
    4. Set Up the Flood Tray:
      • Position the flood tray on a stand above the reservoir. Plant seedlings in perforated pots filled with a growing medium, ensuring the pots are deep enough for the tray.

    4. Nutrient Film Technique (NFT)

    1. Overview: The Nutrient Film Technique is a popular hydroponic system that involves a continuous flow of nutrient solution over the roots of plants, which are suspended in a channel. This method is efficient and ideal for fast-growing, shallow-rooted plants like lettuce and herbs.
    2. Detailed Setup:
    3. Materials Needed:
      • A reservoir for the nutrient solution.
      • Hydroponic fertilizer.
      • A submersible pump.
      • Fill and drain tubes.
      • Channels or tubes for the growing tray.
      • Net pots and a growing medium.
      • Seedlings.
      • An aeration bubbler (optional for additional oxygenation).
    4. Prepare the Reservoir:
      • Place the reservoir below the growing tray and fill it with water and the appropriate amount of fertilizer. Adding an aeration bubbler can help oxygenate the water, although the continuous flow typically provides sufficient oxygen.
    5. Connect Tubes and Pump:
      • Attach a fill tube to the submersible pump, which will circulate the nutrient solution through the channels. Connect a drain tube to return the solution to the reservoir, allowing for continuous recirculation.
    6. Set Up the Growing Tray:
      • Use channels or tubes as the growing tray, ensuring they are slightly angled to allow the nutrient solution to flow over the roots. Drill holes in the channels to fit the net pots or seedlings.
    7. Install Lighting (Optional):
      • If natural light is insufficient, set up a light fixture above the growing tray. Position incandescent bulbs 24 inches away, while LED and fluorescent lights can be closer.
    8. Advantages:
    9. Efficient use of water and nutrients.
    10. Continuous flow provides consistent nutrient delivery.
    11. Suitable for a variety of fast-growing plants.
    12. Limitations:
    13. Requires careful monitoring to prevent pump failure.
    14. Not ideal for large or heavy plants due to limited root support.

    5. Aeroponic System

    1. Overview: The aeroponic system is an advanced hydroponic method where plant roots are suspended in air and misted with a nutrient solution. This system offers rapid growth and high efficiency but requires precise equipment and maintenance.
    2. Detailed Setup:
    3. Materials Needed:
      • A reservoir for the nutrient solution.
      • Hydroponic fertilizer.
      • A submersible pump.
      • Tubing and misting nozzles or sprayers.
      • A growing chamber or tubes for root suspension.
      • Net pots and a growing medium.
      • Seedlings.
      • An aeration bubbler (optional for additional oxygenation).
    4. Prepare the Reservoir:
      • Fill a container with fertilizer-enriched water and place it beneath the growing chamber. Adding an aeration bubbler can help oxygenate the water, although the misting process typically provides sufficient oxygen.
    5. Connect the Pump and Misting System:
      • Attach a submersible pump to tubing that leads to misting nozzles or sprayers. These nozzles should be positioned to evenly mist the plant roots within the growing chamber.
    6. Set Up the Growing Chamber:
      • Use a chamber or tubes to suspend the plant roots. Ensure the roots are exposed to the misting nozzles and that excess solution can drain back into the reservoir.
    7. Install Lighting (Optional):
      • If natural light is insufficient, set up a light fixture above the growing chamber. Position incandescent bulbs 24 inches away, while LED and fluorescent lights can be closer.
    8. Advantages:
    9. Highly efficient nutrient delivery and oxygenation.
    10. Promotes rapid plant growth.
    11. Minimal water usage compared to other systems.
    12. Limitations:
    13. Requires precise equipment and regular maintenance.
    14. Vulnerable to equipment failure, which can quickly harm plants.
    15. Higher initial setup cost compared to simpler systems.
    16. Each of these hydroponic systems offers unique benefits and challenges, making them suitable for different types of plants and gardening goals. By understanding the setup and operation of each system, you can choose the one that best fits your needs and enjoy the rewards of indoor hydroponic gardening.

    Conclusion: Embracing the Future of Gardening

    Indoor hydroponic systems represent a paradigm shift in how we approach gardening and food production. By harnessing the power of water and nutrients, these systems offer a practical and efficient way to grow plants in any environment. Whether you’re a city dweller with limited space or a gardening enthusiast looking to explore new techniques, hydroponics provides a versatile and rewarding solution. Embrace the possibilities of indoor hydroponic gardening and discover the joy of cultivating a thriving garden right in your own home.

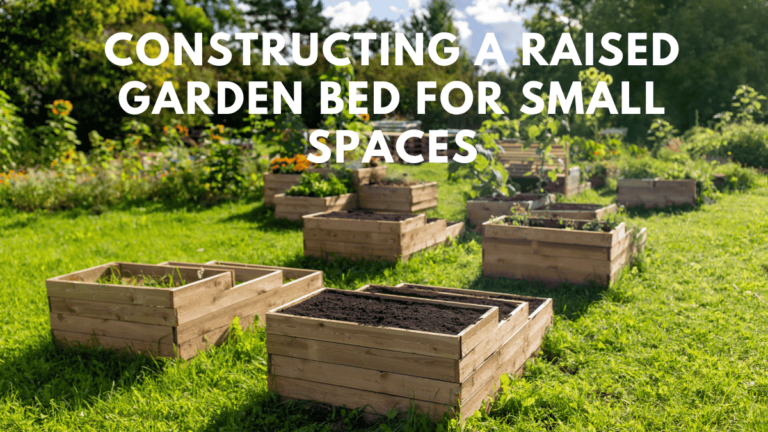
  • How to Constructing a Raised Garden Bed for Small Spaces

    How to Constructing a Raised Garden Bed for Small Spaces

    Introduction

    When it comes to enhancing your garden and growing your own food, building a raised garden bed is one of the most effective solutions. A raised garden bed allows you to grow a variety of plants in controlled conditions, even if you don’t have the ideal soil in your backyard. If you’ve ever wondered how to make a raised garden bed, this guide is for you.

    In this comprehensive article, we will explore everything you need to know about raised garden beds—why they are beneficial, how to build them, and what materials work best. Whether you’re a beginner or an experienced gardener, you will find valuable insights, tips, and step-by-step instructions that will guide you through creating the perfect DIY raised garden bed. We’ll also touch on the importance of using recycled materials, ensuring your project is not only efficient but also eco-friendly.

    Why Build a Raised Garden Bed?

    Raised garden beds, also known as planter boxes, are more than just a functional gardening solution—they are a beautiful addition to any garden space. When designed correctly, they offer various advantages over traditional gardening, particularly in urban settings or areas with poor soil conditions. Raised beds provide better drainage, easier access to your plants, and less stress on your back. Moreover, you have more control over the soil quality, which is crucial for ensuring healthy plant growth.

    One of the key benefits of using raised garden beds is the ability to create the perfect soil conditions. Instead of working with heavy, clay-like, or rocky soil, you can fill your raised bed with nutrient-rich compost, loamy soil, or a custom blend that is tailored to the plants you want to grow. Additionally, raised beds can help reduce weed growth and protect plants from pests, especially when combined with barriers like hardware cloth and landscape fabric.

    For those new to gardening, the ergonomics of raised beds make gardening more accessible and less physically demanding. Raised beds eliminate the need to bend down to ground level, making planting, weeding, and harvesting much more comfortable.

    The Cost of Building Raised Garden Beds

    The cost of building a raised garden bed can vary depending on the size of the bed, the materials you choose, and the tools required. On average, constructing a raised garden bed can cost anywhere between $100 to $300. This includes the cost of lumber, screws, soil, and optional features such as hardware cloth for pest prevention.

    The price fluctuates based on the materials you choose. For example, if you opt for high-quality, durable wood like cedar or redwood, the cost may be on the higher end. On the other hand, if you choose more affordable options like pine or fir, the cost will be significantly lower. Additionally, local soil delivery can also impact the cost, especially if you choose to fill multiple beds at once.

    Selecting the Right Location for Your Raised Garden Bed

    Choosing the right location for your raised garden bed is crucial to the success of your garden. Most vegetables thrive in full sun, so it’s essential to choose a spot that receives at least 6 to 8 hours of direct sunlight per day. Avoid placing your raised bed in areas shaded by trees, fences, or structures unless they face south and won’t block the sunlight.

    If you’re uncertain about the sunlight patterns, it can be helpful to observe the space for a full year. You can also use sun-tracking apps to plan the ideal placement for your garden. Keep in mind that the sun’s path changes with the seasons, so positioning your raised bed carefully is crucial for year-round gardening success.

    Planning Your Raised Garden Bed Layout

    The layout of your raised garden bed plays an important role in optimizing space and ensuring that your plants receive adequate sunlight. In the northern hemisphere, it’s ideal to orient the garden beds in a south-facing direction. This ensures maximum sunlight exposure throughout the year. In the southern hemisphere, the orientation should be reversed, with garden beds facing north.

    For best results, space your raised garden beds at least 28 to 36 inches apart. This spacing allows you to maneuver easily between beds with a wheelbarrow or garden cart, while also preventing overcrowding and shading between plants. If you’re working with limited space, it may be helpful to lay out the dimensions of your planned garden on the ground using ropes or sticks to get a better sense of how much room you need.

    Choosing the Best Wood for Your Raised Garden Bed

    When it comes to constructing a raised garden bed, choosing the right wood is vital for the durability and longevity of your bed. The most common wood options for raised garden beds are cedar and redwood. These woods are naturally resistant to rot and pests, making them excellent choices for building long-lasting beds. Redwood, in particular, is well-suited for areas with a risk of termite infestations.

    If you’re looking for a more budget-friendly option, softer woods like pine and Douglas fir can be used. However, these woods tend to have a shorter lifespan, typically lasting between 3 to 7 years, depending on the climate. It’s important to note that treated lumber, stained wood, or wood from railroad ties should be avoided due to potential toxicity to plants.

    For the best results, opt for wood that is certified by the Forest Stewardship Council (FSC), ensuring that it comes from sustainably managed forests.

    Determining the Size of Your Raised Garden Bed

    One of the main advantages of building your own raised garden bed is the flexibility in design. You can make the beds any size or shape to suit your available space. However, there are some key guidelines to keep in mind for optimal function.

    Width: It’s recommended that raised garden beds be no wider than 4 feet. This allows you to easily reach into the bed from both sides for planting, weeding, and harvesting. If the bed is against a wall or fence, it’s best to limit the width to 3 feet for easy access from the open sides.

    Length: Raised garden beds should generally not exceed 8 feet in length. Longer beds become heavier and more difficult to manage. If you need a larger bed, consider joining multiple smaller beds together to create the appearance of a single continuous bed.

    Depth: The depth of the raised bed should ideally be between 16 to 18 inches. This depth allows for sufficient root growth and water retention. For plants that require deeper soil, consider making the bed even taller.

    Step-by-Step Guide to Building Your Raised Garden Bed

    Now that you’ve selected the location and materials, it’s time to build your raised garden bed. Here’s a step-by-step guide to constructing your bed:

    Step 1: Choose Your Design and Materials
    First, decide on the size of your bed and the type of wood you’ll use. You may want to sketch a design to make sure you have accurate measurements.

    Step 2: Measure, Mark, and Cut the Lumber
    Once you have your materials, measure and cut the lumber to the desired lengths. Make sure to account for the overlap when joining the sides together.

    Step 3: Assemble the Frame
    Start by assembling the shorter sides of the bed and attach them to the corner posts. Use decking screws to ensure the structure is stable.

    Step 4: Add the Long Sides
    Once the short sides are in place, attach the long boards to complete the frame. Ensure everything is square and aligned before securing the boards with screws.

    Step 5: Install Support and Pest Barriers
    If necessary, add additional support beams for longer beds. For added protection, you can line the bottom of the bed with hardware cloth to prevent pests from burrowing.

    Step 6: Fill the Bed with Soil
    Fill the raised bed with a mixture of compost, soil, and other organic materials. Be sure to create a well-draining environment for your plants.

    Pros and Cons of Raised Garden Beds

    ProsCons
    Easier on your back due to elevated heightHigher upfront costs for materials and soil
    Better control over soil qualityMay require more maintenance than in-ground gardening
    Ideal for areas with poor or compacted soilTakes up space in your yard or garden
    Protects plants from pests and weedsPotentially more expensive if not using recycled materials
    Allows for customized plant spacingNeeds proper planning and space management

    Conclusion

    Building a raised garden bed is a fantastic way to start growing your own food, especially if you have limited space or poor soil conditions. By following this guide, you can create a durable and functional garden bed that not only enhances your gardening experience but also improves your yard’s aesthetic appeal.

    Using recycled materials can make the project even more rewarding, ensuring that your raised garden bed is not only sustainable but also eco-friendly. Whether you’re a seasoned gardener or a beginner, raised garden beds offer numerous benefits that can help you cultivate a thriving garden in any space.

    Frequently Asked Questions (FAQs)

    Q1: What is the best wood for a raised garden bed?
    The best wood for raised garden beds includes redwood, cedar, and pine. Redwood and cedar are the most durable, while pine is a budget-friendly option.

    Q2: Can I build a raised garden bed on grass?
    Yes, you can build a raised garden bed on grass. However, it’s recommended to remove the grass or lay down landscape fabric to prevent weeds from growing.

    Q3: How deep should my raised garden bed be?
    For optimal plant growth, your raised garden bed should be at least 16 to 18 inches deep. This allows for proper root growth and moisture retention.

    Q4: How much soil do I need to fill my raised garden bed?
    The amount of soil needed will depend on the size of your bed. A 4×8 foot bed will require approximately 2 cubic yards of soil to fill it to a depth of 16 inches.

    I hope you found this helpful and informative. If so, please leave a review below! Feel free to ask questions in the comments as well.

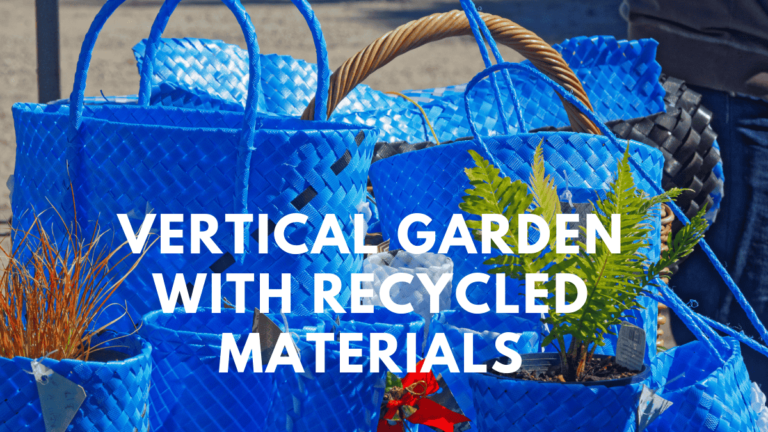
  • Building a Vertical Garden with Recycled Materials

    Building a Vertical Garden with Recycled Materials

    Introduction to Vertical Gardening: A Sustainable Revolution

    Vertical gardening is rapidly becoming an essential practice for those looking to maximize their gardening space, especially in urban environments. This technique involves growing plants upwards, as opposed to the traditional sprawling approach, enabling gardeners to utilize their space more efficiently. Vertical gardens can be created using various methods, with a particular emphasis on DIY projects that are both cost-effective and sustainable. One of the most compelling aspects of vertical gardening is its ability to reduce the footprint of plants, expanding the number of crops you can grow within a limited area.

    Incorporating recycled materials into these vertical gardens not only reduces costs but also supports sustainability. For instance, using old wooden pallets, wire fencing, and discarded containers allows you to create functional and beautiful trellises, planters, and growing structures. In this article, we’ll explore the many benefits of vertical gardening, offer ideas for DIY projects, and guide you on how to incorporate recycled materials into your own garden to create a more productive and eco-friendly growing space.

    What Is Vertical Gardening? A Game-Changer for Urban Gardening

    At its core, vertical gardening is the practice of training plants to grow upwards rather than outwards, using structures like trellises, fences, and walls. This approach allows gardeners to increase their plant yield in confined spaces, such as small backyards or even balconies. Vertical gardening is especially advantageous in urban settings where outdoor space is limited. By growing plants vertically, you make the most of available space, turning unused vertical surfaces into valuable garden areas.

    Moreover, the use of recycled materials in vertical gardening projects is an excellent way to minimize waste. Items like old plastic bottles, scrap wood, and unused wire mesh can be repurposed to create functional, beautiful gardening solutions. This not only reduces costs but also contributes to a more sustainable way of gardening.

    The Numerous Benefits of Vertical Gardening

    1. Maximized Space Utilization

    One of the primary reasons gardeners choose vertical gardening is to save space. Growing plants vertically reduces the ground area needed, allowing for more plants in the same footprint. For instance, a squash plant, which typically requires about 20 square feet of space when grown on the ground, can be trained to grow upwards on a trellis, occupying just a fraction of the space. This makes it possible to share garden beds with a variety of other plants, effectively increasing your garden’s capacity.

    2. Simplified Harvesting Process

    Vertical gardening significantly eases the harvesting process. Instead of bending over or crawling on the ground to reach fruits or vegetables, plants grown vertically are positioned at a convenient height, making them easy to harvest without straining your back and knees. This accessibility is particularly beneficial for gardeners with physical limitations or those who simply want to make harvesting less of a chore.

    Moreover, vertical gardening reduces the chances of missing ripe produce. When fruits and vegetables are positioned at eye level, you are more likely to spot them and harvest them at the right time, ensuring that your crops are fresh and of the highest quality.

    3. Healthier Plants

    Plants grown vertically tend to be healthier than those left to sprawl on the ground. By keeping them off the soil, vertical gardening reduces the risk of fungal diseases, pests, and rot caused by damp, moist soil splashing onto plant leaves. Additionally, vertical growth allows for better air circulation around plants, which is crucial for reducing the spread of diseases.

    This method also prevents pests from easily reaching the plants, keeping your crops safe from small critters that might otherwise nibble on your tomatoes or cucumbers. As a result, vertical gardening can lead to healthier plants and a more successful harvest.

    4. Aesthetic Appeal

    Vertical gardens can significantly enhance the visual appeal of your garden space. These structures add depth, texture, and dimension to your outdoor area, creating an aesthetically pleasing environment. Arched trellises, in particular, provide an elegant and functional design element, offering both beauty and productivity. When properly arranged, vertical gardens can transform even the smallest garden into a lush, vibrant space.

    Vertical gardens also allow for the creative use of materials, making it easy to integrate personal style into the garden design. Whether you prefer rustic, DIY trellises made from reclaimed wood or sleek, modern wire structures, vertical gardening can be adapted to suit any aesthetic.

    Is Vertical Gardening Economical?

    When considering vertical gardening, cost is always a key factor. While pre-made trellises and vertical gardening kits can be expensive, there are many ways to build your own structures using recycled materials. For example, items like welded wire, T-posts, cattle panels, and even old chicken wire can be used to construct effective and affordable vertical gardens. The cost of buying these materials in bulk is often much lower than purchasing commercial trellises, making DIY vertical gardening a budget-friendly solution.

    Avoiding Expensive Pitfalls

    Many gardeners make the mistake of overspending on expensive pre-made gardening structures that may not provide the necessary functionality. For instance, a single trellis designed for one cucumber plant can cost around $35, which can quickly add up if you plan to grow multiple crops. Instead, consider using recycled materials that serve the same purpose without the hefty price tag.

    By being resourceful and creative with your materials, you can create a highly functional vertical garden that fits your budget. Simple DIY trellis ideas, such as using wooden pallets, recycled fencing, or old window frames, can be just as effective and much more affordable.

    DIY Vertical Gardening Projects Using Recycled Materials

    Creating a vertical garden with recycled materials is both easy and satisfying. Here are some DIY project ideas that can help you get started:

    1. Cattle Panel Trellises

    Cattle panels are an excellent material for building large arched trellises. They are sturdy and relatively inexpensive, and they can support a variety of climbing plants like beans, cucumbers, and tomatoes. You can purchase a cattle panel for around $30 and easily bend it into an arch shape to create a visually striking trellis for your garden.

    2. Plastic Bottle Vertical Planters

    Old plastic bottles can be repurposed into vertical planters by cutting holes in them and stacking them to create a cascading garden. This project is perfect for small spaces, as it utilizes vertical space efficiently and provides a unique, eco-friendly way to grow plants like herbs and strawberries.

    3. Recycled Fencing Trellises

    If you have any old fencing lying around, consider turning it into a vertical garden structure. You can repurpose broken dog kennels, old gates, or even scrap metal fencing to create custom trellises that will support climbing plants. This approach is both sustainable and cost-effective.

    4. Wooden Pallet Vertical Gardens

    Wooden pallets are a popular choice for vertical gardening because they are readily available and easy to convert into planters. By attaching a few pallets to a wall or fence, you can create a vertical garden that holds multiple rows of plants, such as lettuce, kale, and herbs.

    5. Dealing with Vertical Garden Maintenance

    Although vertical gardens are generally easier to maintain in terms of pest control and disease prevention, they do require consistent upkeep. For example, plants growing vertically need to be regularly checked to ensure they are properly trained on their support structures. As plants grow, they might need additional support, such as twine or clips, to keep them from falling over or getting tangled.

    Moreover, watering can be trickier with vertical gardens, especially if you’re growing a variety of plants. Unlike traditional gardening, where water is absorbed evenly throughout the soil, vertical gardens often need more targeted watering techniques. Drip irrigation systems or a watering can with a long spout can help ensure that each plant gets the water it needs.

    6. Addressing Potential Problems with Planting Materials

    While recycled materials are a cost-effective way to build vertical garden structures, they may not always last as long as purchased materials. For instance, chicken wire can be prone to rust over time, and wooden pallets may degrade under the weight of heavy plants or exposure to the elements. However, with proper care and maintenance, these materials can last for several seasons, and the environmental benefits of recycling far outweigh any potential drawbacks.

    If you are concerned about durability, consider applying protective coatings to your recycled materials. For example, you can treat wood with a weather-resistant sealant or use coated wire to prevent rust. This simple extra step can extend the lifespan of your vertical garden structures, ensuring that they continue to function well year after year.

    7. Choosing the Right Location for Your Vertical Garden

    Location is crucial when it comes to vertical gardening. Plants that thrive in vertical gardens, such as tomatoes and cucumbers, require plenty of sunlight to grow and produce fruit. Therefore, choosing the right spot with adequate sun exposure is vital for the success of your vertical garden.

    It’s important to assess your garden space and understand how sunlight moves throughout the day. If you’re growing plants indoors, position your vertical garden near a window that receives direct sunlight, or consider investing in grow lights to supplement natural light.

    Additionally, take into account wind exposure when selecting a location for your vertical garden. Strong winds can damage delicate plants or cause your vertical structures to collapse. Make sure your trellises or supports are sturdy enough to withstand gusty conditions, or position them in areas that are shielded from high winds.

    What Plants Are Best for Vertical Gardening?

    Vertical gardening is suitable for a wide range of plants, especially those that naturally climb or spread. Some of the best plants for vertical gardening include:

    • Climbing Beans: Beans are excellent for vertical gardening because they naturally climb, making them ideal candidates for trellises.
    • Cucumbers: Like beans, cucumbers can be trained to grow upwards on a trellis, saving space while producing high yields.
    • Melons: Many melon varieties can be grown vertically, allowing for easy harvesting and a more compact garden layout.
    • Squash: Vertical gardening helps squash plants grow upward, preventing them from sprawling and taking up too much space.
    • Tomatoes: Indeterminate tomato varieties benefit greatly from vertical gardening, as they can be trained to grow upwards, keeping the fruit off the ground.You can also experiment with mixing plants on different sides of the trellis. Just ensure that they have similar watering and sunlight requirements to prevent complications.

    Maximizing the Benefits of Vertical Gardening

    With a bit of effort and planning, vertical gardening can become a highly rewarding endeavor. Here are a few final tips to help you make the most of your vertical garden:

    1. Mix and Match Plants: As mentioned earlier, you can grow different types of plants on each side of a trellis, as long as they have similar water and sunlight needs. Be mindful of plant spacing to avoid overcrowding, and ensure that the plants do not shade each other out.
    2. Use Companion Planting: Vertical gardens are a perfect opportunity to implement companion planting, a technique that involves planting certain species together to benefit each other. For instance, growing basil near tomatoes can enhance the flavor of your tomatoes and help deter pests like aphids.
    3. Prune Regularly: As your vertical garden grows, be sure to prune plants to encourage healthy growth. Pruning helps plants to grow in the direction you want them to, and it prevents them from becoming too bushy or top-heavy, which can make them prone to falling over.
    4. Rotate Crops: To ensure the longevity of your vertical garden, practice crop rotation. This involves planting different types of crops in the same location each year to prevent soil depletion and reduce the risk of pest infestations.

    Frequently Asked Questions (FAQs)

    1. Can I grow flowers in a vertical garden? Yes, many flowers can thrive in vertical gardens, especially climbing varieties like morning glories, sweet peas, and clematis. Vertical gardening works great for both edible and ornamental plants.

    2. How often should I water my vertical garden? Watering frequency will depend on the types of plants you’re growing and the climate. Generally, vertical gardens require more frequent watering than traditional garden beds, as water drains faster in vertical structures. Consider using a drip irrigation system for more efficient watering.

    3. Are there any challenges with vertical gardening in cold climates? Yes, vertical gardens in colder climates may require additional protection during the winter months. You can cover plants with row covers or use a greenhouse structure to shield them from freezing temperatures.

    4. How do I prevent my vertical garden from toppling over? To ensure stability, use sturdy materials like T-posts, welded wire, or cattle panels. Secure your vertical structures firmly in the ground, and consider adding weight to the base if necessary.

    5. Can I grow trees vertically? While most trees require a lot of space and would not be suitable for vertical gardening, smaller fruit trees and dwarf varieties can be trained to grow upwards on trellises or arbors. This technique is ideal for those with limited space.

    The Future of Urban Gardening

    Vertical gardening is a revolutionary technique that allows gardeners to make the most of their space, whether they have a small balcony, a crowded backyard, or even just a tiny apartment. By growing plants upwards rather than outwards, vertical gardening provides a sustainable solution for city dwellers who wish to enjoy home-grown produce without sacrificing valuable space.

    By incorporating recycled materials into your vertical garden, you not only save money but also contribute to a more sustainable and eco-friendly way of gardening. From simple DIY planter projects to more elaborate trellis systems, the possibilities for creating a productive, space-saving garden are endless. Whether you’re looking to grow vegetables, fruits, or ornamental plants, vertical gardening can be adapted to suit your needs.

    With the right tools, materials, and a bit of creativity, you can easily transform your outdoor or indoor space into a thriving vertical garden. Not only will you have a visually appealing garden that’s easy to maintain, but you’ll also enjoy the many benefits of fresh, home-grown produce right at your fingertips.

    Final Thoughts: Vertical Gardening for Everyone

    Vertical gardening is more than just a trend; it’s a practical and sustainable solution for urban gardeners seeking to maximize their growing space. By using recycled materials and implementing DIY projects, you can create a functional and beautiful garden that not only saves space but also promotes sustainability. Whether you’re growing fruits, vegetables, or flowers, vertical gardening offers a creative way to cultivate a thriving garden in even the smallest of spaces.

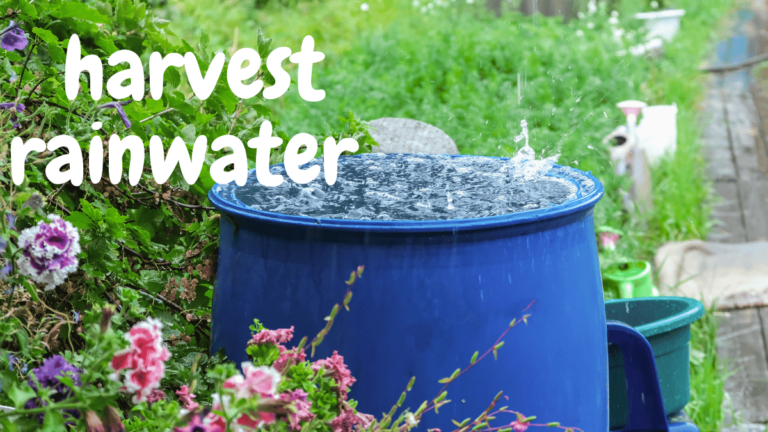
  • How to Harvest Rainwater at home ?

    How to Harvest Rainwater at home ?

    Introduction:

    In today’s world, where environmental consciousness is on the rise, learning how to harvest rainwater at home has become a pivotal step towards sustainable living. Not only does it help conserve precious water resources, but it also offers a practical way to reduce your monthly water bills. Whether you’re a homeowner aiming to cut down on water usage or someone passionate about eco-friendly practices, setting up a rainwater collection system can be both rewarding and beneficial.

    In this comprehensive guide, we’ll delve into the essentials of rainwater harvesting, explore its benefits, and provide a step-by-step approach to setting up your own system. We’ll also address common pitfalls and maintenance tips to ensure your system remains efficient. Let’s dive in!

    Understanding to harvest rainwater

    Rainwater harvesting involves collecting and storing rainwater that would otherwise flow off your roof and into storm drains. Instead of letting this valuable resource go to waste, you can capture, filter, and utilize it for various purposes, such as gardening, flushing toilets, and even drinking, provided it’s properly treated. While the concept might seem complex, it’s surprisingly straightforward once you grasp the basics.

    Why Consider to harvest rainwater?

    Before embarking on your rainwater harvesting journey, it’s essential to understand the compelling reasons behind it:

    1. Environmental Impact: By collecting rainwater, you reduce reliance on groundwater and municipal sources, which are often overused and can lead to droughts.
    2. Cost Savings: Utilizing rainwater for non-potable purposes like irrigation and toilet flushing can significantly lower your water bills.
    3. Self-Sufficiency: A rainwater system reduces dependence on public water supplies, especially in areas prone to water restrictions.
    4. Enhanced Garden Health: Rainwater is naturally soft and free from chemicals, making it ideal for nurturing plants and gardens.

    Types of to harvest rainwater Systems

    Choosing the right system depends on your water usage needs and preferences.

    Here are some common types:

    1. Simple Barrel System: This basic setup involves connecting a barrel to your gutters to collect rainwater. It’s cost-effective but may have limited storage capacity.
    2. Dry System: In this system, water is directed from the roof into a large storage tank, with pipes emptying after each rain. It’s suitable for larger storage needs.
    3. Wet System: Pipes remain full and transport water to a storage tank located away from the house. This setup is ideal for larger properties or when the tank isn’t adjacent to downspouts.

    Getting Started: Essential Components

    To set up a basic rainwater harvesting system, you’ll need the following components:

    • Catchment Area: Typically, your roof serves as the catchment area for collecting rainwater.
    • Gutters and Downspouts: These channel rainwater from the roof into the storage system.
    • First-Flush Diverter: This device diverts the initial, debris-laden rainwater away from the storage tank.
    • Storage Tank: Depending on your needs, this could be a barrel, tank, or cistern. Ensure it has adequate storage capacity.
    • Filter System: A basic mesh filter removes large debris, while advanced systems purify water for drinking.
    • Pump (Optional): If you plan to use the water for irrigation or household purposes, a pump may be necessary.

    Step-by-Step Guide to Setting Up Your Rainwater Harvesting System

    Let’s walk through the process of setting up a simple barrel-based rainwater harvesting system:

    1. Choose the Right Location for Your Barrel or TankPosition your storage tank or barrel near a downspout. Opt for a shaded area to keep the water cool and inhibit bacterial growth. Ensure the ground is level and stable to support the tank’s weight.
    2. Set Up Your Gutters and DownspoutsInstall gutters along the roof’s edge to collect rainwater and direct it to the downspouts. Regularly clear them of debris like leaves and twigs to maintain water flow. Consider adding gutter guards or leaf screens for easier maintenance.
    3. Install the First-Flush DiverterAttach a first-flush diverter to the downspout. This device diverts the initial, dirtier rainwater away from the storage tank. It’s readily available at most hardware stores and easy to install.
    4. Connect Your Downspout to the Storage TankSecurely connect the downspout to your barrel or tank to prevent leaks. For a barrel system, consider using a downspout diverter kit, which allows water to flow into the barrel when it rains and back into the drain when the barrel is full.
    5. Add a Filtration System Place a mesh filter on top of the barrel to keep out leaves, insects, and large debris.

    Certainly! Let’s continue with the setup and maintenance of your rainwater harvesting system, along with additional insights and a conclusion.

    1. Install a Spigot or Pump

    For easy access to the collected water, install a spigot near the bottom of the barrel. This allows you to fill watering cans or connect a hose. If your storage tank is larger or located far from where you need the water, consider installing a pump. Choose a pump size based on your intended water usage, whether for irrigation or household needs.

    Maintenance Tips for Your to harvest rainwater System

    To keep your system running efficiently, regular maintenance is crucial. Here’s a checklist to help you maintain your rainwater harvesting setup:

    • Clean Gutters Regularly: Every two months, clear gutters of leaves, twigs, and debris. This is especially important in the fall when leaves can quickly clog the system.
    • Inspect the First-Flush Diverter: Clean the diverter every couple of months to ensure it functions properly. It reduces the amount of debris entering your tank by diverting the first, dirtier water from your roof.
    • Check the Filter System: Regularly clean mesh screens to remove larger debris. For drinking water systems, replace filter cartridges as needed to maintain water quality.
    • Test for Algae: If your tank is exposed to sunlight, check for algae growth. If algae are present, clean the tank interior and consider relocating it to a shadier spot or covering it.
    • Flush the System: Every few months, completely empty the tank to remove sediment and contaminants. Many systems have a “tank drain” option to facilitate this process.

    Common Mistakes to Avoid

    While to harvest rainwater is relatively straightforward, beginners may encounter some common pitfalls. Avoid these to save time, money, and frustration:

    • Underestimating Tank Size: Many start with a small barrel only to find it fills quickly. Estimate your water needs carefully and opt for a larger tank if possible.
    • Ignoring Local Regulations: Check with local authorities to ensure there are no restrictions on rainwater harvesting in your area before setting up a system.
    • Neglecting Maintenance: Regular maintenance is essential to prevent system contamination or blockages. Keep your system in top shape with routine checks.
    • Placing the Tank in Direct Sunlight: Sunlight can promote algae growth, making the water unsuitable for use. Choose a shaded location or cover the tank to prevent this.

    Long-Term Benefits of to harvest rainwater

    While setting up a rainwater harvesting system requires some initial effort, the long-term benefits are substantial:

    • Eco-Friendly Living: Rainwater harvesting reduces the demand on natural resources, making it an excellent choice for environmentally conscious individuals.
    • Lower Water Bills: Over time, the savings on your water bills will accumulate, helping you reduce household expenses.
    • Improved Plant Growth: Rainwater is naturally soft, pH-balanced, and free of salts and chlorine, making it ideal for plants.
    • Emergency Backup: In case of water shortages or emergencies, having a reserve of collected rainwater can be invaluable.

    FAQs

    1. Is rainwater safe to drink?
      • Rainwater can be safe to drink if properly filtered and treated. Use a multi-stage filtration system and consider UV or chemical treatments for safety.
    2. How much rainwater can I collect?
      • The amount depends on your roof size and local rainfall. On average, a 1,000-square-foot roof can collect about 600 gallons of water per inch of rain.
    3. Do I need a permit for to harvest rainwater?
      • Regulations vary by location. Check with local authorities to determine if permits are required in your area.
    4. Can I use rainwater for all household needs?
      • Rainwater is suitable for non-potable uses like irrigation and toilet flushing. For potable uses, ensure proper filtration and treatment.
    5. How do I prevent mosquitoes in my rainwater tank?
      • Use fine mesh screens on tank openings and ensure all connections are sealed to prevent mosquito entry.

    Pros and Cons of to harvest rainwater

    ProsCons
    Reduces water billsInitial setup cost
    Environmentally friendlyRequires regular maintenance
    Improves plant healthLimited by local rainfall
    Provides emergency water supplyPotential for algae growth
    Promotes self-sufficiencyMay require permits or regulations

    Conclusion: A Step Towards Sustainable Living

    Implementing to harvest rainwater system at home is a significant step towards sustainable living. By capturing and utilizing rainwater, you not only contribute to environmental conservation but also enjoy practical benefits like reduced water bills and improved garden health. Whether you’re motivated by cost savings, environmental concerns, or a desire for self-sufficiency, rainwater harvesting offers a viable solution.As you embark on this journey, remember that the key to a successful to harvest rainwater system lies in careful planning, proper installation, and regular maintenance. By avoiding common pitfalls and adhering to best practices, you can ensure that your system remains efficient and effective for years to come.Moreover, rainwater harvesting fosters a sense of community sustainability. By setting an example, you can inspire neighbors and friends to adopt similar practices, collectively contributing to a more sustainable future. As more individuals embrace rainwater harvesting, the cumulative impact on water conservation and environmental preservation can be substantial.In conclusion, learning how to harvest rainwater at home is not just about saving money or water; it’s about making a conscious choice to live in harmony with our environment. By taking this step, you become part of a growing movement towards sustainable living, ensuring that future generations inherit a healthier planet. So, gather your materials, follow the steps outlined in this guide, and start reaping the benefits of rainwater harvesting today. Your garden, wallet, and the planet will thank you.

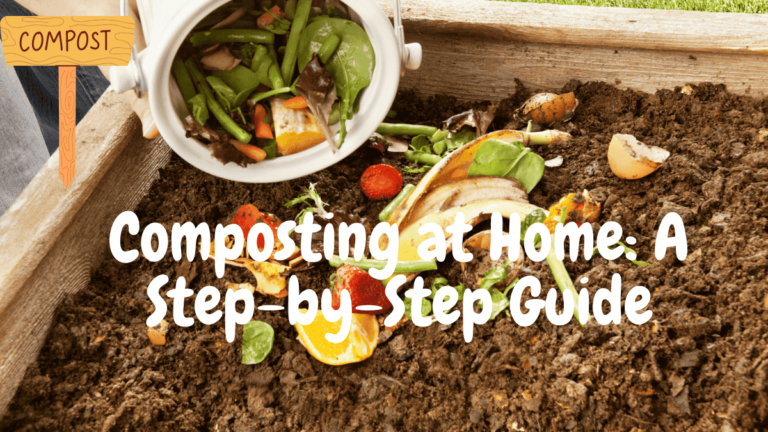
  • Composting at Home: A Step-by-Step Guide

    Composting at Home: A Step-by-Step Guide

    Composting at home is a transformative practice that not only enriches your garden but also significantly reduces household waste. If you’ve yet to dive into the world of composting, you’re missing out on a sustainable way to enhance your garden’s health and contribute positively to the environment. In this comprehensive guide, we’ll explore the benefits of composting, various composting methods, and provide a detailed, step-by-step process to start composting at home.

    What is Composting?

    At its core, composting is the natural decomposition of organic materials like plant and food waste. This process is facilitated by microorganisms such as bacteria, fungi, and worms, which break down the materials with the help of oxygen. The result is compost, a nutrient-rich material that can be added to soil to promote plant growth. While you can purchase compost, creating your own from household waste is both economical and environmentally friendly.

    Why Compost at Home?

    Composting at home offers numerous benefits. It reduces the amount of waste sent to landfills, enriches your garden soil, and decreases the need for chemical fertilizers. By turning organic waste into valuable compost, you contribute to a healthier environment and a more sustainable lifestyle.

    Backyard Composting: A Simple and Effective Method

    Backyard composting is a convenient way to manage organic waste. Despite common misconceptions, composting is not complicated, nor does it have to be messy or smelly. By following the right methods, you can create a compost pile that efficiently turns waste into humus, a rich soil amendment.

    Step-by-Step Guide to Composting at Home

    Step 1: Choose the Right Location

    Select a site for your compost pile or bin that is slightly hidden but accessible. Ensure the spot has good airflow, access to water, partial shade in summer, and full sun in winter.

    Step 2: Create a Base Layer

    Start by laying twigs or straw a few inches deep at the bottom of your compost pile. This layer aids in drainage and airflow, essential for the composting process.

    Step 3: Add Compost Ingredients

    Layer your compost ingredients, alternating between moist and dry materials. Moist components include food scraps and plant waste, while dry materials consist of straw, sawdust, and ashes.

    Step 4: Incorporate Manure

    Add manure to your compost pile as a nitrogen source. This addition accelerates the composting process by activating the decomposition of organic materials.

    Step 5: Maintain Moisture

    Keep your compost pile moist by watering it occasionally. The right moisture level is crucial for the decomposition process.

    Step 6: Cover the Pile

    Covering your compost pile helps retain moisture and heat, both vital for composting. It also prevents the pile from becoming too wet from rain.

    Step 7: Turn the Pile

    Every few weeks, turn your compost pile with a pitchfork. This action aerates the pile, introducing oxygen that speeds up decomposition.

    What Can You Compost?

    Understanding what materials are suitable for composting is essential. Here’s a quick guide:

    Compostable Materials:

    • Pine needles
    • Sawdust
    • Dried leaves and grass
    • Straw
    • Eggshells
    • Shredded cardboard and paper
    • Citrus rinds
    • Coffee grounds and filters
    • Fruit and vegetable waste
    • Teabags
    • Young weeds
    • Wilted flowers

    Non-Compostable Materials:

    • Animal products (fish, bones, meat, fat)
    • Dairy products
    • Treated wood sawdust
    • Diseased plants
    • Human waste
    • Seed-bearing weeds

    Types of Composting

    There are three primary types of composting, each with its own benefits and methods:

    1. Hot Composting

    Hot composting is ideal for those who want quick results. By maintaining the right balance of air, water, nitrogen, and carbon, you can produce compost in as little as one to three months. This method is particularly effective in warm weather.

    2. Cold Composting

    Cold composting is the simplest method, requiring only the collection of biodegradable waste in a pile or bin. This method takes longer, typically a year or two, but requires less effort.

    3. Vermiculture (Worm Composting)

    Vermiculture involves using worms, specifically redworms, to break down organic waste. The worms produce nutrient-rich castings, which are excellent for soil enrichment. This method is efficient and can be done indoors or outdoors.

    Benefits of Composting at Home

    Composting offers numerous advantages, both for your garden and the environment:

    1. Waste Reduction

    Composting significantly reduces the amount of waste sent to landfills. By turning organic waste into compost, you save money on landfill fees and reduce your carbon footprint.

    2. Soil Enrichment

    Compost is a natural soil enhancer, providing essential nutrients like nitrogen, phosphorus, and potassium. It also supplies micronutrients such as iron, zinc, and copper, which are vital for plant health. By improving soil structure, compost increases water retention and reduces erosion, leading to healthier plants and more robust gardens.

    3. Environmental Preservation

    Composting reduces the need for chemical fertilizers, which can harm the environment. By recycling organic materials, composting conserves landfill space and promotes a healthier ecosystem. It also supports beneficial soil organisms, such as earthworms, which help maintain soil balance.

    4. Convenience and Versatility

    Composting is adaptable to various lifestyles and spaces. Whether you have a large backyard or a small apartment, there’s a composting method that suits your needs. Vermiculture, for example, is perfect for indoor composting, while backyard composting is ideal for those with outdoor space.

    Additional Tips for Successful Composting

    • Choose the Right Method: Select a composting method that fits your lifestyle, space, and time commitment. Consider how much compost you need and when you need it.
    • Balance Ingredients: Maintain a good balance of green (nitrogen-rich) and brown (carbon-rich) materials to ensure efficient decomposition.
    • Monitor Moisture and Temperature: Keep your compost pile moist but not waterlogged, and ensure it stays warm to facilitate microbial activity.
    • Aerate Regularly: Turning your compost pile introduces oxygen, which is crucial for the decomposition process.

    FAQs About Composting at Home

    Q: How long does it take to make compost?
    A: The time varies depending on the method. Hot composting can take 1-3 months, while cold composting may take up to 2 years.

    Q: Can I compost in an apartment?
    A: Yes, vermiculture is an excellent option for indoor composting in small spaces.

    Q: What should I do if my compost pile smells bad?
    A: A foul odor usually indicates too much moisture or a lack of oxygen. Turn the pile and add dry materials to balance it out.

    Q: Can I compost in winter?
    A: Yes, composting can continue in winter, though the process may slow down. Insulating your pile can help maintain warmth.

    Pros and Cons of Composting at Home

    ProsCons
    Reduces household wasteRequires time and effort
    Enriches garden soilMay attract pests if not managed
    Decreases need for chemical fertilizersNeeds space for a compost bin or pile
    Supports environmental sustainabilityCan be slow without proper management

    Conclusion

    Composting at home is a rewarding practice that benefits both your garden and the environment. By transforming organic waste into nutrient-rich compost, you contribute to a more sustainable lifestyle and healthier ecosystem. Whether you choose hot composting, cold composting, or vermiculture, the key is to find a method that fits your needs and space. With patience and care, you’ll soon enjoy the fruits of your labor in a thriving, vibrant garden. So, get started today and turn your waste into a valuable resource for your home and the planet.

  • Best Fertilizers for Indoor and Urban Plants

    Best Fertilizers for Indoor and Urban Plants

    Understanding Plant Fertilizer

    Plants absorb their nutrients from the soil or potting medium they grow in. Most plants arrive from the greenhouse with some fertilizer mixed in already, but as they grow, these nutrients are absorbed and depleted, requiring replenishment.In this article we will discuss the Best Fertilizers for Indoor Plants.Fertilizers come with an N-P-K ratio, representing the balance of Nitrogen, Phosphorus, and Potassium. Each element plays a crucial role in plant health:

    • Nitrogen (N): Fuels leafy growth and is essential for chlorophyll production.
    • Phosphorus (P): Supports root development, bud formation, and fruiting.
    • Potassium (K): Helps regulate water balance, prevents excessive moisture loss, and enhances overall plant health.

    Pro Tip: A balanced fertilizer with an equal N-P-K ratio (e.g., 10-10-10) is suitable for most houseplants. However, some plants may require more specific ratios, such as high-nitrogen for foliage plants or high-phosphorus for flowering plants.

    Choosing the Right Fertilizer

    With so many fertilizers on the market, selecting the right one can be daunting. Here are some factors to consider:

    • Plant type: Different plants have unique nutritional needs. For example, succulents require less fertilizer than flowering plants.
    • Growth stage: Plants in the active growing season (spring-summer) require more nutrients than those in dormancy (fall-winter).
    • Soil type: The type of potting mix used can affect fertilizer choice. For instance, organic potting mixes may require less fertilizer.

    Personal Experience: I once used a high-nitrogen fertilizer on my peace lily, thinking it would promote healthy growth. However, it ended up causing more harm than good, leading to weak and leggy stems. Now, I opt for a balanced fertilizer and monitor my plants’ responses to adjust as needed.

    Why Fertilizers Matter

    Indoor plants depend on you to replenish their soil’s nutrients. Over time, even premium potting mixes lose their vitality. Fertilizers restore essential elements like nitrogen (N), phosphorus (P), and potassium (K), ensuring robust growth and resilience.

    How to Fertilize Indoor Plants

    Fertilizing is beneficial during the active growing season, typically from spring to summer. During this time, plants are actively using resources and nutrients for new growth and reproduction. Here’s a step-by-step guide on how to fertilize:

    1. Choose the right fertilizer: Select a fertilizer that matches your plant’s needs, considering factors like N-P-K ratio and growth stage.
    2. Dilute the fertilizer: Follow the instructions on the label to dilute the fertilizer to the recommended strength.
    3. Water your plants: Water your plants as you normally would, using the diluted fertilizer solution.
    4. Monitor and adjust: Observe your plants’ responses to the fertilizer and adjust as needed.

    Pro Tip: Fertilize your plants in the morning, allowing them to absorb the nutrients throughout the day.

    When to Fertilize: Seasonal Timing

    • Spring-Summer: Feed every 4-6 weeks during active growth.
    • Fall-Winter: Pause unless your plant shows new growth (common in tropical species like fiddle leaf figs).

    Exception: My bird of parad

    3 Critical Signs Your Plant Needs Nutrients

    1. Yellow Leaves with Green Veins: Magnesium deficiency. Fix with Epsom salt spray (1 tsp/gallon water).
    2. Purple Undersides: Phosphorus shortage. Use bone meal or bloom booster.
    3. Leggy Growth: Low potassium. Try seaweed extract or banana peel tea.

    3 Signs Your Plant Needs Fertilizer

    Here are three common signs that your plant needs fertilizer:

    1. Yellowing leaves: If your plant’s leaves are turning yellow, it may be a sign of nitrogen deficiency.
    2. Slow growth: If your plant is not growing as quickly as expected, it may be due to a lack of phosphorus or potassium.
    3. Pale foliage: If your plant’s leaves are pale or washed out, it may indicate a magnesium deficiency.

    Pro Tip: Before fertilizing, ensure you’ve ruled out other potential causes of these symptoms, such as overwatering or underwatering.

    Organic vs. Synthetic Fertilizers

    The debate between organic and synthetic fertilizers is ongoing. Here’s a brief comparison:

    AspectOrganicSynthetic
    SpeedSlow-release (weeks)Fast-acting (days)
    Soil HealthImproves microbiomeCan harm beneficial microbes
    SafetyNon-toxic for ediblesRisk of salt buildup
    Eco-ImpactSustainableChemical runoff risks

    Expert Insight: Horticulturist Tim Flood notes, “Organic fertilizers are a better choice for the environment and can provide long-term benefits for soil health.”

    Soil pH and Fertilizer

    Soil pH plays a crucial role in nutrient availability. Most houseplants prefer a slightly acidic to neutral soil pH (6.0-7.0). However, some plants like acid-loving species (e.g., azaleas, blueberries) require a more acidic soil pH (5.5-6.5).

    • Soil testing: Regular soil testing can help determine the optimal fertilizer for your plants.
    • pH adjustment: If necessary, adjust the soil pH using lime or sulfur to create an optimal environment for your plants.

    Pro Tip: Use a soil test kit to determine your soil’s pH and nutrient levels before fertilizing.

    Fertilizers for Specific Plants

    Different plants have unique fertilizer requirements. Here are some examples:

    • Succulents: Use a low-nitrogen, water-soluble fertilizer (e.g., 2-7-7) during the growing season.
    • Orchids: Feed with a balanced, water-soluble fertilizer (e.g., 10-10-10) every 2-3 weeks.
    • Tomatoes: Use a high-phosphorus fertilizer (e.g., 5-10-5) to promote fruiting.

    Pro Tip: Research the specific fertilizer needs of your plants to ensure you’re providing the best nutrition.

    Special Cases: Edibles & Delicate Plants

    • Herbs (Basil, Mint): Use compost tea every 3 weeks.
    • Tomatoes: Opt for 5-10-5 fertilizer to prioritize fruit over leaves.
    • Orchids: Mist with diluted fish emulsion (1/4 strength) monthly.

    Eco-Hack: I use homemade worm castings

    FAQs

    Q: Can I use outdoor fertilizer for indoor plants?
    A: No, outdoor fertilizers are too concentrated and may harm indoor plants.
    Q: How often should I fertilize my indoor plants?
    A: Fertilize every 2-4 weeks during the growing season, depending on the plant’s needs.
    Q: Are organic fertilizers better than synthetic ones?
    A: Organic fertilizers are generally safer for the environment and can provide long-term benefits for soil health.

    Q: Can I use outdoor fertilizer indoors?
    A: No! They’re too concentrated and may burn roots.

    Q: How often should I fertilize succulents?
    A: Every 8-10 weeks in summer with a cactus-specific mix.

    Q: Are eggshells good fertilizer?
    A: Yes! Crush and steep in water for a calcium-rich brew.

    Pro Tip: Consider a balanced fertilizer as a starting point and adjust based on your plant’s response.

    Conclusion

    Fertilizing your indoor plants is an essential part of their care. By understanding the different types of fertilizers, their benefits, and how to use them, you can create a thriving indoor garden. Remember to choose the right fertilizer for your plants, follow the instructions, and monitor their responses. With the right nutrients, your plants will flourish, and you’ll enjoy the many benefits of indoor gardening.

  • How to Care for Indoor Plants?(50 Plants)

    How to Care for Indoor Plants?(50 Plants)

    Indoor plants are more than just decorative elements; they bring life, color, and a sense of tranquility to any space. However, caring for indoor plants can sometimes feel like a daunting task, especially if you’re new to the world of indoor gardening. In this guide, we’ll explore how to care for indoor plants, focusing on popular varieties like peace lilies, orchids, and succulents. Whether you’re a seasoned plant enthusiast or a beginner, these tips will help you maintain a thriving indoor garden.

    Understanding Care For Indoor Plants

    Caring for indoor plants involves understanding their specific needs, including light, water, soil, and temperature. Each plant species has unique requirements, and meeting these needs is crucial for their growth and health.

    Light Requirements

    Most indoor plants thrive in bright, indirect light. However, some plants, like snake plants and ZZ plants, can tolerate low-light conditions. It’s essential to place your plants in a location that matches their light preferences. For instance, a south-facing window is ideal for light-loving plants, while north-facing windows are better for those that prefer less light.

    Watering Techniques

    Overwatering is a common mistake in care for indoor plants. It’s important to let the soil dry out between waterings for most plants. Use a pot with drainage holes to prevent water from accumulating at the bottom. A good rule of thumb is to water when the top inch of soil feels dry. Remember, it’s easier to revive a dry plant than one that’s been overwatered.

    Soil and Potting

    The right soil mix is vital for indoor plants. A well-draining potting mix is ideal for most species. Repotting every couple of years can also help refresh the soil and provide more space for root growth. When repotting, choose a pot that’s slightly larger than the current one to allow for growth.

    Temperature and Humidity

    Indoor plants generally prefer temperatures between 60-75°F (15-24°C). Humidity levels can vary, but many tropical plants benefit from higher humidity. Consider using a humidifier or placing a tray of water near your plants to increase moisture in the air. Avoid placing plants near drafts or heat sources, as sudden temperature changes can stress them.

    Below, I’ve curated care tips for 20+ popular plants. Let’s get specific!

    1. Peace Lily

    • Light: Low to medium indirect light.
    • Water: Keep soil moist but not soggy. Use filtered water to avoid leaf browning.
    • Pro Tip: Wipe leaves monthly to boost photosynthesis.

    2. Orchid

    • Light: Bright, indirect light (east-facing windows).
    • Water: Soak weekly, then drain completely.
    • Pro Tip: Mist aerial roots to mimic tropical humidity.

    3. Snake Plant

    • Light: Thrives in low light.
    • Water: Water every 3–4 weeks. Drought-tolerant!
    • Pro Tip: Perfect for forgetful waterers.

    4. Succulents & Cacti

    • Light: Direct sunlight (south-facing windows).
    • Water: Soak soil, then let it dry completely.
    • Pro Tip: Use terracotta pots to prevent root rot.

    5. Basil

    • Light: 6+ hours of direct sun.
    • Water: Keep soil consistently moist.
    • Pro Tip: Pinch off flowers to encourage leaf growth.

    6. Poinsettia

    • Light: Bright, indirect light.
    • Water: Water when soil feels dry.
    • Pro Tip: Keep away from cold drafts to prolong blooms.

    7. Spider Plant

    • Light: Indirect light.
    • Water: Water weekly in summer, biweekly in winter.
    • Pro Tip: Propagate “spiderettes” for free plants!

    8. Aloe Vera

    • Light: Bright, indirect light.
    • Water: Water every 3 weeks.
    • Pro Tip: Harvest gel from mature leaves for burns.

    9. Kalanchoe

    • Light: Bright, indirect light. Tolerates some direct sun.
    • Water: Let soil dry between waterings. Reduce watering in winter.
    • Humidity: Low humidity preferred.
    • Pro Tip: Deadhead spent blooms to encourage new flowers.

    10. Indoor Bamboo (Lucky Bamboo)

    • Light: Bright, indirect light. Avoid direct sun.
    • Water: Keep roots submerged in water (if grown hydroponically) or keep soil moist.
    • Pro Tip: Use filtered water to prevent chlorine damage.

    11. Ivy Plant

    • Light: Bright, indirect light. Tolerates low light.
    • Water: Water when the top inch of soil is dry.
    • Pro Tip: Trim leggy stems to encourage bushier growth.

    12. Christmas Cactus

    • Light: Bright, indirect light.
    • Water: Keep soil slightly moist. Reduce watering after blooming.
    • Pro Tip: Provide 12–14 hours of darkness in fall to trigger blooms.

    13. Hibiscus

    • Light: Direct sunlight (6+ hours daily).
    • Water: Keep soil consistently moist.
    • Pro Tip: Mist leaves to combat dry indoor air.

    14. Rosemary

    • Light: Full sun (south-facing window).
    • Water: Let soil dry slightly between waterings.
    • Pro Tip: Rotate the pot weekly for even growth.

    15. Hydrangea (Indoor)

    • Light: Bright, indirect light.
    • Water: Keep soil moist but not waterlogged.
    • Pro Tip: Use acidic soil (pH 5.5–6.5) for blue blooms.

    16. Jade Plant

    • Light: Direct sunlight (4–6 hours daily).
    • Water: Water deeply, then let soil dry completely.
    • Pro Tip: Avoid frequent repotting—jade plants enjoy being root-bound.

    17. Lavender (Indoor)

    • Light: Full sun (6–8 hours daily).
    • Water: Water sparingly—let soil dry between waterings.
    • Pro Tip: Prune regularly to prevent legginess.

    18. Monstera (Swiss Cheese Plant)

    • Light: Bright, indirect light.
    • Water: Water when the top 2 inches of soil are dry.
    • Pro Tip: Wipe leaves with a damp cloth to remove dust.

    19. Amaryllis

    • Light: Bright, indirect light during growth; low light during dormancy.
    • Water: Water sparingly until the flower stalk appears.
    • Pro Tip: After blooming, cut the stalk but keep leaves to recharge the bulb.

    20. Venus Fly Trap

    • Light: Full sun (6+ hours daily).
    • Water: Use distilled or rainwater only. Keep soil damp.
    • Pro Tip: Feed insects occasionally (no fertilizer needed).

    21. ZZ Plant

    • Light: Low to bright indirect light.
    • Water: Water every 3–4 weeks. Drought-tolerant!
    • Pro Tip: Wipe leaves with a microfiber cloth for shine.

    22. Pothos

    • Light: Tolerates low light but thrives in bright, indirect light.
    • Water: Water when soil is dry to the touch.
    • Pro Tip: Trim vines to encourage fuller growth.

    23. Money Tree

    • Light: Bright, indirect light.
    • Water: Water when the top 2 inches of soil are dry.
    • Pro Tip: Braid trunks gently for a decorative touch.

    24. Pineapple Plant

    • Light: Full sun (6–8 hours daily).
    • Water: Water moderately; avoid soggy soil.
    • Pro Tip: Harvest fruit when golden and fragrant.

    25. Gardenia

    • Light: Bright, indirect light.
    • Water: Keep soil consistently moist.
    • Pro Tip: Use acidic soil and fertilize monthly during growth.

    26. Anthurium

    • Light: Bright, indirect light.
    • Water: Water weekly; keep soil slightly moist.
    • Pro Tip: Boost humidity with a pebble tray.

    27. Majesty Palm

    • Light: Bright, indirect light.
    • Water: Keep soil evenly moist.
    • Pro Tip: Mist fronds weekly to prevent browning.

    28. Calla Lily

    • Light: Bright, indirect light.
    • Water: Keep soil moist during growth; reduce in dormancy.
    • Pro Tip: Plant bulbs shallowly to avoid rot.

    29. Jasmine

    • Light: Direct sun (4–6 hours daily).
    • Water: Keep soil slightly moist.
    • Pro Tip: Provide a trellis for climbing growth.

    30. Hyacinth

    • Light: Bright, indirect light.
    • Water: Keep soil moist but not waterlogged.
    • Pro Tip: Chill bulbs before planting for better blooms.

    31. Lily Plant (Indoor)

    • Light: Bright, indirect light.
    • Water: Keep soil consistently moist. Avoid waterlogging.
    • Humidity: Moderate humidity.
    • Pro Tip: Remove pollen from flowers to prolong bloom life.

    32. Corn Plant (Dracaena fragrans)

    • Light: Low to bright indirect light.
    • Water: Water when top inch of soil is dry.
    • Pro Tip: Wipe leaves to prevent dust buildup.

    33. Mint Plant

    • Light: Bright, indirect light or partial sun.
    • Water: Keep soil moist. Mint loves water but hates soggy roots.
    • Pro Tip: Grow in a separate pot to control spreading.

    34. Air Plants (Tillandsia)

    • Light: Bright, indirect light.
    • Water: Soak in water for 20 minutes weekly. Shake off excess water.
    • Pro Tip: Mist between soakings in dry climates.

    35. Areca Palm

    • Light: Bright, indirect light.
    • Water: Keep soil evenly moist. Reduce watering in winter.
    • Pro Tip: Mist fronds to maintain humidity.

    36. Parlor Palm

    • Light: Low to medium indirect light.
    • Water: Water when top inch of soil is dry.
    • Pro Tip: Ideal for low-light corners.

    37. Rubber Plant

    • Light: Bright, indirect light. Tolerates medium light.
    • Water: Water when the top 2 inches of soil are dry.
    • Pro Tip: Wipe leaves with a damp cloth to enhance photosynthesis.

    38. Fiddle Leaf Fig

    • Light: Bright, indirect light. Avoid direct sun.
    • Water: Water thoroughly, then let soil dry halfway.
    • Pro Tip: Rotate the plant weekly for even growth.

    39. String of Pearls

    • Light: Bright, indirect light.
    • Water: Water every 2–3 weeks. Let soil dry completely.
    • Pro Tip: Hang near a window for cascading growth.

    40. Philodendron

    • Light: Low to bright indirect light.
    • Water: Water when the top inch of soil is dry.
    • Pro Tip: Trim yellow leaves to redirect energy to healthy growth.

    41. Bird of Paradise

    • Light: Bright, direct light (south-facing window).
    • Water: Water when the top 2 inches of soil are dry.
    • Pro Tip: Wipe leaves monthly to remove dust and boost growth.

    42. Calathea (Prayer Plant)

    • Light: Medium, indirect light. Avoid direct sun.
    • Water: Keep soil lightly moist. Use distilled water to prevent leaf crisping.
    • Pro Tip: Thrives in bathrooms due to high humidity.

    43. Peperomia

    • Light: Bright, indirect light.
    • Water: Water every 1–2 weeks. Let soil dry slightly between waterings.
    • Pro Tip: Compact size makes it perfect for shelves or desks.

    44. Chinese Evergreen

    • Light: Low to medium indirect light.
    • Water: Water when the top inch of soil is dry.
    • Pro Tip: Tolerates fluorescent lighting—ideal for offices.

    45. Schefflera (Umbrella Plant)

    • Light: Bright, indirect light.
    • Water: Water when the top 2 inches of soil are dry.
    • Pro Tip: Prune leggy stems to maintain a bushy shape.

    46. Croton

    • Light: Direct sunlight for vibrant leaf colors.
    • Water: Keep soil consistently moist.
    • Pro Tip: Sudden leaf drop? Check for drafts or temperature changes.

    47. Dracaena Marginata

    • Light: Bright, indirect light. Tolerates low light.
    • Water: Water every 2–3 weeks. Let soil dry between waterings.
    • Pro Tip: Remove brown leaf tips with clean scissors.

    48. English Ivy

    • Light: Bright, indirect light.
    • Water: Keep soil slightly moist.
    • Pro Tip: Hang in baskets for trailing foliage.

    49. Ponytail Palm

    • Light: Bright, direct light.
    • Water: Water every 3–4 weeks. Stores water in its bulbous trunk.
    • Pro Tip: Perfect for sunny, dry rooms.

    50. Begonia

    • Light: Bright, indirect light.
    • Water: Water when the top inch of soil is dry.
    • Pro Tip: Avoid wetting leaves to prevent mildew.

    Advanced Troubleshooting Tips

    1. Yellow Leaves: Often caused by overwatering or poor drainage. Check soil moisture and adjust watering habits.
    2. Brown Tips: Low humidity or fluoride in water. Use filtered water and increase humidity.
    3. Leggy Growth: Insufficient light. Move the plant closer to a window or use grow lights.
    4. Pests: Isolate affected plants and treat with neem oil or insecticidal soap.

    FAQs

    Q: Can I use tap water for my indoor plants?
    A: It depends! Some plants (e.g., spider plants, peace lilies) are sensitive to chemicals like chlorine. Use filtered water or let tap water sit overnight.

    Q: How do I revive a dying plant?
    A: Trim dead foliage, check for root rot, repot in fresh soil, and adjust light/water. Patience is key!

    Q: What’s the best fertilizer for indoor plants?
    A: A balanced, water-soluble fertilizer (e.g., 10-10-10) diluted to half strength. Apply monthly during spring/summer.

    Q: Can I grow herbs indoors year-round?
    A: Absolutely! Basil, mint, and rosemary thrive with 6+ hours of sunlight. Use grow lights in darker months.

    Q: How do I know if my plant is root-bound?
    A: Roots growing through drainage holes or circling the pot’s surface signal it’s time to repot.

    Q: Are coffee grounds good for indoor plants?
    A: Yes! Mix into compost for acid-loving plants like African violets or hydrangeas.

    Conclusion

    Caring for indoor plants is a journey of discovery, patience, and joy. Whether you’re nurturing a resilient snake plant or a finicky fiddle leaf fig, each plant teaches you something new. Remember, even the most experienced plant parents have faced a few casualties—it’s all part of the process!

  • How to Start an Urban Garden in Small Spaces?

    How to Start an Urban Garden in Small Spaces?

    Urban gardening has rapidly gained popularity in recent years as city dwellers are looking for ways to reconnect with nature, grow their food, and make the most of limited spaces. But what exactly is urban gardening? In short, it’s the practice of growing plants in an urban setting, whether on a rooftop, balcony or even in a small yard. But urban gardening isn’t just about plants. It’s about community, sustainability, and personal well-being. This comprehensive guide will walk you through the essentials of urban gardening and how to create your urban garden, no matter how much space you have.

    What is Urban Gardening?

    Urban gardening refers to cultivating plants in an urban environment, such as growing flowers, vegetables, or herbs in city spaces. With the growth of city populations and an increasing interest in sustainability, urban gardening has become a widespread practice. It helps individuals reconnect with nature, provides fresh produce, and offers benefits such as stress reduction and fostering a sense of community.

    Urban gardens can take many forms, including:

    • Container Gardens: Using pots, barrels, or any available containers to grow plants on balconies, windowsills, or even indoor spaces.
    • Community Gardens: Shared gardening spaces where neighbours or communities come together to grow food and connect.
    • Vertical Gardens: Utilizing vertical space on walls or trellises to maximize limited areas for plant growth.
    • Rooftop Gardens: A modern urban gardening trend where unused rooftop spaces are transformed into gardens.

    Urban gardening enhances the aesthetic appeal of urban spaces and reduces environmental impacts by lowering the carbon footprint. It helps combat food insecurity, especially in densely populated areas and promotes healthier living. Additionally, it allows individuals to grow their food, reducing dependency on store-bought produce.

    What is Urban Farming?

    While urban gardening and urban farming share similarities, they differ in scale. Urban farming involves growing food on a larger scale, often for commercial purposes and may include raising animals or growing crops such as fruits, vegetables, and herbs. Urban farming addresses the growing demand for locally sourced food in urban areas, aiming to reduce the reliance on long-distance transportation and increase food accessibility in cities.

    Cities like Tokyo, Hong Kong, Singapore, and major urban centres in the U.S., like Los Angeles and New York, have embraced urban farming in creative ways. From using rooftops to vacant lots, these cities are finding innovative ways to turn unused spaces into sources of fresh, local food.

    Why Urban Gardening Matters?

    Urban gardening is more than just growing plants; it is about creating a healthier and more sustainable urban environment. It can reduce environmental pollution, contribute to better air quality, and provide communities with fresh food. Moreover, it fosters well-being, as gardening has been shown to lower stress, improve mental health, and create strong community bonds.

    Benefits of Urban Gardening:

    • Improves Well-being: Spending time gardening has been shown to reduce stress levels and improve mental health.
    • Saves Money: Growing your food can cut down on grocery bills, especially for fresh produce.
    • Environmental Impact: Reduces food miles and the carbon footprint associated with transporting food long distances.
    • Enhances Community: Urban gardens help neighbours collaborate, share knowledge, and improve social connections.

    How to Get Started with Urban Gardening

    Starting an urban garden may seem intimidating, but it is easy to begin, even in small spaces. Whether you have a balcony, a small backyard, or a windowsill, urban gardening offers an opportunity to create a green space in your life. Here’s a step-by-step guide to help you get started.

    Step 1: Choose Your Space

    The first step in creating an urban garden is finding the right space. You don’t need a lot of room to get started; even a tiny balcony, windowsill, or shared community garden can be a perfect spot. Here are some space options:

    • Balcony or Patio: If you live in an apartment or condo, your balcony or patio can be a great place to start.
    • Rooftops: If you have access to a rooftop, it can be a prime space for a garden.
    • Shared Spaces: You can collaborate with neighbours to transform unused areas into a community garden.
    • Window Boxes: If you don’t have much outdoor space, window boxes are perfect for growing small plants or herbs.

    Be sure to measure your available space, as this will help you decide how much you can grow. If you’re in a shared space, it’s essential to ask for permission from building owners or local authorities before starting your garden.

    Step 2: Choose Your Containers

    Once you’ve chosen your space, it’s time to pick containers for your plants. While decorative pots are an option, they can often be expensive and not as practical. Here are some affordable alternatives:

    • Buckets and Plastic Containers: These can be bought cheaply at garden stores or repurposed from home.
    • Raised Beds: These can be purchased or made from wooden planks. Raised beds are ideal for growing plants in small spaces.
    • Upcycled Containers: Use old crates, wooden boxes, or even discarded toys to create creative containers for your garden.

    Tip: To maximize space, consider using vertical planters such as stackable planters, hanging baskets, or railing planters.

    Step 3: Choose Your Plants

    When selecting plants for your urban garden, think about the available sunlight, the type of plants, and the space constraints. Urban gardens often have limited space, so opt for plants that thrive in confined areas. Some great options include:

    • Vegetables: Leafy greens like lettuce, spinach, and kale thrive in smaller spaces. Tomatoes, peppers, and beans also do well in containers.
    • Herbs: Basil, mint, thyme, and parsley are perfect for container gardening and grow well in small spaces.
    • Flowers: Marigolds, petunias, and sunflowers are colourful additions to any garden and are easy to maintain.

    Ensure that your plants have the proper requirements for sunlight and water. Some plants may need more sunlight, while others might thrive in shadier spots.

    Step 4: Sow Seeds or Plant Seedlings

    After choosing your plants, you can either sow seeds or use seedlings for quicker results. If you decide to start from seeds, you can begin growing them indoors in small containers or egg cartons. Once the seedlings are ready, you can transplant them into larger pots or garden beds.

    If you opt for seedlings, you can buy them from a local nursery or garden centre. When planting, ensure your containers have drainage holes to avoid waterlogging. Fill the bottom with gravel or rocks to improve drainage, then add soil and plant your seedlings.

    Step 5: Water and Care for Your Garden

    Watering your garden is crucial, as plants in containers dry out faster than those planted directly in the ground. Water your plants regularly, but avoid overwatering, as this can lead to root rot. Depending on the weather and the type of plants, you may need to water once or twice a week.

    Consider investing in automatic watering systems or using self-watering containers if you’re often busy or away from home.

    Vertical Gardening: A Space-Saving Solution

    Urban spaces are often limited, but that doesn’t mean you can’t grow plenty of plants. Vertical gardening is an excellent option for maximizing your space and increasing plant yields. You can use various methods for vertical gardening:

    • Vertical Planters: These are stackable pots that allow you to grow plants on top of each other.
    • Wall Planters: Attach planters to your walls for an eye-catching display.
    • Trellises: Use trellises for climbing plants such as beans or tomatoes.

    By going vertical, you can use your walls, fences, and even window frames to grow plants efficiently.

    Urban Gardening Pros and Cons

    Urban Gardening Pros and Cons

    ProsCons
    Reduces food costsLimited space may restrict the number of plants
    Improves mental health and well-beingNeeds regular maintenance
    Helps reduce environmental impactRequires time and commitment
    Promotes sustainability and communitySome plants require specific conditions (sunlight, water)
    Enhances urban aestheticsPests may become a problem in small spaces

    Frequently Asked Questions (FAQs)

    1. Can I start an urban garden in an apartment? Yes! You can start an urban garden in small spaces like balconies, windowsills, or even indoors using containers.

    2. What plants are best for urban gardens? Vegetables like peppers, tomatoes, and salad greens, as well as herbs like basil and thyme, are great choices for urban gardening.

    3. How much time does urban gardening require? It depends on the plants and the setup. On average, expect to spend a few hours a week tending to your garden.

    4. Can I grow flowers in an urban garden? Yes! Flowers like sunflowers, petunias, and marigolds thrive in urban gardens and add vibrant color to your space.

    5. What is the difference between urban gardening and urban farming? Urban gardening is typically done on a smaller scale, often for personal use, while urban farming involves larger-scale food production, often for community consumption or commercial purposes.

    Conclusion

    Urban gardening is an excellent way to bring nature into your life, no matter where you live. Whether you’re looking to grow your own food, create a peaceful green space, or foster a sense of community, starting an urban garden is the perfect solution. With just a little planning, creativity, and dedication, you can turn any small space into a thriving garden that provides both beauty and fresh, homegrown food. So why wait? Start your urban garden today and watch your city space bloom with life!

  • Top 10 Small Garden Design Ideas

    Top 10 Small Garden Design Ideas

    When designing a small garden, every choice you make counts. From selecting plants to deciding on furniture and layout, the goal is to create a space that feels expansive, functional, and beautiful. Whether working with a compact courtyard, a narrow backyard, or a small balcony, there are numerous ways to maximize your outdoor area without overcrowding. In this guide, we’ll dive into some essential small garden design tips, and I’ll share my insights to help you transform your space into a stunning garden that feels bigger than it is.

    In this article, we’ll explore a wide range of strategies to help you make the most of your small garden design, from plant choices to layout techniques, all aimed at creating a functional and visually appealing space. So, if you’re eager to maximize your garden’s potential, read on to discover ideas that can elevate your outdoor space.

    1. Never Underestimate Plant Growth

    When you first plant a garden, it’s easy to get carried away with filling the space to immediately make it look full and lush. However, plants—especially perennials—can grow much more than you expect in a single growing season. In my early gardening days, I planted things close together to create a fuller look, but I soon realized I didn’t need to do this. Overcrowding plants can lead to unnecessary resource competition, leaving some plants suffocated as they try to grow.

    To avoid this, I recommend starting with young plants and giving them room to grow. If you find that some plants are overcrowding others, don’t worry—there are always solutions. When the soil has warmed up, you can move perennials like asters, Erysimum, or rudbeckias to another spot in early spring. For plants that have outgrown their space, like the Carex ‘Everest’ grass, you can lift and divide them in the spring to reduce their size.

    The key is to avoid overplanting and allow your plants the space they need to flourish.

    2. The Effectiveness of Roses

    Roses are often considered outdated, but they can be incredible assets in a small garden. Modern, repeat-flowering varieties can offer multiple flushes of flowers in one season, adding beauty and charm to any garden.

    I’ve found roses to be one of the most reliable plants in my garden, especially varieties like ‘Princess Anne,’ which grows to about 4 feet tall and features large clusters of dark purple to plum red flowers. It also has glossy, healthy leaves, making it a fantastic addition to small spaces. Another variety I love is ‘Maid Marion,’ a fragrant rose with frilly pink flowers. The scent is powerful, and the plant stays compact, making it perfect for smaller gardens.

    Roses are also easy to control. If they take up too much space, prune back unwanted stems at the base. Choosing the right variety and caring for them allows you to enjoy roses year-round without overwhelming your garden.

    3. A Lick of Paint Goes a Long Way

    When designing a small garden from scratch, you’ll inevitably need some time for the plants to grow and fill the space. However, that doesn’t mean you must leave your garden looking bare during the waiting period. One tip I swear by is painting the wooden surfaces of your garden with colored wood stains. This adds an immediate pop of color and structure, helping to define the space as the plants gradually mature.

    In my own garden, I initially chose a cool green paint to complement the soft purples and variegated greens of my plants. In the following year, I opted for a bolder cornflower blue to make sure the painted furniture wouldn’t get lost among the larger, more developed plants. Adding color to your garden not only improves its aesthetic but also helps unify different elements, making the space feel cohesive.

    4. There’s Power in Repeat Planting

    In a small garden, repetition can work wonders. Planting the same plant in multiple areas can create unity throughout your space, even in small doses. I use the evergreen Carex ‘Everest’ and its cousin ‘Eversheen’ throughout my garden, and it’s been incredibly effective in creating a cohesive, well-planned look.

    Repeat planting doesn’t have to mean overdoing it. I usually limit myself to no more than three instances of the same plant to avoid a monotonous effect. The repetition of certain plants, especially evergreen varieties, gives the garden a consistent framework, ensuring that it remains visually appealing throughout the year.

    5. Raised Beds for Effective Edging

    One of my favorite tricks for enhancing the look of a small garden is using raised beds. These beds don’t just help with growing vegetables—they also make a perfect setting for ornamental plants. Raised beds have several advantages: the soil warms up faster in the spring, the plants are easier to access and maintain, and they offer a clear definition of garden spaces.

    In my own design, I’ve used raised beds to showcase various edging plants, like variegated ivies, grasses, and fleabane. The colorful painted backgrounds of the raised beds make these plants pop and add texture and interest to the space. Raised beds are an excellent way to elevate both the plants and the visual appeal of a small garden.

    6. Maximizing Space with Compact Plants

    When working with a small garden design, it’s crucial to focus on plants that won’t overwhelm the space. Compact plants are perfect for small gardens because they don’t take up too much space and often feature a more refined aesthetic. For added vertical appeal, consider incorporating columnar trees that provide height without the width.

    When choosing plants, focus on those that can provide year-round interest, such as those with colorful leaves, unique textures, or vibrant bark. Mixing trees, shrubs, and perennials will help keep your small garden fresh and interesting throughout the seasons.

    7. Think Outside the Box

    Vertical gardens, railing planters, and hanging baskets can be a game-changer for small spaces. These creative additions allow you to make the most of the limited ground area, using height and vertical space to your advantage. If you have a small garden and want to add a touch of greenery, consider growing plants like strawberries in hanging baskets or creating a vertical succulent garden.

    Adding a water feature to your garden is also an excellent way to maximize space. A simple recirculating wall fountain or a tabletop bubbling pot can be a beautiful and low-maintenance solution that brings both visual and auditory appeal to your garden.

    8. Add Privacy and Order

    In a small garden, privacy can be a challenge, but there are ways to work around this. Columnar trees or well-behaved climbers like jasmine on a vertical trellis can provide seasonal screening without taking up too much space. These plants offer height and privacy while maintaining a tidy, minimalist appearance.

    Another design tip is to create a sense of order in the garden. Clean lines and structured designs can make a garden feel more organized and expansive. Using a diagonal axis can also help alter the perception of space in a small garden, making it look larger than it is.

    9. Use Outdoor Furniture Wisely

    Outdoor furniture plays a critical role in the overall feel of a small garden. It’s important to choose pieces that are appropriately sized for the space. Opt for sleek, simple designs over bulky, deep-seated chairs. More miniature, more compact furniture will ensure that your garden doesn’t feel overcrowded.

    10. Incorporate Lighting for Added Drama

    Lighting can transform your garden into a magical space, especially in the evenings. Outdoor lighting extends the use of your garden well beyond daylight hours. Simple string lights, lanterns, or solar-powered path lights can add ambiance and highlight key features of your garden design.

    Pros and Cons of Small Garden Design

    ProsCons
    Maximizes limited space effectivelyCan require careful planning
    Easy to manage and maintainMay need more frequent maintenance
    Creates a cozy, inviting atmosphereLimited room for larger plants
    Can be personalized with furnitureLack of privacy in some designs
    Suitable for growing a variety of plantsMay feel cramped without proper design

    Conclusion: Transforming Your Small Garden into a Stylish Oasis

    Designing a small garden doesn’t have to be a daunting task. By carefully considering your plant choices, furniture, and layout, you can create a space that feels both expansive and welcoming. Incorporating tips like repeat planting, raised beds, and vertical gardens will help you maximize your space while maintaining visual appeal. Don’t forget the power of color and the soothing presence of water features, which can bring tranquility to any garden, no matter how small.

    With the right planning and a little creativity, your small garden can become an extraordinary space that reflects your style, provides functionality, and creates a peaceful retreat. So roll up your sleeves, get planning, and enjoy the process of creating a small garden that feels big on beauty and charm.