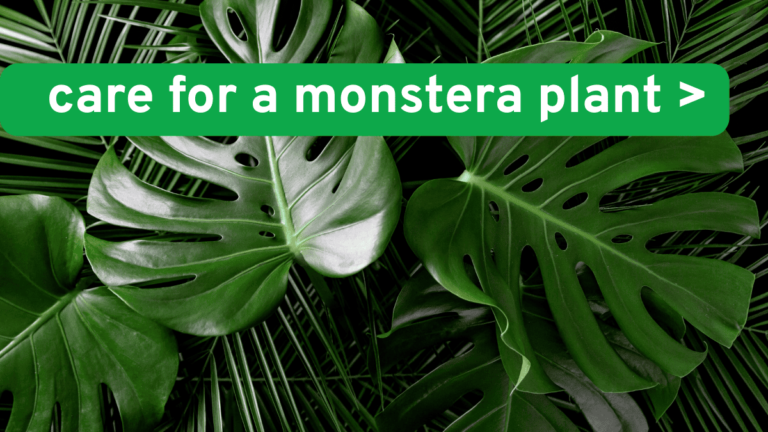
Monstera deliciosa, commonly known as the Swiss cheese plant or split-leaf philodendron, is a popular and striking houseplant. With its large, glossy, heart-shaped leaves and unique fenestrations (the holes and splits in the leaves), it’s no wonder that this tropical beauty is a favorite among plant enthusiasts. Not only is the Monstera a visually appealing addition to any space, but it is also relatively easy to care for, making it an ideal choice for beginners and experienced gardeners alike.
In this article, we’ll dive deep to how to care for a monstera plant , types of monstera plants, propagation methods, and troubleshooting tips to keep your Monstera thriving. Whether you’re a novice or a seasoned plant parent, this guide will help you nurture your Monstera into a lush and healthy beauty.
Understanding How to Care for a Monstera Plant
Monstera plants thrive in humid, tropical environments, and they need specific conditions to grow to their full potential. They are native to Central America and prefer warm temperatures, indirect light, and well-draining soil. Here’s a breakdown of the essential care factors for a healthy Monstera deliciosa:
Sunlight Requirements
The Monstera deliciosa does best in bright, indirect sunlight. Direct sunlight can scorch its delicate leaves, so it’s important to find a spot with filtered light. If you’re growing your Monstera indoors, place it near a window with sheer curtains or use artificial grow lights if natural light is insufficient.
In outdoor spaces, the Swiss cheese plant can grow under the canopy of larger trees, making it perfect for shaded or partially shaded areas. However, too little light can lead to leggy growth and fewer fenestrations (holes in the leaves).
Soil and Potting Needs
Monstera plants require well-draining soil to prevent root rot. A mix of peat-based soil with added perlite or shredded bark is ideal. This combination promotes aeration and drainage while providing the necessary nutrients. When choosing a pot for your Monstera, ensure it has ample drainage holes to allow excess water to escape.
As your Monstera grows, it will eventually outgrow its pot. When this happens, repot your plant every couple of years into a larger container, increasing the pot size by a few inches to accommodate its expanding root system.
Watering Your Monstera
One of the most common mistakes people make when caring for Monstera plants is overwatering. These plants prefer to dry out between waterings, so it’s important to check the soil moisture regularly. Stick your finger into the soil; if the top 2-3 inches are dry, it’s time to water.
During the growing season (spring and summer), Monstera may need watering once a week, but in the winter, when the plant is dormant, watering every couple of weeks should suffice. Always water deeply, ensuring that water runs out from the drainage hole at the bottom of the pot.
Temperature and Humidity
Monstera plants flourish in warm environments, typically between 65°F and 85°F. They are sensitive to cold temperatures and should be kept away from drafts and air conditioners. In terms of humidity, these plants prefer a humid environment, ideally around 60%. To boost humidity, you can mist the leaves or use a humidifier, particularly in dry indoor conditions.
Propagating Monstera: Easy Methods for Growing New Plants
Monstera deliciosa is relatively easy to propagate, whether by stem cuttings or air layering. Here’s a detailed guide on how to propagate your Monstera successfully:
Stem Cutting Method
Stem cuttings are the most common way to propagate Monstera. Follow these simple steps:
Using clean, sharp scissors or pruning shears, cut a stem with a node (the bump where roots will grow) and at least one leaf.
Place the cutting in a glass of water, ensuring the node is submerged. Change the water every 3-5 days.
After a few weeks, you’ll see roots developing. Once the roots are a few inches long, transplant the cutting into fresh soil.
Air Layering Method
For a more advanced and risk-free propagation method, you can use air layering. Here’s how:
Choose a healthy stem with a node.
Cut a small notch in the stem below the node.
Wrap sphagnum moss around the notch and moisten it. Cover it with plastic to keep the moss humid.
After a few months, when roots have developed, cut the stem below the roots and plant the new Monstera in soil.
Both methods are effective, but air layering tends to have a higher success rate, as it allows the roots to form while still attached to the parent plant.
How to Get Monstera Leaves to Split
Monstera leaves are famous for their unique splits, or fenestrations, which develop as the plant matures. To encourage the leaves to split, it’s important to provide optimal conditions for growth:
Light: Ensure the plant receives plenty of bright, indirect light. A grow light can also help promote the formation of fenestrations.
Watering: Maintain consistent watering, letting the soil dry out slightly between waterings.
Fertilizing: Feed your Monstera with a balanced fertilizer every few months during the growing season. This helps provide essential nutrients for healthy leaf development.
If your Monstera is growing slowly or not developing splits, it may not be receiving enough light or nutrients. Increasing light intensity or adding fertilizer can help stimulate new growth.
Types of Monstera Plants: A Quick Overview
Monstera deliciosa is just one of many species in the Monstera genus. Here are a few notable types of Monstera plants:
Monstera albo: This rare, variegated form of Monstera deliciosa has beautiful white splashes on its green leaves. It is often more expensive due to its scarcity and slower growth rate.
Monstera obliqua: Known for its delicate, airy leaves with large holes, Monstera obliqua is one of the rarest and most expensive varieties.
Monstera adansonii: Commonly called the Swiss cheese plant, it has larger leaves than the standard Monstera with more pronounced holes.
Monstera dubia: This vining species has small, round leaves with silvery markings and is commonly grown as a groundcover or climbing plant.
Troubleshooting Common Monstera Problems
Despite being relatively low-maintenance, Monstera plants can face a few issues. Here are some common problems and how to address them:
Brown Leaf Tips: This often indicates dry soil or inconsistent watering. Regularly water your Monstera, making sure the soil doesn’t dry out completely.
Yellow Leaves: If your Monstera’s leaves are turning yellow, it might be a sign of overwatering or insufficient light. Ensure proper drainage and provide adequate light.
Wilting or Curling Leaves: This can occur due to overwatering or low humidity. Check the soil for moisture levels and consider using a humidifier if the air is too dry.
FAQs about Monstera Care
Q: How often should I water my Monstera? A: Water your Monstera once the top 2-3 inches of soil dry out. During the growing season, it may need watering once a week, but in winter, it may only require water every few weeks.
Q: Can I grow Monstera outside? A: Yes, Monstera can be grown outside in USDA zones 10-12, where temperatures remain warm. It thrives in shaded or partially shaded areas.
Q: How can I encourage Monstera leaves to split? A: To encourage leaf splits, provide bright, indirect light, and maintain consistent watering and fertilizing.
Conclusion
Caring for a Monstera deliciosa is straightforward once you understand its basic needs. With the right environment, watering routine, and occasional maintenance, your Monstera will reward you with beautiful, large, split leaves that add a tropical touch to your space. Whether you’re a beginner or an experienced plant enthusiast, this low-maintenance beauty is a perfect addition to any home.
With the proper care, your Monstera can thrive for years, growing larger and more stunning as time goes on. So, take the time to nurture it, and you’ll enjoy its lush foliage and exotic charm in your home or garden.
African violets, with their delicate beauty, are a popular choice among plant enthusiasts. However, despite their visual appeal, these plants can be a bit tricky to care for, especially when it comes to watering. Overwatering or improper watering techniques can lead to root rot, damaged leaves, and poor plant health. One common method for watering African violets is top watering, but if not done correctly, it can harm the plant. This guide will walk you through how to water your African violets from the top like a pro, providing you with the perfect techniques, the best time to water, and how to avoid common mistakes. By following these expert tips, you can ensure that your African violets thrive in your care.
Choosing the Right Watering Tools
When it comes to watering African violets from the top, the right tools can make all the difference. The most essential item you’ll need is a narrow-spout watering can. These are specifically designed to allow you to control the flow of water with precision, preventing splashing and ensuring that the water reaches the soil without disturbing the plant’s delicate leaves and flowers.
A narrow-spout watering can gives you better control over how much water is delivered to the soil, which helps avoid overwatering and damage to the plant. A lightweight watering can is also important, as it reduces strain on your hands and wrists while you maneuver around the plant. When using a watering can, tilt the pot slightly to ensure the water flows evenly into the soil, away from the plant’s crown. This will help prevent moisture from accumulating in the crown, which can lead to rot.
Watering Small Pots with a Syringe
If you have a small African violet pot, using a watering can with a narrow spout may not always be the best option. In such cases, a syringe can be a great tool for watering your plant. Simply fill a syringe with lukewarm water and, using one hand to gently lift and hold back the leaves, direct the water at the base of the plant. This method ensures that the water goes straight to the soil, avoiding the leaves and flowers. The gentle flow of water minimizes the risk of damaging the plant, and it also helps prevent excess moisture from collecting on the foliage.
Another benefit of using a syringe is that it allows you to be precise with how much water you’re giving your plant. Overwatering can be just as harmful as underwatering, so it’s essential to ensure the plant gets just the right amount of moisture.
Pro Tip: The best time to water your African violets is in the morning. This gives the leaves ample time to dry throughout the day, reducing the risk of fungal diseases that can thrive in damp conditions.
Using a Funnel for Controlled Watering
Another great method for watering African violets from the top is by using a funnel. A small funnel with a narrow tip can help control the flow of water and ensure that it reaches the soil without splashing on the leaves or flowers. Position the funnel at the base of the plant and slowly pour water into it. This technique is especially helpful when you’re dealing with smaller pots or plants that have densely packed foliage.
When using a funnel, it’s important not to pour too much water at once. Overwatering can lead to root rot, so pour slowly and steadily, ensuring that the water is absorbed by the soil without excess runoff. To make this method even more efficient, consider using a silicone funnel, which can be adjusted to fit snugly into tight spaces.
Pro Tip: To avoid spills, you can use a half-filled glass or cup to pour the water into the funnel. This allows you to control the amount of water going into the plant, ensuring that you don’t overwhelm the soil.
Creating a Plastic Barrier for Extra Protection
If you want to make watering even easier and protect your African violet’s leaves from moisture, using a plastic barrier can be a great solution. You don’t need to buy anything special for this; a simple plastic bag can do the job. Place the plastic over the pot, leaving a small slit near the soil to allow water to enter. This barrier prevents stray droplets from touching the plant’s delicate foliage while also creating a mini-humidity zone around the plant. African violets thrive in humid conditions, so this extra humidity boost will help them flourish.
This technique also allows you to water less frequently. The plastic cover helps retain moisture in the soil, which means you won’t have to water your African violets again for a longer period, typically 2-3 weeks. After watering, simply remove the plastic cover. The added humidity will help keep the plant healthy and reduce the risk of stress from inconsistent moisture levels.
Pro Tip: African violets prefer a humidity level of around 75%, so using this plastic barrier can significantly improve the plant’s environment.
Why Top Watering Works for African Violets
Top watering is a method of watering that involves pouring water directly onto the soil surface, allowing it to gradually seep down to the roots. For African violets, this method can be beneficial when done correctly. Unlike bottom watering, where water is absorbed through the pot’s drainage holes, top watering ensures that the entire surface area of the soil gets moist. This helps in evenly hydrating the plant and prevents dry spots in the soil, which can lead to uneven growth or stress.
However, top watering can be tricky, especially if not done carefully. If water is splashed on the leaves, it can encourage fungal diseases, and if the water collects in the crown, it can lead to rot. The key to successful top watering is to apply the water slowly, using tools like a narrow-spout watering can or syringe, to ensure it’s directed exactly where it’s needed.
Additional Tips for African Violet Care
While proper watering is essential, it’s only one aspect of caring for African violets. Here are a few additional tips to keep your plants healthy:
Lighting: African violets thrive in bright, indirect light. Avoid placing them in direct sunlight, as it can scorch the leaves. A north or east-facing window is often ideal.
Temperature: These plants prefer temperatures between 65°F and 75°F. Keep them in a warm spot but away from drafts or air conditioners.
Fertilizing: Use a balanced fertilizer every 4-6 weeks during the growing season to promote healthy growth and vibrant blooms.
Repotting: African violets don’t need frequent repotting, but it’s important to refresh the soil every year or two to prevent it from becoming compacted and nutrient-deprived.
Conclusion
Watering African violets from the top can be a highly effective method when done correctly. With the right tools and techniques, you can avoid the common pitfalls that often lead to damage and stress for these beautiful plants. Whether using a narrow-spout watering can, a syringe, or a funnel, the key is to apply the water carefully and consistently. Additionally, creating a micro-humidity environment with a plastic barrier can further enhance the plant’s health, making it thrive in your care. By incorporating these simple but effective methods, you’ll ensure that your African violets continue to bloom beautifully.
Remember, the best time to water your African violets is in the morning, allowing moisture to evaporate during the day, reducing the risk of diseases. Regular care, including proper watering, lighting, and temperature control, will help your plants live their best lives. With the right approach, caring for African violets can become an enjoyable and rewarding experience.
FAQs
How often should I water my African violets? Water your African violets when the soil feels dry to the touch. Typically, they require watering once a week, but it can vary depending on the environment.
Can I use tap water for African violets? Yes, but make sure to let tap water sit for a few hours to dissipate any chlorine before using it. Alternatively, you can use distilled or rainwater.
Why do my African violet leaves turn yellow? Yellowing leaves may indicate overwatering, poor drainage, or too much direct sunlight. Adjust your care routine accordingly.
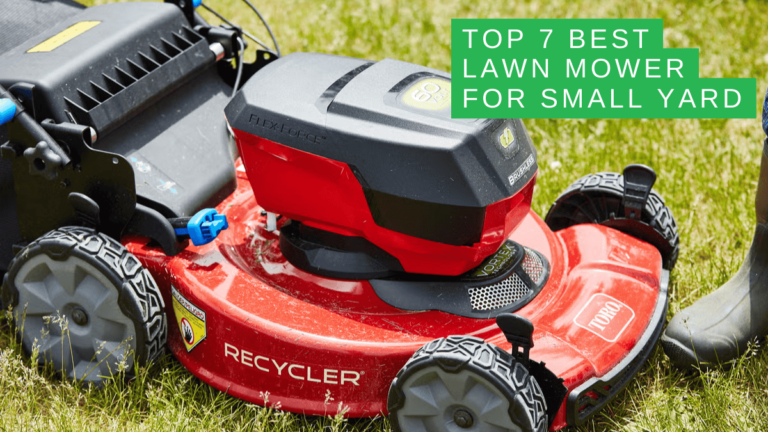
Maintaining a small yard requires the right lawn mower to keep your garden looking neat and well-manicured. While small yards don’t need the heavy-duty equipment that large lawns require, choosing the right mower is just as essential to ensure the job gets done efficiently. In this comprehensive guide, we’ll explore the best lawn mower for small yard, providing you with options across various categories, including electric, battery-powered, and even manual mowers. If you’re in search of the best mower for your small lawn, read on to make an informed decision.
Why the Right Lawn Mower Matters for Small Yards
Small yards may seem easier to maintain, but they come with their own set of challenges. With limited space, you need equipment that is compact, easy to store, and capable of navigating tight corners. Additionally, comfort and ease of use are critical because small yards often have features like flower beds, narrow paths, or garden furniture that require precise maneuvering. In such cases, using the wrong mower can make maintenance more difficult rather than convenient.
Finding a suitable mower will not only ensure that your lawn stays beautiful but also save time, energy, and space. By carefully selecting the best lawn mower for small yards, you’ll be able to create a neat and attractive outdoor space with minimal effort.
Top 7 Best Lawn Mowers for Small Yards
In this section, we’ve reviewed some of the best lawn mowers that cater specifically to small lawns. These products range from electric corded models to battery-powered and manual options, offering versatility and excellent value for money.
1. Greenworks 25022 – Corded Lawn Mower
Specifications:
Power Source: Corded Electric 12 amp
Cutting Diameter: 21-inch
User-Friendly: Single lever, 7-position height adjustment
Discharge Location: Bag
Wheels: 10-inch
The Greenworks 25022 corded electric lawn mower is an excellent choice for small yards. Its 21-inch cutting deck is large enough to cover the yard quickly without being too bulky. The single-lever height adjustment makes it easy to tailor the mowing height to your preference. Additionally, the compact design and foldable handle ensure easy storage in small spaces.
One of the best features of this mower is its bagging system, which collects grass clippings and helps maintain a tidy lawn. However, the corded design may not be ideal for users who want more freedom of movement, as the cord can get tangled while mowing. It is also not suitable for thick or wet grass.
The American Lawn Mower 1204-14 is a mechanical push lawn mower, making it an excellent choice for environmentally-conscious gardeners. This eco-friendly mower is free from emissions, gas, and electricity, providing a sustainable option for smaller lawns. It is lightweight, easy to push, and simple to maintain, offering an intuitive user experience.
However, one drawback is its slower cutting speed compared to powered models, which means it may take a bit longer to cover the yard. The 14-inch cutting width is narrower than some users may prefer.
User-Friendly: 3 tools in 1, easily converts from mower to trimmer to edger
Discharge Location: NA
Wheels: 5-inch
BLACK+DECKER’s MTC220 is a versatile 3-in-1 lawn mower that serves as a mower, trimmer, and edger all in one device. Powered by a 20V battery, it is ideal for small yards where space is limited. This mower is compact, lightweight, and easy to store, offering convenience for homeowners with minimal storage space.
The main drawback of this model is the lack of a bag to collect grass clippings, so users will need an additional tool like a vacuum or blower to clean up after mowing.
4. WORX WG779 – Lawn Mower with Mulching & Intellicut
Specifications:
Power Source: Battery-Powered 40V
Cutting Diameter: 14-inch
User-Friendly: Single-lever, 6 positions
Discharge Location: Mulch / Bag
Wheels: 10-inch
The WORX WG779 is a battery-powered mower that offers excellent power for small to medium-sized lawns. Equipped with Intellicut technology, this mower adjusts power based on the density of the grass, ensuring an efficient mowing experience. It also features a mulching function, which adds valuable nutrients to the lawn.
Although this mower is slightly heavier for small yards, it is still manageable for most users. The dual 40V batteries offer extended run time, making it ideal for larger small lawns.
5. Sun Joe MJ401E-PRO 14-inch – Electric Lawn Mower
Specifications:
Power Source: Corded Electric 13 amp
Cutting Diameter: 14-inch
User-Friendly: 3-position height control
Discharge Location: Bag
Wheels: 10-inch
Sun Joe’s MJ401E-PRO electric lawn mower is perfect for small to medium-sized yards. It is lightweight, easy to maneuver, and the 13-amp motor ensures efficient cutting. The 10.6-gallon grass bag holds a good amount of clippings, reducing the need for frequent emptying.
One downside is the plastic exterior, which may not be as durable as metal alternatives. However, the mower’s excellent performance and reasonable price make it an excellent option for those with limited storage.
The EGO Power+ LM2100 cordless mower offers a reliable battery-powered solution for small yards. With a 21-inch cutting deck, it efficiently covers a larger area while still being compact. The mower includes three functions: mulching, bagging, and side discharge, giving you flexibility depending on your yard’s needs.
While it operates quietly, some users find it underpowered when compared to corded models, and the charger is not included in the package.
BLACK+DECKER MM2000 is a corded electric lawn mower that provides powerful performance for small lawns. Its 20-inch cutting width covers more ground quickly, and the 13-gallon bag reduces the frequency of emptying. The adjustable height settings allow you to customize the grass length based on your preference.
Though a bit heavier than other small yard mowers, the MM2000 is still compact enough for easy storage and offers great value for the price.
When selecting the best mower for your small yard, consider the following factors:
Power Source: Electric, battery, and manual mowers each have their benefits. Electric mowers are ideal for small yards with consistent power, while battery-powered mowers offer more flexibility without the constraint of cords. Manual mowers are eco-friendly but require physical effort.
Cutting Width and Deck Size: A wider cutting width can save time, but it may be too bulky for very small yards. For tight spaces, choose a mower with a smaller cutting width that can easily maneuver.
Storage Space: For small yards with limited storage, a foldable or compact design will make storing the mower easier.
Eco-Friendliness: Battery and manual mowers are typically more eco-friendly than gas-powered models, as they produce no emissions.
FAQs
What type of lawnmower is the best for small yards? For small yards, a battery-powered or corded electric mower is usually the best option. These mowers are lightweight, efficient, and easy to store.
How often should I mow my grass? Grass should be mowed once a week during the growing season. This helps maintain healthy grass and prevents the lawn from becoming overgrown.
What horsepower do I need for a lawnmower? For small yards, a 3-4 horsepower mower is sufficient. Higher horsepower is needed for larger, more demanding lawns.
How long does it take to cut an acre of grass with a lawnmower? Typically, it would take around 2-2.5 hours to cut an acre of grass with a 16-inch mower.
What is better for small yards, electric or gas lawn mowers? Electric mowers are better for small yards due to their lightweight, quiet operation, and eco-friendliness. Gas mowers are better suited for larger yards.
Conclusion
Choosing the best lawn mower for small yards doesn’t have to be a difficult decision. Whether you opt for a corded electric model, a battery-powered mower, or a manual push reel, it’s essential to consider your specific needs and the size of your yard. The mowers reviewed in this guide are some of the top options for small yards, each offering unique features and benefits that make them suitable for compact outdoor spaces.
By selecting the right mower, you can keep your yard looking great with minimal effort, and enjoy a tidy, well-maintained outdoor area year-round. Make sure to assess your needs carefully, and pick the mower that fits your lifestyle best.
When it comes to maintaining a pristine lawn without the hassle of traditional lawn care methods, robotic lawn mowers have revolutionized the way we approach yard work. No longer do we need to spend hours under the sun, pushing a heavy mower back and forth across the lawn. With advancements in technology, robotic mowers offer a smarter, more efficient solution for maintaining a beautiful lawn with minimal effort.
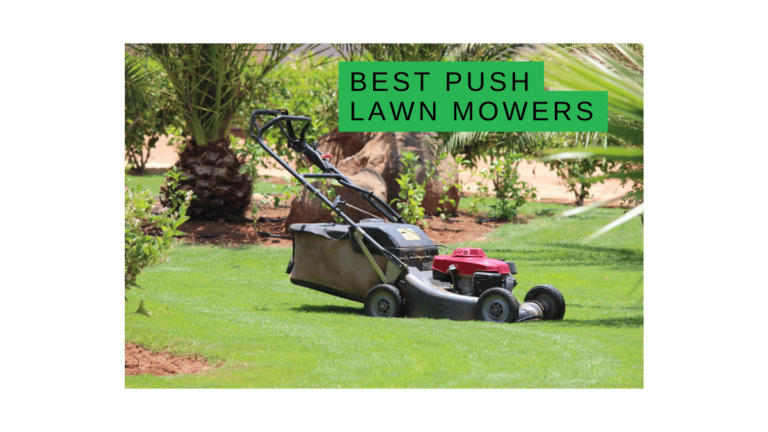
Whether you’re looking for the best push lawn mowers for large or small yards, the options in 2025 provide exceptional features that can handle various terrains, slopes, and grass types. In this comprehensive guide, we will explore some of the top robotic mowers on the market, their key features, and what makes them stand out.
Husqvarna Automower 430X / 430XH: The Best Overall
When it comes to robotic lawn mowers, the Husqvarna Automower 430XH stands out as a top contender. It is ideal for medium to large yards and can handle up to 0.8 acres of lawn with ease. What sets this model apart is its ability to navigate complex landscapes, making it a great choice for yards with multiple obstacles and slopes.
The Husqvarna Automower 430X and 430XH are virtually the same model, with the only difference being the cutting height range. The 430X is perfect for grass heights ranging from 0.8 to 2.4 inches, while the 430XH caters to taller grass, from 2.0 to 3.6 inches. Equipped with GPS tracking, the mower creates a detailed map of your lawn and adjusts its mowing pattern accordingly for maximum efficiency.
This model also features powerful LED headlights, making it a great option for night-time mowing. You can easily set a custom mowing schedule, allowing your lawn to be maintained 24/7. The Automower 430XH is compatible with both Amazon Alexa and Google Assistant, providing voice control capabilities. Additionally, it is equipped with a theft protection alarm and can be tracked via GPS, offering an extra layer of security.
Pros and Cons of Husqvarna Automower 430XH
Pros
Cons
Efficient for medium to large lawns (up to 0.8 acres)
Higher price point compared to budget models
Can handle slopes of up to 24°
Requires professional installation for boundary wires
GPS tracking and mapping for optimal mowing patterns
Limited battery life of 145 minutes
Voice control via Amazon Alexa and Google Assistant
If you’re looking for a robotic lawn mower that delivers great performance at a more affordable price, the Gardena 4069 R80Li is an excellent option. While it may not offer as many premium features as the Husqvarna 430XH, the Gardena 4069 R80Li is still a strong contender in the robotic mower market, offering a great balance between price and performance.
This mower is designed to handle gardens up to 800 square meters and can mow for up to 60 minutes on a 50-minute charge. It can also manage slopes of up to 25%, which is quite impressive for its price. While it lacks some of the smart features, like GPS tracking and mobile app connectivity, it still offers a solid mowing experience. The built-in security system includes an alarm that sounds if the mower is lifted and requires a PIN code to unlock.
Pros and Cons of Gardena 4069 R80Li
Pros
Cons
Affordable price point
Lacks GPS tracking and mobile app features
Can handle slopes of up to 25%
Mowing time limited to 60 minutes on a 50-minute charge
Solid performance for small to medium lawns (up to 0.75 acres)
No voice control or integration with smart home systems
Built-in security with alarm and PIN code protection
Husqvarna Automower 310: Best Budget-Friendly Option
For those with smaller lawns who are looking for a more budget-friendly option, the Husqvarna Automower 310 is a great entry-level robotic mower. Despite being more affordable than some high-end models, the Automower 310 doesn’t skimp on quality and performance. It’s ideal for small to medium-sized yards up to 0.25 acres and can handle slopes of up to 22 degrees.
One of the standout features of this mower is its user-friendly design. It’s easy to set up, and once the perimeter wire is laid down, the mower can get to work on its own. The Automower 310 has Bluetooth connectivity for wireless control, although it lacks some of the smart features found in more expensive models. However, with the optional Husqvarna Automower Connect system, you can access more advanced features like remote control via Google Assistant or Alexa.
Pros and Cons of Husqvarna Automower 310
Pros
Cons
Affordable option for small to medium lawns
Lacks GPS tracking
Easy setup with Bluetooth connectivity
No mobile app compatibility without Husqvarna Automower Connect add-on
Can handle slopes of up to 22°
Limited to smaller lawns (up to 0.25 acres)
Great for budget-conscious buyers
Optional Husqvarna Automower Connect for smart features
Worx WR150 Landroid L: A Great Choice for Larger Yards
For those with medium to large yards, the Worx WR150 Landroid L offers a powerful solution. This robotic mower can manage up to half an acre and features a 9-inch cutting disc that ensures efficient mowing across larger lawns. It’s equipped with both GPS tracking and Wi-Fi connectivity, making it easy to monitor the mower’s progress via a mobile app.
One of the key features of the Worx Landroid L is its “Digital Fence,” which replaces traditional boundary wires and allows you to set no-go zones within your yard. This feature ensures that the mower avoids certain areas, such as flower beds or garden furniture. The mower also comes with a GPS anti-theft tracking system, providing peace of mind if the mower is stolen.
Pros and Cons of Worx WR150 Landroid L
Pros
Cons
Suitable for larger lawns (up to 0.5 acres)
No voice control via Amazon Alexa or Google Assistant
GPS tracking and Wi-Fi connectivity for remote monitoring
Limited to smaller yards compared to premium models
Digital Fence for no-go zones
May require additional setup time due to the Digital Fence feature
The Robomow RS630 is another top contender for large yards. It’s capable of managing lawns up to 3/4 acres in size and can handle slopes of up to 20 degrees. One of the standout features of the Robomow RS630 is its dual-blade cutting system, which provides a wide 22-inch cutting path for faster mowing. This makes it a great option for lawns with intricate layouts or multiple obstacles.
The Robomow RS630 also features Bluetooth connectivity and is compatible with Amazon Alexa, allowing you to control the mower using voice commands. However, it’s worth noting that it’s slightly louder than other models, but the noise level is still manageable compared to traditional gas-powered mowers.
For those with smaller yards, the MowRo RM24 offers an affordable and easy-to-use robotic mower. It’s perfect for lawns up to 1/4 acre and can handle slopes of up to 30%. One of the key benefits of the MowRo RM24 is its quiet operation, producing only 65 decibels of noise, which is roughly the equivalent of a loud conversation.
The MowRo RM24 is equipped with a rain sensor, which automatically sends it back to its charging station when the weather turns wet. While it lacks some of the advanced features found in other models, such as GPS tracking and mobile app connectivity, it offers a reliable and simple mowing experience for those on a budget.
Pros and Cons of MowRo RM24
Pros
Cons
Affordable and easy to use
No GPS tracking or mobile app features
Quiet operation (65 decibels)
Limited to smaller lawns (up to 0.25 acres)
Rain sensor for automatic return to charging station
The Husqvarna Automower 315X offers a great balance of features and affordability, making it an excellent choice for small to medium-sized lawns. It’s easy to set up and can be controlled remotely via a mobile app. The Automower 315X is also equipped with GPS tracking and an anti-theft system, ensuring that your mower remains safe and secure.
This model can handle slopes of up to 22 degrees and is designed to work in areas with tight spaces and complex landscapes. The only downside is that it doesn’t have a rain sensor, which means it may continue mowing in wet conditions. However, the mower is waterproof, so it can still function in light rain.
Pros and Cons of Husqvarna Automower 315X
Pros
Cons
Perfect for small to medium-sized lawns (up to 0.4 acres)
The advent of robotic lawn mowers has undoubtedly transformed lawn care from a tedious chore into an effortless and efficient task. With models like the Husqvarna Automower 430XH leading the charge, robotic mowers provide a range of options suitable for various yard sizes and terrains. From budget-friendly choices like the Gardena 4069 R80Li to premium models with advanced features, there’s a robotic mower for every need.
By selecting the right robotic mower, you can enjoy a beautifully manicured lawn without the hassle of traditional lawn care methods. Consider the size of your yard, the features you need, and your budget when making your decision. With the right robotic lawn mower, maintaining your lawn has never been easier or more enjoyable.
A greenhouse offers gardeners the opportunity to grow plants in a controlled environment, extending the growing season and ensuring a steady supply of fresh produce. Whether you want to grow vegetables, flowers, or even tropical plants, a greenhouse can make it possible year-round. However, not everyone has the space or budget for a large, pre-built greenhouse. Fortunately, there are numerous greenhouse ideas that you can create yourself with minimal cost and effort. These DIY greenhouse ideas are perfect for those with limited space or those looking to save money. By utilizing common household items and inexpensive materials, you can build a functional and effective greenhouse that serves your gardening needs.
The Importance of a Greenhouse for Your Garden
A greenhouse provides a unique advantage for growing plants compared to outdoor gardening. It shields your plants from unpredictable weather, such as frost or heavy rain, and allows you to grow delicate or tropical plants that would otherwise struggle in the open. By creating a controlled climate, a greenhouse helps to retain heat and humidity, encouraging optimal growth conditions for a wide variety of plants. Whether you’re an avid gardener or a beginner, having a greenhouse at your disposal can significantly improve your plant’s health and increase harvest yields.
One of the key benefits of using a greenhouse is that it provides a longer growing season. You can start seeds early in the spring and continue growing well into the winter, depending on the types of plants you’re growing. A greenhouse also offers the flexibility to experiment with a wider variety of plants. This makes it an essential tool for any gardener looking to maximize their gardening space and productivity.
While purchasing a greenhouse can be expensive, building one yourself is a cost-effective alternative. DIY greenhouse ideas allow you to build something tailored to your specific needs, whether it’s a small, simple structure for a few plants or a larger, more elaborate setup. With some creativity and basic materials, you can design a greenhouse that suits your garden space and budget.
Affordable Greenhouse Ideas for Small Spaces
Not everyone has the luxury of a large backyard or garden space, but that doesn’t mean you have to forgo the benefits of a greenhouse. Small greenhouses can be just as effective and are a perfect solution for those with limited space. Here are some inexpensive DIY greenhouse ideas that can be easily adapted to small gardens or even balconies.
1.Upcycle Scraps to Build a Greenhouse
One of the easiest and most cost-effective ways to build a greenhouse is by upcycling materials you may already have at home. Old windows, scrap wood, or even plastic bottles can be repurposed to create a small, functional greenhouse. Using recycled materials not only saves money but also reduces waste, making it an eco-friendly option.
For a simple structure, you can use old wooden planks or metal sheets to form the sides of the greenhouse. If you have old windows lying around, you can attach them to the frame to create the walls and roof. Plastic bottles can also be cut and used as makeshift windows to allow light into the structure. This is a great way to create a greenhouse with minimal investment while still enjoying all its benefits.
2.Recycle Old Picture Frames
Old picture frames are another fantastic material to use when building a small greenhouse. These frames can be repurposed to create a box-like structure that serves as a mini greenhouse. The glass from the picture frames can act as the greenhouse “windows,” allowing sunlight to reach your plants while also providing protection from the elements.
If you don’t have glass frames, you can stretch clear plastic over the frames to create a lightweight, affordable alternative. This DIY greenhouse idea is perfect for gardeners who want a small, portable greenhouse for starting seeds or protecting young plants. It’s also a great way to recycle unused picture frames and give them new life in your garden.
3.Reuse Plastic Containers for Mini Greenhouses
Plastic containers, such as clear plastic cups or fruit containers, are ideal for creating mini greenhouses. These containers can be placed over individual plants or small seed trays to create a tiny greenhouse effect. The plastic helps to retain moisture and warmth, creating the perfect environment for seeds to sprout and thrive.
For an even larger greenhouse effect, you can use larger plastic containers like clear plastic bottles or containers to cover multiple plants or trays. This method is simple, quick, and inexpensive, making it a great option for gardeners on a tight budget or those who only need to protect a few plants.
4.Use Clear Storage Bins for a Simple Greenhouse
For those looking for a slightly larger solution, clear plastic storage bins can be repurposed into mini greenhouses. By simply turning the bin upside down and placing it over a bed of plants or individual containers, you create an instant greenhouse. These bins are ideal for protecting plants from cold weather or creating a warm, humid environment for seedlings.
Clear storage bins are an affordable and practical solution for gardeners with limited space. They are easy to find at most home goods stores and can be reused season after season. Additionally, the clear plastic allows sunlight to penetrate, while the bin’s sides provide ample protection from the elements.
5.Upcycling Household Items into Greenhouses
Repurposing household items for your greenhouse project is not only a sustainable practice but also a creative way to build something functional and unique. There are many household items that can be used to construct a greenhouse, each offering its own set of advantages.
6.Turn an Old Glass Cabinet into a Greenhouse
If you have an old glass cabinet or curio cabinet lying around, it can be transformed into a charming mini greenhouse. These cabinets are often made from glass, making them perfect for growing plants indoors. While they may not be suitable for outdoor use unless secured properly, glass cabinets are ideal for small, indoor greenhouses.
Simply place small potted plants inside the cabinet and ensure that it’s in a location with plenty of sunlight. The glass will help trap heat and humidity, creating an ideal environment for plant growth. This upcycled greenhouse option is both functional and stylish, adding a touch of charm to your home while benefiting your plants.
7.Repurpose an Aquarium into a Greenhouse
An old glass aquarium is another great option for building a small greenhouse. Aquariums are naturally transparent, which makes them perfect for growing plants indoors. Simply turn the aquarium upside down to cover your plants, or leave it upright with the screen at the top acting as a lid. This method works especially well for seedlings or smaller plants that need extra warmth.
Aquariums are often available for little to no cost through online marketplaces or secondhand stores. They’re a great option for those looking for a simple, low-cost greenhouse solution. Plus, they’re easy to move around if you need to change the location of your plants.
More DIY Greenhouse Ideas for Every Garden
While the ideas mentioned above are great for small spaces, there are also other ways to create a greenhouse in your garden. If you have more room to work with, consider building a larger structure with a simple framework and plastic sheeting. This option is still affordable but offers more space for plants to grow.
Another option is to purchase a DIY greenhouse kit. These kits provide all the materials and instructions you need to build your own greenhouse, saving you time and effort. While these kits tend to be more expensive than building from scratch, they are still more affordable than buying a pre-built greenhouse.
FAQ
Q: How much does it cost to build a DIY greenhouse? A: The cost of building a DIY greenhouse depends on the materials you use. Using recycled materials, such as old windows or plastic containers, can make it very affordable, with costs ranging from $20 to $100. Purchasing a greenhouse kit can cost anywhere from $100 to $500, depending on the size and complexity.
Q: How long does it take to build a DIY greenhouse? A: Building a small DIY greenhouse can take anywhere from a few hours to a couple of days, depending on the complexity of your design and the materials you’re using.
Q: Can a DIY greenhouse be used in all climates? A: Yes, DIY greenhouses can be used in various climates. However, if you live in an area with extreme temperatures, you may need to add additional insulation or use more durable materials to ensure your greenhouse provides adequate protection for your plants.
Q: What are some plants I can grow in a DIY greenhouse? A: A variety of plants can be grown in a DIY greenhouse, including vegetables like tomatoes, peppers, and lettuce, as well as herbs, flowers, and even tropical plants.
Pros and Cons of DIY Greenhouses
Pros
Cons
Affordable and cost-effective
Requires time and effort to build
Customizable to fit your space
May need maintenance or repairs
Environmentally friendly (recycles materials)
May not be as durable as pre-built greenhouses
Provides a controlled growing environment
Limited space in small greenhouses
Conclusion
Building your own greenhouse is a great way to enjoy the benefits of year-round gardening without breaking the bank. With a little creativity and resourcefulness, you can create a greenhouse using everyday materials like old picture frames, plastic containers, or even an aquarium. These greenhouse DIY ideas allow you to grow plants in a controlled environment, extend your growing season, and experiment with a wider variety of plants. Whether you’re working with a small balcony or a large backyard, there are plenty of options for creating a functional and affordable greenhouse that meets your gardening needs. So, why wait? Start building your own mini greenhouse today and enjoy the rewards of a thriving garden all year long!
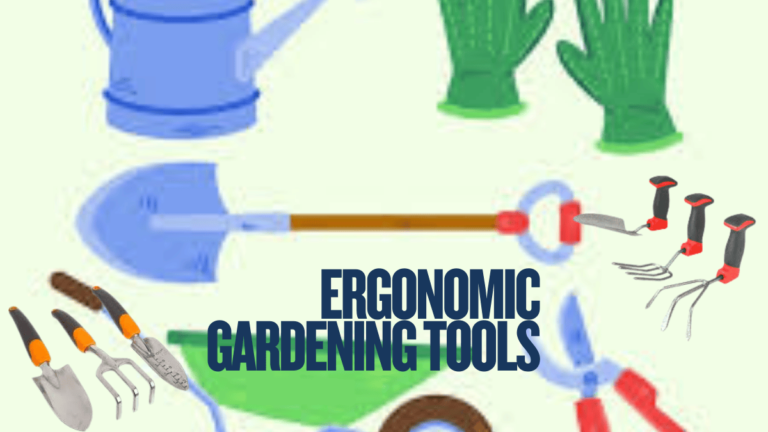
Gardening is a cherished hobby for many, offering a peaceful retreat into nature and a chance to cultivate beauty. However, the physical demands of gardening can sometimes lead to discomfort or injury. This is where ergonomic gardening tools come into play, designed to enhance your gardening experience by aligning with the natural movements of your body. In this article, we will explore the benefits of ergonomic gardening tools, how to choose the right ones, and provide a comprehensive guide to some of the best tools available.
Understanding Ergonomics in Gardening Tools
Ergonomics is the science of designing tools and environments to fit the natural movements of the human body, minimizing physical strain and maximizing efficiency. In the context of gardening, ergonomic tools are crafted to reduce the physical impact on your back, knees, wrists, arms, and hands. By matching the physical demands of gardening tasks with your body’s capabilities, these tools help prevent injuries, improve work efficiency, and increase satisfaction.
The Importance of Ergonomic Gardening Tools
Ergonomic gardening tools are essential for maintaining good posture and reducing stress on tendons and joints. Traditional gardening tools can often lead to discomfort and long-term injuries due to their design, which may not align with the body’s natural movements. Ergonomic tools, on the other hand, are designed to fit comfortably in your hand, allowing you to work efficiently without excessive force or awkward postures.
Key Features of Ergonomic Gardening Tools
When selecting ergonomic gardening tools, consider the following features:
Cushioned Handles: These provide comfort and absorb shock, reducing strain on your hands and wrists.
Adjustable Handles: Customizable handles allow you to find the perfect fit for your height and reach, minimizing bending and stretching.
Lightweight Materials: Tools made from lightweight materials are easier to maneuver, reducing fatigue during extended gardening sessions.
Reduced Risk of Injury: By aligning with your body’s natural movements, these tools help prevent common gardening injuries such as tendonitis, carpal tunnel syndrome, and back pain.
Increased Efficiency: Ergonomic tools allow you to complete tasks more quickly and with less effort, enabling you to accomplish more in less time.
Enhanced Comfort: With features like cushioned grips and adjustable handles, ergonomic tools make gardening more comfortable, allowing you to enjoy your time in the garden without discomfort.
Choosing the Right Ergonomic Tools for Your Garden
Selecting the right ergonomic tools involves considering your specific gardening needs and physical capabilities. Here are some tips to help you choose the best tools:
Consider Your Gardening Tasks: Identify the tasks you perform most frequently and choose tools designed to make those tasks easier.
Test the Tools: Whenever possible, try out tools before purchasing to ensure they feel comfortable and natural in your hands.
Look for Quality Materials: Choose tools made from durable, weather-resistant materials to ensure they last for many gardening seasons.
Top Ergonomic Gardening Tools to Consider
Here are some of the best ergonomic gardening tools available, designed to make your gardening experience more enjoyable and pain-free:
Pruner with Rotating Handle
Description: This pruner is perfect for those suffering from wrist and hand pain. Its rotating handle allows fingers to move naturally along the non-slip grips, reducing strain on your wrists. The design ensures that you can prune for longer periods without discomfort, making it ideal for both amateur and professional gardeners.
Description: This weeder is designed to minimize stress on the wrist while maximizing leverage, making it ideal for weeding tasks. Its unique design allows for easy removal of weeds with minimal effort, ensuring that your garden remains pristine without the usual strain on your hands and wrists.
Description: This lightweight kneeler provides support for your arms and eases back stress, making it perfect for planting and weeding. The padded surface ensures comfort during prolonged gardening sessions, while its foldable design allows for easy storage and transport. It’s an excellent choice for gardeners who spend a lot of time working close to the ground.
Description: Designed by a hand surgeon, these gloves improve comfort for achy hands and provide added grip without limiting motion. They are perfect for gardeners with arthritis or those who experience hand fatigue. The gloves’ ergonomic design ensures that you can maintain a firm grip on tools while protecting your hands from blisters and calluses.
Description: This 39-inch long-handled weeder allows you to remove weeds without bending or kneeling, saving your knees and back. Its four serrated stainless-steel claws grip weeds firmly, making removal quick and efficient. This tool is ideal for those who want to maintain a tidy garden without the physical strain of traditional weeding methods.
Description: Featuring a patented O-handle, this lightweight shovel relieves arm, hand, and wrist stress, making digging tasks easier. Its ergonomic design allows for efficient transfer of power from your arms to the shovel, reducing fatigue and increasing productivity. This shovel is perfect for gardeners who need a reliable tool for digging and planting.
Description: Perfect for those who have trouble reaching or bending over, these tools allow you to work from a standing position. The set includes various tools with extended handles, enabling you to perform a range of gardening tasks without straining your back. This set is ideal for gardeners with limited mobility or those who prefer to work while standing.
Description: Featuring a bucket basket and a comfortable seat, this tool makes tasks requiring stooping or squatting easier on your knees and back. The scoot’s sturdy construction and maneuverability make it perfect for larger gardens where mobility is key. It’s an excellent choice for gardeners who need to transport tools and plants around their garden with ease.
Description: This ergonomic water wand eliminates heavy lifting and bending, making watering tasks a breeze. Its one-touch valve allows for easy control of water flow, ensuring that your plants receive the right amount of water without waste. This tool is perfect for gardeners who want to water their plants efficiently and comfortably.
Description: Lightweight yet strong, this transporter reduces strain while you work around your garden. Its ergonomic design allows you to move plants, soil, and tools with ease, minimizing the physical effort required. The transporter is ideal for gardeners who need to carry heavy loads without straining their back or arms.
Conclusion: Embrace Comfort and Efficiency in Your Garden
Ergonomic gardening tools are a game-changer for anyone who loves spending time in the garden but wants to avoid the physical strain that often accompanies it. By investing in tools that are designed with your comfort and safety in mind, you can enjoy gardening more fully and for longer periods. Whether you’re planting, weeding, or watering, ergonomic tools can make your gardening experience more enjoyable and less painful. So, equip yourself with the right tools, and let your garden thrive while you stay healthy and comfortable.
By choosing ergonomic gardening tools, you not only enhance your gardening efficiency but also protect your body from unnecessary strain and injury. These tools are designed to fit naturally in your hands, allowing you to work longer and more comfortably. Whether you’re a seasoned gardener or just starting, investing in ergonomic tools is a wise decision that will pay off in the long run. So, get ready to transform your gardening experience and enjoy the beauty of your garden with ease and comfort.
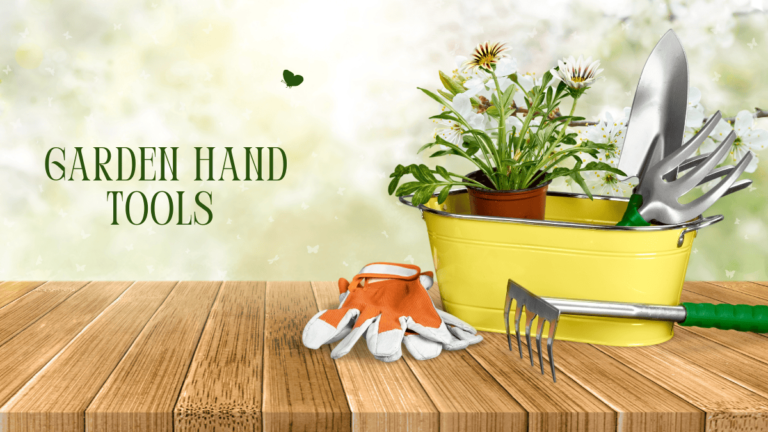
The Foundation of Gardening: Choosing Quality Hand Tools
Gardening thrives on preparation, passion, and the right tools. For both seasoned enthusiasts and newcomers, investing in durable garden hand tools ensures efficiency and longevity. While the allure of endless gadgets is tempting, focusing on hand garden tools that balance quality and practicality prevents clutter and maximizes your investment. Over my years of cultivating gardens, I’ve learned that well-maintained tools not only save time but also elevate the joy of nurturing plants. Let’s explore the essentials every gardener needs.
1. Gardening Gloves
Gardening gloves protect hands from thorns, splinters, and soil while offering grip and comfort. Look for breathable, water-resistant fabrics and snug fits to prevent blisters. Long cuffs shield wrists, and proper storage extends their lifespan.
Pruning shears trim overgrown plants and dead branches. Bypass types suit live stems, while anvil styles handle dry wood. Ratcheting models reduce hand strain for thicker cuts.
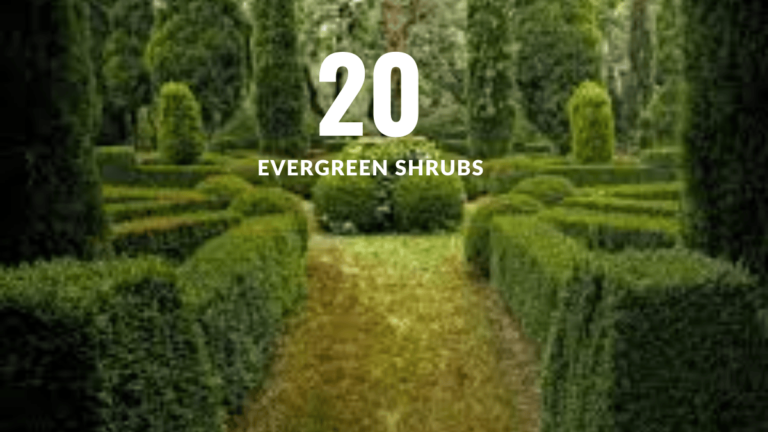
Introduction: The Importance of Evergreen Shrubs in Urban Gardens
Urban gardens are becoming more popular as people look for ways to connect with nature in bustling city environments. Whether you have a small balcony, a rooftop garden, or a larger urban space, evergreen shrubs play a crucial role in enhancing the aesthetic appeal and functionality of your garden. Evergreen plants are invaluable because they retain their foliage throughout the year, offering structure, texture, and color even during the colder months when most plants are dormant.
In urban gardens, where space can be limited, selecting the right evergreen shrubs can transform your garden into a vibrant and sustainable outdoor haven. These shrubs provide year-round visual interest, create privacy, and can even act as sound barriers or windbreaks. This article will delve into the various evergreen shrubs that are perfect for urban gardens, including their features, benefits, and considerations for proper care.
Why Choose Evergreen Shrubs for Urban Gardens?
Evergreen shrubs are an essential element of urban garden design, offering many benefits beyond just their aesthetic appeal. These plants are especially useful in urban environments where gardeners often seek ways to create low-maintenance, durable, and visually interesting landscapes.
Year-Round Greenery
One of the most significant advantages of evergreen shrubs is their ability to retain their foliage all year long. While other plants may lose their leaves in the winter, evergreen shrubs provide consistent greenery, maintaining the visual appeal of your garden even during the colder months. This is particularly valuable in urban spaces where green areas may be sparse.
Privacy and Screening
Urban gardens often face challenges when it comes to privacy. With buildings, streets, and neighbors in close proximity, evergreen shrubs can help create a sense of seclusion. Tall, bushy evergreens such as arborvitae or holly can act as natural screens, blocking out unwanted views and providing a peaceful retreat.
Low Maintenance
Most evergreen shrubs are hardy and require minimal upkeep once established. They are typically well-suited to urban conditions, where water and soil quality may not always be ideal. Additionally, many evergreen varieties are resistant to pests and diseases, making them a practical choice for busy gardeners.
Best Evergreen Shrubs for Urban Gardens
There is a wide range of evergreen shrubs that can thrive in urban gardens. These shrubs vary in size, shape, and color, allowing you to find the perfect plant for your garden’s needs. Below are some of the top recommendations, each offering distinct qualities that cater to different urban garden requirements.
1. SprinterBoxwood (Buxus microphylla)
Boxwood is a popular evergreen shrub that adds a formal touch to urban landscapes. The Sprinter Boxwood variety is known for its fast growth and glossy, year-round foliage. This shrub has a compact rounded habit, making it an excellent choice for low hedges, edging along pathways, or as a container plant. Hardy in zones 5-9, the Sprinter Boxwood can thrive in both full sun and partial shade. It grows to a height of 2-4 feet, making it ideal for small spaces in urban gardens.
2. Gold Splash Wintercreeper (Euonymus fortunei)
The Gold Splash Wintercreeper is a broadleaf evergreen with a shrubby, vining habit that adds dynamic visual interest to urban gardens. Its leaves are green with bright golden edges, creating a vibrant contrast that stands out throughout the year. This shrub is particularly useful as a ground cover or for mass plantings in urban gardens. It is also versatile, capable of being sheared to size or grown in containers. Hardy in zones 5-8, it thrives in full sun to partial sun and grows to a height of 18-24 inches.
3. Castle Keep Blue Holly (Ilex x meserveae)
Castle Keep Blue Holly is a stunning broadleaf evergreen shrub that offers fine texture with its small, leathery, glossy green leaves. This holly variety retains its rounded shape with little to no pruning required, making it an excellent choice for low-maintenance urban gardens. Its upright, dense growth habit makes it ideal for hedging, foundation plantings, or as a stand-alone specimen in mixed borders. Hardy in zones 5-7, it grows to 3-5 feet tall and 3-4 feet wide.
4. Gem Box Inkberry Holly (Ilex glabra)
For those looking for a shrub that thrives in shady conditions, the Gem Box Inkberry Holly is a fantastic choice. This broadleaf evergreen has a dense, rounded habit, and its small, dark green leaves give it a refined, polished appearance. It is particularly suitable for use as low hedging, along borders, or in containers. This variety is hardy in zones 5-9 and grows to a height of 2-3 feet with a width of 2-3 feet. It is also deer-resistant, making it an excellent addition to any garden.
5. Sky Box Japanese Holly (Ilex crenata)
Sky Box Japanese Holly is a narrow, columnar evergreen shrub that adds vertical interest to urban gardens. Its glossy dark green foliage provides a soft texture that contrasts beautifully with other plants. This shrub is perfect for screening, dividing garden spaces, or as a focal point in mixed borders. Hardy in zones 6-8, it grows to a height of 4-5 feet and a width of 2-3 feet, making it ideal for narrow spaces in urban environments.
6. North Pole Arborvitae (Thuja occidentalis)
The North Pole Arborvitae is a conical evergreen shrub that makes a striking focal point in urban gardens. With its upright, narrow habit, it is an excellent choice for narrow spaces or as a privacy screen along fences and property lines. Its dense foliage also offers year-round interest and is exceptionally hardy in colder climates. This arborvitae grows to 10-15 feet tall and 3-5 feet wide, making it an ideal choice for urban gardens where space is limited but privacy is needed. Hardy in zones 3-8, it thrives in full sun to partial sun.
7. Tator Tot Arborvitae (Thuja occidentalis)
For smaller urban gardens, the Tator Tot Arborvitae is one of the best dwarf evergreen shrubs. Its rounded, compact form makes it perfect for small spaces, containers, or as a decorative accent in borders. This shrub grows only 1-2 feet tall and wide, and its fine-textured foliage provides an elegant backdrop to other plants in the garden. Hardy in zones 3-8, Tator Tot Arborvitae thrives in full sun to partial sun, making it a versatile choice for urban gardens of all sizes.
8. Perfecto Mundo Red Reblooming Azalea (Rhododendron x)
Azaleas are renowned for their colorful flowers, and the Perfecto Mundo Red Reblooming Azalea takes it a step further by offering vibrant, lipstick-red blooms twice a year. This broadleaf evergreen shrub is a popular choice for urban gardens because of its beautiful flowers and compact size, growing to a height of 30 inches and a width of 3-4 feet. Hardy in zones 6-9, it thrives in full sun to partial sun and provides continuous color throughout the growing season. It’s a fantastic addition to foundation plantings, borders, or containers.
9. Dandy Man Purple Rhododendron (Rhododendron x)
The Dandy Man Purple Rhododendron offers deep purple, bell-shaped flowers in spring, adding a touch of elegance to any garden. This variety is more cold-hardy than most rhododendrons, thriving in zones 4-8. It can grow up to 4-8 feet tall and wide, making it suitable for larger urban gardens or as a focal point. The Dandy Man Purple rhododendron is ideal for foundation plantings or mixed borders, where its colorful blooms can be appreciated for months.
10. Stonehenge Yew (Taxus x media)
The Stonehenge Yew is a versatile conifer that can be used as a tree or shrub, depending on the desired effect. It has a narrow columnar shape, making it perfect for tight spaces, screens, or as a vertical element in mixed borders. The yew is also one of the best evergreen shrubs for shade, thriving in both full sun and full shade. Hardy in zones 4-7, it grows up to 8-10 feet tall and 2-4 feet wide, making it ideal for urban gardens with limited space.
11. Gin Fizz Juniper (Juniperus chinensis)
The Gin Fizz Juniper is a tall, conical evergreen shrub that produces attractive blue-green berries against aromatic, soft green foliage. This variety is perfect for screening, mass plantings, or as a standalone feature in your garden. The Gin Fizzjuniper is hardy in zones 4-8, growing up to 10-18 feet tall and 7-10 feet wide. It thrives in full sun and is resistant to deer, making it a low-maintenance choice for urban gardens.
12. Tortuga Juniper (Juniperus communis)
The Tortuga Juniper is a tough evergreen shrub that can withstand extreme weather conditions, including drought, sun, and cold. This hardy shrub grows as a low-mounded groundcover with emerald-green foliage, making it an excellent choice for edging or as a ground cover in urban gardens. Hardy in zones 2-7, Tortuga Juniper grows up to 2 feet tall and 3-4 feet wide, making it ideal for small gardens or containers.
13. Steady as She Goes Gardenia (Gardenia jasminoides)
Known for its intensely fragrant, snow-white blooms, the Steady as She Goes Gardenia is an evergreen shrub that brings both beauty and fragrance to your urban garden. This variety is more heat and cold-tolerant than traditional gardenias, making it suitable for a wider range of climates. Hardy in zones 7-10, it grows 3-5 feet tall and 4-7 feet wide. The glossy, evergreen foliage provides year-round interest, while the blooms add a burst of fragrance in the spring and summer.
The Soft Serve False Cypress is a dwarf evergreen shrub that offers soft, cedar-like foliage in a conical shape. Its gently weeping habit creates a striking visual effect in the garden, making it ideal for hedging, screening, or as a specimen plant. Hardy in zones 4-8, it grows to 6-10 feet tall and 5-6 feet wide. This shrub is deer resistant, making it an excellent choice for urban gardens where deer are a concern.
15. Interstella Lily of the Valley Shrub (Pieris japonica)
The Interstella Lily of the Valley Shrub is a broadleaf evergreen that produces clusters of deep ruby-red, bell-shaped flowers in early spring. It is one of the best small evergreen shrubs, growing 3-4 feet tall and wide, making it ideal for smaller urban gardens or as a focal point in a mixed border. Hardy in zones 5-8, Interstella thrives in full sun to full shade, making it versatile for different garden conditions.
16. Waxwing Lime Mirror Bush (Coprosma repans)
The Waxwing Lime Mirror Bush is a unique broadleaf evergreen shrub with glossy leaves in a striking combination of yellow, lime green, and deep purple. This plant thrives in full sun to partial sun and is perfect for use as a low-growing hedge, ground cover, or edging plant in urban gardens. Hardy in zones 9-11, it can be overwintered indoors in colder climates, making it adaptable for different growing conditions.
17. Sweet Talker Fragrant Viburnum (Viburnum)
The Sweet Talker Fragrant Viburnum is a broadleaf evergreen that offers trumpet-shaped pink flowers in late winter and early spring, filling your garden with honey-scented fragrance. Hardy in zones 7-8, it grows to 8-10 feet tall and 3-5 feet wide, making it suitable for hedging, screening, or as part of a mixed border. Its textured green foliage takes on burgundy hues in winter, providing year-round interest.
18. Sunjoy Todo Barberry (Berberis x)
The Sunjoy Todo Barberry is a semi-evergreen shrub that features deep purple foliage, small yellow flowers, and bright red berries in fall. This variety is non-invasive and is ideal for low hedging, mass plantings, or as part of a mixed border. Hardy in zones 6-8, it grows to 18-24 inches tall and wide, making it perfect for smaller urban gardens.
19. Peppy Le Pom Pomegranate (Punica granatum)
The Peppy Le Pom Pomegranate is a dwarf variety that features bright orange flowers resembling dangling earrings. This evergreen shrub grows 3-4 feet tall and 3 feet wide, making it an excellent choice for urban gardens or containers. Hardy in zones 7-10, it produces small ornamental fruits after flowering and is deer resistant.
20. Juke Box Pyracomeles (x Pyracomeles sp.)
The Juke Box Pyracomeles is a hybrid evergreen shrub with shiny green leaves and finely textured growth. Similar to boxwood, it is a low-maintenance option for ground cover, hedging, or edging borders and pathways. Hardy in zones 7-9, it grows 12-36 inches tall and wide, providing a lush, dense backdrop to other plants in the landscape.
Care Tips for Evergreen Shrubs in Urban Gardens
Caring for evergreen shrubs in urban gardens is relatively simple, but there are a few essential guidelines to ensure that they thrive. Urban environments can present unique challenges, such as pollution, compacted soil, and limited sunlight. By following these tips, you can help your evergreen shrubs flourish year-round.
Soil and Fertilization
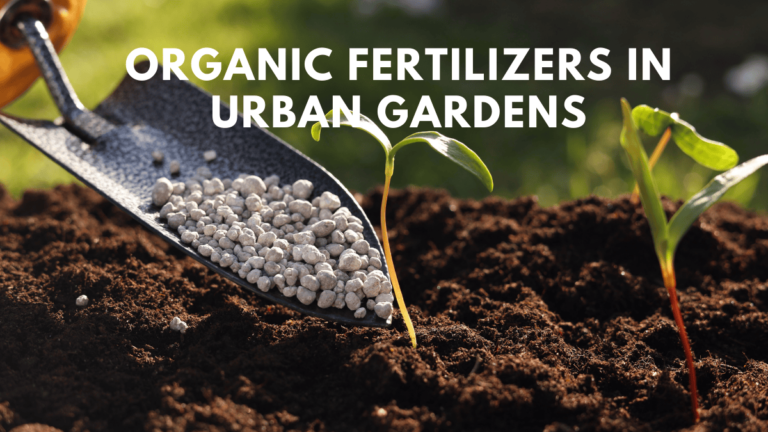
Evergreen shrubs generally prefer well-drained soil. In urban settings, where soil quality may be compromised, it is essential to improve soil conditions before planting. Adding organic matter such as compost can help enrich the soil and promote healthy root development. For fertilization, use a balanced fertilizer in the early spring to encourage robust growth throughout the growing season.
Watering
Although evergreen shrubs are typically drought-resistant once established, they still require regular watering, especially during the initial planting phase. Ensure the soil remains moist but not waterlogged, as excess moisture can lead to root rot. It’s best to water deeply and infrequently to encourage deep root growth.
Pruning
While many evergreen shrubs require minimal pruning, occasional trimming may be necessary to maintain their shape and health. Prune dead or damaged branches and lightly trim the shrub to shape it if needed. Always prune during the dormant season to prevent stressing the plant.
Protection from Extreme Conditions
Urban gardens often experience extreme weather conditions, such as heat islands or cold winds. In regions with harsh winters, protect your evergreen shrubs by mulching around their base to insulate the roots. In areas with intense heat, provide shade during the hottest part of the day to prevent sunburn on the leaves.
Pros and Cons of Evergreen Shrubs for Urban Gardens
Certainly! Below is a table format with the Pros and Cons of each evergreen shrub from serial 1 to 23:
Shrub
Pros
Cons
Sprinter Boxwood (Buxus microphylla)
Fast-growing, deer resistant, suitable for low hedging, glossy year-round foliage
May require regular pruning to maintain shape, sensitive to overwatering in clay soils
Gold Splash Wintercreeper (Euonymus fortunei)
Compact, vibrant golden foliage, easy to maintain, can be grown in containers
Can become invasive if not controlled, needs regular trimming
Castle Keep Blue Holly (Ilex x meserveae)
Low maintenance, attractive year-round, deer resistant, rounded shape with little pruning required
Does not tolerate heavy shade well, may need supplemental watering in dry conditions
Gem Box Inkberry Holly (Ilex glabra)
Thrives in shade, dense growth, deer resistant, ideal for small spaces and low hedging
Slow-growing, may need extra watering in dry periods
Sky Box Japanese Holly (Ilex crenata)
Ideal for narrow spaces, minimal pruning required, attractive glossy foliage
Not very drought-tolerant, sensitive to harsh winds in exposed areas
North Pole Arborvitae (Thuja occidentalis)
Narrow, upright form, great for privacy screening, hardy in cold climates
Needs regular watering in dry conditions, can be prone to wind damage in exposed areas
Tator Tot Arborvitae (Thuja occidentalis)
Compact, low maintenance, deer resistant, perfect for small gardens
Limited height, may not provide much screening, requires well-drained soil
Perfecto Mundo Red Reblooming Azalea (Rhododendron x)
Reblooming flowers for extended color, compact size, vibrant lipstick-red blooms
May need extra watering in dry periods, sensitive to harsh winter winds
Dandy Man Purple Rhododendron (Rhododendron x)
Cold-hardy, colorful flowers, low maintenance, attractive all year round
Needs regular watering, prone to root rot if overwatered
Stonehenge Yew (Taxus x media)
Tolerates full sun to shade, versatile in landscape design, low maintenance
Toxic to pets, requires regular trimming to maintain shape
Requires full sun, may not tolerate freezing temperatures in colder climates
Juke Box Pyracomeles (x Pyracomeles sp.)
Low-maintenance, disease-resistant, suitable for ground cover or hedging
Needs regular trimming to maintain shape, not ideal for very wet soil
Conclusion: Elevate Your Urban Garden with Evergreen Shrubs
Evergreen shrubs are a game-changer for urban gardens, offering consistent beauty, privacy, and functionality throughout the year. Whether you’re aiming to create a serene retreat, a vibrant display of greenery, or a low-maintenance outdoor space, evergreen shrubs can meet all of these needs. From the compact SprinterBoxwood to the tall and stately North Pole Arborvitae, the variety of evergreen shrubs available today makes it easy to find the perfect plant for your garden.
Incorporating evergreen shrubs into your urban garden not only enhances the overall aesthetic but also ensures that your outdoor space remains functional and attractive, even during the colder months. With proper care and thoughtful selection, these resilient plants can thrive in urban environments and provide lasting beauty for years to come.
FAQ
What are the most popular evergreen shrubs? Some of the most popular evergreen shrubs include arborvitae, boxwood, false cypress, holly, juniper, wintercreeper, azalea, and rhododendron.
What kind of bushes stay green all year? Evergreen shrubs, including conifers (with needles) and broadleaf evergreens (with foliage), stay green all year round.
What shrubs stay green in winter? Conifers and certain broadleaf evergreen shrubs like azalea and rhododendron remain green in winter.
Which flowering shrubs are evergreen? Some evergreen flowering shrubs include camellia, daphne, lily of the valley shrub, mahonia, azalea, and rhododendron.
What evergreen shrubs stay small? Dwarf evergreen shrubs, such as Tater Tot Arborvitae and Tortuga Juniper, are perfect for small urban gardens.
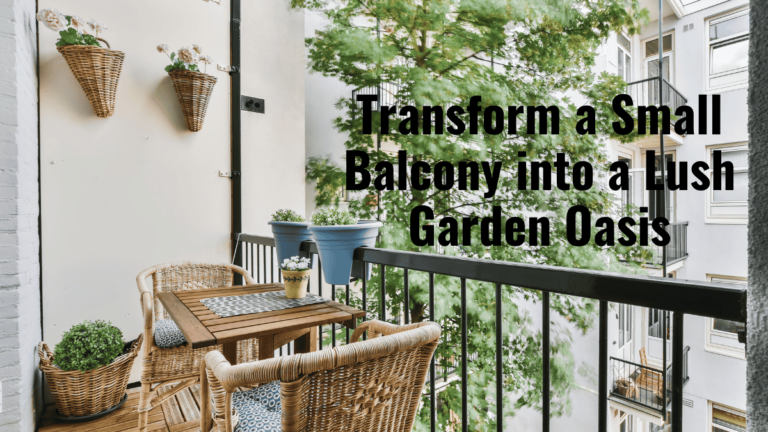
In the hustle and bustle of urban living, where space is often at a premium, the idea of transforming a small balcony into a lush garden oasis has become an increasingly popular trend. Not only does it provide a much-needed green retreat, but it also creates a sanctuary where you can unwind and reconnect with nature. In 2025, more people are looking to embrace the charm of balcony gardens, incorporating unique small balcony ideas and small balcony decor into their urban spaces. Whether you have a tiny corner or a larger open-air area, with the right design, your balcony can be transformed into a stunning, functional space.
This guide explores the essentials of small balcony design ideas, including tips on plant selection, layout planning, and furniture choices that work for even the most compact balconies. By the end of this article, you will be equipped with the knowledge to create a beautiful, sustainable balcony garden that enhances both the aesthetics and functionality of your living space.
Choosing the Right Plants for Your Small Balcony
When it comes to transforming your balcony into a garden oasis, plant selection plays a pivotal role. The type of plants you choose depends largely on the amount of sunlight your balcony receives, as well as the space you have available. For a small balcony, you’ll want to select plants that not only thrive in your climate but also don’t overcrowd the space.
Sunlight Assessment
Before you begin planting, assess the amount of sunlight your balcony receives throughout the day. Does it get full sun, partial shade, or is it shaded most of the time? Sun-loving plants such as geraniums, petunias, and marigolds will thrive in balconies that get full sun. On the other hand, for those with shaded spaces, opt for shade-tolerant plants like ferns, hostas, and ivy. Understanding the light patterns of your balcony will help ensure your plants flourish.
Space Limitations and Vertical Gardening
Small spaces call for creativity. To maximize your balcony garden’s potential, consider vertical gardening. Vertical gardening techniques like hanging planters, wall-mounted pots, and trellis systems allow you to grow plants upward rather than outward. This method not only saves floor space but also adds a striking visual element to your garden. Vines, climbing roses, and jasmine are excellent choices for vertical growth.Designing Your Balcony Layout
A well-thought-out layout can transform a cramped balcony into a cozy, functional retreat. By utilizing every available space efficiently, you can create a serene garden that still allows for easy movement and relaxation.
Incorporating Functional Furniture
Choosing the right furniture for your balcony is equally important as selecting the plants. Opt for compact, foldable furniture that won’t overwhelm the space. Small balcony furniture sets, such as fold-up chairs or a compact table, are great options. These pieces are easy to store when not in use, keeping your space versatile and functional. Additionally, consider multi-purpose furniture with built-in storage to keep gardening tools and accessories out of sight.
Maximizing Vertical and Horizontal Space
The layout of your balcony should take full advantage of both vertical and horizontal spaces. For example, position taller plants or climbing vines against the back wall, and place shorter plants or decorative items on the ground or side tables. This creates layers that draw the eye upward, making the space feel more expansive and visually appealing.Choosing Durable Materials
Outdoor elements can take a toll on your garden’s longevity, so it’s important to choose materials that can withstand changing weather conditions. Here are a few tips for selecting the best materials for your small balcony decor:
Weather-Resistant Planters
Choose planters made from weather-resistant materials like fiberglass, resin, or treated wood. These materials will help prevent deterioration over time, ensuring your plants stay healthy and your balcony garden remains in top condition. Avoid materials that absorb water, as they can lead to mold or mildew.
Sustainable Decking and Flooring
For flooring, consider using durable, low-maintenance options like WPC (Wood Plastic Composite) decking. WPC is resistant to rot, moisture, and fading, making it perfect for outdoor use. This material is easy to clean and offers a sophisticated, natural wood appearance that complements a variety of garden designs.
Creating a Cohesive Color Scheme
One of the easiest ways to bring harmony to your small balcony garden is by choosing a cohesive color palette. A well-thought-out color scheme ties the whole space together, enhancing its visual appeal.
Neutral Tones and Soft Colors
Soft, natural colors such as earthy browns, gentle whites, and muted greens can help make your space feel larger and more inviting. If you prefer bolder accents, incorporate colorful cushions or vibrant flowers that stand out against a more neutral backdrop.
Adding Textures and Layers
Texture plays a crucial role in adding depth and interest to your balcony garden. Combine glossy, smooth leaves with matte finishes, and balance soft foliage with rigid structures. Mixing textures through plant types, furniture, and accessories creates a visually dynamic and engaging space.
The Therapeutic Benefits of Balcony Gardening
Beyond aesthetics, balcony gardening offers numerous mental health benefits. The act of tending to plants can be a meditative and stress-relieving activity. The presence of greenery has been shown to improve mood and increase feelings of well-being. By creating a personal green space, you not only beautify your home but also nurture your mental health.
Personalizing Your Balcony Garden
A personalized touch can transform your balcony garden into a truly unique and inviting space. Whether it’s through decorative accessories or DIY planters, adding your own flair will make your balcony feel like an extension of your home.
Decorative Accessories
Add charm to your garden with accessories such as outdoor rugs, string lights, or wind chimes. Solar-powered fairy lights can add a magical glow to your balcony at night, making it the perfect space for evening relaxation. A small water feature, like a tabletop fountain, can introduce soothing sounds to your environment, creating a peaceful ambiance.
DIY Planters and Personal Touches
Incorporating DIY elements into your garden is not only fun but also sustainable. Consider making planters from recycled materials, such as wooden crates or old buckets. This eco-friendly approach adds character to your space and allows you to create a one-of-a-kind design.
Maintaining Your Balcony Garden
Once your balcony garden is up and running, proper care is essential to keep it flourishing. Regular maintenance will ensure your plants stay healthy and vibrant throughout the seasons.
Routine Care
Set a schedule for watering, pruning, and fertilizing your plants. Some plants may require daily watering, while others only need attention once or twice a week. Be sure to regularly check for pests or diseases to keep your plants in top condition.
Seasonal Adjustments
During extreme weather conditions, you may need to move sensitive plants indoors or provide them with shade during the hottest parts of the day. By staying proactive, you can protect your plants and ensure they thrive year-round.Maintenance Tips: Keeping Your Garden Thriving
Routine care is essential for a flourishing small balcony garden. Set a regular schedule for watering, pruning, and fertilizing your plants. Be prepared to move sensitive plants indoors during harsh weather conditions or provide shade during the hottest part of the day. This proactive approach ensures your garden remains healthy and vibrant.
Example Layout for a Small Balcony Garden
To inspire your small balcony design ideas, consider this layout:
Decor: String up solar-powered lights around the railing and include decorative elements like wind chimes or a small statue.
Back Wall: Install a vertical garden panel filled with a mix of ferns and small flowering plants.
Flooring: Lay down WPC decking for a clean, low-maintenance surface.
Side Areas: Place tall, narrow planters with climbing plants to create natural privacy screens.
Center Space: Position a small, round table with two chairs, using foldable furniture for easy rearrangement.
Conclusion: Your Perfect Garden Oasis Awaits
In conclusion, transforming your small balcony into a lush garden oasis is both an exciting and rewarding project. By carefully selecting the right plants, incorporating functional furniture, and paying attention to design details, you can create a serene, beautiful space that serves as a retreat from the urban hustle. Whether you have a tiny balcony or a larger space, the possibilities for small balcony design ideas are endless.
Creating a green retreat on your balcony not only enhances the aesthetic appeal of your home but also offers environmental benefits, such as improved air quality and the ability to grow your own fresh produce. With the right planning, your balcony can become a vibrant, peaceful haven for relaxation, creativity, and enjoyment.
FAQs
1. How do I choose the right plants for my balcony?
Start by assessing the sunlight your balcony receives, then select plants that are suited to those conditions. For sunny balconies, choose sun-loving plants like geraniums, while shaded spaces are ideal for ferns and hostas.
2. Can I have a vertical garden on a small balcony?
Yes, vertical gardens are perfect for small balconies. Use hanging planters, wall-mounted pots, or trellises to grow plants upward, saving space and adding beauty.
3. What materials should I use for my balcony garden?
Choose durable, weather-resistant materials for planters and furniture. Materials like fiberglass, resin, and WPC decking are ideal for outdoor use, offering longevity and low maintenance.
4. How can I add a personal touch to my balcony garden?
Incorporate accessories like outdoor rugs, cushions, fairy lights, or DIY planters. These elements help personalize your space and create a unique, inviting atmosphere.
Introduction: Why Organic Fertilizers are a Game-Changer in Urban Gardens
Urban gardens have become a sanctuary for city dwellers seeking a connection to nature and a way to grow their own food. As these urban spaces expand, so does the demand for sustainable gardening practices that not only provide a healthy yield but also protect the environment. One of the most significant shifts in urban gardening is the adoption of organic fertilizers.
When compared to synthetic alternatives, organic lawn fertilizer and organic liquid fertilizer offer several notable advantages that contribute to healthier plants, richer soil, and a more sustainable gardening approach. Whether you’re growing vegetables in small containers or cultivating a lush green lawn, incorporating organic fertilizers into your gardening routine ensures that you’re not just creating beauty but also nurturing the earth beneath your feet. In this article, we will explore the benefits of using organic fertilizers in urban gardens and how they can transform your gardening experience.
What Are Organic Fertilizers?
Organic fertilizers are derived from natural sources, such as plant-based materials, animal manure, or mineral deposits. Unlike synthetic fertilizers, which are chemically processed, organic fertilizers work in harmony with nature. They provide nutrients to the soil in a slow-release manner, improving the long-term health of your plants and the environment.
In urban gardens, where space is limited, and soil quality can be poor, these fertilizers play an essential role in restoring balance and promoting growth. Organic fertilizers not only nourish plants but also support soil organisms that are crucial for maintaining a healthy ecosystem.
The Environmental Benefits of Organic Fertilizers
One of the main reasons organic fertilizers have gained popularity in urban gardens is their minimal environmental impact. Unlike synthetic fertilizers, which can leach harmful chemicals into the soil and water, organic fertilizers promote soil health without polluting the environment. Here are a few key environmental advantages:
Reduced Chemical Runoff: Synthetic fertilizers often lead to the leaching of nitrates and phosphates into nearby water bodies, contributing to water pollution. Organic fertilizers, on the other hand, release nutrients gradually, minimizing the risk of nutrient runoff.
Soil Health and Biodiversity: Organic fertilizers improve soil structure by adding organic matter, which increases soil moisture retention, aeration, and microbial activity. This results in a healthier soil ecosystem, supporting a diverse range of beneficial organisms such as earthworms and microbes.
Lower Carbon Footprint: Organic fertilizers have a lower carbon footprint than synthetic fertilizers, as they are typically produced with fewer industrial processes and transport emissions. This makes them a more sustainable option for urban gardeners concerned about climate change.
Reduction of Soil Erosion: By improving soil structure and fostering a healthy ecosystem, organic fertilizers help prevent soil erosion, which is especially important in urban areas where green spaces are limited.
Benefits of Organic Fertilizers for Plant Growth
Urban gardeners can benefit greatly from the use of organic fertilizers, as they directly influence plant growth in multiple ways. Here are some of the key benefits:
Improved Soil Fertility: Over time, organic fertilizers enhance the soil’s nutrient content, making it more fertile and capable of supporting a variety of plants. These fertilizers release a balanced mix of nutrients, including nitrogen, phosphorus, and potassium, which are essential for healthy plant growth.
Stronger Root Development: The slow-release nature of organic fertilizers ensures that plants receive a steady supply of nutrients, encouraging deeper and more robust root systems. This makes plants more resilient to drought, pests, and diseases.
Enhanced Nutrient Absorption: Unlike synthetic fertilizers, which often provide nutrients in a form that can be rapidly absorbed by plants (and potentially washed away), organic fertilizers are broken down by microorganisms in the soil. This slow process allows plants to absorb nutrients over time, preventing nutrient imbalances and promoting healthier growth.
Reduced Plant Stress: Organic fertilizers are less likely to cause fertilizer burn, a common issue with synthetic fertilizers. As a result, plants are less stressed and can focus their energy on growth rather than recovering from nutrient overload.
Better Fruit and Vegetable Yields: For urban gardeners growing fruits and vegetables, organic fertilizers can significantly improve yields. The nutrients released from organic fertilizers are crucial for producing high-quality crops, especially when using organic fertilizer for vegetables.
Organic Fertilizers and Vegetable Gardening
For urban gardeners who focus on growing their own food, organic fertilizers for vegetables are a critical component of a successful gardening strategy. Unlike synthetic fertilizers, which can sometimes leave harmful residues on crops, organic fertilizers provide a safe and natural way to grow vegetables. Here’s how they benefit vegetable gardens:
Healthier Vegetables: Organic fertilizers help vegetables grow without the risk of harmful chemicals, ensuring that they are both safe to eat and full of essential nutrients.
Better Soil Structure: By enriching the soil with organic matter, these fertilizers improve drainage, reduce compaction, and increase the soil’s ability to retain moisture. This creates optimal conditions for vegetable growth.
Increased Biodiversity: Organic fertilizers support soil biodiversity, which leads to better pollination and a more balanced ecosystem, essential for growing a variety of vegetables.
Sustainable Gardening: By using organic fertilizers, gardeners can maintain a sustainable, eco-friendly approach to food production, reducing the need for harmful chemical inputs.
The Role of Organic Lawn Fertilizers in Urban Landscaping
Urban gardeners are not just limited to vegetable patches; many city dwellers maintain beautiful lawns as well. Organic lawn fertilizers provide an excellent way to create a lush, green lawn while ensuring the health of both the grass and the surrounding ecosystem. Here’s how organic fertilizers benefit lawns:
Healthier Grass Growth: Organic fertilizers provide grass with a steady, consistent supply of nutrients, which encourages strong, healthy growth. Over time, this results in a thick, lush lawn that is more resistant to pests, diseases, and environmental stressors like drought and extreme temperatures.
Environmental Safety: Traditional chemical lawn fertilizers can be harmful to the environment, often leading to contamination of nearby water sources or harming beneficial insects and wildlife. Organic lawn fertilizers, however, are made from natural materials and are far less likely to cause environmental harm.
Reduction of Pesticides: Organic fertilizers help improve the natural resilience of the grass, reducing the need for chemical pesticides. This creates a safer and healthier environment for pets, children, and local wildlife.
Soil Health and Sustainability: By improving soil quality, organic lawn fertilizers encourage a more sustainable lawn. Healthy soils support a balanced ecosystem that benefits the entire garden, from the smallest microbes to the tallest trees.
Pros and Cons of Using Organic Fertilizers in Urban Gardens
Pros
Cons
Environmentally friendly
Slower nutrient release compared to synthetic fertilizers
Improves soil health and biodiversity
May require more frequent applications
Reduces chemical runoff and pollution
Organic fertilizers can be more expensive
Supports plant resilience and growth
Some organic fertilizers may have an odor
Enhances nutrient availability over time
May take longer to see results compared to chemical alternatives
Safe for edible plants and vegetables
Can be challenging to find the right mix for specific plant needs
Conclusion: Embracing Organic Fertilizers for a Sustainable Future
In conclusion, the benefits of using organic fertilizers in urban gardens are clear. From promoting sustainable gardening practices to improving plant health and protecting the environment, organic fertilizers offer numerous advantages over synthetic options. Whether you’re focused on growing vegetables, maintaining a lush lawn, or simply enhancing the beauty of your garden, organic fertilizers are a key tool in creating a healthier, more sustainable garden space.
By choosing organic fertilizers, urban gardeners can contribute to the overall health of the planet while reaping the rewards of a thriving garden. The shift towards organic fertilizers represents a growing movement toward sustainability, healthier living, and responsible gardening practices. In urban areas where space is limited, organic fertilizers provide the ideal solution for nurturing plants and soil without harming the environment. Embrace the power of organic fertilizers and watch your urban garden thrive.