Author: jan

  • 5 Garden Design ideas to Elevate Your Outdoor Space

    5 Garden Design ideas to Elevate Your Outdoor Space

    Creating a garden design ideas that’s both functional and beautiful requires careful planning and consideration. Whether you’re looking to grow your vegetables, create a peaceful sanctuary, or enhance your landscape, understanding the core elements of garden design will help you build the garden of your dreams. In this article, we’ll explore five essential garden elements that I always incorporate into my designs and that you should consider for your garden.

    These elements will enhance your garden’s beauty, making it easier to maintain and improve your overall gardening experience. Let’s explore how each of these elements can take your garden to the next level.

    Top 5 Garden Design ideas

    1. Raised Garden Beds: Starting with the Right Foundation

    The raised garden bed is one of the most impactful elements in garden design. It serves as the foundation for many successful gardens, especially if you plan on growing vegetables, herbs, or other plants requiring specific soil conditions. Raised beds are fantastic for gardeners looking for a controlled, clean environment for their plants.

    Why Raised Garden Beds?

    • Better Soil Quality: Raised beds allow you to create the ideal soil for your plants. You can fill the beds with nutrient-rich compost or organic soil, which promotes healthy growth. Unlike traditional gardens, you won’t have to deal with poor soil quality or the constant need for soil amendments.
    • Improved Drainage: Raised beds are elevated, so water drains are more effective. This is especially important for plants like tomatoes, carrots, and lettuce, which need well-drained soil.
    • Increased Accessibility: Raised beds are perfect if you have mobility issues or just want to avoid back strain. The height of the beds minimizes bending over, making gardening more comfortable and less strenuous.
    • Pest Control: Raised beds are less prone to pests like slugs or weeds, especially when you add barriers to the base or use enclosed systems.

    Design Tips for Raised Beds:

    • Size and Shape: The width of your raised bed should allow easy access to all parts without bending or stretching too much. A width of about 2 to 3 feet is ideal for most gardeners.
    • Height: A bed 12 to 18 inches high is suitable for most plants, but for deeper-rooted plants like carrots or potatoes, choose a 2-foot-high raised bed.
    • Materials: Opt for natural, durable materials like cedar, stone, or brick. These materials blend seamlessly into most landscapes and ensure that your raised bed lasts through the seasons.

    2. Garden Trellises: Vertical Gardening for Better Space Management

    Trellises are the perfect solution for gardeners with limited space who want to grow vining plants such as tomatoes, cucumbers, or beans. They provide vertical support, allowing plants to grow upwards instead of sprawling across the ground.

    Why Use Trellises?

    • Maximizes Space: Vertical gardening allows more plants to be grown in smaller spaces. You save valuable ground space for other plants by training plants to climb trellises.
    • Healthier Plants: Trellises help improve airflow and sunlight exposure, which reduces the risk of plant diseases and helps them grow better.
    • Aesthetic Appeal: Trellises bring beauty to your garden, especially when covered with lush vines or flowers. They create a focal point and add dimension to your garden.

    Types of Trellises:

    • Panel Trellises: These flat trellises can be placed against walls, fences, or in the middle of garden beds. They are perfect for narrow spaces and allow plants to grow upward.
    • Obelisk Trellises: Shaped like pyramids or towers, obelisks add an architectural touch to your garden. They’re great for raised beds or smaller garden spaces.
    • Arch Trellises: Arch trellises create an elegant garden entrance or pathway. They allow plants like climbing roses or beans to thrive while providing a charming structure.

    Design Tips for Trellises:

    • Material: Consider using sturdy materials like powder-coated steel, which can withstand weather conditions and last many years. Wooden trellises (e.g., cedar or bamboo) are more affordable but may need to be replaced more frequently.
    • Placement: Ensure the trellis provides adequate support without blocking sunlight or airflow to other plants. If it’s a tall trellis, secure it well to prevent it from toppling in strong winds.

    3. Garden Borders: Structuring and Defining Your Garden Space

    Garden borders are crucial for visually separating your garden from the rest of your yard. They also play an important role in garden maintenance, keeping grass and weeds from creeping into your beds. Whether growing flowers, vegetables, or herbs, borders help structure your space, ensuring your garden looks neat and organized.

    Why Garden Borders Matter:

    • Create Boundaries: Borders define your garden space, separating it from the rest of your yard or landscaping.
    • Prevent Invasive Grass and Weeds: A well-installed border keeps grass and weeds from invading your garden beds, reducing maintenance efforts.
    • Add Visual Appeal: Borders give your garden a polished, professional, and well-maintained appearance.

    Types of Garden Borders:

    • Metal Edging: Provides a sleek, modern look and is durable enough to withstand weather conditions. Steel is a popular choice.
    • Stone or Brick: Adds a natural, rustic feel to your garden. Stone borders are perfect for creating a more natural aesthetic.
    • Plastic or Rubber: Budget-friendly and easy to install, though not as durable as metal or stone borders.

    Design Tips for Borders:

    • Durability: Choose materials that will withstand the elements in your region. Metal and stone offer the most longevity.
    • Installation: Dig a trench around the perimeter of your garden to secure the border in place. This will prevent it from shifting over time.

    4. Garden Pathways: Accessibility Meets Aesthetic Appeal

    Pathways are not just functional—they can also serve as an aesthetic element that enhances the beauty of your garden. They help with accessibility, allowing you to move easily between garden beds, and they protect your plants from damage.

    Why Garden Pathways?

    • Ease of Access: Pathways provide easy movement between garden areas, allowing you to tend your plants without stepping on them.
    • Enhance Aesthetics: A well-designed pathway can be a focal point in your garden. It guides the eye and creates visual interest.
    • Prevent Soil Compaction: Pathways help prevent soil compaction in areas where you frequently walk, ensuring that your garden beds remain fertile and well-drained.

    Pathway Materials:

    • Gravel: Gravel is durable, easy to install, and creates a natural look in the garden. It also helps with drainage.
    • Mulch: Mulch is affordable and provides a soft, natural look, though it degrades over time and requires replenishing.
    • Stone or Brick: These materials create a more formal, structured look and are long-lasting.

    Design Tips for Pathways:

    • Width: Pathways should be wide enough to comfortably accommodate foot traffic. A width of 2 to 3 feet is ideal.
    • Flow: Ensure the pathways lead naturally through your garden, creating smooth transitions from one area to another.

    5. Native Plant & Pollinator Garden Spaces: Eco-Friendly Design

    Native plants are essential for creating a garden that supports local wildlife, including pollinators like bees, butterflies, and birds. By incorporating a pollinator-friendly garden into your design, you’re helping to maintain biodiversity and improve the health of your entire garden ecosystem.

    Why Native Plants and Pollinator Gardens?

    • Support Local Wildlife: Native plants attract pollinators and beneficial insects, improving plant health and the overall balance of your garden.
    • Low Maintenance: Native plants are adapted to your local climate, require less water and fewer chemicals, and are more resistant to pests.
    • Eco-Friendly: Planting native species helps conserve local ecosystems and reduce the spread of invasive plants.

    Design Tips for Native Plants:

    • Research Local Plants: Learn about the native plants in your area and choose species that will thrive in your garden’s climate.
    • Pollinator Spaces: Include flowers, shrubs, and trees that provide nectar, shelter, and nesting spaces for pollinators.

    FAQs

    Q1: What are the benefits of raised garden beds? Raised garden beds provide better drainage, improve soil quality, and make gardening more accessible. They also offer easier maintenance and can help protect plants from pests.

    Q2: How do I choose the right trellis for my garden? Choose a trellis based on the types of plants you’re growing. For taller plants, go for obelisk or arch trellises. For smaller spaces, panel trellises are ideal.

    Q3: Can I create a pollinator garden if I don’t have a lot of space? Yes! Even a tiny pollinator garden with native plants and flowers can attract bees, butterflies, and birds. Focus on growing a mix of nectar-rich plants in any available space.

    Conclusion: Creating Your Dream Garden Design Ideas

    Incorporating these five key elements into your garden design ideas—raised garden beds, trellises, borders, pathways, and native plant spaces—will help you create a functional, beautiful, and eco-friendly garden. Each element works together to enhance the overall gardening experience, making it easier to maintain while supporting local wildlife. Whether you’re growing your vegetables, designing a peaceful retreat, or welcoming pollinators into your garden, these elements transform your outdoor space into the garden of your dreams. Happy gardening!

  • Revamp Your Space: 25 Genius DIY Garden Projects

    Revamp Your Space: 25 Genius DIY Garden Projects

    Introduction
    If you’ve ever stared at your garden and thought, “This needs a refresh,” you’re not alone. Whether you’re itching to organize your tools, add personality to your patio, or create a sustainable oasis, DIY garden projects are the perfect solution. Over the years, I’ve transformed my own backyard from a cluttered mess to a functional retreat using simple, hands-on ideas—no professional skills required. In this guide, I’ll share 25 of my favorite projects, complete with tips, tricks, and lessons learned. Let’s dig in!

    1. Build a Weatherproof Concrete Table

    Concrete tables blend industrial chic with practicality. I crafted mine using a cedar base and tinted concrete mix, which resists moisture and lasts for years.

    Pro tip: Let the concrete cure for at least 48 hours to avoid cracks. Perfect for outdoor dinners or potting plants!

    Materials Needed:

    • Cedar planks
    • Concrete mix
    • Mold (use melamine boards for smooth edges)

    Why It Works:

    • Durable and low-maintenance
    • Customizable size and color

    2. Create a Miniature Succulent Wonderland

    Succulents thrive on neglect, making them ideal for busy gardeners. I designed a tiny desert scene using an old wheelbarrow and thrifted figurines. Add sand, gravel, and a mix of echeverias and sedums for texture.

    Personal Hack:
    Use a shallow container with drainage holes to prevent root rot.

    3. Craft a Tool-Cleaning Station

    Rusty tools? Say goodbye with a DIY cleaning bucket. Fill a sturdy pail with sand and mineral oil—it scrubs off dirt and conditions metal. I keep mine by the shed for quick cleanups.

    Bonus: Add a mesh liner to sift debris.

    4. Design a Low-Maintenance Terrarium

    Terrariums are my go-to for adding greenery to small spaces. Layer pebbles, activated charcoal, and soil in a glass jar, then add ferns or air plants. Place it near indirect light, and mist monthly.

    Avoid: Overwatering—succulents and cacti prefer dry conditions.

    5. Plant a Mini Evergreen Garden

    For year-round color, combine dwarf conifers like Mugo pine with perennials like heuchera. I lined mine with moss to retain moisture and added polished stones for contrast.

    Best For: Balconies or tabletops.

    6. Assemble Concrete Paver Planters

    Skip the mess of mixing concrete—use pavers instead! Stack them vertically or horizontally, secure with construction adhesive, and fill with soil. I used this method to create sleek herb planters for my patio.

    Cost: Under $20 per planter.

    7. Repurpose Furniture into a Gardening Station

    An old china cabinet got a second life as my outdoor storage hub. After sanding and painting it teal, I added hooks for tools and labeled bins for seeds.

    Key Tip: Use outdoor-rated paint to withstand weather.

    8. Upcycle Bottles into Bird Feeders

    Turn wine bottles into chic feeders by wrapping copper wire around the neck and attaching a wooden perch. Fill with sunflower seeds, and watch finches flock to your yard.

    Eco-Friendly Bonus: Reduces glass waste.

    9. Frame a Living Succulent Art Piece

    I mounted succulents on a shadow box frame filled with soil and moss. Hang it indoors or under a covered porch—just water sparingly!

    Variation: Use a vintage picture frame for a rustic look.

    10. Craft Log-Slice Stepping Stones

    After a storm downed a birch tree, I sliced the trunk into stepping stones. Stain them with walnut ink for a weathered finish, or leave them natural.

    Safety Note: Seal with polyurethane to prevent rot.

    11. Hang a Wooden Basket Planter

    I wove a basket from cedar strips, lined it with moss, and planted trailing ivy. Hang it near a window for a cascading green display.

    Beginner-Friendly: Use pre-made baskets to save time.

    12. Weave Dogwood Branches into Garden Orbs

    Pruned dogwood branches? Twist them into orbs for garden decor. I added fairy lights to mine for evening ambiance.

    Pro Tip: Soak branches in water first for flexibility.

    13. Label Plants with Chalkboard Markers

    Paint wooden stakes with chalkboard paint to label herbs and veggies. I update mine seasonally—no more forgotten seedlings!

    Cost: Under $5 for a set.

    14. Install a Compact Pond Box

    No yard? No problem! I turned a plastic storage bin into a mini pond with water lilies and a small pump. Place it on a balcony or deck for a serene vibe.

    Maintenance: Clean monthly to prevent algae.

    15. Grow a Mini Herb Garden

    In a wooden crate, I planted basil, thyme, and mint. Add pebbles for drainage and place it near a sunny window. Fresh pesto, anyone?

    Quick Tip: Trim herbs regularly to encourage growth.

    16. Build a Rain Barrel from a Trash Can

    Cutting my water bill was a game-changer. I drilled a spigot into a garbage can, added a mesh filter, and placed it under a downspout.

    Savings: Collects 50+ gallons per storm.

    17. Mold Concrete Garden Spheres

    Using old Christmas ornaments as molds, I created concrete spheres. Dab them with green paint for a mossy patina.

    Creative Twist: Embed seashells or tiles before drying.

    18. Paint Terra-Cotta Pots

    Give plain pots a makeover with metallic paint or stencils. I used gold leaf for a luxe finish—they’re now my patio’s focal point.

    Durability: Seal with outdoor varnish.

    19. Construct a Pallet Potting Bench

    Pallets are a goldmine for DIYers. I built a bench with storage shelves and added a chalkboard panel for notes.

    Customize: Add wheels for portability.

    20. Organize Tools with a Pallet Rack

    Mount a stained pallet on your shed wall and attach hooks for shovels and rakes. My tools have never been so accessible!

    Time Saver: Label hooks for quick grabs.

    21. DIY Compost Bin from a Trash Can

    Drill aeration holes in a bin, add kitchen scraps, and let nature work. My compost enriches soil in just 2–3 months.

    Do Compost: Fruit peels, coffee grounds, leaves.
    Avoid: Meat, dairy, oils.

    22. Marbleize Terra-Cotta Pots

    Swirl acrylic paints in water, dip pots, and let dry. Each one is unique—I gifted these at my last garden party!

    Sealant: Use Mod Podge for longevity.

    23. Grow Herbs Vertically with Pallets

    Attach small pots to a pallet leaned against a fence. My vertical herb garden saves space and looks Instagram-worthy.

    Ideal Herbs: Rosemary, parsley, cilantro.

    24. Build a Raised Garden Bed

    Using untreated lumber, I built a 4×4 bed for veggies. The elevated design reduces back strain and improves drainage.

    Soil Mix: Combine compost, peat moss, and vermiculite.

    25. Craft a Succulent Wreath

    Soak sphagnum moss, shape it into a wreath form, and tuck in succulent cuttings. Mine hangs on my front door and thrives with weekly misting.

    Longevity: Succulents root into the moss over time.

    Pros and Cons of DIY Garden Projects

    ProsCons
    Budget-friendlyTime-intensive
    Customizable designsRequires basic tools/skills
    Eco-friendly (upcycles materials)Weather-dependent for outdoor work
    Boosts curb appealTrial-and-error adjustments

    FAQs

    Q: What are the easiest DIY garden projects for beginners?
    A: Start with chalkboard plant markers, miniature herb gardens, or pallet organizers. They require minimal tools and time.

    Q: How do I protect outdoor projects from rain?
    A: Use weather-resistant materials like cedar, outdoor paint, and concrete. Seal wooden items with polyurethane.

    Q: Can I complete these projects in a weekend?
    A: Yes! Projects like terrariums, bird feeders, or marbleized pots take 1–2 hours.

    Q: What if I don’t have a green thumb?
    A: Opt for low-maintenance plants like succulents, snake plants, or herbs.

    Conclusion

    Transforming your garden doesn’t require a hefty budget or expert skills—just creativity and a willingness to experiment. From functional storage hacks to whimsical decor, these 25 DIY garden projects cater to all skill levels and spaces. As someone who’s accidentally killed more plants than I’d like to admit, trust me: Start small, learn as you go, and celebrate every bloom. Your dream garden is just a project away!

  • How To  sketch of a flower garden

    How To sketch of a flower garden

    Introduction: Why Sketching Your Flower Garden is Essential

    Whether you have a small corner of your backyard or a sprawling garden, creating a sketch of a flower garden is the perfect way to begin your gardening journey. Gardening is not just a hobby; it’s an artistic process that brings joy, peace, and beauty into your space. By sketching your flower garden layout, you can visualize how each plant will thrive in your garden, ensuring it’s both visually pleasing and sustainable.

    In this guide, we’ll walk through the essential steps for creating a beautiful flower garden, from conceptualizing the theme to planting the final flower. So, grab a pencil and some graph paper (or use online tools) — let’s sketch your garden masterpiece!

    Step 1: Determine Your Flower Garden Theme

    The first step in any flower garden planning process is choosing a theme. Much like an artist picks a canvas, your garden needs direction. Themes set the tone and guide your plant choices. Whether it’s a vibrant, colorful garden or a more subtle, monochromatic design, your garden’s theme will help unify all the elements.

    Popular Flower Garden Themes:

    • Cottage Garden: Think wildflowers, climbing roses, and lavender.
    • Zen Garden: Choose calming colors with Japanese-inspired plants like cherry blossoms and bamboo.
    • English Garden: Perfect for classic beauty with peonies, hydrangeas, and delphiniums.
    • Tropical Garden: Think bold, exotic plants like hibiscus, bird-of-paradise, and palm trees.

    Don’t be afraid to get creative! Sometimes, blending multiple styles works beautifully. Your sketch of a flower garden is your personal masterpiece, so let your imagination guide you.

    Step 2: Plan Your Flower Garden Layout

    Now that you’ve chosen your theme, it’s time to think about your layout. If you’re working with limited space or uneven ground, be sure to map everything out before you start planting. A well-planned layout ensures that your plants receive the right amount of sunlight and nutrients, helping them thrive throughout the seasons.

    Start by drawing a basic layout. You can use graph paper or even online tools like the “Plan-a-Garden” feature on Better Homes & Gardens. These tools allow you to virtually place plants and structures, giving you a preview of your finished garden.

    Tips for Flower Garden Layout:

    • Consider Sunlight: Make sure you understand how much sunlight each plant requires (full sun, partial sun, or shade). This affects their growth and flowering.
    • Plant Height: Taller plants should go at the back, with shorter plants in front. This arrangement ensures all your plants get enough sunlight and don’t block each other.
    • Spacing: Ensure each plant has enough room to grow. Overcrowding can stunt growth and reduce the aesthetic value of your garden.

    Step 3: Growing Flower Seeds vs. Buying Flower Plants

    One of the most exciting parts of flower gardening is choosing how you want to start your plants. You can either grow flowers from seeds or buy established plants from a nursery. Both options come with their advantages and challenges.

    Growing Flowers from Seeds

    • Pros:
      • Cost-effective.
      • A wider selection of plants.
      • It’s rewarding to watch your plants grow from the very beginning.
    • Cons:
      • Takes longer for flowers to bloom.
      • Requires more patience and care.

    If you’re new to gardening, starting with seeds can be a fun learning experience. However, you’ll need patience as some flowers may take months to bloom.

    Buying Flower Plants

    • Pros:
      • Instant gratification — flowers will bloom sooner.
      • More consistent results.
      • Easier for beginners.
    • Cons:
      • Can be more expensive.
      • Limited variety, depending on the nursery.

    Step 4: Construct Your Flower Garden

    Once you’ve chosen your plants, it’s time to get your hands dirty! Whether you’re working with a small space or a larger plot, constructing a flower garden involves soil preparation, planting, and proper care. Follow these steps to get started:

    Preparing Your Soil

    • Loosen the Soil: Use a shovel, rake, and trowel to break up compacted soil. This will allow roots to grow more easily.
    • Add Organic Matter: Incorporating compost or well-rotted manure into the soil improves its structure and provides essential nutrients.

    Planting Your Flowers

    • Planting Depth: Follow planting instructions for each plant species. Some flowers need to be planted deeper than others.
    • Watering: Water thoroughly right after planting, but avoid over-watering, which can drown the roots.

    Step 5: Ongoing Care for Your Flower Garden

    Once your flowers are planted, the real fun begins! Enjoying your flower garden design means maintaining it with regular care. Watering, fertilizing, and pruning are essential tasks that will help your plants flourish.

    Maintenance Tips:

    • Watering: Deep watering encourages roots to grow deeper, helping the plants tolerate dry conditions.
    • Mulching: Use mulch to retain moisture and keep weeds at bay.
    • Pruning: Regularly prune dead or damaged flowers to promote healthy growth.

    Step 6: Enjoy Your Flower Garden Design

    One of the best aspects of a flower garden is that it’s constantly evolving. As the seasons change, so will the look and feel of your garden. You can experiment with different flower varieties, rearrange plants, or even start fresh with new ideas. Your garden is a living masterpiece that reflects your personality and creativity.

    FAQs About Creating a Sketch of a Flower Garden

    Q1: How do I choose the right flowers for my garden theme?
    A1: Research flowers that match your chosen theme. For example, for a Zen garden, choose calm, low-maintenance flowers like irises or lotus. For an English garden, try roses and lavender.

    Q2: Can I grow flowers in a small space?
    A2: Absolutely! With proper planning, you can create a flower garden even in small areas like balconies or patios. Vertical gardens and container gardening can help maximize space.

    Q3: How can I make my flower garden last all year?
    A3: Choose a mix of perennial and annual flowers. Perennials come back year after year, while annuals provide color throughout the seasons.

    Q4: How do I prevent pests from damaging my flower garden?
    A4: Regularly inspect plants for signs of pests, and use organic pest control methods like neem oil. Encourage beneficial insects like ladybugs to keep harmful pests in check.

    Pros and Cons of Creating a Sketch of a Flower Garden

    ProsCons
    Encourages creativity and self-expressionRequires time and patience
    Provides a structured approach to gardeningCan be overwhelming for beginners
    Enhances garden planning and organizationInitial cost of seeds or plants
    Increases plant health with proper spacingRequires ongoing maintenance and care
    Provides a visually appealing spaceSoil quality can be an issue in some areas

    Conclusion: Transform Your Space with a Beautiful Flower Garden

    Creating a sketch of a flower garden isn’t just about planting flowers — it’s about bringing your creativity to life and transforming your space into a colorful, welcoming retreat. Whether you’re a beginner or an experienced gardener, following these steps will help you design a garden that’s both beautiful and sustainable.

    By planning carefully, choosing the right plants, and maintaining your garden, you’ll have a stunning floral display to enjoy for seasons to come. So, grab your sketchpad and get started — the garden of your dreams is just a few steps away!

  • Best Flowers for Tattoos: Meaning & Symbolism That Will Wow You

    Best Flowers for Tattoos: Meaning & Symbolism That Will Wow You

    Flowers have long been revered not only for their natural beauty but also for the deep meanings they hold across cultures. This makes flower tattoos an incredibly popular choice among tattoo enthusiasts. With their rich history, intricate designs, and wide array of meanings, best flowers for tattoos can express everything from love and beauty to life cycles and transformation.

    Whether you’re someone who wants a small, delicate flower on your wrist or a full sleeve of intricate floral designs, this comprehensive guide will help you choose the best flower tattoo for your personality, life experiences, and artistic preferences.

    Why Choose Flowers for Your Tattoo?

    1. Timeless Beauty:
    Flowers have been a prominent motif in art, culture, and tattoos for centuries. Their natural beauty, vibrant colors, and intricate details make them a timeless choice for tattoo enthusiasts. A flower tattoo can range from minimalist to highly detailed, adapting to any style.

    2. Symbolism:
    Each flower carries its own specific symbolism. Some represent love, others are linked to spiritual growth, or they may signify new beginnings, strength, or remembrance. A flower tattoo allows you to express your emotions, ideals, and personal story.

    3. Versatility in Design:
    One of the reasons flowers are so popular in tattoos is their versatility. Whether you prefer traditional, neo-traditional, watercolor, or geometric styles, flowers can be adapted to any tattoo style. Additionally, they can be small and delicate or large and elaborate, depending on what suits your personal taste.

    4. Connection to Nature:
    Flowers are deeply connected to nature and can represent growth, rebirth, and transformation. They are also closely tied to the cycle of life—birth, life, and death—making them symbolic of resilience and change.

    5. Emotional Expression:
    Flower tattoos can represent personal stories or emotions. A rose might symbolize love, while a lotus could symbolize overcoming adversity. The variety of meanings makes flowers ideal for expressing individual experiences, dreams, or goals.

    Best Flowers for Tattoos and Their Meanings

    Let’s dive deeper into the best flowers for tattoos, the meanings they hold, and why they might be perfect for your next tattoo.

    1. Rose Tattoo

    • Symbolism: Love, beauty, passion, sacrifice, and romance.
    • Color Meanings:
      • Red Rose: Represents deep love, passion, and desire. A classic choice for romantic love.
      • White Rose: Symbolizes purity, innocence, new beginnings, and remembrance. Often chosen for memorial tattoos or new life.
      • Yellow Rose: Signifies friendship, joy, and positivity. A perfect option to symbolize platonic love and gratitude.
      • Pink Rose: Represents admiration, appreciation, and gratitude. It’s softer than the red rose and a popular choice for family tattoos.
    • Why It’s Popular: The rose is one of the most iconic flowers in both art and tattoos. Its rich history and versatility in color make it a top choice for tattoos that represent a wide array of emotions.

    2. Lotus Tattoo

    • Symbolism: Spiritual enlightenment, purity, rebirth, and overcoming adversity.
    • Why It’s Popular: The lotus has a deep connection to Eastern philosophy, particularly Buddhism and Hinduism, where it represents purity and enlightenment. For many, a lotus tattoo symbolizes personal growth and a journey toward self-discovery.

    3. Cherry Blossom Tattoo

    • Symbolism: Beauty, the fleeting nature of life, and new beginnings.
    • Why It’s Popular: In Japanese culture, cherry blossoms represent the ephemeral nature of life. They bloom beautifully for a short period and fall away, reminding people to live fully and embrace the present moment. This symbolism resonates with those who appreciate the transient beauty of life.

    4. Lily Tattoo

    • Symbolism: Purity, renewal, refined beauty, and motherhood.
    • Why It’s Popular: Known for their elegant, delicate petals, lilies symbolize rebirth and new beginnings. The flower is often associated with the Virgin Mary in Christian iconography, representing purity and grace. Many choose lily tattoos to mark a fresh start or as a tribute to motherhood.

    5. Sunflower Tattoo

    • Symbolism: Happiness, positivity, loyalty, and longevity.
    • Why It’s Popular: Sunflowers are a bright, bold symbol of optimism. Their large, vibrant blooms are associated with the sun, and they can evoke feelings of warmth, joy, and hope. A sunflower tattoo is perfect for those who want to express a positive outlook or remind themselves to stay true to their authentic self.

    6. Daisy Tattoo

    • Symbolism: Innocence, purity, simplicity, and new beginnings.
    • Why It’s Popular: Daisies have a simple yet profound beauty. They are often linked to the concept of innocence and youth, making them perfect for people who value simplicity in life. The daisy also has a strong connection to renewal and new beginnings, making it ideal for someone starting a new chapter.

    7. Peony Tattoo

    • Symbolism: Prosperity, romance, good fortune, and beauty.
    • Why It’s Popular: Peonies are large, full flowers often associated with prosperity and success. In Chinese culture, they are symbols of wealth and good fortune, making them a great choice for someone who values abundance in their life. Peony tattoos are also beautiful and often used in detailed, ornamental designs.

    8. Tulip Tattoo

    • Symbolism: Perfect love, elegance, and grace.
    • Why It’s Popular: The tulip is a symbol of perfect love and elegance. Its graceful form and vibrant color make it an attractive tattoo choice. It’s often chosen by people who want a tattoo that signifies refined beauty and romantic feelings.

    9. Orchid Tattoo

    • Symbolism: Beauty, strength, luxury, and fertility.
    • Why It’s Popular: Orchids are exotic and rare flowers that represent uniqueness and luxury. They are also symbolic of strength and beauty, often associated with strong, independent individuals. An orchid tattoo can be a stunning, sophisticated piece of art that represents elegance and personal strength.

    Tips for Getting a Flower Tattoo Before you jump into getting your flower tattoo, here are some tips to help you make an informed decision:

    1. Take Your Time Choosing a Design:
    A flower tattoo can be something personal, so take time to choose the type of flower and design that truly resonates with you.

    2. Size and Placement Matter:
    Consider where you want your tattoo and how large or small it should be. Some flowers, like roses or lilies, work well as larger designs, while others, like daisies or cherry blossoms, are great for smaller tattoos.

    3. Do Your Research on Tattoo Artists:
    Look for a tattoo artist who specializes in floral designs. Check their portfolio and ask about their experience with intricate floral tattoos.

    4. Be Prepared for Aftercare:
    Tattoos require proper aftercare to heal correctly. Make sure you can access the tattoo for cleaning and moisturizing during the healing process.

    5. Pay Attention to Color:
    Decide whether you want your flower tattoo in full color, black and grey, or a mix. Some flowers, like sunflowers and tulips, look vibrant in color, while others, like roses, can have a striking look in black and grey.

    Pros and Cons of Flower Tattoos

    ProsCons
    Symbolic Meaning: Many flowers carry personal significance.Requires High Maintenance: Detailed flower tattoos may require more frequent touch-ups.
    Timeless Design: Flowers never go out of style.Size Matters: Larger flower tattoos may be more painful and take longer to heal.
    Versatility: Can be adapted to any style, from minimalist to detailed.Fades Over Time: Some flower tattoos, especially with lighter colors, can fade faster.
    Nature-Inspired: Connects you to nature and its cycles.Complexity in Design: Intricate designs may need skilled artists for a perfect result.

    Conclusion

    Flower tattoos are an excellent choice for those who want a design that is not only beautiful but also meaningful. Whether you’re drawn to the timeless symbolism of the rose, the spiritual depth of the lotus, or the positivity of a sunflower, there’s a flower that can represent your journey, beliefs, or emotions.

    By understanding the meanings behind different flowers, you can choose a tattoo that resonates with your personality and life experiences. Just remember to do your research on your tattoo artist, take your time deciding on the right design, and follow proper aftercare to ensure your tattoo heals beautifully.So, what are you waiting for? The best flowers for tattoos are waiting for you to bring them to life!

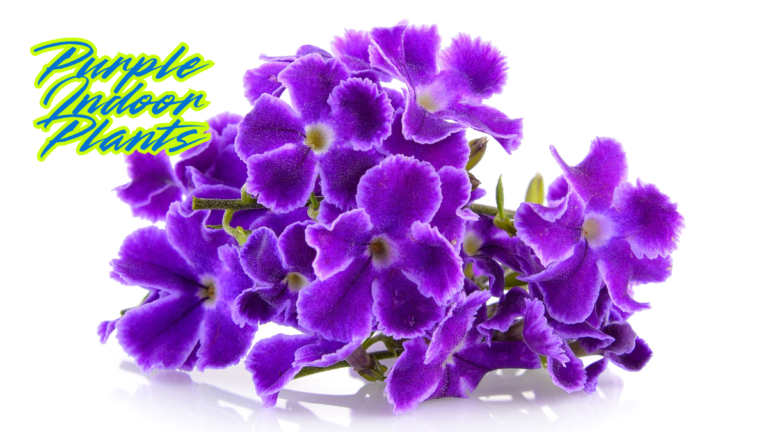
  • Beautiful Purple Indoor Plants to Add Color to Your Home

    Beautiful Purple Indoor Plants to Add Color to Your Home

    Indoor plants are a fantastic way to bring life and vibrancy into your home, especially during the colder months when outdoor gardening isn’t an option. Among the many color options available, purple indoor plants stand out, offering a variety of shades—from the softest lilacs to deep, bold hues. Whether you’re looking for a subtle pop of color or a statement piece, these plants are perfect for any room in your house.

    Why Choose Purple Indoor Plants?

    Purple indoor plants do more than just brighten a space—they add a unique, rich touch to your décor. From flowering plants to leafy varieties, purple plants offer a range of textures and shapes. Some are known for their calming effects, while others provide a pop of bold, exotic beauty. Not to mention, many purple plants are low-maintenance, making them ideal for beginners or those who aren’t sure if they have a green thumb.

    If you’re looking to add some color to your home with minimal effort, purple indoor plants could be your perfect solution. Let’s dive into the 21 best purple indoor plants that can thrive in your space.

    1. Purple Oxalis (Purple Shamrock)

    Light: Direct sunlight
    Water: Every 1-2 weeks
    Mature Size: 0.5–1 ft. tall, 1–2 ft. wide
    Difficulty: Low maintenance

    The Purple Oxalis, also known as the purple shamrock, is an easy-to-care-for plant that offers rich, deep purple leaves. To get the most out of this plant, place it in direct sunlight. It’s a low-maintenance beauty that adds a moody, elegant touch to any room.

    2. Lavender

    Light: Full, direct sunlight
    Water: Once every 10-14 days
    Mature Size: 1-2 ft. tall, 1-2 ft. wide
    Difficulty: Low maintenance

    Lavender isn’t just for gardens—it’s also a wonderful purple indoor plant. Its fragrant blooms and soft purple leaves can create a relaxing atmosphere in any room. Be sure to place it in a spot with at least 4-6 hours of direct sunlight daily to ensure it thrives.

    3. Prayer Plant

    Light: Bright, indirect sunlight
    Water: Every 1-2 weeks
    Mature Size: 6–12 in. tall, 6–12 in. wide
    Difficulty: Low maintenance

    Prayer plants offer a subtle yet captivating touch with their purple undersides. These plants are great for adding texture and interest to your home. They grow best in indirect light and require minimal watering, making them an excellent option for those who are new to plant care.

    4. Rex Begonia

    Light: Partial shade
    Water: Weekly when the top of the soil has dried
    Mature Size: 12-18 in. tall
    Difficulty: Low maintenance

    Rex begonias are perfect for those seeking purple indoor plants with striking foliage. With burgundy undertones and intricate leaf patterns, these plants add warmth to your space. They thrive in moderate humidity and are relatively easy to care for, requiring only weekly watering.

    5. Coleus

    Light: Partial shade
    Water: Regularly
    Mature Size: 0.5–3 ft. tall, 0.5–3 ft. wide
    Difficulty: Low maintenance

    Coleus is an excellent choice for those who love vibrant colors. With its deep purple hues and lush green leaves, it’s a perfect addition to any indoor garden. Keep this plant out of direct sunlight to prevent its colors from fading, and water it regularly to keep it looking its best.

    6. Purple Passion (Gynura aurantiaca)

    Light: Bright, indirect sunlight
    Water: Regularly during active growth
    Mature Size: 1-2 ft high, vines up to 5 ft long
    Difficulty: Low maintenance

    The Purple Passion plant lives up to its name with its vibrant purple foliage. This plant’s velvety texture and bold color make it a statement piece in any room. Water it regularly during its growing season and place it in bright, indirect sunlight for optimal growth.

    7. Calathea

    Light: Indirect sunlight only
    Water: Weekly
    Mature Size: 1–2 ft. tall, 1–2 ft. wide
    Difficulty: Moderate maintenance

    Calatheas are a favorite among plant enthusiasts for their stunning patterns and vibrant hues. These plants do well in indirect sunlight and require regular watering to keep the soil moist. While they’re a little more demanding than others, they’re still relatively easy to care for.

    8. Tradescantia Zebrina (Wandering Jew)

    Light: Bright, indirect light
    Water: When the soil has dried
    Mature Size: 14 in. tall, 14 in. wide
    Difficulty: Low maintenance

    The Tradescantia Zebrina is known for its striking purple, silver, and green striped leaves. This plant is perfect for any indoor space, requiring minimal attention. It grows well in bright, indirect light and only needs watering when the soil has dried out.

    9. Persian Shield

    Light: Full, partial sunlight
    Water: Regularly
    Mature Size: 3–4 ft. tall, 2–3 ft. wide
    Difficulty: Moderate maintenance

    The Persian Shield offers dramatic purple foliage that adds a touch of royalty to any room. These plants require bright, indirect sunlight and regular watering. To maintain their vibrant color, make sure to keep them consistently moist.

    10. Purple Heart (Tradescantia pallida)

    Light: Full, direct sunlight
    Water: When the top of the soil has dried
    Mature Size: 12-18 in. tall and wide
    Difficulty: Low maintenance

    Purple Heart is a unique and stunning plant with deep purple foliage and soft pink flowers. It thrives in direct sunlight, making it an excellent choice for bright, sunny spots in your home. Water it when the soil dries out, and it will reward you with bold color and easy maintenance.

    11. Ti Plant (Cordyline fruticosa)

    Light: Partial sunlight
    Water: When the top inch of soil has dried
    Mature Size: 2-10 ft. tall, 3–4 ft. wide
    Difficulty: Moderate maintenance

    Ti plants are dramatic and bold, offering sharp, spiky leaves with rich purple hues. These plants are perfect for adding a statement piece to your decor. Keep the soil well-drained and water only when the top inch of soil has dried.

    12. Echeveria (Succulent)

    Light: Full, direct sunlight
    Water: When soil has dried
    Mature Size: 2-24 in. tall, 2-12 in. wide
    Difficulty: Low maintenance

    For succulent lovers, Echeveria is a great option. With their muted purple-pinkish and green stems, they add a soft and natural touch to any indoor space. These drought-tolerant plants are easy to care for, needing only a few hours of direct sunlight and occasional watering.

    13. Purple Waffle Plant (Hemigraphis alternata)

    Light: Indirect sunlight
    Water: Keep moist
    Mature Size: 6 in. tall, 8 in. wide
    Difficulty: Low maintenance

    The Purple Waffle Plant features ridged leaves in deep purple tones, making it an eye-catching addition to any indoor garden. It’s easy to care for, requiring only indirect sunlight and moist soil to thrive. Plus, it produces beautiful white flowers for an added touch of elegance.

    14. Moses in the Cradle (Tradescantia spathacea)

    Light: Full, partial sunlight
    Water: When the top two inches are dry
    Mature Size: 6–12 in. tall, 12–24 in. wide
    Difficulty: Low maintenance

    Moses in the Cradle, also known as oyster plant, is a compact plant with long green leaves and a splash of purple along the edges. It’s easy to care for, needing just full or partial sun and regular watering when the soil starts to dry out.

    15. Ruby’s Necklace (Othonna capensis)

    Light: Bright, direct sunlight
    Water: Water when soil begins to dry
    Mature Size: 2 in. tall, vines downward
    Difficulty: Low maintenance

    Ruby’s Necklace is a striking succulent that features rich purple stems and pinkish-purple leaves. It thrives in full sunlight and requires minimal care. Perfect for smaller spaces, this plant adds drama without the hassle.16. 16.Sweet Potato Vine (Ipomoea batatas)

    Light: Full to partial sunlight
    Water: Regular watering, but allow the soil to dry slightly between waterings
    Mature Size: 6-10 ft. long (vines)
    Difficulty: Low maintenance

    Sweet Potato Vine is known for its fast-growing vines and rich purple leaves. This plant works well in hanging baskets or as ground cover. It’s incredibly easy to care for and thrives in a variety of lighting conditions, making it an excellent choice for both beginners and seasoned gardeners.

    17. Fuchsia

    Light: Bright, indirect sunlight
    Water: Regular watering, keeping soil consistently moist
    Mature Size: 12–24 in. tall, 12–18 in. wide
    Difficulty: Moderate maintenance

    Fuchsia plants are famous for their vibrant, drooping purple and pink flowers. While they do require some maintenance in terms of watering and occasional pruning, they reward you with stunning blooms. A fuchsia plant in a hanging basket or window box can bring a tropical touch to your indoor space.

    18. Purple Bell Vine (Codonopsis pumila)

    Light: Partial sunlight
    Water: Regular watering, allow the soil to dry between waterings
    Mature Size: 4-6 ft. tall (vines)
    Difficulty: Moderate maintenance

    This stunning vine produces bell-shaped flowers in shades of purple. It’s perfect for hanging baskets or trellises, adding a cascading, elegant look to your home. The plant thrives in partial sunlight and needs regular watering. However, it’s a little more particular about humidity levels.

    19. Begonia Rex (Rex Begonia)

    Light: Bright, indirect light
    Water: Keep moist, but don’t let it sit in water
    Mature Size: 8–12 in. tall
    Difficulty: Moderate maintenance

    The Rex Begonia is prized for its striking foliage. Purple veins contrast beautifully against silvery and green leaves, making it a favorite among indoor plant lovers. It needs a moderate amount of care and attention, especially regarding watering and humidity levels.

    20. African Violet (Saintpaulia)

    Light: Indirect sunlight
    Water: Water from below to avoid wetting the leaves
    Mature Size: 6–12 in. tall
    Difficulty: Moderate maintenance

    The African Violet is a classic purple indoor plant known for its vibrant blooms in various shades of purple. This plant prefers indirect light and should be watered carefully to prevent the crown from getting wet. Regular deadheading and careful watering will keep it thriving and blooming throughout the year.

    Conclusion

    Purple indoor plants bring an exquisite balance of elegance and boldness to any home. From low-maintenance options like the Purple Oxalis to the show-stopping blooms of the Fuchsia, these plants not only provide beauty but also purify the air and enhance the overall mood of a space. No matter your level of expertise or the amount of light your home gets, there’s a perfect purple indoor plant for you. Add some of these stunning options to your home to elevate your indoor garden and enjoy the tranquility they bring.

  • Why Unique Indoor Plants Are a Must-Have for Your Home

    Why Unique Indoor Plants Are a Must-Have for Your Home

    Adding unique indoor plants to your space instantly elevates its aesthetic, infuses it with natural energy, and enhances the air quality. Whether you’re a plant enthusiast or a beginner, choosing the right houseplants can be both exciting and rewarding. Plus, maintaining indoor plants is easier than you think! From low-maintenance succulents to exotic statement pieces, we’ve compiled a list of unique indoor plants that will transform your home.

    Unique Indoor Plants to Elevate Your Home

    1. Whale Fin Sansevieria

    The Whale Fin Sansevieria is a rare and stunning variety of the snake plant, known for its wide, paddle-like leaves resembling a whale’s fin. This plant is an excellent choice for those seeking a low-maintenance indoor plant that thrives in various lighting conditions. It can tolerate low light but grows best in bright, indirect light. Overwatering is the most common issue with this plant, so it’s best to let the soil dry out completely between waterings. It is also drought-tolerant and does not require frequent misting, making it an excellent option for busy plant owners.

    2. Anthurium ‘Veitchii’ (King Anthurium)

    The King Anthurium is a true statement plant, featuring massive, elongated, and heavily textured leaves that can grow up to four feet long. Native to tropical rainforests, this plant thrives in high humidity and warm temperatures. It prefers bright, indirect light and requires well-draining soil with good aeration to prevent root rot. Regular misting or using a humidifier will keep the foliage lush and healthy. This plant is ideal for those who want to add an exotic and luxurious touch to their indoor space.

    3. Dieffenbachia

    Dieffenbachia, also known as the Dumb Cane plant, is an air-purifying houseplant with large, variegated green and yellow leaves. It is relatively low-maintenance and adapts well to different light conditions, though it thrives in bright, indirect light. It requires watering when the top two inches of soil are dry, and it benefits from moderate humidity. While this plant is easy to care for, it is toxic if ingested, making it unsuitable for homes with pets or small children.

    4. Alocasia ‘Tiny Dancer’

    The Alocasia ‘Tiny Dancer’ is a unique and charming houseplant with delicate, arching stems that resemble a dancer in motion. This plant enjoys bright, indirect sunlight and thrives in high humidity, making it a great choice for bathrooms or kitchens. The soil should be kept moist but never soggy, as overwatering can lead to root rot. With proper care, this plant will reward its owner with striking foliage that adds elegance to any indoor space.

    5. Geogenanthus

    Geogenanthus is an uncommon indoor plant with thick, deep purple glossy leaves that make it a standout addition to any plant collection. It thrives in low to medium light and does not require excessive watering. Allowing the soil to dry out between waterings helps prevent overwatering issues. This plant is perfect for those looking to introduce a splash of color into their home without needing extensive plant care knowledge.

    6. Pink Polka Dot Plant

    The Pink Polka Dot Plant is a visually stunning houseplant with small, speckled pink and green leaves. It is compact and thrives in humid conditions, making it a great option for terrariums or small indoor spaces. This plant requires regular watering to keep the soil moist and prefers bright, indirect light to maintain its vibrant color. If grown in low light, the leaf patterns may fade, reducing its visual appeal.

    7. Alocasia Melo

    Alocasia Melo is a rare Alocasia variety known for its thick, textured leaves that resemble carved stone. It thrives in warm, humid environments and prefers bright, indirect light. It needs well-draining, aerated soil and regular watering when the top inch of soil becomes dry. While this plant requires a bit more attention than others, its unique, structural beauty makes it a favorite among houseplant collectors.

    8. Norfolk Pine

    Norfolk Pine is a beautiful indoor evergreen that resembles a miniature Christmas tree, making it a popular seasonal plant. Unlike true pines, it thrives indoors with bright, indirect light and moderate humidity. Overwatering is a common issue, so it’s essential to let the topsoil dry out before watering again. This plant adds year-round greenery to indoor spaces and is an excellent choice for those looking for a festive yet long-lasting plant.

    9. Calathea ‘White Fusion’

    Calathea ‘White Fusion’ is an eye-catching tropical plant known for its green and white marbled foliage with hints of purple underneath. It thrives in bright, indirect light and requires high humidity to maintain its vibrant color. This plant prefers well-draining, moisture-retentive soil and should be watered regularly to keep the soil slightly damp. It is sensitive to tap water, so using filtered or distilled water can prevent browning of the leaves.

    10. Bay Laurel Tree

    The Bay Laurel Tree is a versatile plant that can be grown indoors for its glossy, aromatic leaves, which are commonly used in cooking. It prefers bright, direct sunlight and well-draining soil to prevent root rot. This plant is relatively low-maintenance and requires occasional pruning to maintain its shape. It benefits from moderate humidity but can tolerate drier conditions as well.

    11. Wintergreen Berries

    Wintergreen Berries is a low-maintenance plant that produces bright red berries, adding a splash of color to your home. It emits a refreshing minty scent when the leaves are crushed. This plant thrives in indirect sunlight and requires minimal watering, making it a great seasonal addition to indoor plant collections.

    12. Christmas Cactus

    The Christmas Cactus is a unique holiday plant that blooms in late December, producing beautiful pink, red, or white flowers. Unlike desert cacti, it prefers moderate humidity and dappled light. Keeping the soil slightly moist but not waterlogged will ensure healthy growth and prolonged blooms.

    13. Moonshine Snake Plant

    A modern variation of the snake plant, the Moonshine variety has striking silver-green leaves that set it apart. It is nearly indestructible and thrives in both bright and low-light conditions. Minimal watering is required, making it an excellent option for forgetful plant owners.

    14. Purple Passion Plant

    The Purple Passion Plant is known for its velvety, deep green leaves with purple undertones. This eye-catching plant thrives in medium to bright indirect light and requires regular watering to maintain its vibrant color. It adds an exotic touch to any indoor space.

    15. Red Chinese Evergreen

    The Red Chinese Evergreen features lush green leaves with red and pink accents, making it a vibrant addition to any indoor setting. It thrives in indirect light and needs regular watering, but it’s a hardy plant that can tolerate occasional neglect.

    16. Bird’s Nest Fern

    This fern has wavy, rosette-shaped leaves that add texture to your home decor. Unlike traditional ferns, it holds moisture longer, reducing watering frequency. It thrives in bright, indirect light and enjoys moderate humidity.

    17. Zebra Plant

    The Zebra Plant is a bite-sized succulent with white-striped, spiky leaves resembling zebra patterns. It thrives in bright, indirect light and requires minimal watering. Due to its compact size, it is perfect for small spaces like desks or windowsills.

    18. Majesty Palm

    A great statement plant, the Majesty Palm brings a tropical feel indoors. It requires bright, indirect light and high humidity to thrive. Regular misting and well-draining soil help maintain its health, making it a striking but slightly demanding plant.

    19. Prayer Plant ‘Beauty Kim’

    This plant gets its name from the way its leaves fold up at night, resembling hands in prayer. It does well in low to medium light and enjoys high humidity. Watering should be consistent to keep the soil evenly moist.

    20. Monstera Swiss Cheese Plant

    With its distinctive hole-filled leaves, this plant is a favorite among houseplant enthusiasts. It thrives in bright, indirect light and requires weekly watering. Over time, it can grow into a large, statement-making plant.

    21. Blue Star Fern

    The Blue Star Fern has soft, blue-green fronds that add a delicate touch to indoor spaces. It prefers moderate humidity and bright, indirect light. Unlike most ferns, it can tolerate slightly drier conditions.

    22. Boston Fern

    Boston Ferns are well-known for their air-purifying qualities and lush, feathery fronds. They require high humidity and should be watered frequently. These plants do well in bathrooms or kitchens where moisture levels are higher.

    23. Algerian Ivy

    Algerian Ivy is a fast-growing vine that is easy to maintain indoors. It prefers shade and regular watering. Pruning is necessary to control its growth and keep it looking tidy.

    24. Tricolor Hoya ‘Krimson Queen’

    This waxy-leafed vine produces white, green, and sometimes pink leaves. It thrives in bright, indirect light and should be watered sparingly. As a non-toxic plant, it’s safe for pets.

    25. Corkscrew Rush

    An unusual plant with curly, corkscrew-like stems, this plant thrives in indirect light and consistently moist soil. It adds a fun, architectural element to any indoor garden.

    26. Olive Tree

    Olive trees can be grown indoors in pots with ample sunlight. They prefer dry conditions and well-draining soil. Pruning helps keep them manageable indoors.

    27. Golden Pothos

    One of the easiest plants to grow, Golden Pothos has trailing vines with golden-green leaves. It thrives in low to bright light and requires minimal watering. It is an excellent choice for beginners.

    28. ZZ Plant

    A hardy plant that can tolerate low light and infrequent watering, the ZZ Plant is perfect for beginners. Its thick, waxy leaves store water, making it drought-resistant and highly resilient.

    29. Rubber Plant

    The Rubber Plant has large, glossy leaves that make it a great decorative houseplant. It thrives in bright, indirect light and requires watering only when the soil is dry.

    30. String of Pearls

    This cascading succulent has round, bead-like leaves that drape beautifully over the edge of pots. It requires bright, indirect light and occasional watering to keep the soil slightly moist.

    31. Pilea

    Also known as the Chinese Money Plant, Pilea features round, coin-like leaves. It thrives in bright, indirect light and prefers a “drench-and-dry” watering method.

    32. Fiddle Leaf Fig Tree

    A popular indoor plant with large, dramatic leaves, the Fiddle Leaf Fig requires bright, indirect light and careful watering. It’s sensitive to overwatering but can thrive when given proper care.

    33. Sweetheart Waxplant

    A heart-shaped succulent that requires minimal care, this plant does well in bright, indirect light and needs occasional watering.

    34. Anthurium

    Known for its glossy, heart-shaped flowers, Anthurium needs bright, indirect light and high humidity to bloom regularly.

    35. Bird of Paradise

    A tropical plant with large, banana-like leaves, Bird of Paradise prefers bright light and regular watering. It adds a bold statement to any home.

    36. Sansevieria

    Also called Snake Plant, it thrives in low light and requires minimal watering. Its stiff, upright leaves make it a great air purifier.

    37. Watermelon Peperomia

    This plant has round, striped leaves that resemble watermelons. It thrives in low to bright light and needs occasional watering.

    38. Begonia Maculata

    Known as the Polka Dot Begonia, this plant has spotted leaves and thrives in bright, indirect light with consistent watering.

    39. Air Plants

    These plants don’t require soil and absorb moisture from the air. They need occasional soaking and bright, indirect light.

    40. Peace Lily

    The Peace Lily has elegant, white flowers and thrives in low to medium light. It helps purify the air and requires watering when the soil dries out.

    Conclusion:

    Adding unique indoor plants to your home is a simple yet effective way to enhance your space. From air-purifying benefits to mood-boosting effects, these plants offer beauty and functionality. Whether you prefer low-maintenance options or statement pieces, there’s a plant for everyone.

  • How to Care for Aloe Vera Plant: Expert Tips

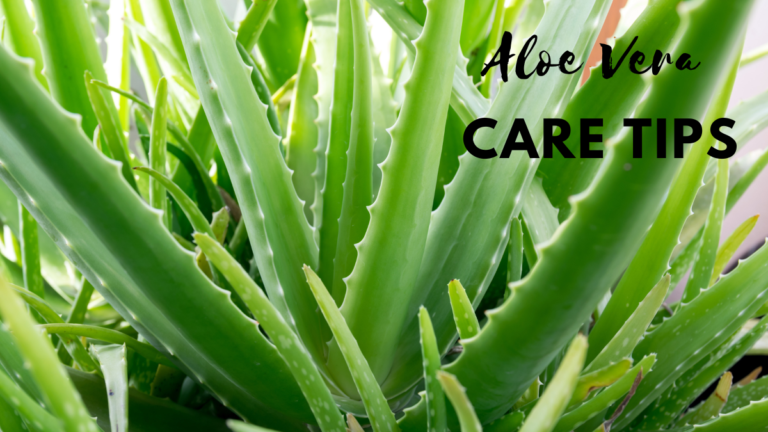
    How to Care for Aloe Vera Plant: Expert Tips

    Aloe vera, also known as the “plant of immortality,” has been revered for centuries for its healing properties and striking beauty. Whether you’re a beginner or an experienced plant parent, learning how to care for aloe vera plant is essential to keeping it healthy and vibrant.

    This hardy succulent is not just visually appealing, but it also offers a plethora of benefits. From soothing skin burns to purifying the air, aloe vera is a versatile plant that thrives with minimal care. So, if you’re ready to embrace this amazing plant in your home or garden, keep reading for expert tips on how to keep your aloe vera plant healthy and thriving.

    Why Aloe Vera is a Perfect Plant for You

    Before diving into the specifics of how to care for aloe vera plant, let’s first take a moment to understand why aloe vera is so popular. Aloe vera is a succulent, meaning it stores water in its fleshy leaves, allowing it to survive with less frequent watering. This makes it an ideal plant for busy people, beginners, or anyone who may not have a green thumb.

    Native to the Arabian Peninsula, aloe vera is now grown all over the world. It’s a resilient plant that can handle diverse conditions but thrives in specific environments. Aloe vera’s long, spiky leaves and striking green color add a touch of elegance to any space. The gel inside its leaves has been used for centuries in skincare and medicinal treatments, making it an invaluable addition to any home.

    How to Care for Aloe Vera Plant

    1. Light Requirements for Aloe Vera

    Aloe vera plants love light, but they’re not fans of direct sunlight. Too much sunlight can cause the leaves to burn, leaving behind brown or orange spots. To ensure your aloe vera thrives, place it in a bright spot with indirect sunlight. Think of a south or west-facing window where the plant gets plenty of light, but isn’t exposed to the harsh midday sun.

    If growing aloe vera outdoors, aim for a location that gets 2-3 hours of sunlight per day. Avoid placing it in an area where it is exposed to hot afternoon rays. In fact, placing aloe vera under the shade of taller plants or next to a wall that reflects light can provide the perfect amount of indirect sunlight.

    2. Watering Aloe Vera: Less is More

    One of the most common mistakes people make when caring for aloe vera is overwatering. Aloe vera plants are drought-tolerant and can easily survive in dry soil. The key is to wait until the soil is completely dry before watering. To check, insert your finger into the soil about 2 inches deep. If it feels dry, it’s time to water. If it still feels moist, wait a few more days before checking again.

    During the warmer months, aloe vera may need watering every 7-14 days, depending on the temperature and humidity levels. In the winter, watering can be reduced to once every 3-4 weeks as the plant enters a dormant period.

    3. Choosing the Right Soil for Aloe Vera

    Aloe vera needs well-draining soil to thrive. Cactus and succulent mixes are perfect for aloe vera as they allow excess water to flow through, preventing root rot. When planting aloe vera in a pot, make sure there are drainage holes at the bottom of the pot. This ensures that water doesn’t accumulate at the bottom and keeps the roots from getting waterlogged.

    If you’re planting aloe vera outdoors, ensure the soil is sandy or gravelly and drains quickly. Aloe vera doesn’t like to sit in water, so it’s essential to plant it in a location with good drainage.

    4. Temperature Needs for Aloe Vera

    Aloe vera is relatively low-maintenance when it comes to temperature. It thrives in warm environments, typically between 59°F to 77°F (15°C to 25°C). If growing it indoors, your typical home temperature should be ideal. However, make sure to avoid placing your aloe vera near cold drafts, air conditioners, or heaters. These fluctuations can stress the plant.

    In areas with freezing temperatures, it’s essential to bring aloe vera indoors during the winter months. Aloe vera is hardy to around 28°F (-2°C), but anything colder than that can damage the plant.

    5. Potting and Repotting Aloe Vera

    When choosing a pot for your aloe vera, opt for a sturdy one with drainage holes. Concrete or ceramic pots are ideal as they’re heavy enough to prevent the plant from toppling over as it grows. Aloe vera plants can become top-heavy, especially when they’re large and mature, so it’s important to use a pot that supports its weight.

    Aloe vera doesn’t need frequent repotting, and they do well in pots that are a little snug. Typically, you can repot your aloe vera every 1-2 years or when it outgrows its pot.

    How to Propagate Aloe Vera

    Aloe vera is a plant that loves to multiply. It naturally produces offsets or “pups” that grow at the base of the mother plant. These pups can be carefully separated and repotted to grow into new aloe vera plants.

    To propagate aloe vera:

    • Gently remove the pup from the soil.
    • Let the pup dry out for a day or two to form a callus over the cut surface.
    • Plant the pup in a small pot with well-draining soil.
    • Water sparingly until the pup begins to show signs of new growth.

    Common Aloe Vera Issues and How to Solve Them

    Aloe vera is a tough plant, but like all plants, it can face a few issues from time to time. Let’s go over some common problems and their solutions:

    IssueSolution
    Yellow or Brown LeavesThis can indicate too much sunlight or overwatering. Move to a more shaded area and reduce watering.
    Soft, Mushy LeavesOften caused by overwatering. Make sure the soil dries out between waterings and check for root rot.
    Pests (e.g., Mealybugs, Aphids)Use a cotton swab dipped in rubbing alcohol to remove pests, or gently spray the plant with a hose.
    Root RotEnsure proper drainage, and never let the plant sit in water. If roots are rotting, prune them before repotting.

    Can You Use Aloe Vera Gel?

    Aloe vera gel is famous for its soothing properties, especially for skin burns and irritation. You can safely cut mature leaves from your aloe vera plant to extract the gel. Simply slice the leaf open, and scoop out the gel inside. This gel can be applied directly to minor burns, cuts, or insect bites.

    Important Note: While the gel is safe for external use, it’s not recommended to consume the gel. It can be mildly toxic to humans and pets if ingested.

    Benefits of Aloe Vera Plant

    Aloe vera is not just a decorative houseplant – it offers several health and wellness benefits, such as:

    • Natural Skin Care: Aloe vera gel is known for its ability to hydrate and heal the skin. It can help reduce the appearance of scars and promote wound healing.
    • Air Purification: Like many houseplants, aloe vera helps purify the air by removing toxins and producing oxygen.
    • Medicinal Uses: Aloe vera has been used in traditional medicine for centuries to treat digestive issues, skin problems, and inflammation.

    Pros and Cons of Aloe Vera Plant Care

    ProsCons
    Low-maintenance, perfect for busy peopleSensitive to overwatering
    Can be used for skin treatments and first aidNeeds bright light, but not direct sun
    Ideal for both indoor and outdoor gardeningCan be toxic to pets if ingested
    Helps purify the airLeaves can become heavy as the plant matures
    Drought-tolerant, doesn’t require frequent wateringNeeds well-draining soil to avoid root rot

    Conclusion: Growing Aloe Vera Made Easy

    Caring for an aloe vera plant doesn’t have to be complicated. With just a little attention to light, water, and soil, you can enjoy a thriving aloe vera plant that brings both beauty and health benefits to your space. By following these simple tips, you’ll ensure that your aloe vera thrives, whether it’s growing in your home, garden, or as a decorative piece in your living room.

    So, if you’re looking for a plant that’s stylish, easy to maintain, and beneficial to your health, aloe vera is the perfect choice. Start small, follow these tips, and watch your aloe vera flourish into a beautiful and functional plant.

  • Ultimate Spider Plant Care Guide

    Ultimate Spider Plant Care Guide

    Spider plants are among the most beloved houseplants, adored for their low maintenance, attractive foliage, and easy-going nature. Whether you’re a beginner or a seasoned plant enthusiast, caring for a spider plant is both rewarding and simple. Known for their ability to thrive on minimal attention, these plants are perfect for busy individuals or anyone who might struggle to remember plant care routines. In this detailed guide, we’ll cover everything you need to know about spider plant care, ensuring your plant thrives in your home or office.

    Why Spider Plants are So Popular

    Spider plants, or Chlorophytum comosum, are well-known for their charming appearance and health benefits. They are versatile, adaptable, and resilient, making them an excellent choice for nearly any space. Unlike many plants that require consistent pampering, spider plants thrive on neglect. They are known for being beginner-friendly, easy to propagate, and safe for pets, making them a must-have for any plant lover.

    But what exactly makes them stand out among other indoor plants?

    • Low-maintenance: These plants don’t need constant care. They require occasional watering, light, and a bit of fertilizing during their growing season. That’s about it.
    • Air-purifying qualities: Spider plants have been shown to remove harmful toxins from indoor air, improving your environment.
    • Pet-friendly: Unlike many popular houseplants, spider plants are non-toxic to cats, dogs, and other pets.

    In this article, we’ll dive into spider plant care, covering everything from watering and light needs to propagation tips and dealing with pests. By the end of this guide, you’ll be a spider plant expert!

    Spider Plant Care: Key Factors to Keep in Mind

    Let’s explore the essential components of caring for your spider plant, ensuring it remains healthy and vibrant.

    1. Watering Your Spider Plant

    Spider plants are relatively tolerant when it comes to watering. However, they do prefer their soil to remain slightly moist. Here’s a quick breakdown of how to water your spider plant properly:

    • Frequency: During the warmer months (spring and summer), water your spider plant about once a week. In the cooler months (fall and winter), you can reduce the watering frequency.
    • How to Check: Stick your finger about two inches into the soil. If it feels dry, it’s time to water. Avoid overwatering, as it can lead to root rot.
    • Water Quality: If possible, use distilled or rainwater for your plant. Spider plants are sensitive to fluoride and chlorine in tap water, which can cause browning on the tips of the leaves.

    Pro Tip: Keep a consistent watering schedule but avoid letting the plant sit in water, as this can cause root rot.

    2. Lighting Conditions for Spider Plants

    While spider plants are forgiving when it comes to lighting, they do thrive best in bright, indirect light. Here’s what you need to know:

    • Ideal Light: Place your spider plant near a window where it receives indirect light. Avoid direct sunlight, as this can scorch the leaves.
    • Low Light: Although spider plants tolerate low light conditions, they will grow slower and may not produce as many plantlets.
    • Signs of Too Much Sun: If the tips of the leaves start to turn brown, your plant might be getting too much direct sunlight.

    3. Temperature and Humidity Requirements

    Spider plants are tropical plants, so they prefer warmer temperatures and a moderate level of humidity. Here’s the lowdown:

    • Ideal Temperature: Spider plants thrive in temperatures between 60°F and 75°F (16°C to 24°C). Protect them from drafts and avoid placing them in areas with temperatures below 50°F (10°C).
    • Humidity Needs: These plants enjoy moderate humidity levels, ideally between 40% and 60%. If your home is dry, consider placing your spider plant on a humidifier tray or grouping it with other plants to increase the humidity.

    4. Fertilization: Do Spider Plants Need Extra Nutrients?

    Spider plants do benefit from occasional feeding, but they don’t require a lot of fertilizer. Here’s how to go about it:

    • Frequency: Fertilize your spider plant once a month during its active growing period (spring and summer).
    • Type of Fertilizer: Use a balanced liquid fertilizer or an all-purpose plant food. Be careful not to over-fertilize, as this can result in brown tips and weak growth.
    • Winter Dormancy: During the colder months, when your plant enters a semi-dormant state, avoid fertilizing.

    5. Pruning and Maintenance

    Although spider plants are low-maintenance, a little bit of attention can go a long way in keeping your plant healthy and looking its best. Here’s how to prune and maintain it:

    • Remove Dead Leaves: As your spider plant grows, it’s normal for some leaves to turn brown or yellow. Simply snip them off at the base.
    • Trimming Plantlets: If you notice a lot of “spidettes” (the small offshoots of the plant), you can trim them to redirect the plant’s energy to the main plant.

    Propagation: How to Grow More Spider Plants

    One of the best things about spider plants is how easy they are to propagate. If you’re looking to expand your collection or share the love, here’s how you can do it:

    1. When to Propagate: Wait until the spidettes have long roots (about 1-2 inches) before cutting them off.
    2. Potting the Plantlets: Place the rooted spidettes in well-draining soil and keep the soil moist (but not soggy) until the plant becomes established.
    3. Alternative Method (without roots): If the plantlets haven’t formed roots, place them in a small pot with moist soil. Once they develop roots, cut them off and repot them.

    Common Issues with Spider Plants and How to Fix Them

    Despite their hardiness, spider plants can face a few common problems. Below, we address some of these issues and offer solutions:

    ProblemSolution
    Browning Leaf TipsOften caused by over-fertilizing, fluoride, or too much sun. Move plant to indirect light and use filtered water.
    Leggy GrowthCut back plantlets to redirect energy to the main plant or repot if root-bound.
    Yellowing LeavesMay indicate overwatering. Ensure good drainage and water only when soil is dry.
    Pests (Aphids, Mites)Rinse the plant with water, or use neem oil or insecticidal soap for severe infestations.

    FAQs about Spider Plant Care

    Q1: How often should I water my spider plant?
    A1: Water your spider plant once a week during warmer months. In cooler months, reduce watering but keep the soil moist.

    Q2: Can spider plants grow in low light?
    A2: Yes, spider plants tolerate low light but grow better with indirect light. Avoid direct sunlight, which can burn the leaves.

    Q3: What’s the best way to propagate a spider plant?
    A3: Cut the plantlets once they have developed roots and pot them in moist soil. Alternatively, place the plantlet in a new pot to allow roots to grow before snipping.

    Q4: Are spider plants safe for pets?
    A4: Yes, spider plants are non-toxic to pets, making them a great choice for households with animals.

    Conclusion: A Plant That’s Here to Stay

    Spider plants continue to be a favorite in homes and offices for good reason. Their easy-going nature, coupled with their air-purifying qualities, makes them the perfect plant for any space. With simple care tips like occasional watering, avoiding direct sunlight, and occasional pruning, your spider plant can thrive for years.

    Whether you’re a new plant owner or a seasoned gardener, the spider plant offers a wonderful opportunity to add greenery and life to your environment. The best part? You don’t have to be an expert to keep it thriving. Just follow the tips in this guide, and your spider plant will reward you with lush, vibrant foliage and even new plantlets to propagate. Happy planting!

  • Money Tree Plant How to Care: Complete Guide

    Money Tree Plant How to Care: Complete Guide

    The Money Tree plant, also known as Pachira aquatica, is an exquisite indoor plant that has become a popular choice for adding a tropical touch to homes and offices. Its unique braided trunk and glossy green leaves give it a palm-like appearance, making it a visually striking addition to any space. Native to Central and South America, the Money Tree is also widely recognized in East Asian cultures, particularly in Taiwan, where it is believed to bring good luck and positive energy according to Feng Shui principles.

    In this guide, we’ll walk you through everything you need to know about money tree plant how to care, from watering and sunlight needs to pruning and propagation. Whether you’re a seasoned plant enthusiast or a beginner, this easy-to-follow guide will help your Money Tree thrive.

    1. Introduction to the Money Tree

    The Money Tree is more than just a houseplant—it’s a symbol of good fortune, positive energy, and prosperity. Whether you’re interested in its Feng Shui benefits or its ability to add greenery to your home, the Money Tree is sure to bring charm and vibrance to any room. With its fast growth rate (up to 24 inches a year) and easy-to-care-for nature, it’s an excellent choice for both beginner gardeners and experienced plant lovers alike.

    As the plant matures, it can reach impressive heights of 6 to 8 feet. It’s a forgiving plant that thrives with minimal care, as long as you meet its basic requirements. Now, let’s dive into the specifics of money tree plant how to care and ensure it remains healthy and happy.

    2. Why Should You Care for a Money Tree?

    Taking care of your Money Tree plant isn’t just about having a pretty plant in your home. It’s about providing the right conditions for it to flourish and bring positive energy into your life. Many people believe that having a Money Tree in their home can help attract wealth and success, as it’s often seen as a symbol of good fortune. Additionally, this plant is known for its stress-relieving qualities, making it a great addition to any room where relaxation and calmness are essential.

    Health Benefits:

    • Stress Reduction: Spending time with plants, including Money Trees, has been linked to lowered stress levels.
    • Air Purification: Like many indoor plants, the Money Tree helps purify the air by absorbing carbon dioxide and releasing oxygen.

    3. Essential Money Tree Care Tips

    Proper care is essential to keeping your Money Tree healthy. Here are the main care requirements for this resilient plant:

    Light Requirements

    Money Trees thrive in bright, indirect sunlight. This helps the plant grow strong and healthy. However, too much direct sunlight can scorch the leaves and cause them to turn yellow or brown. Place your Money Tree near a window with filtered light or use grow lights if natural sunlight is insufficient.

    If you have limited light, the Money Tree can tolerate medium light, but its growth may slow down.

    Soil Preferences

    A Money Tree needs a well-draining potting mix. The ideal mix should be peat-moss-based or a cactus soil mix to provide excellent drainage. This helps avoid the risk of root rot, a common problem when the roots are left sitting in water. You can also add perlite to the mix to further improve drainage.

    Watering Guidelines

    Watering is one of the most crucial aspects of caring for your Money Tree. These plants prefer to be kept evenly moist, but not soggy. You should water when the top inch of the soil feels dry to the touch. During the growing season (spring and summer), you’ll need to water more frequently. In the fall and winter, reduce watering to avoid overwatering.

    Always ensure that the pot has drainage holes to prevent water from collecting at the bottom.

    Temperature and Humidity

    Money Trees thrive in temperatures between 65°F and 75°F (18°C to 24°C). They should be kept away from drafts, hot air vents, and cold windows. In terms of humidity, Money Trees appreciate moisture but can tolerate average household humidity levels. If the air in your home is very dry, you can increase humidity by placing your plant on a pebble tray with water or using a room humidifier.

    Fertilization Needs

    To encourage strong growth, fertilize your Money Tree once a month during the growing season in spring and summer. A balanced, general-purpose liquid fertilizer diluted to half strength works well. Avoid fertilizing in the fall and winter, as the plant’s growth slows during these months.

    4. How to Braid a Money Tree

    The braided trunk of the Money Tree is one of its most distinguishing features. Here’s how you can create a beautiful braided trunk:

    1. Select Healthy Stems: Choose young, flexible stems that are at least 12 inches long.
    2. Loosely Braid the Stems: Carefully braid the stems together without pulling too tightly, as this could harm the plant.
    3. Tie the End: Use a twist tie or string to secure the braid.
    4. Repot the Tree: After braiding, repot the Money Tree and stabilize it with a stake if needed.
    5. Let It Recover: Place the braided plant in a partially shaded area for a month to help it recover from the stress of braiding.

    5. How to Propagate Your Money Tree

    Propagating a Money Tree is simple and can be done through stem cuttings. Here’s how:

    1. Choose a Healthy Stem: Take a cutting that’s at least 4 inches long, making sure it has a couple of nodes.
    2. Place in Water: Put the cutting in a jar of water, ensuring that the nodes are submerged.
    3. Wait for Roots to Form: After a few weeks, the cutting will begin to root.
    4. Pot the Cutting: Once the cutting has established roots, pot it in a well-draining soil mix.

    6. Potting and Repotting Your Money Tree

    Money Trees need space to grow, so they should be repotted every couple of years. When repotting, use a pot that’s one size larger than the current one, and ensure it has adequate drainage. If you want to keep your plant small, you can avoid repotting it too frequently.

    7. Common Pests and DiseasesWhile Money Trees are generally resilient, they can be prone to a few pests:

    • Mealybugs: These pests can be controlled with insecticidal soap or neem oil.
    • Scale: These pests attach themselves to the plant’s stem and leaves. Treat them with horticultural oil.

    8. Troubleshooting Common Problems

    Problem: Yellow or Brown Leaves
    Cause: This can be a sign of overwatering or underwatering. Check the soil moisture and adjust watering as needed.

    Problem: Leggy Plant
    Cause: Insufficient light can lead to a leggy appearance. Move your plant to a brighter spot.

    Problem: Soft, Mushy Stems
    Cause: Overwatering can cause the stems to become mushy. Ensure your plant has proper drainage and reduce watering frequency.

    9. Money Tree FAQs

    How long do Money Trees live?

    With proper care, a Money Tree can live for a decade or more.

    Does the Money Tree flower?

    Money Trees only flower when grown outdoors in their native environment. Indoors, they do not bloom, as they require pollination by bats.

    Can I put my Money Tree outside?

    Yes, you can move your Money Tree outdoors during the summer, but ensure nighttime temperatures don’t fall below 50°F. Gradually acclimate the plant to outdoor conditions.

    10. Conclusion

    Caring for a Money Tree is relatively simple, and with the right attention to its light, soil, and watering needs, it can grow into a thriving, long-lasting plant. Not only does it enhance the beauty of your indoor space, but it’s also believed to bring positive energy and good fortune. By following the tips outlined in this guide, you can enjoy the benefits of this gorgeous plant for years to come.

    Pros and Cons of Money Tree Care

    ProsCons
    Easy to care for, perfect for beginnersSusceptible to root rot if overwatered
    Attractive, with a unique braided trunkCan grow tall and may need repotting
    Believed to bring good luck and positive energyCan attract pests like mealybugs and scale
    Tolerates medium light and dry airNeeds proper humidity in dry environments
    Helps reduce stress and purifies the airCan become leggy if not given enough light

    By following these simple care tips and addressing any common issues that arise, you’ll be well on your way

    to ensuring your Money Tree thrives in your home. Happy gardening!

  • Ultimate Guide and Tips for Healthy Growth Snake Plant Sansevieria

    Ultimate Guide and Tips for Healthy Growth Snake Plant Sansevieria

    Introduction:

    The Snake Plant Sansevieria, also known as Mother-in-Law’s Tongue, is a hardy and elegant houseplant that can thrive in a variety of conditions. Native to Africa, it made its way to Europe in the 18th century and has been captivating plant lovers ever since. Known for its sword-like, sculptural leaves and air-purifying qualities, it’s no surprise that the Sansevieria is one of the most popular indoor plants worldwide. Whether you’re a beginner or an experienced plant parent, this low-maintenance beauty deserves a spot in your home.

    In this comprehensive guide, I’ll walk you through everything you need to know about the Snake Plant Sansevieria, from potting and watering to light requirements and troubleshooting common issues. Let’s dive into the care tips that will help your snake plant thrive!

    What Makes the Snake Plant Sansevieria Special?

    Before we jump into care instructions, it’s essential to understand why Sansevieria is such a prized plant. Known for its air-purifying abilities, the Snake Plant can help remove harmful toxins like formaldehyde, benzene, and xylene from the air. It’s one of the few plants that can absorb CO2 at night and release oxygen, making it an excellent addition to any home or office.

    But it’s not just about air quality! The striking appearance of its long, upright leaves makes the Snake Plant a stylish addition to any room. Plus, it’s incredibly easy to care for, making it the perfect choice for beginners or anyone who wants to add some greenery without the stress of high-maintenance plants.

    Potting Your Snake Plant: The Foundation of Success

    When you bring a Sansevieria into your home, the first step is proper potting. Here’s how to set your plant up for success.

    Choosing the Right Pot

    When selecting a pot for your Snake Plant, it’s essential to choose one with a drainage hole. Sansevierias are highly sensitive to overwatering, and stagnant water at the bottom of the pot can quickly lead to root rot. Terracotta pots are an excellent choice because they are breathable and help the soil dry out faster. However, any pot with proper drainage will work.

    Soil Choice: A Must for Healthy Roots

    The right soil mix is critical. Snake plants prefer a well-draining soil that allows water to flow through easily, preventing the roots from sitting in moisture. You can purchase a cactus or succulent mix, or you can create your own by adding sand and Perlite to your regular potting soil. Perlite is an excellent addition as it improves aeration and drainage. Avoid using heavy, compact soil, as it will trap too much moisture and lead to root rot.

    Optimal Lighting for Snake Plant Sansevieria

    One of the most remarkable features of the Snake Plant is its versatility in light conditions. Whether placed in bright, indirect light or a dark corner, the Sansevieria can adapt to its surroundings. However, if you want your plant to thrive, it’s best to place it in bright, indirect light. While it can tolerate low light, it will grow more slowly and may not reach its full potential.

    A great rule of thumb:

    Bright light = Faster growth and larger leaves.

    Low light = Slower growth, but the plant will still survive and remain happy.

    Watering Tips: Don’t Overdo It!

    Overwatering is one of the quickest ways to kill a Snake Plant. These plants are native to arid climates, so they’re built to withstand drought rather than excessive moisture.

    How Often Should You Water?

    Water your Snake Plant only when the soil is completely dry. I usually check the soil by sticking my finger into it—if the top few inches are dry, it’s time to water. During the growing season (spring to fall), you may need to water every 2-3 weeks. In the fall and winter months, your plant will need less water, and you can extend the interval to about 4 weeks.

    Tip: Never let your plant sit in water. Always ensure that any excess water can drain out of the pot.

    Fertilizing Your Snake Plant

    Though not particularly needy, the Snake Plant Sansevieria can benefit from occasional fertilization, especially during the growing season. Here’s how to do it right:

    1. Choose the Right Fertilizer: Use a balanced, liquid fertilizer diluted to half-strength. Fertilize at the beginning of spring and again in mid-summer to give your plant a nutrient boost.
    2. Apply Sparingly: Fertilizing too often or using too much fertilizer can cause fertilizer burn, which results in brown leaf tips and yellowing.
    3. Don’t Overdo It: Snake plants are low-maintenance, so they don’t need frequent fertilization. If you’re unsure, it’s safer to skip a feeding rather than overfeed.

    Propagating Snake Plants: A Simple Process

    The propagation process of Snake Plants is both fun and rewarding. You can propagate your Sansevieria in either water or soil, and the best part is that the new plant is virtually the same as the original one!

    Water Propagation

    1. Cut a healthy leaf from the base using clean scissors.
    2. Place the cutting in a glass of water with about 4 inches submerged.
    3. Change the water regularly (every 3-4 days).
    4. Once roots form (typically 3-4 weeks), plant the cutting in well-draining soil.

    Soil Propagation

    For soil propagation, simply plant the leaf cutting directly in damp soil. Keep the soil lightly moist but not soggy until the roots begin to develop.

    Common Issues with Snake Plants and How to Troubleshoot

    Although the Snake Plant Sansevieria is easy to care for, occasional issues can arise. Here’s how to handle some common problems.

    ProblemCauseSolution
    Yellowing LeavesOverwatering or root rotReduce watering; repot if necessary.
    Brown Leaf TipsOver-fertilization or dry airTrim the brown tips; avoid overfeeding.
    Leggy GrowthInsufficient lightMove to a brighter spot with indirect light.
    Pests (Spider Mites)Presence of tiny insectsTreat with neem oil or insecticidal soap.
    Leaf SpotsFungal or bacterial infectionRemove affected leaves; improve airflow.

    Conclusion: Why You Should Add a Snake Plant to Your Home

    The Snake Plant Sansevieria is more than just a beautiful houseplant—it’s a hardy, low-maintenance option that offers numerous benefits, including improved air quality, aesthetic appeal, and a touch of greenery in any room. By following these care guidelines, you’ll be able to keep your Snake Plant healthy and thriving for years to come.

    Whether you’re a beginner or a seasoned plant enthusiast, the Snake Plant is a perfect companion. Remember, the key is simplicity—don’t overwater, provide adequate light, and choose the right soil. With just a little attention, you’ll enjoy the beauty of this resilient plant and its benefits for your home’s air quality.

    FAQs

    Q: How often should I water my Snake Plant?
    A: Water your Snake Plant only when the soil is dry. During the growing season (spring to fall), water every 2-3 weeks. In the winter, reduce watering to once a month.

    Q: Can my Snake Plant survive in low light?
    A: Yes! Snake Plants are highly adaptable and can thrive in low light, though they will grow faster and fuller with brighter, indirect light.

    Q: How do I know if my Snake Plant needs to be repotted?
    A: If you see roots emerging from the drainage holes, it’s time to repot. Typically, Snake Plants need repotting every 2-3 years.

    Q: Can I propagate my Snake Plant in water?
    A: Yes, you can propagate your Snake Plant in water. Simply cut a healthy leaf and place it in water, changing the water every few days until roots form.

    Key Takeaways:

    • Easy Care: The Snake Plant requires minimal care, making it ideal for beginners.
    • Air Purifying: It can improve your home’s air quality by removing toxins and releasing oxygen.
    • Adaptable: Thrives in a variety of lighting conditions and is tolerant of drought.
    • Troubleshooting: Address common issues like overwatering or pests to keep your plant healthy.

    By following these straightforward tips, you’ll be well on your way to becoming a Snake Plant pro!