Author: jan

  • Freestanding Greenhouse Disadvantages

    Freestanding Greenhouse Disadvantages

    Freestanding greenhouses are popular for their flexibility and scalability, but they come with unique challenges. Whether you’re a homeowner, urban gardener, or commercial grower, understanding these drawbacks can save you time, money, and frustration. In this guide, we’ll break down the Top Freestanding Greenhouse Disadvantages, provide solutions tailored to specific audiences, and share real-life experiences and research insights.

    What is a Freestanding Greenhouse?

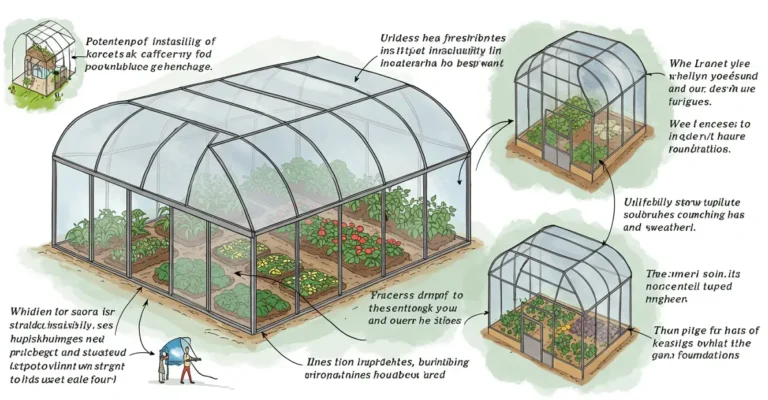
    A freestanding greenhouse is a standalone structure not attached to a building. It’s typically built in open spaces like backyards, farms, or urban balconies. While versatile, its independence creates unique challenges compared to attached or lean-to greenhouses.When I first decided to install a freestanding greenhouse, the idea of having an independent structure with the freedom to choose the location anywhere on my property was exciting. With no restrictions from nearby buildings, I imagined it as the perfect way to grow a variety of plants under the best sunlight and airflow conditions. But after a few seasons, I realized that this standalone design, though popular among many gardeners, came with real challenges.

    Top 10 Freestanding Greenhouse Disadvantages

    I personally experienced and found through additional research studies, including findings from greenhouse design experts and university extension programs.

    [su_note note_color=”#ac66ff” radius=”20″]Main Disadvantage: Freestanding greenhouses are costly to build and heat due to their complete structure and lack of shared insulation.[/su_note]

    1. Higher Upfront Investment

    Unlike lean-to greenhouses that share a wall with an existing house, garage, or shed, a freestanding greenhouse needs a full foundation, walls, and a roof. This complete setup means more materials, more labor, and a much higher initial cost. It’s a serious investment for anyone on a tight budget.

    2. Increased Heating and Utility Costs

    Since the structure stands alone, there’s no shared insulation from buildings. This leads to more energy required to maintain a stable temperature, especially in cooler climates. A study by the University of Vermont Extension revealed that freestanding greenhouses could use up to 30% more heating energy than attached greenhouses in colder months.

    3. Greater Exposure to Harsh Weather

    Because it’s fully exposed to weather conditions, a freestanding greenhouse experiences more wear and tear. Over the years, I had to invest in repairs and replacements for damaged parts after storms and strong winds. Without proper care and high-quality materials, the lifespan of the greenhouse can shorten quickly.

    4. More Demanding Maintenance

    Long-term maintenance considerations are often overlooked. I found myself spending extra time and money to clean, repair, and update parts of the structure. Unlike attached greenhouses, these require regular upkeep on all sides and roof panels to ensure performance.

    5. Space Limitations in Smaller Areas

    While larger freestanding models offer ample room, they aren’t practical for urban or compact backyards. If you’re limited on land, you’ll need a smaller model, which often restricts your planting space and movement inside.

    6. Challenging Interior Layout

    With less room, it becomes hard to arrange shelves and benches efficiently. I struggled with the narrow layout, especially in a small footprint. Thankfully, I later discovered vertical techniques and stackable planters to better optimize the interior, but it required thoughtful planning.

    7. Less Energy Efficiency

    Unlike a lean-to design that benefits from the warmth of the attached building, a freestanding greenhouse loses heat quickly. The system must work harder to keep temperatures consistent. This setup minimizes utility efficiency, raising energy use and heating bills over time.

    8. Difficult to Relocate Once Installed

    While it’s technically possible to move a freestanding greenhouse, doing so is not easy. Once it has a solid foundation and permanent structure, relocating it takes significant effort and may require disassembly, which can damage parts or weaken its durability.

    9. Takes Up Valuable Outdoor Space

    In tight quarters or urban areas, a standalone greenhouse can sacrifice valuable outdoor space that could be used for other activities. Unlike attached greenhouses, these do not make the most of restricted areas and can feel intrusive in small gardens.

    10. Not Ideal for Quick or Budget Builds

    If you’re a beginner or simply trying to build a cost-effective greenhouse quickly, the freestanding design might not suit your plan. The requirements—from full construction to insulation systems—are higher, complex, and often increase expenses, making it less attractive for beginners looking for a simpler entry into gardening.

    Case Study 1: Retired Ron’s Heating Cost Crisis

    Ron, a 68-year-old gardener in Vermont, spent $1,500 annually heating his greenhouse. By adding insulation and a solar heater, he reduced costs by 40%.

    Case Study 2: Urban Gardener Greg’s Balcony Solution

    Greg used a $200 pop-up greenhouse on his NYC balcony to grow herbs year-round, avoiding HOA conflicts.

    Research Insight: Pest Control in Freestanding Greenhouses

    A 2021 University of California study found that companion planting (marigolds, basil) reduced pest infestations by 25%.

    FAQs About Freestanding Greenhouses

    1. Are freestanding greenhouses worth it?

    Yes, but only if you address climate challenges and budget for hidden costs.

    2. What’s the cheapest freestanding greenhouse?

    Hoop houses ($200–$500) or DIY PVC setups.

    3. How do I stabilize a greenhouse in windy areas?

    Anchor it with ground stakes and use wind-resistant materials like polycarbonate.

    4. Can I move a freestanding greenhouse?

    Yes! Renters like Rachel use lightweight, modular kits.

    Conclusion:

    Freestanding greenhouses offer unparalleled flexibility for growers, but their drawbacks—from high costs and weather vulnerability to zoning restrictions and energy inefficiency—require careful consideration. By understanding these challenges through the lens of your unique needs, you can turn potential frustrations into opportunities for innovation.

  • 12 Game-Changing a Lush Green Grass Lawn Care Tips You Need

    12 Game-Changing a Lush Green Grass Lawn Care Tips You Need

    Introduction

    A lush, green grass lawn care is more than just a pretty view—it’s a sign of good care and smart planning. Whether you’re part of a small family-run, independent business or simply love spending time outdoors, proper green grass lawn care helps you enjoy your space all year round. With the right lawn treatments, like weed and feed, and consistent efforts through every growing season, you can keep your yard weed free, healthy, and vibrant.

    [su_note note_color=”#ac66ff” radius=”20″]Caution
    Always follow the manufacturer’s instructions when applying lawn care products to avoid damage to your lawn. Use protective gear, and avoid applying products during extreme weather conditions, as it may reduce effectiveness or cause harm to your grass.[/su_note]

    12 Ways to Keep Your Lawn Green

    Maintaining a healthy, lush green lawn requires consistent effort, but with the right strategies, you can ensure your grass thrives throughout the year. Here are some practical tips for keeping your lawn looking its best, focusing on methods that will help your grass grow strong and healthy.

    1. Prevent Weeds Before They Appear

    One of the most important steps in lawn care is preventing weeds from germinating in the first place. Using a pre-emergent herbicide can be incredibly effective in stopping stubborn weeds like crabgrass from sprouting. Applying it early in the spring gives your lawn a head start, ensuring that the seeds don’t take root and disrupt the healthy grass growth.

    2. Take Care of Broadleaf Weeds

    Sometimes, weeds are already present and can be tough to remove. Broadleaf weeds such as dandelions, plantain, and clover can stand out in your lawn. You can address these with granular weed control products. If there are only a few offenders, you can remove them by hand using simple garden tools. Be sure to follow the product’s directions for best results and avoid over-watering the lawn before applying the treatment.

    3. Mow Regularly, but Don’t Cut Too Short

    Mowing your lawn regularly is essential, but cutting it too short can cause more harm than good. Keeping your grass at the proper height allows it to develop deeper roots, making it more resistant to damage from pests, drought, and disease. A general rule of thumb is to never cut more than one-third of the grass blade at once. This will help maintain the health of the grass and keep it lush.

    4. Keep Your Mower Blade Sharp

    Using a dull mower blade can damage your grass, causing ragged edges that make your lawn look brown and unhealthy. A sharp blade cuts the grass cleanly, which promotes faster recovery and better overall lawn health. Check your blade’s condition regularly, and replace or sharpen it if it shows signs of wear.

    5. Water Your Lawn in the Morning

    The best time to water your lawn is in the early morning, when the sun will help dry the grass and prevent moisture from sitting too long on the blades. Night watering can promote disease by keeping the grass damp for too long. It’s important to water deeply but infrequently to encourage strong root growth. Aim for about an inch of water each time, which you can check with a simple test using a can.

    [su_note note_color=”#ac66ff” radius=”20″]Good to Know For best results, water your lawn deeply but less frequently, allowing the soil to soak in moisture several inches down. Also, remember to sharpen your mower blade regularly—this helps make clean cuts and keeps the grass healthy. Lastly, applying granular weed control products during a dewy morning helps them stick to the leaves for better results.[/su_note]

    6. Aerate to Combat Soil Compaction

    Soil compaction can prevent water, nutrients, and air from reaching the grass roots. Aerating your lawn helps to alleviate this issue by creating small holes in the soil. This process allows your lawn to breathe and lets moisture and nutrients penetrate deeper into the roots. You can aerate your lawn using a push aerator, riding mower attachment, or hire a professional. It’s best to aerate in the autumn for cool-season grasses and late spring for warm-season varieties.

    7. Feed Your Lawn with Proper Fertilizer

    Your lawn needs the right nutrients to grow thick and healthy. Nitrogen is the most important nutrient in grass fertilizers, promoting green, lush growth. Look for a fertilizer with a mix of fast- and slow-release components. Apply fertilizer during the right season—spring and fall for northern lawns, and spring and summer for southern lawns. Avoid fertilizing dormant grass, as it won’t be able to absorb the nutrients.

    8. Spot-Train Your Dog to Protect Your Lawn

    If you have a dog, their urine can cause unsightly yellow or brown spots in your lawn. To minimize this, train your dog to use a specific spot in the yard. You can create a gravel or mulch area for them to go, helping to protect the rest of your lawn from damage.

    9. Dethatch Your Lawn for Better Growth

    Thatch is a layer of organic material that builds up on top of the soil and can suffocate your grass if it becomes too thick. If you notice brown patches in your lawn, it could be due to excessive thatch. To address this, use a dethatcher to remove the buildup. For smaller areas, a rake will suffice, but for larger spaces, a dethatching attachment for your riding mower will do the job more efficiently.

    10. Reseed Sparse Areas

    If your lawn is looking thin or sparse in some areas, reseeding can help bring it back to life. The best time to reseed cool-season grasses is in the fall, while warm-season grasses should be reseeded in late spring. Make sure to aerate and dethatch the area before spreading new grass seed, as this will improve seed-to-soil contact and promote healthy growth.

    11. Edge Your Lawn for a Tidy Appearance

    Edging your lawn along curbs, driveways, and walkways helps keep your lawn looking neat and well-maintained. Use an edging tool or a trimmer to create clean, sharp lines that separate your lawn from other landscaping elements like flower beds or pathways. This will give your lawn a polished, tidy appearance.

    12. Mulch for Nutrients and Weed Control

    Instead of raking up dead leaves in the fall, consider using a mulching attachment on your mower to shred the leaves and leave them on the lawn. This provides valuable organic material that helps nourish your grass over the winter months. Mulching can also prevent weeds by blocking sunlight from reaching the soil.

    Conclusion

    Maintaining a green and healthy lawn is a rewarding effort that requires regular care and attention. By following these 12 essential steps, from preventing weeds before they appear to using proper watering and fertilizing techniques, you can ensure your lawn thrives throughout the seasons. Taking the time to aerate, dethatch, and reseed when necessary will keep your grass lush and vibrant, while regular mowing and edging will give it a neat, tidy appearance. Whether you’re a seasoned lawn care pro or just getting started, these tips will help you create the beautiful, green lawn you’ve always wanted.

    FAQ

  • Urban Gardener Seeds: Secrets to Growing in Tight Spaces

    Urban Gardener Seeds: Secrets to Growing in Tight Spaces

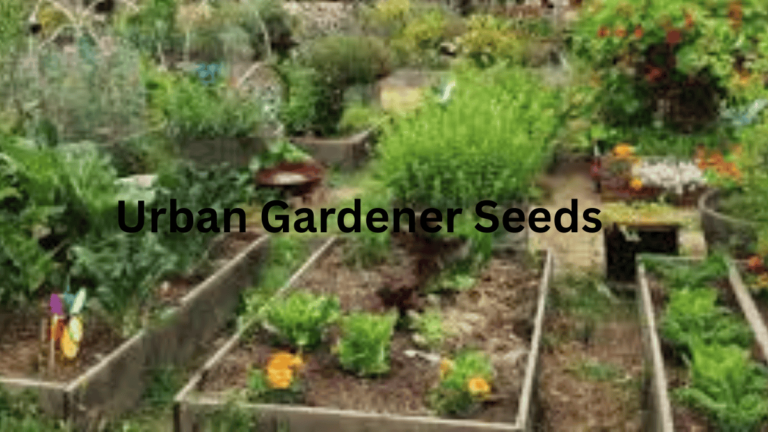
    Urban gardening is more than just a trend; it’s a lifestyle that many city dwellers are adopting as a way to reconnect with nature, grow their own food, and contribute to a more sustainable environment. If you’re a beginner or looking to expand your gardening skills in the heart of the city, understanding the role of urban gardener seeds is essential. This article will guide you through everything you need to know, from selecting the best seeds for urban environments to growing and maintaining your garden.

    [su_note note_color=”#ac66ff” radius=”20″]Recommendation Urban gardening is a great way to grow plants in small spaces like apartments or balconies. Start by choosing space-efficient, fast-growing seeds like herbs (basil, mint) and compact vegetables (lettuce, radishes). Use containers with proper drainage and good-quality potting soil. Water your plants regularly, ensuring not to overwater. Provide 4-6 hours of sunlight or use grow lights if needed. Regular maintenance is essential—remove dead leaves, check for pests, and use organic fertilizers. [/su_note]

    Introduction to Urban Gardening and Seed Selection

    Urban gardening involves cultivating plants in smaller spaces like balconies, rooftops, or even windowsills. With limited space and resources, it’s crucial to choose the right seeds for successful gardening. Urban gardener seeds are specifically selected for their adaptability to confined spaces, urban environments, and diverse weather conditions. In this guide, I’ll take you through some of the best seeds for urban gardening, along with tips for a thriving garden in the city.

    What Makes Urban Gardener Seeds Special?

    Urban gardening requires specific considerations, such as limited sunlight, small spaces, and diverse climates. Choosing the right seeds is crucial for success. Urban gardener seeds are typically fast-growing, space-efficient, and easy to maintain. Whether you’re growing herbs, vegetables, or flowers, these seeds are designed to thrive in the challenges posed by city life.

    Key Traits of Urban Gardener Seeds

    Urban gardener seeds are chosen based on several characteristics that make them ideal for growing in cities:

    • Space Efficiency: These plants are often compact and suitable for containers or vertical gardening.
    • Short Growing Seasons: Urban gardener seeds typically have a fast-growing cycle, perfect for small spaces.
    • Resilience: Urban gardens face environmental challenges like pollution, inconsistent weather, and pests. These seeds are hardy and can withstand such conditions.
    • Low Maintenance: Ideal for busy city dwellers, urban gardener seeds require minimal care once planted.

    Why Space-Efficient Seeds Are Essential

    In the city, space is often limited, and your gardening space might only be a small corner of your balcony or rooftop. Space-efficient seeds allow you to grow more in less space, making the most of every square inch.

    Choosing the Best Urban Gardener Seeds for Your Garden

    The selection of seeds can make or break your urban gardening experience. It’s essential to know what works well in small spaces and varying environmental conditions.

    Best Herbs for Urban Gardens

    Herbs are often the go-to choice for urban gardeners due to their compact size and culinary value. Here are some top picks:

    • Basil: A popular herb that thrives in small containers and requires minimal care.
    • Mint: Grows rapidly and is perfect for small spaces, but be mindful—it can spread quickly!
    • Thyme: A hardy herb that grows well in both pots and gardens.

    Top Vegetables for Urban Gardens

    If you’re interested in growing your own food, certain vegetables are better suited for small urban spaces. Consider these:

    • Lettuce: Quick-growing and perfect for containers or vertical gardens.
    • Radishes: Thrive in compact spaces and can be harvested in as little as a month.
    • Tomatoes: Cherry and dwarf varieties are ideal for container gardening.

    Flowering Plants for Small Spaces

    Urban gardens can also be colorful and fragrant! Some flowers that perform well in small spaces include:

    • Petunias: These flowers grow well in hanging baskets or containers.
    • Sunflowers: Smaller varieties are perfect for balconies and windowsills.
    • Marigolds: Known for their vibrant colors and ability to deter pests.

    How to Plant and Grow Urban Gardener Seeds

    Knowing how to plant and care for your seeds is key to a thriving urban garden. Here’s a step-by-step guide to get you started.

    Preparing Your Garden Space

    Before planting your seeds, ensure your garden space is prepared properly:

    1. Choose Containers: Use pots, hanging baskets, or raised beds that fit your available space.
    2. Ensure Proper Drainage: Make sure your containers have holes for water drainage.
    3. Soil Quality: Invest in high-quality potting soil that provides good drainage and nutrients.

    Planting Urban Gardener Seeds

    Once your space is prepared, it’s time to plant! Follow these steps:

    1. Follow Seed Depth Guidelines: Each type of seed will have specific planting depths, so check your seed packets for details.
    2. Water Gently: After planting, water your seeds lightly, ensuring they’re not flooded.
    3. Ensure Adequate Light: Urban spaces often have limited sunlight, so place your garden in a sunny spot or consider investing in grow lights if necessary.

    Maintaining Your Urban Garden

    Urban gardening is a long-term commitment, and proper care ensures that your plants thrive. Here are some maintenance tips:

    Watering Your Urban Garden

    In small spaces, it’s important to avoid overwatering, as it can lead to root rot. Water your plants when the soil feels dry to the touch, but ensure the excess water can drain out.

    Fertilizing and Feeding Plants

    Urban gardens benefit from regular feeding to replenish the nutrients in your soil. Use an organic fertilizer to avoid chemicals and to keep your plants healthy.

    Dealing with Pests and Pollination

    Urban gardens can attract pests, but there are organic ways to manage them:

    • Neem oil: A natural pesticide that can deter harmful insects.
    • Beneficial insects: Introduce ladybugs or bees to your garden to help with pollination and pest control.

    Seasonal Care for Urban Gardener Seeds

    Different seasons require different care strategies for your urban garden.

    Summer Care

    During the summer, your plants will require more frequent watering and protection from intense sun. Use shade cloths to protect sensitive plants from overheating.

    Winter Care

    In colder months, some plants may need to be brought indoors, especially tender vegetables or herbs. Consider creating a mini greenhouse to extend the growing season.

    Troubleshooting Common Urban Gardening Problems

    Even seasoned urban gardeners face challenges. Here’s how to troubleshoot some common issues:

    Poor Soil Drainage

    If water is pooling in your containers, add more organic matter or perlite to improve drainage. This will help prevent root rot and promote healthy plant growth.

    Yellowing Leaves

    Yellow leaves can be a sign of overwatering, nutrient deficiency, or pests. Check your watering routine, ensure adequate sunlight, and inspect your plants for signs of insects.

    Benefits of Urban Gardening

    Urban gardening has numerous benefits for individuals and the environment. Some of the key advantages include:

    Improved Mental Health

    Gardening has been shown to reduce stress, anxiety, and depression. Growing plants and spending time in nature can boost your mood and provide a sense of accomplishment.

    Sustainable Living

    By growing your own food, you reduce your carbon footprint and reliance on store-bought products. Urban gardening is an excellent way to practice sustainability.

    Fresh and Healthy Produce

    Having a garden in the city allows you to enjoy fresh, pesticide-free fruits, vegetables, and herbs right from your balcony or rooftop.

    Conclusion: Your Journey as an Urban Gardener

    Urban gardening is a rewarding and fulfilling hobby that offers numerous benefits. By choosing the right urban gardener seeds and following proper planting and care techniques, you can create a thriving garden in the heart of the city. Whether you’re growing herbs for culinary use or vegetables for your family, urban gardening is a great way to embrace sustainable living and enjoy fresh produce right at your doorstep.

    Frequently Asked Questions (FAQs)

    What are the best seeds for urban gardens?

    The best seeds for urban gardens include space-efficient vegetables like lettuce, radishes, and dwarf tomatoes, as well as herbs like basil and thyme. Flowers such as marigolds and petunias are also great options.

    How much sunlight does an urban garden need?

    Most urban plants need at least 4-6 hours of direct sunlight a day. However, if sunlight is limited, consider using grow lights to supplement natural light.

    Can I grow vegetables indoors?

    Yes, many vegetables can be grown indoors with the right lighting and care. Consider growing leafy greens, herbs, and dwarf vegetable varieties in containers on a windowsill.

    How can I control pests in my urban garden?

    To control pests naturally, try using neem oil, introducing beneficial insects like ladybugs, or planting pest-repellent herbs like lavender or basil.

    Is urban gardening expensive?

    Urban gardening can be as affordable or expensive as you make it. Start small with a few containers, seeds, and organic soil. Over time, you can expand your garden with more plants and tools.

  • Snake Plant Benefits: The Ultimate Air-Purifying Hero

    Snake Plant Benefits: The Ultimate Air-Purifying Hero

    Snake plant benefits are numerous, making it an ideal choice for any home. Not only does it purify the air by absorbing toxins like formaldehyde and benzene, but it also releases oxygen both day and night. This hardworking plant thrives in low-maintenance conditions, making it perfect for busy individuals or beginners. Additionally, its calming presence can reduce stress and enhance mental well-being, creating a peaceful and healthy indoor environment. Whether you’re a beginner or an experienced plant enthusiast, this plant is a brilliant companion to have around. Its resilience makes it the perfect choice for those who don’t have much time to devote to care but still want to enjoy the beauty and benefits of a thriving indoor plant.

    With its unique appearance, the Snake Plant is not only a favorite among plant lovers, but it also serves as an excellent addition to any indoor space. The benefits of this plant go beyond its looks—its easy maintenance and ability to improve air quality make it a must-have. Whether placed in a living room, office, or bedroom, this low-maintenance plant requires only a little nurturing to go a long way. Its air-purifying qualities and adaptability are just a few reasons why the Snake Plant has become a go-to for many.

    The Benefits of the Snake Plant

    Top 3 Benefits[su_note note_color=”#66ff6b” radius=”20″]The snake plant offers multiple benefits, making it an ideal choice for any home. It excels at air purification by absorbing toxins like formaldehyde and benzene, while releasing oxygen both day and night. This hardy plant requires minimal care, thriving in low light and with irregular watering, making it perfect for beginners or those with busy schedules. Additionally, its calming presence helps reduce stress and improve mental well-being, creating a peaceful and relaxing atmosphere in any room.[/su_note]

    1.Air Purification and Healthier Indoor Environment

    If you’ve been searching for a plant that not only looks great but also purifies the air, the snake plant is a perfect indoor companion. Known for its oxygen release during both the day and night, it is one of the few plants that can work tirelessly to improve your indoor environment. The snake plant helps with toxin absorption, effectively removing harmful substances like formaldehyde, benzene, and xylene from the air. This creates a fresher and healthier atmosphere for your home or office.

    Its ability to perform photosynthesis around the clock, even at night, means you’ll benefit from cleaner, fresh air while you sleep. Over time, this can improve sleep quality, making it easier to rest in a space that’s not only visually appealing but also supportive of your health.

    2.Low Maintenance and Resilience

    One of the best aspects of the snake plant is its low maintenance nature. If you’re someone who tends to be busy or perhaps a beginner in caring for plants, this is an ideal choice. The snake plant’s resilience allows it to survive in unexpected conditions like low light, irregular watering, and even periods of neglect. It’s a hardy plant that thrives even in less-than-ideal environments, making it perfect for those who may not have the time to tend to plants every day.

    Whether it’s indoors or outdoors, the snake plant will thrive, showing resilience in various conditions. Its adaptability means it can be placed in pots or hanging baskets, complementing your interior or landscaping designs with ease.

    3.Stress Reduction and Mental Well-Being

    Living with plants, especially ones like the snake plant, has been shown to reduce stress and improve overall mental well-being. The presence of greenery in your space has a calming effect, creating a more relaxing atmosphere. It’s not just about its aesthetic appeal; the snake plant promotes tranquility, lowering stress levels as it becomes a peaceful addition to any room.

    Its natural ability to regulate the indoor humidity through moisture release makes it particularly useful in dry climates or winter months. It acts as a humidifier, helping to alleviate issues like dry skin, respiratory problems, and allergies that are common in drier environments. This all adds to its soothing presence, promoting relaxation and peace of mind.

    4.Aesthetic Appeal and Longevity

    The snake plant isn’t just good for your health; it’s also an aesthetic addition to any space. Its architectural leaves and striking patterns offer elegance and versatility. Available in several varieties, such as Sansevieria trifasciata laurentii, its tall, upright leaves make it a statement piece. Whether it’s in your living room, office, or bedroom, the snake plant enhances any space with its clean and modern look.

    Moreover, with proper care, the snake plant is a long-lasting investment. Known for its longevity, it can thrive for many years, offering an enduring presence in your home. Its sustainable nature ensures it will continue to grow and add beauty to your space for years to come.

    5.Easy Propagation and Care Tips

    If you’re looking to expand your collection, the snake plant is also one of the easiest plants to propagate. Whether through division or leaf cuttings, you’ll find it a rewarding process to grow new plants. This makes it a fantastic option for anyone looking to spread the joy of plant care.

    In terms of care, the snake plant doesn’t demand much attention. It thrives in well-draining soil, and a cactus mix works well to provide the necessary aeration. Watering should be done carefully to avoid root rot—better to underwater than overwater. The plant can tolerate a range of light conditions, from bright indirect to medium, making it flexible in placement.

    6.Insect Repellent and Pet Safety

    The snake plant also serves as a natural insect-repellent. Containing saponins, it can help deter pests like mosquitoes, which is an added bonus for homes looking for natural methods of pest control. However, pet owners should be cautious—snake plants can be toxic to cats and dogs if ingested. Keep your plant out of reach of pets to avoid potential nausea or vomiting.

    FAQ

  • 24 DIY Plant Stands: The Secret to a Lush, Stylish Home

    24 DIY Plant Stands: The Secret to a Lush, Stylish Home

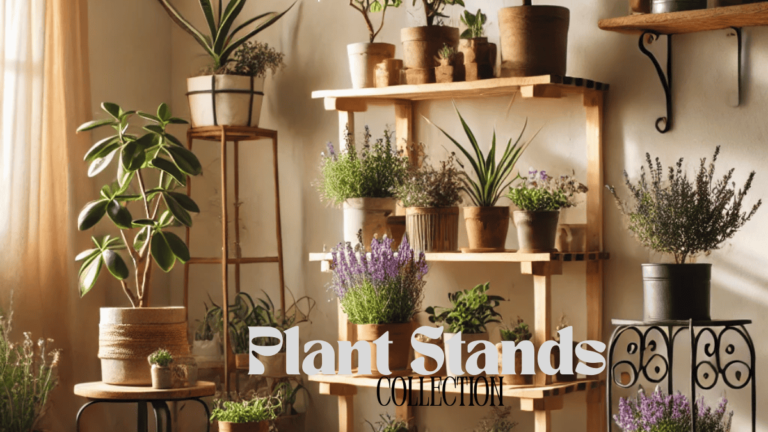
    If you’re looking to display your favorite plants with style, indoor plant stand with grow lights is a great option to provide both beauty and proper lighting. From rod iron planter stands to DIY plant stands with grow lights, there are plenty of ways to personalize your space. You can add a touch of rustic charm with a vintage rod iron plant stand or go modern with rod iron outdoor plant stands. Tall plant stands with grow lights help create height, while the best plant stand with grow lights ensures your plants get the proper care. Whether it’s an iron rod plant stand or an antique rod iron plant stand, these stands blend style with function to showcase your plants beautifully.

    Preview AMP(opens in a new tab)

    [su_note note_color=”#66ff6b” radius=”7″]Recommendation:

    For an indoor garden with limited natural sunlight, I highly recommend the Indoor Plant Stand with Grow Lights, which provides both elevation and artificial light to help your plants thrive. If you’re aiming for a touch of vintage charm, the Rod Iron Planter Stands offer durability and timeless elegance, making them perfect for larger pots. For a sleek, modern look, the Bacekoll Plant Stand with Grow Lights combines minimalistic style with functionality, ensuring your plants receive the right amount of light while enhancing your space’s aesthetic. These stands are versatile, practical, and stylish options to suit various home decor preferences.[/su_note]

    Click & Grow Smart Indoor Herb Garden

    1. Indoor Plant Stand with Grow Lights: The Perfect Solution for Limited Sunlight

    If you live in a space that doesn’t receive ample natural light, consider an indoor plant stand with grow lights. These stands not only elevate your plants but also provide them with the artificial light they need to thrive indoors. Here’s how to build one with minimal materials:

    • Materials Needed: Wooden boards, LED grow lights, screws, drill, and paint.
    • Instructions: Measure the space where you want to place the stand, then cut the wood to size. Assemble the stand with multiple shelves to hold your plants, and install the grow lights above each tier. Paint the stand to match your decor.

    Pro Tip: Choose LED lights for better energy efficiency and a longer lifespan.

    2. Rod Iron Planter Stands for a Touch of Elegance

    If you want to add a bit of vintage charm to your plant display, rod iron planter stands are the perfect choice. These sturdy stands bring an antique feel while providing a durable base for your plants. The iron design adds strength, making it suitable for heavy pots.

    • Materials Needed: Rod iron, welding tools, paint, and heavy-duty plant pots.
    • Instructions: If you’re familiar with welding, craft your rod iron stand to the desired height and design. Paint it in a color that complements your existing decor, whether a classic black or a pop of color for contrast.

    3. DIY Plant Stand with Grow Lights for Full Sun and Shade Balance

    Sometimes, you may need to manage the amount of sunlight your plants receive. A diy plant stand with grow lights allows you to balance natural and artificial light efficiently. Here’s how to create a customized stand:

    • Materials Needed: Pallet wood, grow lights, wood stain, screws, and drill.
    • Instructions: Repurpose an old pallet and transform it into a tiered plant stand. Attach grow lights to the top shelf to mimic natural sunlight and ensure your plants are well-lit.

    4. Bacekoll Plant Stand with Grow Lights for Modern Charm

    Bacekoll plant stands bring a modern, minimalistic flair to your indoor garden. These stands with integrated grow lights are perfect for adding both light and style to your space.

    • Materials Needed: Bacekoll stand, LED grow light strips, zip ties, and decorative planters.
    • Instructions: Use a bacekoll plant stand and affix LED grow light strips underneath the shelves. This ensures your plants receive the right amount of light without sacrificing style.

    5. Tall Plant Stand with Grow Lights: Ideal for Larger Plants

    If you have larger plants or need to save floor space, a tall plant stand with grow lights is your best bet. The height allows your plants to grow vertically, making it a perfect solution for spaces with limited room.

    • Materials Needed: Tall wooden boards, grow light fixtures, screws, and a saw.
    • Instructions: Build a tall, sturdy wooden stand with multiple levels. Add grow lights to each tier to ensure each plant gets enough light to grow tall and healthy.

    6. Vintage Rod Iron Plant Stands: Add a Classic Touch to Your Space

    A vintage rod iron plant stand is the epitome of timeless elegance. This stand will make your plants look like they belong in a charming cottage garden or historical home.

    • Materials Needed: Vintage rod iron, decorative accents, and a spray paint of your choice.
    • Instructions: Find an old rod iron stand at a thrift store or garage sale and restore it to its former glory. Add decorative elements like vintage knobs or flowers for an extra touch of personality.

    7. Wooden Plant Stand with Grow Lights for a Rustic Appeal

    A wooden plant stand with grow lights combines rustic aesthetics with practicality. It’s perfect for those who love the farmhouse-style decor and want to incorporate some greenery into their homes.

    • Materials Needed: Pallet wood, LED grow lights, drill, and screws.
    • Instructions: Build a multi-tiered wooden plant stand, staining the wood to give it a rich, rustic appearance. Install grow lights on the top shelf and arrange your plants on the lower shelves.

    8. Rod Iron Outdoor Plant Stands for Your Garden or Patio

    Transform your garden or patio into a lush, green space with rod iron outdoor plant stands. These stands are perfect for outdoor conditions and can withstand the elements.

    • Materials Needed: Rod iron, outdoor paint, heavy-duty outdoor planters, and screws.
    • Instructions: Design your outdoor stand using sturdy rod iron, making sure it’s tall enough for larger plants. Coat the stand with outdoor paint to protect it from weathering.

    9. 3-Tier Plant Stand with Grow Lights: Ideal for Small Spaces

    A 3-tier plant stand with grow lights allows you to maximize vertical space, which is great for apartments or rooms with limited space for plants. The tiers help you create a mini vertical garden.

    • Materials Needed: 3 wooden shelves, LED grow lights, screws, and a drill.
    • Instructions: Create a compact 3-tier design where each shelf holds a row of plants. Attach LED grow lights above each shelf to ensure your plants receive the right amount of light.

    10. Small Plant Stand with Grow Lights: The Perfect Fit for Any Space

    A small plant stand with grow lights is perfect for people with limited space but who still want to enjoy a beautiful display of plants. These stands can easily be placed on desks, windowsills, or even by the kitchen.

    • Materials Needed: Small wooden box, grow lights, wood stain, and paint.
    • Instructions: Build a small stand with a sturdy base. Install the grow light underneath, ensuring it lights up the plants effectively.

    11. Hanging Wooden Plant Stand for Air Plants

    For air plants or small greenery, a hanging wooden plant stand is a great way to save space while still displaying your plants beautifully. Hang your plants from the ceiling for a unique, floating look.

    • Materials Needed: Wood, macrame rope, hooks, and small planters.
    • Instructions: Cut the wood into small circular pieces. Attach macrame rope to each piece and hang it from the ceiling using hooks.

    12. Rolling Plant Stand with Shelves for Easy Movement

    A rolling plant stand allows you to move your plants around easily for maximum sunlight exposure or for changing up your decor. These rolling stands are especially useful in rooms with limited space.

    • Materials Needed: Rolling cart, shelves, screws, and a drill.
    • Instructions: Install shelves on the rolling cart to create multiple tiers. Ensure the cart can support the weight of the plants.

    13. Wire Tomato Cage Plant Stand for a DIY Twist

    Repurpose an old wire tomato cage into a plant stand. This is a creative way to use everyday materials to create a functional and stylish piece for your garden.

    • Materials Needed: Wire tomato cage, spray paint, and plant pots.
    • Instructions: Simply spray paint the tomato cage with a color that suits your decor, then place a plant pot at the base.

    14. Cement Garden Column Plant Stand for a Strong Base

    For a more industrial look, consider a cement garden column plant stand. These provide a heavy, sturdy base that keeps plants upright and secure.

    • Materials Needed: Cement, mold, paint, and heavy-duty plant pots.
    • Instructions: Pour cement into a mold, let it harden, and paint it as desired. Place a plant pot on top of the column for a sophisticated look.

    15. Bamboo Fencing Plant Stand for Eco-Friendly Outdoor Use

    Use bamboo fencing to create a natural-looking plant stand that blends seamlessly with your outdoor space. Bamboo is eco-friendly and sturdy enough for holding multiple potted plants.

    • Materials Needed: Bamboo fencing, nails, hammer, and planters.
    • Instructions: Attach bamboo fencing together to form a vertical stand. Secure it with nails and place your plants in various pots for an attractive display.

    16. Wooden Ladder Plant Stand for Rustic Charm

    A wooden ladder plant stand is a simple and rustic way to display your plants. The ladder design allows for multiple levels, giving each plant the space it needs to thrive.

    • Materials Needed: Wooden ladder, screws, and plant pots.
    • Instructions: Repurpose an old wooden ladder or build one from scratch. Place plants on each step to create a charming display.

    17. Stacked Tires Plant Stand for a Fun Outdoor Look

    If you have old tires lying around, why not repurpose them into a stacked tires plant stand? Spray paint the tires in bright colors for a fun and functional display.

    • Materials Needed: Old tires, spray paint, potting soil, and plants.
    • Instructions: Stack the tires in a pyramid shape, fill them with soil, and place your plants inside. This stand works best for large outdoor plants.

    18. Rustic Wooden Crate Plant Stand for Vintage Appeal

    A rustic wooden crate plant stand is a simple way to add a vintage touch to your plant display. Crates provide a natural, earthy look that complements various decor styles.

    • Materials Needed: Wooden crates, nails, and plants.
    • Instructions: Stack the wooden crates in your desired arrangement. Secure them with nails and place plants inside for an eco-friendly plant stand.

    19. Woven Ottoman Plant Stand for Textural Appeal

    Transform an old woven ottoman into a stylish plant stand. This idea works especially well with large, statement plants that need a bit more height.

    • Materials Needed: Woven ottoman, spray paint, and large plants.
    • Instructions: Spray paint the ottoman to match your decor. Place your large plants on top for a chic and functional plant stand.

    20. Corner Plant Stand for Space Optimization

    If you’re looking to optimize a corner, a corner plant stand is perfect. This stand is designed to fit into tight spaces while offering ample room for multiple plants.

    • Materials Needed: Wood, screws, drill, and corner space.
    • Instructions: Measure the corner space and create a stand with shelves that fits snugly into the corner. Arrange plants on each shelf to create a lush display.

    21. Vintage Wooden Crates Plant Stand for a Country Touch

    Transform vintage wooden crates into a charming plant stand that adds rustic character to any room.

    • Materials Needed: Vintage wooden crates, screws, and plants.
    • Instructions: Stack and secure the crates to create a multi-level plant stand.

    22. Hemp Rope Wrapped Plant Stand for a Boho Style

    A hemp rope wrapped plant stand adds a touch of boho charm and natural texture to your space. It’s perfect for smaller plants that need to be elevated.

    • Materials Needed: Hemp rope, wooden stand, and plants.
    • Instructions: Wrap the wooden stand with hemp rope to create a boho-inspired plant display.

    23. Rolling Plant Stand Shelves for Flexibility and Movement

    Rolling plant stand shelves offer mobility, allowing you to easily move your plants from one place to another, depending on sunlight or décor changes.

    • Materials Needed: Shelves, wheels, screws, and plants.
    • Instructions: Attach wheels to the bottom of the shelves. Use these shelves to organize your plants on multiple levels.

    24. DIY Iron Plant Stand for a Modern Touch

    A DIY iron plant stand provides a sleek, modern touch for your home. This simple yet sturdy stand is perfect for showcasing a few statement plants.

    • Materials Needed: Iron rods, welding tools, and paint.
    • Instructions: Craft a modern, minimalistic iron frame and finish it with paint that matches your space.

    FAQs

    What is the best type of wood for building a plant stand?

    The best type of wood depends on the style you’re going for. For a rustic look, pallet wood works well. For a more refined finish, consider using hardwood like oak or pine.

    Can I use a plant stand outdoors?

    Yes, many plant stands are designed specifically for outdoor use. Be sure to choose materials like rod iron or treated wood that can withstand the elements.

    How do I choose the right grow light for my plants?

    The right grow light depends on the type of plants you have. LED grow lights are typically best because they provide the necessary spectrum of light while being energy-efficient.

    Can I build a plant stand with multiple materials?

    Absolutely! Combining different materials like wood, metal, and even rope can create a unique and functional design that fits your space and style.

  • 15 Must-Have Indoor Climbing Plants to Elevate Your Decor

    15 Must-Have Indoor Climbing Plants to Elevate Your Decor

    Introduction Climbing house Plants

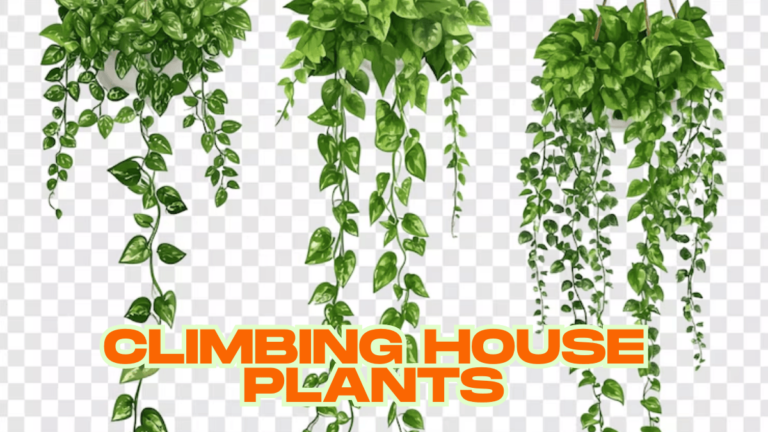
    Indoor climbing plants bring so much more than just greenery to your home. They’re the gift that keeps on giving, enhancing your space with their beauty and clean air. These plants are not only known for their ability to reduce stress and increase productivity, but they also offer a stylish, visual intrigue that makes your decor stand out. I’ve always been fascinated by the way climbing plants can transform a room, filling it with life and energy. For those who want to level up their interior design, indoor climbing plants are the way to go.

    Most of them thrive in filtered light with a bit of humidity, but they’re also quite forgiving. Even if you don’t have the perfect conditions, tweaking the water schedule can help them flourish. As Futeral recommends, giving them a bit of light and letting them dry out before watering will keep them healthy. Whether you’re a seasoned plant owner or a beginner, these plants are great low-maintenance houseplants that are sure to impress with their aesthetic appeal.

    15 Indoor Climbing House Plants to Take Your Decor to New Heights

    [su_note]If you’re looking for the best indoor climbing plants, consider the Pothos Silver Splash, which features gorgeous blue-gray tones and silver streaking along its large leaves, making it an elegant addition to any room. The Cebu Blue Pothos offers a delicate, small-leafed appearance and thrives in shady spots with minimal care, while the Golden Pothos Plant brings a tropical feel with its huge leaves and immense impact, all while being low maintenance and air purifying—perfect for creating a calming environment.[/su_note]

    1.Pothos Silver Splash

    If you’re looking to add a touch of elegance to your space, Pothos Silver Splash might be just what you need. Its boasts large, impressive leaves with a blue-gray tone and stunning silver streaking, making it gorgeous to look at. Though it’s expensive and not pet friendly, its air purifying properties make it a great choice for enhancing your indoor environment.

    2.Cebu Blue Pothos

    Its small leaves and unique blue-gray tone give it a nuanced look. This vining plant is fast-growing, and although it’s not pet friendly, it thrives in shady areas with minimal care—just water infrequently and watch it climb!

    3.Golden Pothos Plant

    Add a tropical feel to your home with the Golden Pothos Plant. This variety features huge leaves that are bound to create an immense impact in your space. Low maintenance and shade-seeking, it’s perfect for those who want a vacation home vibe. However, you might want to invest in a humidifier during dry months to keep it thriving.

    4.Rhaphidophora Tetrasperma

    Another easy to care for climbing option is Rhaphidophora Tetrasperma known for its climbing potential and unique appearance, this fast-growing plant is often compared to a miniature Monstera. With a jungle feel, it’s great for creating a lush atmosphere when supported with a moss pole or plank of wood.

    5.Spider Plant Variegated

    The Spider Plant Variegated is a pet friendly option with pointy leaves that dangle beautifully. Its plantlets grow along the leaves, allowing you to propagate and create new plants. It’s perfect for hanging displays and adding a web-like effect to your decor.

    6.Philodendron Cordatum ‘Heartleaf’

    The Philodendron Cordatum, often called Heartleaf, is ideal for low to medium indirect sunlight. This plant grows quickly and has stunning heart-shaped leaves with bronze stem tones. It requires minimal waterings, making it a great choice for busy plant parents, though it’s toxic to pets.

    7.Mistletoe Cactus

    If you’re after something a bit different, try the Mistletoe Cactus. Its small size and trailing nature make it a unique addition to any indoor garden. The plant thrives in bright sunlight and can even be hung upside down in a hanging planter to create a striking visual effect.

    8.English Ivy

    For those who want a plant that can truly trail or climb, English Ivy is a fantastic option. This plant can grow up to 10 feet tall, making it a statement piece in any room. While it’s not pet friendly, it’s versatile enough to survive in various climates and shady spots.

    9.Ficus Repens

    Another excellent choice for indoor climbing is the Ficus Repens known for its quick growth, this plant has green leaf varieties or variegated leaves with white and green hues. While it can eventually cover a wall, it’s important to stay on top of its pruning needs.

    10.Mini Pink Jasmine Vine

    If you’re looking for something that’s not only beautiful but also offers an air purifying benefit, the Mini Pink Jasmine Vine is a great option. This pet friendly plant has a sweet aroma when it blooms, though it is high maintenance, requiring careful attention to sunlight, airflow, and frequent waterings.

    11.String of Pearls Succulent

    For a more unique succulent, consider the String of Pearls Succulent known for its teeny-tiny leaves resembling a pearl necklace, this plant thrives with ample light and well-drained soil. It also acts as a great air purifier while requiring minimal watering.

    12.Hoya Krimson Queen

    For a touch of regal charm, the Hoya Krimson Queen offers a gorgeous appearance with thick waxy leaves that retain water. This plant is nontoxic to pets and is perfect for an area with indirect bright light. It can grow up to six feet tall, making it a stunning addition to any room.

    13.Ceropegia Woodii

    Another nontoxic to pets plant is the Ceropegia Woodii Often referred to as the String of Hearts, this plant is a succulent with heart-shaped leaves. It requires bright warm spaces, though not direct sunlight, and only needs watering once a week to thrive.

    14.Bougainvillea

    Looking to add some color to your indoor garden? Bougainvillea is the way to go. This plant produces vibrant pink and purple flowers while also acting as an air purifier. It’s mildly toxic to pets, so keep that in mind, but it thrives in direct sunlight and requires only occasional watering.

    15.String of Turtles

    Lastly, the String of Turtles is a perfect addition to your decor. Its tortoise’s shell-like leaves are unique, and it is a resilient plant that requires only indirect sunlight and weekly watering to thrive.

  • GROW HERBS in Hot Climates: Unbeatable Top 10 Tips for Growing Herbs in Hot Climates

    GROW HERBS in Hot Climates: Unbeatable Top 10 Tips for Growing Herbs in Hot Climates

    Introduction: Overcoming the Challenges of Growing Herbs in Hot Climates


    Growing herbs in hot climates can be a challenging but highly rewarding experience. Whether you’re in a Mediterranean region like Mesa, Arizona, or experiencing intense summer heat, it’s possible to grow a thriving herb garden with the right knowledge and preparation. From rosemary to mint, thyme, and basil, herbs are some of the most versatile and beneficial plants to grow, enhancing both your meals and your garden. In this article, I’ll share my experience and the top tips to help you succeed in hot climates and get the most out of your herb-growing journey.

    Why Growing Herbs in Hot Climates Can Be Tough


    In regions with hot, dry summers, and rocky soil, herbs may struggle to thrive due to the heat and lack of moisture. High temperatures can cause many plants to go into survival mode, slowing their growth and possibly leading to dormant periods. However, with the right care, even in challenging conditions, it is possible to grow good, flavorful herbs that will prosper.

    The Best Herbs to Grow in Hot Climates

    Some herbs are better suited to hot environments due to their perennial nature, meaning they return each year. Rosemary, thyme, oregano, sage, and lavender are all Mediterranean herbs that naturally thrive in hot, dry conditions. These plants require minimal water once established and can withstand the harsh sun of summer without too much difficulty.
    Annual herbs such as basil, parsley, cilantro, and chamomile can also be grown successfully in hot climates with the right care. These herbs may need more attention and water than perennials, but they still flourish in sunny, well-drained soil.

    Tips for Growing Herbs in Hot Climates

    1. Choose the Right Spot for Your Herb Garden
    The location of your herb garden is crucial to its success. Choose a spot that gets plenty of sunlight throughout the day. Most herbs, like basil and rosemary, love full sun, but you also need to provide some afternoon shade for more delicate varieties such as parsley and mint, which can struggle in intense heat.

    2. Opt for Raised Beds or Containers for Better Drainage
    If you’re struggling with soggy soil or poor drainage, a raised bed or container gardening might be the best option. Herbs like oregano, thyme, and garlic need well-drained soil to prevent root rot. A container will allow you to control soil quality and moisture levels more effectively.

    3. Amend Your Soil with Organic Matter
    In hot, dry climates, the soil can often be too dry or compacted. Adding compost or organic matter to your garden bed can improve drainage and make the soil more nutrient-rich. This also ensures that your herbs get the good nutrients they need to thrive.

    4. Water Regularly, but Avoid Overwatering
    Herbs like rosemary and sage don’t require as much water once they’re established, but in hot climates, they still need consistent moisture. However, be careful not to overwater, as this can cause roots to rot. Watering deeply but less frequently will encourage deep root growth, helping your herbs survive hot summers.

    5. Mulch to Retain Moisture and Keep Roots Cool
    Using mulch, such as straw or wood chips, around your herb plants will help retain moisture and keep the roots cool. Mulching is particularly important in hot climates where water evaporation happens quickly. It also prevents weeds from competing with your herbs for nutrients and water.

    6. Prune and Harvest Regularly to Promote Healthy Growth
    Regular pruning helps your herbs stay healthy and productive. Remove dead or damaged growth and regularly harvest leaves for cooking or drying. Pruning will also prevent your plants from becoming too leggy and encourage them to produce fresh, new growth, even during hot months.

    7. Protect Against Pests and Insects
    Insects and pests can be a common problem for herb gardeners in hot climates. The presence of pollinators like ladybugs can help control harmful insects. Use natural pest control methods, such as planting garlic, rosemary, or basil near your other herbs to deter unwanted guests.

    8. Provide Some Afternoon Shade
    While most herbs love the sun, the intense afternoon sun can be too much for some plants, especially in the peak of summer. Consider shading your herb garden during the hottest part of the day, particularly for more sensitive herbs like cilantro and parsley. This can help them continue to grow without going into dormant mode.

    9. Use Fertilizer Sparingly
    In hot climates, too much fertilizer can overwhelm your herbs and cause excessive leaf growth with little flavor. Use a balanced fertilizer sparingly, and be sure to choose one that promotes strong, healthy roots rather than just lush top growth.

    10. Plan for Seasonal Changes
    As temperatures drop in fall and winter, some herbs will go dormant, while others may struggle to survive. Be prepared by planting perennial herbs that can withstand frost and replanting annual herbs in the spring. You may also consider bringing certain herbs like mint, thyme, or parsley into a container for the cooler months.

    Additional Considerations for Growing Herbs in Hot Climates

    Companion Planting for Pest Control and Healthy Growth
    Certain herbs work well together and can help each other thrive. For example, basil planted next to tomatoes can deter pests, while rosemary can help protect carrots and lettuce from insects. Companion planting is an excellent strategy for creating a healthier, more resilient garden.

    Native Herbs to Grow in Hot Climates
    Native herbs, such as bay laurel and lemon verbena, are already adapted to the dry, hot conditions of certain regions. By choosing native varieties, you’ll reduce the need for extra care and maintenance, as these herbs are naturally suited to their environment.

    Conclusion:

    Growing herbs in hot climates may seem challenging, but with the right knowledge and care, it’s possible to create a thriving herb garden. By selecting the best plants for your climate, ensuring good soil and water practices, and managing pests naturally, you can enjoy fresh, flavorful herbs all year long. Whether you’re growing rosemary, mint, basil, or even more exotic herbs like ginger or turmeric, your herb garden can flourish with a little time, effort, and love.

    FAQs:

    What herbs thrive in hot climates?

    Some of the best herbs for hot climates include rosemary, thyme, sage, lavender, oregano, and basil. These are all Mediterranean herbs that do well in dry, sunny conditions.

    How often should I water herbs in hot climates?

    Herbs in hot climates should be watered deeply but less frequently. Ensure that the soil is moist, but not soggy, to avoid root rot. Once established, perennial herbs need less water.

    Can I grow herbs in containers in hot climates?

    Yes! Container gardening is an excellent choice for hot climates as it provides better drainage and allows you to control soil conditions more easily.

    How do I protect my herbs from pests in hot climates?

    Use natural pest control methods such as planting garlic or rosemary to deter insects. Additionally, companion planting and encouraging pollinators like ladybugs can help keep harmful pests at bay.

    Which herbs need afternoon shade in hot climates?

    Herbs like parsley, mint, and cilantro prefer some afternoon shade in hot climates, as intense afternoon sun can stress these plants.


  • Top 10 Balcony Garden Plants for all Seasons

    Top 10 Balcony Garden Plants for all Seasons

    Introduction For Plants for a Balcony Garden

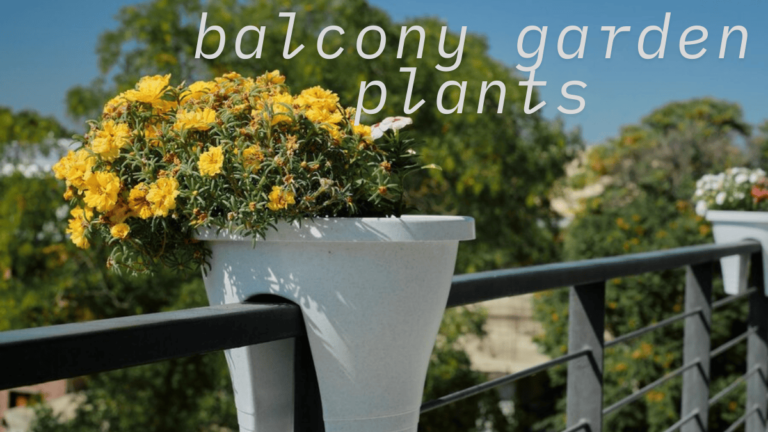
    Plants for a Balcony Garden can completely transform even the smallest outdoor space into a lush, peaceful retreat. With the right mix of greenery, scent, and structure, your balcony becomes more than just an extension of your home—it becomes a personal escape. Whether you’re dreaming of vibrant blooms, edible herbs, or calming evergreens, the perfect plants can bring daily joy, elevate your mood, and turn ordinary mornings into something extraordinary.There’s something deeply therapeutic about stepping onto a balcony filled with vibrant plants, each one designed with intention and care.

    [su_note]Recommendation

    If you’re starting a balcony garden, I highly recommend Dwarf Citrus, Thyme, and Buxus (Topiary). Dwarf citrus offers fragrant blossoms, edible fruits, and a stunning focal point in large pots. Thyme is a low-maintenance, aromatic herb that fills gaps beautifully and thrives even in tough conditions. Buxus brings timeless structure and elegance with its sculpted, evergreen form—perfect for creating clean lines and contrast in your plant layout. These three together balance beauty, function, and ease.[/su_note]

    1. Dwarf Citrus

    Dwarf Citrus

    Dwarf citrus trees are one of the most rewarding plants you can grow on a balcony. Whether it’s lemon, orange, or lime, these small trees thrive in large containers with well-draining soil. Their fragrant blossoms, aromatic leaves, and the joy of collecting fruit make them a true multi-sensory delight. I’ve found that placing them in a sunny corner where they get direct sunlight for at least 6 hours a day keeps them blooming and productive. They love consistency—regular watering, occasional fertilising, and pruning to keep their shape. Bonus: they look stunning in corten or decorative steel pots.

    2. Thyme

    Thyme is a fantastic creeping herb for tight balcony spaces. It’s therapeutic, flavourful, and works well as an underplanted layer in pots. I often use thyme along the edges of my citrus containers where it fills in the gaps and gently drapes over the edges, adding texture and that distinct aromatic scent. It thrives in dry, sunny conditions and doesn’t need much fuss—just well-draining soil and occasional watering. It’s also a great plant for beginner gardeners due to its manageable nature.

    3. Buxus (Topiary)

    Buxus, commonly used for topiary, gives your balcony a polished, architectural feel. When sculpted into cloudpruned, ball shapes and placed in a cluster, they create a sense of cleanliness, balance, and form. I love how they bring structure—especially when paired with softer, cascading plants like dichondra. Buxus requires regular watering, some shaping every few months, and does well in both sun and partial shade. They’re surprisingly low-maintenance and offer year-round greenery.

    4. Dichondra (Silver Falls)

    Dichondra is a silvery, flowing groundcover that adds elegance to any planter. Its cascading habit looks magical spilling from containers or hanging baskets. I often use it as an underplanting for topiary or citrus, where it softens the harder lines of the pot and enhances the visual layering. It prefers well-drained soil and only moderate watering, making it ideal for urban balconies that may be exposed to heat and wind.

    5. Creeping Herbs

    Beyond thyme, creeping herbs like oregano and mint offer delightful scent, edible foliage, and are great space-savers. I tuck them between larger plants in a shared container to make use of every inch. These herbs create a pleasant ambiance, especially when you brush past them and release their aromatic oils. Keep in mind that mint can spread quickly, so planting it in a separate pot might be best to avoid competition.

    6. Sculpted Topiary Forms (Wistringia, Pittosporum)

    Plants like Wistringia and Pittosporum are fantastic alternatives to traditional buxus. With their ability to be sculpted and shaped, they bring that same architectural drama with more texture and movement. I use them in clusters, often flanking both sides of a narrow balcony to give it a designed, intentional feel. They’re also very hardy, handle trimming well, and grow steadily in containers.

    7. Underplanting Combinations

    One of the best tips I’ve learned is to use underplanting creatively. Combining cascading herbs with seasonal flowers in the same pot as a feature tree or topiary creates layers of interest and color. These combinations enhance growth by creating mini-ecosystems—herbs like thyme help with soil moisture retention and even deter pests. It’s a brilliant way to maximize your space while keeping everything pleasant and productive.

    8. Cascading Petunias

    If you want something that truly pops, go with petunias. Their vibrant, blooming nature and wide range of colors turn even a plain balcony into a garden showcase. They love sun, need regular watering, and bloom like crazy all season. I use them in hanging baskets and window boxes—they pair well with underplanted herbs and do best when deadheaded regularly. They’re easy, cheerful, and make you smile every morning.

    9. Rosemary

    A classic that no balcony should be without, rosemary is a sturdy, drought-tolerant herb with a pleasant scent and sharp architectural appeal. Its upright growth habit works well in smaller spaces, and the slender stems can be trimmed into shapes or left to spill over a pot for a natural look. I keep mine near the kitchen window for easy snipping while cooking. It thrives in full sun, needs little watering, and still adds aromatic charm all year round.

    10. Artistic Pots and Planters

    This isn’t a plant, but it’s just as important. The pots you choose—especially corten, steel, or ceramic—can make a massive difference. A well-chosen container not only holds your plants but becomes part of the feature itself. I like mixing materials: matte steel for herbs, glazed ceramic for flowers, and earthy tones for trees. When matched with the right plant, your planters become living sculptures that speak to your personal style.

  • 5 Jade Plant Benefits That Will Blow Your Mind!

    5 Jade Plant Benefits That Will Blow Your Mind!

    In this article main 5 Jade plant benefits which are scientifically known as Crassula ovata, is discussed ,making it a popular choice for indoor gardening. If you’re new to the world of plants or just looking for a low-maintenance addition to your home, this succulent is an excellent option. With its thick, fleshy, oval-shaped leaves and sturdy stem, the Jade plant thrives in dry conditions and requires minimal watering. Whether you’re a seasoned gardener or a beginner, this botanical wonder from Africa is easy to care for, making it perfect for anyone looking to enjoy the beauty of plants without much effort.

    The Jade plant is often referred to as Money Plant, Dollar Plant, Lucky Plant, or even the Friendship tree. These names reflect its symbolism in various cultures, where it is believed to bring prosperity, wealth, and good fortune to its owner. It’s no surprise that this houseplant is favored by many, considering its aesthetic appeal and cultural significance.

    Jade Plant Benefits

    1. A Breath of Fresh Air: Purifying Your Indoor Space

    One of the most notable benefits of the Jade plant is its ability to improve indoor air quality. Research has shown that the air inside homes can be just as polluted, if not more so, than the air outside. Harmful chemicals like formaldehyde, acetone, benzene, and toluene are common in indoor environments, often emitted by household products such as paints, glues, and fire retardants. The Jade plant acts as a natural air purifier, absorbing these volatile organic compounds (VOCs) and helping to reduce pollution indoors.

    This air-purifying ability is crucial, as exposure to these toxins can lead to symptoms like dizziness, headache, nausea, and even Sick Building Syndrome. By placing a Jade plant in your home, you can help reduce the harmful effects of these pollutants, promoting a healthier and more comfortable living environment. With its ability to purify the air, the Jade plant is a simple yet effective solution for enhancing the quality of your indoor space.

    2. The Humidity Boost You Didn’t Know You Needed

    Another great feature of the Jade plant is its ability to help increase humidity in your home. Many of us struggle with dry indoor air, especially during the winter months when the cold air outside and the heater inside dry out the atmosphere. This can lead to issues like dry skin, flaky lips, and an itchy throat. On top of that, low humidity can make bacteria and viruses more resilient, increasing the risk of colds and flu.

    By having a Jade plant indoors, you can contribute to maintaining an ideal humidity level of 30 to 60 percent, which is optimal for both comfort and health. The Jade plant utilizes Crassulacian Acid Metabolism (CAM), which allows it to absorb moisture even in the dark, thus supporting humidity throughout the day and night. This unique trait helps to keep the air around you more balanced, making the Jade plant a great addition to any home, especially in areas with fluctuating humidity.

    3. The Feng Shui Connection: A Symbol of Prosperity and Luck

    In Feng Shui, the Jade plant is more than just a decorative piece; it is believed to bring positive energy and good luck. Its evergreen nature represents consistency and renewal, qualities that are deeply valued in Feng Shui principles. Placing the Jade plant in certain areas of your home can help attract prosperity and wealth, especially when positioned in the Southeast corner or near the entrance of your business or home.

    The Jade plant is also seen as a symbol of growth and harmony, making it an excellent choice for boosting the positive vibes in your living space. Whether you place it on your coffee table, office desk, or as a housewarming gift, the Jade plant brings both beauty and symbolic meaning to your home.

    4. A Plant That’s Easy to Care For

    One of the most appealing aspects of the Jade plant is how easy it is to maintain. As a slow-growing succulent, it doesn’t require frequent pruning, fertilizing, or repotting. Simply make sure the plant gets indirect sunlight and water it only when the soil is dry. Because it’s so drought-tolerant, you can enjoy the beauty of this plant without having to worry about it wilting from lack of care. It’s the perfect option for anyone with a busy lifestyle or those who may not have a “green thumb.”

    Another advantage of the Jade plant is its adaptability. It thrives in a range of lighting conditions, from low-light environments to areas with partial shade. This makes it a versatile addition to nearly any space, whether it’s in your living room, office, or even your bedroom.

    5. Medicinal Benefits of the Jade Plant

    In addition to its aesthetic and symbolic qualities, the Jade plant also offers some medicinal benefits. In various cultures, including Chinese and KhoiKhoi traditions, the Jade plant is used as a natural remedy for ailments like wounds, stomach upset, and even diabetes. The sap and leaf extract have been traditionally applied for their healing properties, making this plant not only a beauty enhancer but also a wellness booster.

    Though it should not replace professional medical treatment, the Jade plant has been used for stress reduction and immune boost in folk medicine. Its natural healing abilities further enhance its value, making it a multifunctional plant to have in your home.

    6. A Touch of Beauty and Style

    Visually, the Jade plant adds a touch of elegance and charm to any space. With its glossy, rich green leaves and compact size, it fits seamlessly into any home décor style, whether it’s minimalistic or more ornate. Some varieties of the Jade plant, such as the Crassula arborescens, feature flat leaves with a unique silvery blue tint, while others have stunning red edges. Its decorative appeal makes it an excellent choice for indoor décor, whether placed on a coffee table, office desk, or as part of a fairy garden arrangement.

    The Jade plant also boasts beautiful seasonal flowers, such as pink or white blossoms, which bloom in late winter or early spring, further enhancing its visual appeal.

    Conclusion

    The Jade plant, or Crassula ovata, is not just a decorative addition to your home, but a versatile and beneficial houseplant that offers a variety of advantages. From purifying indoor air and boosting humidity to bringing good luck and positive energy, the Jade plant stands out as a low-maintenance, highly rewarding plant. Whether you’re looking to improve your home’s air quality, add a touch of beauty, or even enjoy its medicinal properties, the Jade plant is a perfect fit for any living space. Its adaptability and symbolism make it a favorite among both seasoned gardeners and beginners alike.

    With its many benefits and easy care, the Jade plant is more than just a plant—it’s a companion for your home and a symbol of prosperity and health.

  • How to propagate manjula pothos (2025)

    How to propagate manjula pothos (2025)

    Introduction to Manjula Pothos:

    The world of houseplants is filled with fascinating varieties, but few plants can match the sheer beauty and allure of the Manjula Pothos. Recognized for its distinctive variegation and stunning appearance, the Manjula Pothos has gained widespread popularity as an indoor plant. Whether you’re a novice plant parent or an experienced green thumb, this captivating plant can be an excellent addition to your home or office.

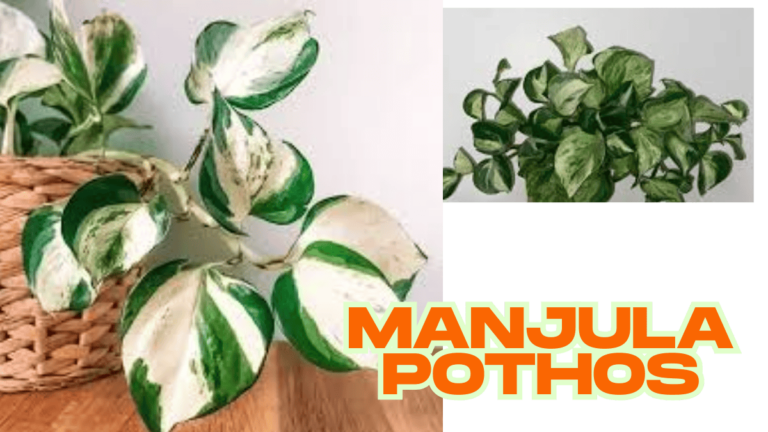
    Manjula Pothos, a variety of the pothos plant, is a hybrid that boasts marbled leaves with shades of green, white, and silver. This variety stands out for its vibrant foliage, which catches the eye in any space it inhabits. It’s important to note that while Manjula Pothos care is relatively simple, understanding the nuances of its care requirements ensures that your plant thrives and remains lush for years.

    Understanding the Origins of Manjula Pothos

    Before delving into the specifics of care and propagation, it’s worth understanding where the Manjula Pothos comes from. This particular variety is a hybrid, created by a horticulturist in the 1990s. While it shares similarities with other pothos varieties, such as the golden pothos or marble queen pothos, the Manjula Pothos is distinct in its variegation. The plant’s leaves can feature white, silver, and green tones, making it a highly sought-after specimen for both indoor decor and gardening collections.

    The popularity of this plant soared once gardeners and plant enthusiasts discovered how resilient and adaptable it is. Manjula Pothos has a more slow-growing nature compared to some pothos varieties, but its unique foliage ensures that the plant adds beauty and sophistication to any indoor space. It’s also noteworthy that the Manjula variety can grow much longer than other pothos types, making it perfect for hanging baskets or trailing from shelves and mantels.

    What Makes Manjula Pothos Special?

    One of the primary reasons Manjula Pothos has become such a sought-after plant is its stunning appearance. The plant’s heart-shaped leaves are adorned with silvery, white, and green marbling, making each leaf truly unique. The natural variegation gives the plant an artistic quality, and as it matures, its vines continue to grow long and elegant, making it a perfect addition to a plant display or as part of a room’s decor.

    Unlike other pothos varieties, the Manjula Pothos is known for its non-uniform growth pattern. This means that you might find some vines that grow with more variegation than others, or some leaves that have a more solid green hue. This variety is sometimes referred to as a “mutant” pothos due to its varied and somewhat unpredictable leaf patterns, making it a favorite among those who enjoy a bit of mystery and unpredictability in their plants.

    The Beauty and Diversity of Manjula Pothos

    The Manjula Pothos is not just visually appealing—its versatility also makes it suitable for a wide variety of indoor environments. This plant can be placed on shelves, in hanging baskets, or even allowed to trail down a tall plant stand. Its adaptability to different growing conditions is another reason for its widespread popularity. Whether you have low light or bright, indirect sunlight, the Manjula Pothos will adapt accordingly.

    The cascading vines of the plant give it an elegant and timeless appeal. As it grows, the plant can extend to several feet in length, creating a luxurious, lush appearance. Because of its distinctive look and ease of care, it is often used as a statement piece in modern home decor.

    Manjula Pothos Care: How to Keep It Thriving

    Caring for your Manjula Pothos is relatively simple, but there are specific requirements that should be met to ensure the plant thrives. Here’s an in-depth look at the key aspects of Manjula Pothos care, which will help you maintain a healthy and vibrant plant.

    Lighting Conditions

    The Manjula Pothos thrives in bright, indirect light. Although it can tolerate lower light conditions, its growth will slow, and the variegation on its leaves may become less pronounced. If the plant is kept in low light for extended periods, you might notice that the leaves lose their unique marbling and revert to a more uniform green color.

    To achieve the best results, place your Manjula Pothos near a window where it can receive filtered sunlight. Direct sunlight should be avoided, as it can scorch the delicate leaves, leading to damage and discoloration. A well-lit room with plenty of natural light but no harsh direct sun is the ideal environment for this plant.

    Watering and Humidity

    Watering is an essential component of Manjula Pothos care. Like many pothos varieties, this plant prefers to dry out slightly between waterings. Overwatering can cause root rot, which is one of the most common problems with pothos plants. To determine when your plant needs water, check the top inch of soil. If it feels dry to the touch, it’s time to water.

    During the growing season (spring and summer), you may need to water your Manjula Pothos more frequently, while in the dormant season (fall and winter), watering can be reduced. A general guideline is to water the plant every 1-2 weeks, but always check the soil first to ensure it’s dry.

    Regarding humidity, Manjula Pothos enjoys moderate humidity levels. If you live in a dry climate or your indoor air tends to be dry, you can place a humidifier near the plant to ensure it stays comfortable. Alternatively, placing the plant on a humidity tray with water and pebbles can also increase the moisture around it.

    Temperature

    The ideal temperature range for the Manjula Pothos is between 60°F and 85°F (16°C – 29°C). This temperature range is comfortable for most indoor environments, making the plant easy to care for. It’s crucial to avoid placing the plant in areas with extreme temperature fluctuations, such as near air conditioners, heaters, or drafty windows, as this can stress the plant and cause the leaves to droop or yellow.

    Soil and Fertilization

    Manjula Pothos prefers well-draining soil that prevents water from sitting around the roots. A standard indoor potting mix works well, but it’s beneficial to mix in some perlite or sand to improve drainage. You can also use a specially formulated pothos soil mix available at most garden centers.

    Fertilizing is not required for Manjula Pothos, but if you want to promote healthy growth, feeding the plant with a balanced, water-soluble fertilizer once a month during the growing season can help. Over-fertilizing, however, can lead to excess growth without the same amount of leaf variegation, so it’s important to follow the recommended application rates.

    Mutant Manjula Pothos: A Fascinating Twist

    Sometimes, Manjula Pothos plants exhibit unique mutations that give rise to more unusual and distinct leaf patterns. These plants, often referred to as “mutant Manjula Pothos,” offer even more variety and surprise in their appearance. These mutations may result in leaves that are predominantly white or feature stronger marbling. As the plant grows, the mutation may become more pronounced, adding a layer of charm and unpredictability to the plant’s overall appearance.

    While the term “mutant” might sound alarming, it’s simply a way to describe the irregular nature of some Manjula Pothos plants. These mutations are harmless and can add a touch of character and rarity to your collection. Gardeners often enjoy finding unique specimens within their pothos collections, and the mutant Manjula Pothos is no exception.

    How to Propagate Manjula Pothos

    One of the joys of owning Manjula Pothos is its ability to be easily propagated. Whether you want to grow new plants for yourself or share the joy with friends and family, propagation is straightforward.

    Stem Cuttings

    The most common way to propagate Manjula Pothos is by taking stem cuttings. Here’s a detailed guide to ensure successful propagation:

    1. Choose a Healthy Vine: Look for a healthy stem with at least 2-3 leaves and a couple of nodes (the small bumps on the vine from which roots and leaves sprout).
    2. Make a Clean Cut: Using sharp scissors or pruning shears, cut the stem just below a node.
    3. Place in Water: Place the cutting in a glass or jar of water, ensuring that the node is submerged while the leaves remain above water. Change the water every few days to keep it fresh.
    4. Wait for Roots to Grow: After a few weeks, roots will begin to form. Once the roots reach about 2-3 inches in length, the cutting is ready to be transferred into soil.
    5. Pot the Cutting: Transfer the rooted cutting into a small pot filled with well-draining soil. Water the new plant thoroughly, and place it in a location with bright, indirect light.

    Air Layering

    Another method of propagation is air layering. This technique involves rooting a portion of the stem while it is still attached to the parent plant. This can be a more advanced technique but is effective when done correctly.

    FAQs About Manjula Pothos

    Q1: Is Manjula Pothos toxic to pets? Yes, like many other pothos varieties, Manjula Pothos is toxic to pets if ingested. Keep it out of reach of cats and dogs to prevent any health risks.

    Q2: How often should I water my Manjula Pothos? Water your Manjula Pothos when the top inch of soil is dry. Typically, watering once every 1-2 weeks is sufficient, but this depends on your home’s temperature and humidity.

    Q3: Can I grow Manjula Pothos outdoors? Manjula Pothos is best suited for indoor environments, but it can be grown outdoors in tropical and subtropical regions where it’s protected from direct sun.

    Q4: Why are the leaves of my Manjula Pothos turning yellow? Yellowing leaves are usually a sign of overwatering or poor drainage. Ensure that your plant is not sitting in water and that the pot has drainage holes.


    Pros and Cons of Growing Manjula Pothos

    ProsCons
    Attractive and unique variegated leavesToxic to pets if ingested
    Easy to care for and maintainNeeds indirect light for optimal growth
    Can be propagated easilySensitive to overwatering
    Thrives in low light conditionsCan be invasive in tropical climates

    Conclusion: Why Manjula Pothos Should Be Your Next Plant Investment

    In conclusion, Manjula Pothos is an ideal addition to any home or office. Its stunning variegated leaves, ease of care, and adaptability to different environments make it a versatile and charming houseplant. Whether you’re a beginner or an experienced gardener, this plant can bring life and beauty to your space without much hassle. Its low-maintenance nature, combined with its striking aesthetic, makes the Manjula Pothos an excellent investment for anyone looking to enhance their indoor plant collection.