Tag: Organic Gardening

  • GROW HERBS in Hot Climates: Unbeatable Top 10 Tips for Growing Herbs in Hot Climates

    GROW HERBS in Hot Climates: Unbeatable Top 10 Tips for Growing Herbs in Hot Climates

    Introduction: Overcoming the Challenges of Growing Herbs in Hot Climates


    Growing herbs in hot climates can be a challenging but highly rewarding experience. Whether you’re in a Mediterranean region like Mesa, Arizona, or experiencing intense summer heat, it’s possible to grow a thriving herb garden with the right knowledge and preparation. From rosemary to mint, thyme, and basil, herbs are some of the most versatile and beneficial plants to grow, enhancing both your meals and your garden. In this article, I’ll share my experience and the top tips to help you succeed in hot climates and get the most out of your herb-growing journey.

    Why Growing Herbs in Hot Climates Can Be Tough


    In regions with hot, dry summers, and rocky soil, herbs may struggle to thrive due to the heat and lack of moisture. High temperatures can cause many plants to go into survival mode, slowing their growth and possibly leading to dormant periods. However, with the right care, even in challenging conditions, it is possible to grow good, flavorful herbs that will prosper.

    The Best Herbs to Grow in Hot Climates

    Some herbs are better suited to hot environments due to their perennial nature, meaning they return each year. Rosemary, thyme, oregano, sage, and lavender are all Mediterranean herbs that naturally thrive in hot, dry conditions. These plants require minimal water once established and can withstand the harsh sun of summer without too much difficulty.
    Annual herbs such as basil, parsley, cilantro, and chamomile can also be grown successfully in hot climates with the right care. These herbs may need more attention and water than perennials, but they still flourish in sunny, well-drained soil.

    Tips for Growing Herbs in Hot Climates

    1. Choose the Right Spot for Your Herb Garden
    The location of your herb garden is crucial to its success. Choose a spot that gets plenty of sunlight throughout the day. Most herbs, like basil and rosemary, love full sun, but you also need to provide some afternoon shade for more delicate varieties such as parsley and mint, which can struggle in intense heat.

    2. Opt for Raised Beds or Containers for Better Drainage
    If you’re struggling with soggy soil or poor drainage, a raised bed or container gardening might be the best option. Herbs like oregano, thyme, and garlic need well-drained soil to prevent root rot. A container will allow you to control soil quality and moisture levels more effectively.

    3. Amend Your Soil with Organic Matter
    In hot, dry climates, the soil can often be too dry or compacted. Adding compost or organic matter to your garden bed can improve drainage and make the soil more nutrient-rich. This also ensures that your herbs get the good nutrients they need to thrive.

    4. Water Regularly, but Avoid Overwatering
    Herbs like rosemary and sage don’t require as much water once they’re established, but in hot climates, they still need consistent moisture. However, be careful not to overwater, as this can cause roots to rot. Watering deeply but less frequently will encourage deep root growth, helping your herbs survive hot summers.

    5. Mulch to Retain Moisture and Keep Roots Cool
    Using mulch, such as straw or wood chips, around your herb plants will help retain moisture and keep the roots cool. Mulching is particularly important in hot climates where water evaporation happens quickly. It also prevents weeds from competing with your herbs for nutrients and water.

    6. Prune and Harvest Regularly to Promote Healthy Growth
    Regular pruning helps your herbs stay healthy and productive. Remove dead or damaged growth and regularly harvest leaves for cooking or drying. Pruning will also prevent your plants from becoming too leggy and encourage them to produce fresh, new growth, even during hot months.

    7. Protect Against Pests and Insects
    Insects and pests can be a common problem for herb gardeners in hot climates. The presence of pollinators like ladybugs can help control harmful insects. Use natural pest control methods, such as planting garlic, rosemary, or basil near your other herbs to deter unwanted guests.

    8. Provide Some Afternoon Shade
    While most herbs love the sun, the intense afternoon sun can be too much for some plants, especially in the peak of summer. Consider shading your herb garden during the hottest part of the day, particularly for more sensitive herbs like cilantro and parsley. This can help them continue to grow without going into dormant mode.

    9. Use Fertilizer Sparingly
    In hot climates, too much fertilizer can overwhelm your herbs and cause excessive leaf growth with little flavor. Use a balanced fertilizer sparingly, and be sure to choose one that promotes strong, healthy roots rather than just lush top growth.

    10. Plan for Seasonal Changes
    As temperatures drop in fall and winter, some herbs will go dormant, while others may struggle to survive. Be prepared by planting perennial herbs that can withstand frost and replanting annual herbs in the spring. You may also consider bringing certain herbs like mint, thyme, or parsley into a container for the cooler months.

    Additional Considerations for Growing Herbs in Hot Climates

    Companion Planting for Pest Control and Healthy Growth
    Certain herbs work well together and can help each other thrive. For example, basil planted next to tomatoes can deter pests, while rosemary can help protect carrots and lettuce from insects. Companion planting is an excellent strategy for creating a healthier, more resilient garden.

    Native Herbs to Grow in Hot Climates
    Native herbs, such as bay laurel and lemon verbena, are already adapted to the dry, hot conditions of certain regions. By choosing native varieties, you’ll reduce the need for extra care and maintenance, as these herbs are naturally suited to their environment.

    Conclusion:

    Growing herbs in hot climates may seem challenging, but with the right knowledge and care, it’s possible to create a thriving herb garden. By selecting the best plants for your climate, ensuring good soil and water practices, and managing pests naturally, you can enjoy fresh, flavorful herbs all year long. Whether you’re growing rosemary, mint, basil, or even more exotic herbs like ginger or turmeric, your herb garden can flourish with a little time, effort, and love.

    FAQs:

    What herbs thrive in hot climates?

    Some of the best herbs for hot climates include rosemary, thyme, sage, lavender, oregano, and basil. These are all Mediterranean herbs that do well in dry, sunny conditions.

    How often should I water herbs in hot climates?

    Herbs in hot climates should be watered deeply but less frequently. Ensure that the soil is moist, but not soggy, to avoid root rot. Once established, perennial herbs need less water.

    Can I grow herbs in containers in hot climates?

    Yes! Container gardening is an excellent choice for hot climates as it provides better drainage and allows you to control soil conditions more easily.

    How do I protect my herbs from pests in hot climates?

    Use natural pest control methods such as planting garlic or rosemary to deter insects. Additionally, companion planting and encouraging pollinators like ladybugs can help keep harmful pests at bay.

    Which herbs need afternoon shade in hot climates?

    Herbs like parsley, mint, and cilantro prefer some afternoon shade in hot climates, as intense afternoon sun can stress these plants.


  • Composting at Home: A Step-by-Step Guide

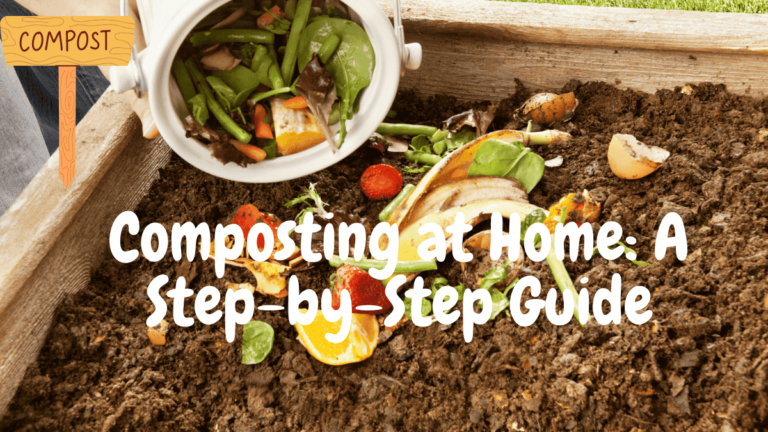
    Composting at Home: A Step-by-Step Guide

    Composting at home is a transformative practice that not only enriches your garden but also significantly reduces household waste. If you’ve yet to dive into the world of composting, you’re missing out on a sustainable way to enhance your garden’s health and contribute positively to the environment. In this comprehensive guide, we’ll explore the benefits of composting, various composting methods, and provide a detailed, step-by-step process to start composting at home.

    What is Composting?

    At its core, composting is the natural decomposition of organic materials like plant and food waste. This process is facilitated by microorganisms such as bacteria, fungi, and worms, which break down the materials with the help of oxygen. The result is compost, a nutrient-rich material that can be added to soil to promote plant growth. While you can purchase compost, creating your own from household waste is both economical and environmentally friendly.

    Why Compost at Home?

    Composting at home offers numerous benefits. It reduces the amount of waste sent to landfills, enriches your garden soil, and decreases the need for chemical fertilizers. By turning organic waste into valuable compost, you contribute to a healthier environment and a more sustainable lifestyle.

    Backyard Composting: A Simple and Effective Method

    Backyard composting is a convenient way to manage organic waste. Despite common misconceptions, composting is not complicated, nor does it have to be messy or smelly. By following the right methods, you can create a compost pile that efficiently turns waste into humus, a rich soil amendment.

    Step-by-Step Guide to Composting at Home

    Step 1: Choose the Right Location

    Select a site for your compost pile or bin that is slightly hidden but accessible. Ensure the spot has good airflow, access to water, partial shade in summer, and full sun in winter.

    Step 2: Create a Base Layer

    Start by laying twigs or straw a few inches deep at the bottom of your compost pile. This layer aids in drainage and airflow, essential for the composting process.

    Step 3: Add Compost Ingredients

    Layer your compost ingredients, alternating between moist and dry materials. Moist components include food scraps and plant waste, while dry materials consist of straw, sawdust, and ashes.

    Step 4: Incorporate Manure

    Add manure to your compost pile as a nitrogen source. This addition accelerates the composting process by activating the decomposition of organic materials.

    Step 5: Maintain Moisture

    Keep your compost pile moist by watering it occasionally. The right moisture level is crucial for the decomposition process.

    Step 6: Cover the Pile

    Covering your compost pile helps retain moisture and heat, both vital for composting. It also prevents the pile from becoming too wet from rain.

    Step 7: Turn the Pile

    Every few weeks, turn your compost pile with a pitchfork. This action aerates the pile, introducing oxygen that speeds up decomposition.

    What Can You Compost?

    Understanding what materials are suitable for composting is essential. Here’s a quick guide:

    Compostable Materials:

    • Pine needles
    • Sawdust
    • Dried leaves and grass
    • Straw
    • Eggshells
    • Shredded cardboard and paper
    • Citrus rinds
    • Coffee grounds and filters
    • Fruit and vegetable waste
    • Teabags
    • Young weeds
    • Wilted flowers

    Non-Compostable Materials:

    • Animal products (fish, bones, meat, fat)
    • Dairy products
    • Treated wood sawdust
    • Diseased plants
    • Human waste
    • Seed-bearing weeds

    Types of Composting

    There are three primary types of composting, each with its own benefits and methods:

    1. Hot Composting

    Hot composting is ideal for those who want quick results. By maintaining the right balance of air, water, nitrogen, and carbon, you can produce compost in as little as one to three months. This method is particularly effective in warm weather.

    2. Cold Composting

    Cold composting is the simplest method, requiring only the collection of biodegradable waste in a pile or bin. This method takes longer, typically a year or two, but requires less effort.

    3. Vermiculture (Worm Composting)

    Vermiculture involves using worms, specifically redworms, to break down organic waste. The worms produce nutrient-rich castings, which are excellent for soil enrichment. This method is efficient and can be done indoors or outdoors.

    Benefits of Composting at Home

    Composting offers numerous advantages, both for your garden and the environment:

    1. Waste Reduction

    Composting significantly reduces the amount of waste sent to landfills. By turning organic waste into compost, you save money on landfill fees and reduce your carbon footprint.

    2. Soil Enrichment

    Compost is a natural soil enhancer, providing essential nutrients like nitrogen, phosphorus, and potassium. It also supplies micronutrients such as iron, zinc, and copper, which are vital for plant health. By improving soil structure, compost increases water retention and reduces erosion, leading to healthier plants and more robust gardens.

    3. Environmental Preservation

    Composting reduces the need for chemical fertilizers, which can harm the environment. By recycling organic materials, composting conserves landfill space and promotes a healthier ecosystem. It also supports beneficial soil organisms, such as earthworms, which help maintain soil balance.

    4. Convenience and Versatility

    Composting is adaptable to various lifestyles and spaces. Whether you have a large backyard or a small apartment, there’s a composting method that suits your needs. Vermiculture, for example, is perfect for indoor composting, while backyard composting is ideal for those with outdoor space.

    Additional Tips for Successful Composting

    • Choose the Right Method: Select a composting method that fits your lifestyle, space, and time commitment. Consider how much compost you need and when you need it.
    • Balance Ingredients: Maintain a good balance of green (nitrogen-rich) and brown (carbon-rich) materials to ensure efficient decomposition.
    • Monitor Moisture and Temperature: Keep your compost pile moist but not waterlogged, and ensure it stays warm to facilitate microbial activity.
    • Aerate Regularly: Turning your compost pile introduces oxygen, which is crucial for the decomposition process.

    FAQs About Composting at Home

    Q: How long does it take to make compost?
    A: The time varies depending on the method. Hot composting can take 1-3 months, while cold composting may take up to 2 years.

    Q: Can I compost in an apartment?
    A: Yes, vermiculture is an excellent option for indoor composting in small spaces.

    Q: What should I do if my compost pile smells bad?
    A: A foul odor usually indicates too much moisture or a lack of oxygen. Turn the pile and add dry materials to balance it out.

    Q: Can I compost in winter?
    A: Yes, composting can continue in winter, though the process may slow down. Insulating your pile can help maintain warmth.

    Pros and Cons of Composting at Home

    ProsCons
    Reduces household wasteRequires time and effort
    Enriches garden soilMay attract pests if not managed
    Decreases need for chemical fertilizersNeeds space for a compost bin or pile
    Supports environmental sustainabilityCan be slow without proper management

    Conclusion

    Composting at home is a rewarding practice that benefits both your garden and the environment. By transforming organic waste into nutrient-rich compost, you contribute to a more sustainable lifestyle and healthier ecosystem. Whether you choose hot composting, cold composting, or vermiculture, the key is to find a method that fits your needs and space. With patience and care, you’ll soon enjoy the fruits of your labor in a thriving, vibrant garden. So, get started today and turn your waste into a valuable resource for your home and the planet.