Tag: indoor plants

  • How to propagate manjula pothos (2025)

    How to propagate manjula pothos (2025)

    Introduction to Manjula Pothos:

    The world of houseplants is filled with fascinating varieties, but few plants can match the sheer beauty and allure of the Manjula Pothos. Recognized for its distinctive variegation and stunning appearance, the Manjula Pothos has gained widespread popularity as an indoor plant. Whether you’re a novice plant parent or an experienced green thumb, this captivating plant can be an excellent addition to your home or office.

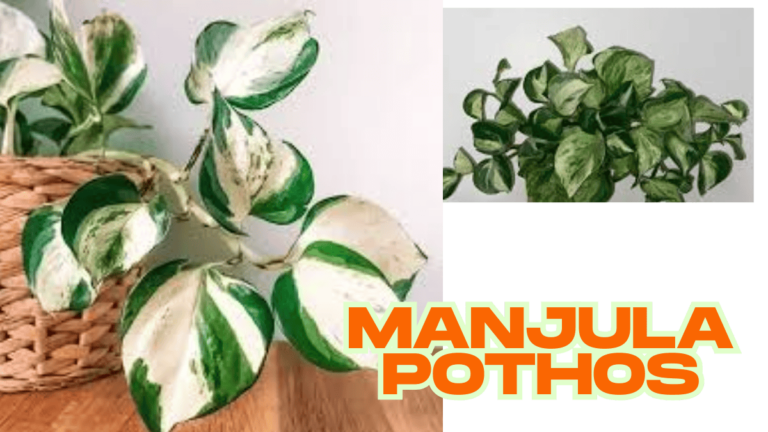
    Manjula Pothos, a variety of the pothos plant, is a hybrid that boasts marbled leaves with shades of green, white, and silver. This variety stands out for its vibrant foliage, which catches the eye in any space it inhabits. It’s important to note that while Manjula Pothos care is relatively simple, understanding the nuances of its care requirements ensures that your plant thrives and remains lush for years.

    Understanding the Origins of Manjula Pothos

    Before delving into the specifics of care and propagation, it’s worth understanding where the Manjula Pothos comes from. This particular variety is a hybrid, created by a horticulturist in the 1990s. While it shares similarities with other pothos varieties, such as the golden pothos or marble queen pothos, the Manjula Pothos is distinct in its variegation. The plant’s leaves can feature white, silver, and green tones, making it a highly sought-after specimen for both indoor decor and gardening collections.

    The popularity of this plant soared once gardeners and plant enthusiasts discovered how resilient and adaptable it is. Manjula Pothos has a more slow-growing nature compared to some pothos varieties, but its unique foliage ensures that the plant adds beauty and sophistication to any indoor space. It’s also noteworthy that the Manjula variety can grow much longer than other pothos types, making it perfect for hanging baskets or trailing from shelves and mantels.

    What Makes Manjula Pothos Special?

    One of the primary reasons Manjula Pothos has become such a sought-after plant is its stunning appearance. The plant’s heart-shaped leaves are adorned with silvery, white, and green marbling, making each leaf truly unique. The natural variegation gives the plant an artistic quality, and as it matures, its vines continue to grow long and elegant, making it a perfect addition to a plant display or as part of a room’s decor.

    Unlike other pothos varieties, the Manjula Pothos is known for its non-uniform growth pattern. This means that you might find some vines that grow with more variegation than others, or some leaves that have a more solid green hue. This variety is sometimes referred to as a “mutant” pothos due to its varied and somewhat unpredictable leaf patterns, making it a favorite among those who enjoy a bit of mystery and unpredictability in their plants.

    The Beauty and Diversity of Manjula Pothos

    The Manjula Pothos is not just visually appealing—its versatility also makes it suitable for a wide variety of indoor environments. This plant can be placed on shelves, in hanging baskets, or even allowed to trail down a tall plant stand. Its adaptability to different growing conditions is another reason for its widespread popularity. Whether you have low light or bright, indirect sunlight, the Manjula Pothos will adapt accordingly.

    The cascading vines of the plant give it an elegant and timeless appeal. As it grows, the plant can extend to several feet in length, creating a luxurious, lush appearance. Because of its distinctive look and ease of care, it is often used as a statement piece in modern home decor.

    Manjula Pothos Care: How to Keep It Thriving

    Caring for your Manjula Pothos is relatively simple, but there are specific requirements that should be met to ensure the plant thrives. Here’s an in-depth look at the key aspects of Manjula Pothos care, which will help you maintain a healthy and vibrant plant.

    Lighting Conditions

    The Manjula Pothos thrives in bright, indirect light. Although it can tolerate lower light conditions, its growth will slow, and the variegation on its leaves may become less pronounced. If the plant is kept in low light for extended periods, you might notice that the leaves lose their unique marbling and revert to a more uniform green color.

    To achieve the best results, place your Manjula Pothos near a window where it can receive filtered sunlight. Direct sunlight should be avoided, as it can scorch the delicate leaves, leading to damage and discoloration. A well-lit room with plenty of natural light but no harsh direct sun is the ideal environment for this plant.

    Watering and Humidity

    Watering is an essential component of Manjula Pothos care. Like many pothos varieties, this plant prefers to dry out slightly between waterings. Overwatering can cause root rot, which is one of the most common problems with pothos plants. To determine when your plant needs water, check the top inch of soil. If it feels dry to the touch, it’s time to water.

    During the growing season (spring and summer), you may need to water your Manjula Pothos more frequently, while in the dormant season (fall and winter), watering can be reduced. A general guideline is to water the plant every 1-2 weeks, but always check the soil first to ensure it’s dry.

    Regarding humidity, Manjula Pothos enjoys moderate humidity levels. If you live in a dry climate or your indoor air tends to be dry, you can place a humidifier near the plant to ensure it stays comfortable. Alternatively, placing the plant on a humidity tray with water and pebbles can also increase the moisture around it.

    Temperature

    The ideal temperature range for the Manjula Pothos is between 60°F and 85°F (16°C – 29°C). This temperature range is comfortable for most indoor environments, making the plant easy to care for. It’s crucial to avoid placing the plant in areas with extreme temperature fluctuations, such as near air conditioners, heaters, or drafty windows, as this can stress the plant and cause the leaves to droop or yellow.

    Soil and Fertilization

    Manjula Pothos prefers well-draining soil that prevents water from sitting around the roots. A standard indoor potting mix works well, but it’s beneficial to mix in some perlite or sand to improve drainage. You can also use a specially formulated pothos soil mix available at most garden centers.

    Fertilizing is not required for Manjula Pothos, but if you want to promote healthy growth, feeding the plant with a balanced, water-soluble fertilizer once a month during the growing season can help. Over-fertilizing, however, can lead to excess growth without the same amount of leaf variegation, so it’s important to follow the recommended application rates.

    Mutant Manjula Pothos: A Fascinating Twist

    Sometimes, Manjula Pothos plants exhibit unique mutations that give rise to more unusual and distinct leaf patterns. These plants, often referred to as “mutant Manjula Pothos,” offer even more variety and surprise in their appearance. These mutations may result in leaves that are predominantly white or feature stronger marbling. As the plant grows, the mutation may become more pronounced, adding a layer of charm and unpredictability to the plant’s overall appearance.

    While the term “mutant” might sound alarming, it’s simply a way to describe the irregular nature of some Manjula Pothos plants. These mutations are harmless and can add a touch of character and rarity to your collection. Gardeners often enjoy finding unique specimens within their pothos collections, and the mutant Manjula Pothos is no exception.

    How to Propagate Manjula Pothos

    One of the joys of owning Manjula Pothos is its ability to be easily propagated. Whether you want to grow new plants for yourself or share the joy with friends and family, propagation is straightforward.

    Stem Cuttings

    The most common way to propagate Manjula Pothos is by taking stem cuttings. Here’s a detailed guide to ensure successful propagation:

    1. Choose a Healthy Vine: Look for a healthy stem with at least 2-3 leaves and a couple of nodes (the small bumps on the vine from which roots and leaves sprout).
    2. Make a Clean Cut: Using sharp scissors or pruning shears, cut the stem just below a node.
    3. Place in Water: Place the cutting in a glass or jar of water, ensuring that the node is submerged while the leaves remain above water. Change the water every few days to keep it fresh.
    4. Wait for Roots to Grow: After a few weeks, roots will begin to form. Once the roots reach about 2-3 inches in length, the cutting is ready to be transferred into soil.
    5. Pot the Cutting: Transfer the rooted cutting into a small pot filled with well-draining soil. Water the new plant thoroughly, and place it in a location with bright, indirect light.

    Air Layering

    Another method of propagation is air layering. This technique involves rooting a portion of the stem while it is still attached to the parent plant. This can be a more advanced technique but is effective when done correctly.

    FAQs About Manjula Pothos

    Q1: Is Manjula Pothos toxic to pets? Yes, like many other pothos varieties, Manjula Pothos is toxic to pets if ingested. Keep it out of reach of cats and dogs to prevent any health risks.

    Q2: How often should I water my Manjula Pothos? Water your Manjula Pothos when the top inch of soil is dry. Typically, watering once every 1-2 weeks is sufficient, but this depends on your home’s temperature and humidity.

    Q3: Can I grow Manjula Pothos outdoors? Manjula Pothos is best suited for indoor environments, but it can be grown outdoors in tropical and subtropical regions where it’s protected from direct sun.

    Q4: Why are the leaves of my Manjula Pothos turning yellow? Yellowing leaves are usually a sign of overwatering or poor drainage. Ensure that your plant is not sitting in water and that the pot has drainage holes.


    Pros and Cons of Growing Manjula Pothos

    ProsCons
    Attractive and unique variegated leavesToxic to pets if ingested
    Easy to care for and maintainNeeds indirect light for optimal growth
    Can be propagated easilySensitive to overwatering
    Thrives in low light conditionsCan be invasive in tropical climates

    Conclusion: Why Manjula Pothos Should Be Your Next Plant Investment

    In conclusion, Manjula Pothos is an ideal addition to any home or office. Its stunning variegated leaves, ease of care, and adaptability to different environments make it a versatile and charming houseplant. Whether you’re a beginner or an experienced gardener, this plant can bring life and beauty to your space without much hassle. Its low-maintenance nature, combined with its striking aesthetic, makes the Manjula Pothos an excellent investment for anyone looking to enhance their indoor plant collection.

  • How to Care for african violet (2025)

    How to Care for african violet (2025)

    African violet are beloved houseplants that brighten any space with their colorful blooms and lush green foliage. Known for their compact size and easy-care nature, they can thrive indoors with the right care. Whether you’re a seasoned plant enthusiast or a newcomer to the world of houseplants, learning how to care for African violet is essential for ensuring they grow strong, healthy, and bloom beautifully year-round. In this guide, we’ll delve into the vital aspects of African violet care, from lighting and watering to soil and temperature preferences.

    Understanding African Violets

    Native to tropical regions of East Africa, African violets (Saintpaulia) are hardy plants that thrive in warm, humid conditions. They are known for their vibrant flowers that can range from purple to pink, blue, and even white. These plants are often seen in homes and offices because of their low-maintenance needs and long-lasting blossoms. However, like all plants, African violets require specific care to flourish. This article will provide comprehensive guidance on everything from soil requirements to common pests that may affect them.

    Light Requirements for African Violets

    The first thing to consider when caring for African violets is light. These plants thrive in moderate light, but direct sunlight can be harmful. Too much direct sunlight will burn the delicate leaves, causing them to yellow and wilt. On the other hand, insufficient light will result in poor growth and few flowers.

    A bright, indirect light source is ideal for African violets. Place them near windows with sheer curtains, or use grow lights designed for indoor plants to give them the light they need without the risk of sunburn. Keep in mind that African violets need about 12-14 hours of light per day to bloom properly. If you live in a region with long winters, a grow light will be particularly beneficial.

    Watering African Violets

    Watering is one of the most important aspects of African violet care. These plants require consistent moisture but are prone to root rot if overwatered. The key is to maintain the right balance. It’s best to water African violets from the bottom, as this helps prevent water from sitting on the leaves, which can cause them to rot.

    To water properly, place the pot in a shallow tray filled with water for 10-15 minutes. Let the plant absorb the water through the drainage holes at the bottom of the pot. Afterward, discard any excess water that remains in the tray. It’s essential to ensure that the plant is not sitting in water for too long, as this can lead to waterlogged soil and root rot.

    When watering, always use room temperature water. Cold water can shock the plant, and hot water can cause the roots to burn. Watering once every 5-7 days is generally sufficient, but always check the soil’s moisture level by sticking your finger about an inch into the soil. If it feels dry, it’s time to water.

    Soil and Potting for African Violets

    African violets prefer a light, well-draining soil mix that allows water to move freely without becoming soggy. Specially formulated African violet potting mixes are available, but if you prefer to make your own, a good mixture includes equal parts of peat moss, perlite, and vermiculite. This combination ensures that the soil is airy and retains just the right amount of moisture.

    When selecting a pot, choose one with good drainage. African violets do not like to sit in stagnant water, so it’s essential to ensure that excess moisture can escape. A small, shallow pot works best for African violets, as their roots are relatively compact.

    Temperature and Humidity

    African violets thrive in temperatures between 65-75°F (18-24°C), making them perfect for indoor environments. These plants are sensitive to sudden temperature fluctuations, so avoid placing them near drafty windows, air conditioning units, or heating vents. Additionally, they prefer humidity levels of 50% or higher. If you live in a dry climate, you may want to use a humidity tray or a humidifier to create a more suitable environment.

    Fertilizing African Violets

    To encourage healthy growth and vibrant blooms, regular feeding is essential. African violets benefit from a balanced, water-soluble fertilizer that is high in phosphorus. You can use a special African violet fertilizer or any balanced fertilizer diluted to about one-quarter of the recommended strength. Fertilize every 4-6 weeks during the growing season (spring and summer) and reduce feeding in the fall and winter when the plant is dormant.

    It’s important not to over-fertilize, as this can lead to leggy growth and reduced flowering. If the leaves begin to turn yellow or the plant’s growth slows, this may be a sign that it’s not getting enough nutrients.

    Common Problems and Solutions

    Even though African violets are relatively low-maintenance, they can still face a few challenges. Common issues include:

    • Yellowing Leaves: This could indicate overwatering or inadequate light. Adjust watering habits and ensure the plant is getting enough light.
    • Leggy Growth: If your African violet is growing tall with few flowers, it may be lacking light. Consider moving it to a brighter location.
    • Pests: Common pests that affect African violets include aphids, mealybugs, and spider mites. If you notice any signs of pests, treat the plant with an insecticidal soap or a mild, homemade solution of water and dish soap.

    Are African Violets Poisonous to Cats?

    This is a common question among pet owners who are concerned about the safety of their plants. Fortunately, African violets are non-toxic to cats and other pets. Unlike some plants that can cause harm if ingested, African violets are safe to have around your furry friends. However, it’s always a good idea to keep plants out of reach of pets to avoid any potential chewing.

    How to Propagate African Violets

    Propagating African violets is a rewarding and relatively simple process. The best way to propagate African violets is through leaf cuttings. To do this, select a healthy, mature leaf and cut it at the base using a clean, sharp knife. Place the leaf in a glass of water, ensuring that only the base of the leaf is submerged. After a few weeks, tiny roots will begin to form. Once the roots are long enough, you can transplant the leaf cutting into a small pot with fresh African violet soil.

    FAQs About African Violet Care

    1. How often should I water my African violet?

    Water your African violet when the top inch of soil feels dry. This is usually about once every 5-7 days, but it can vary depending on your environment.

    2. Can African violets be grown in low light?

    While African violets prefer moderate to bright indirect light, they can survive in low light conditions. However, they may not bloom as frequently or as vibrantly.

    3. Why are my African violet leaves turning yellow?

    Yellowing leaves are often a sign of overwatering, insufficient light, or a lack of nutrients. Check your watering schedule, light levels, and consider fertilizing if necessary.

    4. Can I use regular potting soil for African violets?

    It’s best to use a soil mix designed for African violets, as it is light and well-draining. Regular potting soil can become too heavy and lead to poor root health.

    5. Are African violets safe for pets?

    Yes, African violets are non-toxic to cats and other pets, making them a safe option for households with animals.

    Pros and Cons of African Violets

    ProsCons
    Non-toxic to petsRequire specific care (light, humidity)
    Easy to propagateCan be susceptible to pests
    Compact size, perfect for indoor spacesNeed consistent watering practices
    Long-lasting bloomsSensitive to temperature changes

    Conclusion

    Caring for African violets may seem like a delicate task, but with the right knowledge and attention, these beautiful plants can thrive in your home for years to come. By providing the correct light, water, soil, and temperature, you will enjoy their vibrant flowers season after season. Additionally, with proper care, African violets can easily be propagated, allowing you to grow even more of these charming plants.

    Whether you’re a plant enthusiast or just beginning your gardening journey, African violets are a fantastic choice. Their beauty, ease of care, and pet-friendly nature make them a perfect addition to any home. With the information provided in this guide, you’re now ready to ensure your African violets receive the care they deserve.

  • Transforming Prayer Plant Care: Cultivating Lush Foliage with Ease (2025)

    Transforming Prayer Plant Care: Cultivating Lush Foliage with Ease (2025)

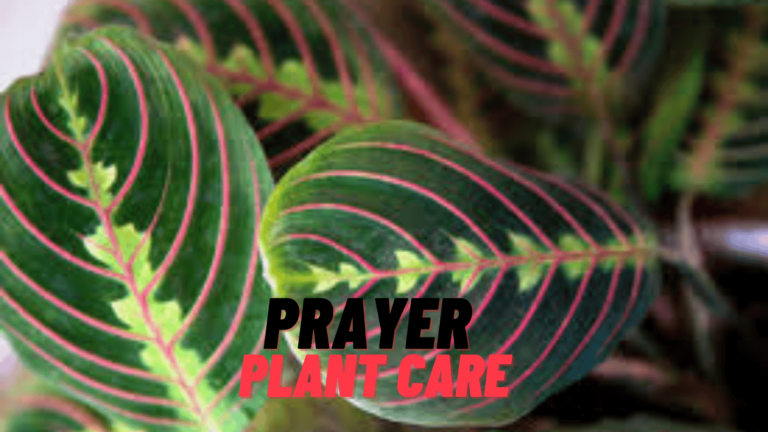
    The prayer plant (Maranta leuconeura) is a captivating species from the family Marantaceae, renowned for its striking foliage and remarkable ability to fold its leaves upwards at night, mimicking hands in prayer. In this comprehensive guide, we will explore the essential aspects of prayer plant care, including watering, lighting, humidity, soil, temperature, fertilization, pruning, propagation, and pest management.This unique characteristic is called nyctinasty, a form of circadian rhythm that allows the plant to protect itself from excess moisture and light during nighttime. The leaves themselves are a work of art, with intricate patterns that often display various shades of green, red, and purple depending on the variety.

    However, this beauty comes with specific care requirements. By understanding the plant’s natural habitat and replicating it as closely as possible in your home, you can enjoy a healthy, thriving prayer plant.

    Lighting: How to Get It Right

    Lighting

    Prayer plants are adapted to grow under the canopy of taller trees in the wild, meaning they naturally experience dappled sunlight. In your home, it’s crucial to mimic this environment by placing your plant in a spot that gets bright, indirect light. Direct sunlight can scorch the delicate leaves, causing them to develop brown spots or edges.

    The best location for your prayer plant is near a north or east-facing window, where it will get soft morning sunlight. If you’re unsure, you can always test the light levels by holding your hand above the plant—if the shadow is clear and defined, the light is too strong, and you may need to move the plant further away.

    Alternatively, if your home doesn’t have ample natural light, you can use a grow light to provide the necessary intensity without the risk of burning the leaves. Ensure the light is positioned a few feet above the plant to prevent damage.

    Watering: The Key to Health

    Watering is one of the most critical aspects of prayer plant care, and getting it right is essential for the overall health of your plant. Prayer plants require consistent moisture but should never sit in water logged soil, as this can lead to root rot.

    • Frequency of Watering: Water the plant when the top 1-2 inches of soil feel dry. During warmer months, your prayer plant may need more frequent watering, perhaps once a week. In the colder months, it may need less frequent watering as the plant’s growth slows down.
    • Watering Technique: Always water evenly around the base of the plant, ensuring that the entire root system receives moisture. Ensure the pot has drainage holes, and allow any excess water to drain out. Never let your prayer plant sit in standing water.
    • Water Quality: Tap water, especially hard water that contains high levels of minerals like fluoride and chlorine, can harm the plant over time. Distilled water or rainwater is the best choice for watering. If you must use tap water, let it sit out overnight to allow the chemicals to dissipate.
    • Signs of Overwatering or Underwatering: Overwatering leads to yellowing leaves and mushy stems, while underwatering will cause the leaves to wilt, curl, and become crispy, particularly at the edges.

    Humidity: A Crucial Element

    Prayer plants are native to the humid environments of Brazil’s tropical forests, where the humidity levels can reach 60% or higher. To replicate these conditions indoors, it’s essential to keep the air around your plant moist.

    • Ideal Humidity: Prayer plants prefer a humidity level between 50% to 60%. Anything below 40% can lead to brown tips on the leaves and general poor health.
    • How to Increase Humidity: If your indoor air is dry, especially during the winter months when heating systems dry out the air, consider using a humidifier to boost moisture levels. Another simple trick is to place a pebble tray beneath the plant’s pot. Fill the tray with water and small stones, ensuring the pot itself does not sit in the water. As the water evaporates, it will increase the humidity around the plant.
    • Misting: While misting can provide temporary relief, it’s not a long-term solution. Misting your prayer plant a few times a week can help, but it should be done early in the day to avoid fungal issues.

    Soil: Perfecting the Base

    The soil you use for your prayer plant is crucial for proper root development and moisture retention. You’ll want a soil mix that is well-draining yet retains enough moisture to keep the roots hydrated without becoming waterlogged.

    • Ideal Soil Type: A light, well-draining mix is key. The best mixture for a prayer plant includes:
      • Two parts sphagnum peat moss
      • One part perlite or vermiculite
      • One part well-draining potting soil or coconut coir

    This blend allows for proper aeration around the roots, preventing the dreaded root rot while providing enough moisture retention for the plant’s growth.

    • Repotting: Prayer plants do not require frequent repotting. However, every 1 to 2 years, when the plant becomes root-bound or the soil begins to deplete in nutrients, it’s time to move the plant to a slightly larger pot. When repotting, gently loosen the roots and avoid disturbing them too much to minimize stress.

    Temperature: Ideal Conditions for Growth

    Prayer plants prefer warm environments, so you should aim to keep them in a room with temperatures between 65°F and 80°F (18°C to 27°C). They are sensitive to temperature fluctuations and drafts, which can cause leaf curling and stress.

    • Avoid Cold Drafts: Keep your prayer plant away from air conditioners, heating vents, or windows that open frequently, as these temperature fluctuations can harm the plant.
    • Seasonal Adjustments: In colder months, the plant’s growth may slow down due to lower light levels and cooler temperatures, so reduce the watering frequency accordingly.

    Fertilizing: Boosting Growth

    Prayer plants grow actively in the spring and summer months, and during this time, they benefit from regular fertilization. Fertilization encourages healthy, vibrant foliage.

    • Type of Fertilizer: Use a balanced, water-soluble fertilizer with equal proportions of nitrogen (N), phosphorus (P), and potassium (K) to support the plant’s overall health.
    • Application Frequency: During the growing season (spring through summer), fertilize your prayer plant once every 2 weeks. In the fall and winter, reduce fertilization to once a month, as the plant’s growth slows significantly.
    • Signs of Over-fertilization: Over-fertilizing can cause the leaves to become scorched or have burnt edges. If you notice this, reduce the frequency of fertilizing and flush the soil with clean water to remove excess nutrients.

    Pest and Disease Management

    While prayer plants are relatively pest-resistant, they can occasionally attract spider mites, mealybugs, and aphids. Regularly inspect the undersides of leaves for signs of pests.

    • Dealing with Pests: Treat infestations promptly with neem oil or insecticidal soap. For mild infestations, wiping the leaves with a damp cloth can help remove pests.
    • Diseases: Root rot is a major concern for prayer plants, especially when the plant is overwatered or the soil does not drain well. To prevent root rot, always ensure proper drainage, and avoid allowing water to stagnate at the bottom of the pot.

    Pros and Cons of Growing Prayer Plants

    ProsCons
    Attractive Foliage: Prayer plants are known for their striking, patterned leaves that add an elegant and exotic touch to any space.Humidity Sensitivity: Prayer plants require high humidity levels to thrive, which can be challenging to maintain, especially in dry climates or during winter.
    Non-Toxic: These plants are safe for pets and humans, making them an excellent choice for households with animals or small children.Sensitive to Overwatering: Prayer plants are highly susceptible to root rot if they are overwatered, requiring careful monitoring of watering habits.
    Unique Leaf Movement: The leaves fold up at night, resembling hands in prayer, adding an intriguing, dynamic aspect to their care and appearance.Requires Frequent Attention: Due to their specific care needs (water, light, humidity), prayer plants can require more attention than other houseplants.
    Low Light Tolerance: Prayer plants can grow well in medium to low-light environments, making them versatile for various indoor settings.Pest-Prone: While generally resistant, prayer plants can attract common pests like spider mites, mealybugs, and aphids, which can be a hassle to manage.
    Aesthetic Appeal: With their colorful and patterned foliage, prayer plants enhance the décor of any room, becoming a statement piece.Slow Growth: These plants can grow slowly, particularly in low light conditions or when not given optimal care, which can be frustrating for some plant enthusiasts.
    Air Purification: Like many indoor plants, prayer plants help purify the air, improving the overall environment in your home.Prone to Leaf Damage: Prayer plants are sensitive to extreme temperature fluctuations and drafts, which can cause their leaves to curl or discolor.

    Conclusion: A Beautiful Journey of Care

    Caring for a prayer plant may seem like a lot of effort, but it’s a highly rewarding experience. By paying attention to its needs for indirect light, consistent watering, high humidity, and well-draining soil, your prayer plant can flourish and add beauty to your home for years to come. Remember, each plant is unique, so observe your plant’s individual needs and adjust care routines accordingly.

  • Ultimate Spider Plant Care Guide

    Ultimate Spider Plant Care Guide

    Spider plants are among the most beloved houseplants, adored for their low maintenance, attractive foliage, and easy-going nature. Whether you’re a beginner or a seasoned plant enthusiast, caring for a spider plant is both rewarding and simple. Known for their ability to thrive on minimal attention, these plants are perfect for busy individuals or anyone who might struggle to remember plant care routines. In this detailed guide, we’ll cover everything you need to know about spider plant care, ensuring your plant thrives in your home or office.

    Why Spider Plants are So Popular

    Spider plants, or Chlorophytum comosum, are well-known for their charming appearance and health benefits. They are versatile, adaptable, and resilient, making them an excellent choice for nearly any space. Unlike many plants that require consistent pampering, spider plants thrive on neglect. They are known for being beginner-friendly, easy to propagate, and safe for pets, making them a must-have for any plant lover.

    But what exactly makes them stand out among other indoor plants?

    • Low-maintenance: These plants don’t need constant care. They require occasional watering, light, and a bit of fertilizing during their growing season. That’s about it.
    • Air-purifying qualities: Spider plants have been shown to remove harmful toxins from indoor air, improving your environment.
    • Pet-friendly: Unlike many popular houseplants, spider plants are non-toxic to cats, dogs, and other pets.

    In this article, we’ll dive into spider plant care, covering everything from watering and light needs to propagation tips and dealing with pests. By the end of this guide, you’ll be a spider plant expert!

    Spider Plant Care: Key Factors to Keep in Mind

    Let’s explore the essential components of caring for your spider plant, ensuring it remains healthy and vibrant.

    1. Watering Your Spider Plant

    Spider plants are relatively tolerant when it comes to watering. However, they do prefer their soil to remain slightly moist. Here’s a quick breakdown of how to water your spider plant properly:

    • Frequency: During the warmer months (spring and summer), water your spider plant about once a week. In the cooler months (fall and winter), you can reduce the watering frequency.
    • How to Check: Stick your finger about two inches into the soil. If it feels dry, it’s time to water. Avoid overwatering, as it can lead to root rot.
    • Water Quality: If possible, use distilled or rainwater for your plant. Spider plants are sensitive to fluoride and chlorine in tap water, which can cause browning on the tips of the leaves.

    Pro Tip: Keep a consistent watering schedule but avoid letting the plant sit in water, as this can cause root rot.

    2. Lighting Conditions for Spider Plants

    While spider plants are forgiving when it comes to lighting, they do thrive best in bright, indirect light. Here’s what you need to know:

    • Ideal Light: Place your spider plant near a window where it receives indirect light. Avoid direct sunlight, as this can scorch the leaves.
    • Low Light: Although spider plants tolerate low light conditions, they will grow slower and may not produce as many plantlets.
    • Signs of Too Much Sun: If the tips of the leaves start to turn brown, your plant might be getting too much direct sunlight.

    3. Temperature and Humidity Requirements

    Spider plants are tropical plants, so they prefer warmer temperatures and a moderate level of humidity. Here’s the lowdown:

    • Ideal Temperature: Spider plants thrive in temperatures between 60°F and 75°F (16°C to 24°C). Protect them from drafts and avoid placing them in areas with temperatures below 50°F (10°C).
    • Humidity Needs: These plants enjoy moderate humidity levels, ideally between 40% and 60%. If your home is dry, consider placing your spider plant on a humidifier tray or grouping it with other plants to increase the humidity.

    4. Fertilization: Do Spider Plants Need Extra Nutrients?

    Spider plants do benefit from occasional feeding, but they don’t require a lot of fertilizer. Here’s how to go about it:

    • Frequency: Fertilize your spider plant once a month during its active growing period (spring and summer).
    • Type of Fertilizer: Use a balanced liquid fertilizer or an all-purpose plant food. Be careful not to over-fertilize, as this can result in brown tips and weak growth.
    • Winter Dormancy: During the colder months, when your plant enters a semi-dormant state, avoid fertilizing.

    5. Pruning and Maintenance

    Although spider plants are low-maintenance, a little bit of attention can go a long way in keeping your plant healthy and looking its best. Here’s how to prune and maintain it:

    • Remove Dead Leaves: As your spider plant grows, it’s normal for some leaves to turn brown or yellow. Simply snip them off at the base.
    • Trimming Plantlets: If you notice a lot of “spidettes” (the small offshoots of the plant), you can trim them to redirect the plant’s energy to the main plant.

    Propagation: How to Grow More Spider Plants

    One of the best things about spider plants is how easy they are to propagate. If you’re looking to expand your collection or share the love, here’s how you can do it:

    1. When to Propagate: Wait until the spidettes have long roots (about 1-2 inches) before cutting them off.
    2. Potting the Plantlets: Place the rooted spidettes in well-draining soil and keep the soil moist (but not soggy) until the plant becomes established.
    3. Alternative Method (without roots): If the plantlets haven’t formed roots, place them in a small pot with moist soil. Once they develop roots, cut them off and repot them.

    Common Issues with Spider Plants and How to Fix Them

    Despite their hardiness, spider plants can face a few common problems. Below, we address some of these issues and offer solutions:

    ProblemSolution
    Browning Leaf TipsOften caused by over-fertilizing, fluoride, or too much sun. Move plant to indirect light and use filtered water.
    Leggy GrowthCut back plantlets to redirect energy to the main plant or repot if root-bound.
    Yellowing LeavesMay indicate overwatering. Ensure good drainage and water only when soil is dry.
    Pests (Aphids, Mites)Rinse the plant with water, or use neem oil or insecticidal soap for severe infestations.

    FAQs about Spider Plant Care

    Q1: How often should I water my spider plant?
    A1: Water your spider plant once a week during warmer months. In cooler months, reduce watering but keep the soil moist.

    Q2: Can spider plants grow in low light?
    A2: Yes, spider plants tolerate low light but grow better with indirect light. Avoid direct sunlight, which can burn the leaves.

    Q3: What’s the best way to propagate a spider plant?
    A3: Cut the plantlets once they have developed roots and pot them in moist soil. Alternatively, place the plantlet in a new pot to allow roots to grow before snipping.

    Q4: Are spider plants safe for pets?
    A4: Yes, spider plants are non-toxic to pets, making them a great choice for households with animals.

    Conclusion: A Plant That’s Here to Stay

    Spider plants continue to be a favorite in homes and offices for good reason. Their easy-going nature, coupled with their air-purifying qualities, makes them the perfect plant for any space. With simple care tips like occasional watering, avoiding direct sunlight, and occasional pruning, your spider plant can thrive for years.

    Whether you’re a new plant owner or a seasoned gardener, the spider plant offers a wonderful opportunity to add greenery and life to your environment. The best part? You don’t have to be an expert to keep it thriving. Just follow the tips in this guide, and your spider plant will reward you with lush, vibrant foliage and even new plantlets to propagate. Happy planting!

  • Money Tree Plant How to Care: Complete Guide

    Money Tree Plant How to Care: Complete Guide

    The Money Tree plant, also known as Pachira aquatica, is an exquisite indoor plant that has become a popular choice for adding a tropical touch to homes and offices. Its unique braided trunk and glossy green leaves give it a palm-like appearance, making it a visually striking addition to any space. Native to Central and South America, the Money Tree is also widely recognized in East Asian cultures, particularly in Taiwan, where it is believed to bring good luck and positive energy according to Feng Shui principles.

    In this guide, we’ll walk you through everything you need to know about money tree plant how to care, from watering and sunlight needs to pruning and propagation. Whether you’re a seasoned plant enthusiast or a beginner, this easy-to-follow guide will help your Money Tree thrive.

    1. Introduction to the Money Tree

    The Money Tree is more than just a houseplant—it’s a symbol of good fortune, positive energy, and prosperity. Whether you’re interested in its Feng Shui benefits or its ability to add greenery to your home, the Money Tree is sure to bring charm and vibrance to any room. With its fast growth rate (up to 24 inches a year) and easy-to-care-for nature, it’s an excellent choice for both beginner gardeners and experienced plant lovers alike.

    As the plant matures, it can reach impressive heights of 6 to 8 feet. It’s a forgiving plant that thrives with minimal care, as long as you meet its basic requirements. Now, let’s dive into the specifics of money tree plant how to care and ensure it remains healthy and happy.

    2. Why Should You Care for a Money Tree?

    Taking care of your Money Tree plant isn’t just about having a pretty plant in your home. It’s about providing the right conditions for it to flourish and bring positive energy into your life. Many people believe that having a Money Tree in their home can help attract wealth and success, as it’s often seen as a symbol of good fortune. Additionally, this plant is known for its stress-relieving qualities, making it a great addition to any room where relaxation and calmness are essential.

    Health Benefits:

    • Stress Reduction: Spending time with plants, including Money Trees, has been linked to lowered stress levels.
    • Air Purification: Like many indoor plants, the Money Tree helps purify the air by absorbing carbon dioxide and releasing oxygen.

    3. Essential Money Tree Care Tips

    Proper care is essential to keeping your Money Tree healthy. Here are the main care requirements for this resilient plant:

    Light Requirements

    Money Trees thrive in bright, indirect sunlight. This helps the plant grow strong and healthy. However, too much direct sunlight can scorch the leaves and cause them to turn yellow or brown. Place your Money Tree near a window with filtered light or use grow lights if natural sunlight is insufficient.

    If you have limited light, the Money Tree can tolerate medium light, but its growth may slow down.

    Soil Preferences

    A Money Tree needs a well-draining potting mix. The ideal mix should be peat-moss-based or a cactus soil mix to provide excellent drainage. This helps avoid the risk of root rot, a common problem when the roots are left sitting in water. You can also add perlite to the mix to further improve drainage.

    Watering Guidelines

    Watering is one of the most crucial aspects of caring for your Money Tree. These plants prefer to be kept evenly moist, but not soggy. You should water when the top inch of the soil feels dry to the touch. During the growing season (spring and summer), you’ll need to water more frequently. In the fall and winter, reduce watering to avoid overwatering.

    Always ensure that the pot has drainage holes to prevent water from collecting at the bottom.

    Temperature and Humidity

    Money Trees thrive in temperatures between 65°F and 75°F (18°C to 24°C). They should be kept away from drafts, hot air vents, and cold windows. In terms of humidity, Money Trees appreciate moisture but can tolerate average household humidity levels. If the air in your home is very dry, you can increase humidity by placing your plant on a pebble tray with water or using a room humidifier.

    Fertilization Needs

    To encourage strong growth, fertilize your Money Tree once a month during the growing season in spring and summer. A balanced, general-purpose liquid fertilizer diluted to half strength works well. Avoid fertilizing in the fall and winter, as the plant’s growth slows during these months.

    4. How to Braid a Money Tree

    The braided trunk of the Money Tree is one of its most distinguishing features. Here’s how you can create a beautiful braided trunk:

    1. Select Healthy Stems: Choose young, flexible stems that are at least 12 inches long.
    2. Loosely Braid the Stems: Carefully braid the stems together without pulling too tightly, as this could harm the plant.
    3. Tie the End: Use a twist tie or string to secure the braid.
    4. Repot the Tree: After braiding, repot the Money Tree and stabilize it with a stake if needed.
    5. Let It Recover: Place the braided plant in a partially shaded area for a month to help it recover from the stress of braiding.

    5. How to Propagate Your Money Tree

    Propagating a Money Tree is simple and can be done through stem cuttings. Here’s how:

    1. Choose a Healthy Stem: Take a cutting that’s at least 4 inches long, making sure it has a couple of nodes.
    2. Place in Water: Put the cutting in a jar of water, ensuring that the nodes are submerged.
    3. Wait for Roots to Form: After a few weeks, the cutting will begin to root.
    4. Pot the Cutting: Once the cutting has established roots, pot it in a well-draining soil mix.

    6. Potting and Repotting Your Money Tree

    Money Trees need space to grow, so they should be repotted every couple of years. When repotting, use a pot that’s one size larger than the current one, and ensure it has adequate drainage. If you want to keep your plant small, you can avoid repotting it too frequently.

    7. Common Pests and DiseasesWhile Money Trees are generally resilient, they can be prone to a few pests:

    • Mealybugs: These pests can be controlled with insecticidal soap or neem oil.
    • Scale: These pests attach themselves to the plant’s stem and leaves. Treat them with horticultural oil.

    8. Troubleshooting Common Problems

    Problem: Yellow or Brown Leaves
    Cause: This can be a sign of overwatering or underwatering. Check the soil moisture and adjust watering as needed.

    Problem: Leggy Plant
    Cause: Insufficient light can lead to a leggy appearance. Move your plant to a brighter spot.

    Problem: Soft, Mushy Stems
    Cause: Overwatering can cause the stems to become mushy. Ensure your plant has proper drainage and reduce watering frequency.

    9. Money Tree FAQs

    How long do Money Trees live?

    With proper care, a Money Tree can live for a decade or more.

    Does the Money Tree flower?

    Money Trees only flower when grown outdoors in their native environment. Indoors, they do not bloom, as they require pollination by bats.

    Can I put my Money Tree outside?

    Yes, you can move your Money Tree outdoors during the summer, but ensure nighttime temperatures don’t fall below 50°F. Gradually acclimate the plant to outdoor conditions.

    10. Conclusion

    Caring for a Money Tree is relatively simple, and with the right attention to its light, soil, and watering needs, it can grow into a thriving, long-lasting plant. Not only does it enhance the beauty of your indoor space, but it’s also believed to bring positive energy and good fortune. By following the tips outlined in this guide, you can enjoy the benefits of this gorgeous plant for years to come.

    Pros and Cons of Money Tree Care

    ProsCons
    Easy to care for, perfect for beginnersSusceptible to root rot if overwatered
    Attractive, with a unique braided trunkCan grow tall and may need repotting
    Believed to bring good luck and positive energyCan attract pests like mealybugs and scale
    Tolerates medium light and dry airNeeds proper humidity in dry environments
    Helps reduce stress and purifies the airCan become leggy if not given enough light

    By following these simple care tips and addressing any common issues that arise, you’ll be well on your way

    to ensuring your Money Tree thrives in your home. Happy gardening!