Tag: Gardening Tips

  • 7 Greenhouse Ideas: Simple & Affordable DIY Solutions for Your Garden

    7 Greenhouse Ideas: Simple & Affordable DIY Solutions for Your Garden

    Introduction

    A greenhouse offers gardeners the opportunity to grow plants in a controlled environment, extending the growing season and ensuring a steady supply of fresh produce. Whether you want to grow vegetables, flowers, or even tropical plants, a greenhouse can make it possible year-round. However, not everyone has the space or budget for a large, pre-built greenhouse. Fortunately, there are numerous greenhouse ideas that you can create yourself with minimal cost and effort. These DIY greenhouse ideas are perfect for those with limited space or those looking to save money. By utilizing common household items and inexpensive materials, you can build a functional and effective greenhouse that serves your gardening needs.

    The Importance of a Greenhouse for Your Garden

    A greenhouse provides a unique advantage for growing plants compared to outdoor gardening. It shields your plants from unpredictable weather, such as frost or heavy rain, and allows you to grow delicate or tropical plants that would otherwise struggle in the open. By creating a controlled climate, a greenhouse helps to retain heat and humidity, encouraging optimal growth conditions for a wide variety of plants. Whether you’re an avid gardener or a beginner, having a greenhouse at your disposal can significantly improve your plant’s health and increase harvest yields.

    One of the key benefits of using a greenhouse is that it provides a longer growing season. You can start seeds early in the spring and continue growing well into the winter, depending on the types of plants you’re growing. A greenhouse also offers the flexibility to experiment with a wider variety of plants. This makes it an essential tool for any gardener looking to maximize their gardening space and productivity.

    While purchasing a greenhouse can be expensive, building one yourself is a cost-effective alternative. DIY greenhouse ideas allow you to build something tailored to your specific needs, whether it’s a small, simple structure for a few plants or a larger, more elaborate setup. With some creativity and basic materials, you can design a greenhouse that suits your garden space and budget.

    Affordable Greenhouse Ideas for Small Spaces

    Not everyone has the luxury of a large backyard or garden space, but that doesn’t mean you have to forgo the benefits of a greenhouse. Small greenhouses can be just as effective and are a perfect solution for those with limited space. Here are some inexpensive DIY greenhouse ideas that can be easily adapted to small gardens or even balconies.

    1.Upcycle Scraps to Build a Greenhouse

    One of the easiest and most cost-effective ways to build a greenhouse is by upcycling materials you may already have at home. Old windows, scrap wood, or even plastic bottles can be repurposed to create a small, functional greenhouse. Using recycled materials not only saves money but also reduces waste, making it an eco-friendly option.

    For a simple structure, you can use old wooden planks or metal sheets to form the sides of the greenhouse. If you have old windows lying around, you can attach them to the frame to create the walls and roof. Plastic bottles can also be cut and used as makeshift windows to allow light into the structure. This is a great way to create a greenhouse with minimal investment while still enjoying all its benefits.

    2.Recycle Old Picture Frames

    Old picture frames are another fantastic material to use when building a small greenhouse. These frames can be repurposed to create a box-like structure that serves as a mini greenhouse. The glass from the picture frames can act as the greenhouse “windows,” allowing sunlight to reach your plants while also providing protection from the elements.

    If you don’t have glass frames, you can stretch clear plastic over the frames to create a lightweight, affordable alternative. This DIY greenhouse idea is perfect for gardeners who want a small, portable greenhouse for starting seeds or protecting young plants. It’s also a great way to recycle unused picture frames and give them new life in your garden.

    3.Reuse Plastic Containers for Mini Greenhouses

    Plastic containers, such as clear plastic cups or fruit containers, are ideal for creating mini greenhouses. These containers can be placed over individual plants or small seed trays to create a tiny greenhouse effect. The plastic helps to retain moisture and warmth, creating the perfect environment for seeds to sprout and thrive.

    For an even larger greenhouse effect, you can use larger plastic containers like clear plastic bottles or containers to cover multiple plants or trays. This method is simple, quick, and inexpensive, making it a great option for gardeners on a tight budget or those who only need to protect a few plants.

    4.Use Clear Storage Bins for a Simple Greenhouse

    For those looking for a slightly larger solution, clear plastic storage bins can be repurposed into mini greenhouses. By simply turning the bin upside down and placing it over a bed of plants or individual containers, you create an instant greenhouse. These bins are ideal for protecting plants from cold weather or creating a warm, humid environment for seedlings.

    Clear storage bins are an affordable and practical solution for gardeners with limited space. They are easy to find at most home goods stores and can be reused season after season. Additionally, the clear plastic allows sunlight to penetrate, while the bin’s sides provide ample protection from the elements.

    5.Upcycling Household Items into Greenhouses

    Repurposing household items for your greenhouse project is not only a sustainable practice but also a creative way to build something functional and unique. There are many household items that can be used to construct a greenhouse, each offering its own set of advantages.

    6.Turn an Old Glass Cabinet into a Greenhouse

    If you have an old glass cabinet or curio cabinet lying around, it can be transformed into a charming mini greenhouse. These cabinets are often made from glass, making them perfect for growing plants indoors. While they may not be suitable for outdoor use unless secured properly, glass cabinets are ideal for small, indoor greenhouses.

    Simply place small potted plants inside the cabinet and ensure that it’s in a location with plenty of sunlight. The glass will help trap heat and humidity, creating an ideal environment for plant growth. This upcycled greenhouse option is both functional and stylish, adding a touch of charm to your home while benefiting your plants.

    7.Repurpose an Aquarium into a Greenhouse

    An old glass aquarium is another great option for building a small greenhouse. Aquariums are naturally transparent, which makes them perfect for growing plants indoors. Simply turn the aquarium upside down to cover your plants, or leave it upright with the screen at the top acting as a lid. This method works especially well for seedlings or smaller plants that need extra warmth.

    Aquariums are often available for little to no cost through online marketplaces or secondhand stores. They’re a great option for those looking for a simple, low-cost greenhouse solution. Plus, they’re easy to move around if you need to change the location of your plants.

    More DIY Greenhouse Ideas for Every Garden

    While the ideas mentioned above are great for small spaces, there are also other ways to create a greenhouse in your garden. If you have more room to work with, consider building a larger structure with a simple framework and plastic sheeting. This option is still affordable but offers more space for plants to grow.

    Another option is to purchase a DIY greenhouse kit. These kits provide all the materials and instructions you need to build your own greenhouse, saving you time and effort. While these kits tend to be more expensive than building from scratch, they are still more affordable than buying a pre-built greenhouse.

    FAQ

    Q: How much does it cost to build a DIY greenhouse?
    A: The cost of building a DIY greenhouse depends on the materials you use. Using recycled materials, such as old windows or plastic containers, can make it very affordable, with costs ranging from $20 to $100. Purchasing a greenhouse kit can cost anywhere from $100 to $500, depending on the size and complexity.

    Q: How long does it take to build a DIY greenhouse?
    A: Building a small DIY greenhouse can take anywhere from a few hours to a couple of days, depending on the complexity of your design and the materials you’re using.

    Q: Can a DIY greenhouse be used in all climates?
    A: Yes, DIY greenhouses can be used in various climates. However, if you live in an area with extreme temperatures, you may need to add additional insulation or use more durable materials to ensure your greenhouse provides adequate protection for your plants.

    Q: What are some plants I can grow in a DIY greenhouse?
    A: A variety of plants can be grown in a DIY greenhouse, including vegetables like tomatoes, peppers, and lettuce, as well as herbs, flowers, and even tropical plants.

    Pros and Cons of DIY Greenhouses

    ProsCons
    Affordable and cost-effectiveRequires time and effort to build
    Customizable to fit your spaceMay need maintenance or repairs
    Environmentally friendly (recycles materials)May not be as durable as pre-built greenhouses
    Provides a controlled growing environmentLimited space in small greenhouses

    Conclusion

    Building your own greenhouse is a great way to enjoy the benefits of year-round gardening without breaking the bank. With a little creativity and resourcefulness, you can create a greenhouse using everyday materials like old picture frames, plastic containers, or even an aquarium. These greenhouse DIY ideas allow you to grow plants in a controlled environment, extend your growing season, and experiment with a wider variety of plants. Whether you’re working with a small balcony or a large backyard, there are plenty of options for creating a functional and affordable greenhouse that meets your gardening needs. So, why wait? Start building your own mini greenhouse today and enjoy the rewards of a thriving garden all year long!

  • Top 10 Ergonomic Gardening Tools for Comfortable Gardening

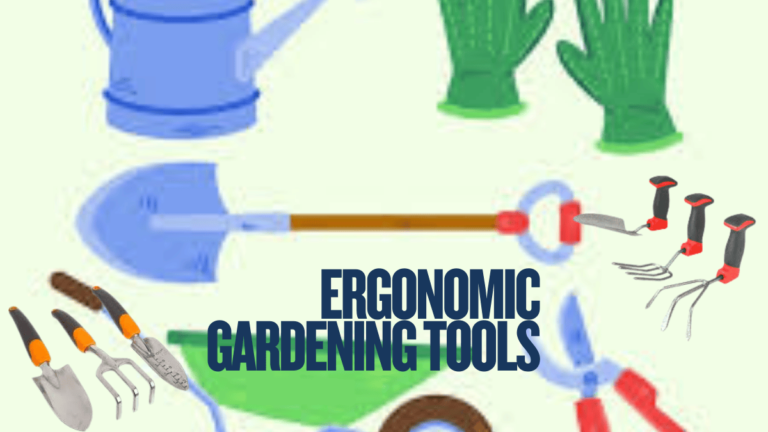
    Top 10 Ergonomic Gardening Tools for Comfortable Gardening

    Gardening is a cherished hobby for many, offering a peaceful retreat into nature and a chance to cultivate beauty. However, the physical demands of gardening can sometimes lead to discomfort or injury. This is where ergonomic gardening tools come into play, designed to enhance your gardening experience by aligning with the natural movements of your body. In this article, we will explore the benefits of ergonomic gardening tools, how to choose the right ones, and provide a comprehensive guide to some of the best tools available.

    Understanding Ergonomics in Gardening Tools

    Ergonomics is the science of designing tools and environments to fit the natural movements of the human body, minimizing physical strain and maximizing efficiency. In the context of gardening, ergonomic tools are crafted to reduce the physical impact on your back, knees, wrists, arms, and hands. By matching the physical demands of gardening tasks with your body’s capabilities, these tools help prevent injuries, improve work efficiency, and increase satisfaction.

    The Importance of Ergonomic Gardening Tools

    Ergonomic gardening tools are essential for maintaining good posture and reducing stress on tendons and joints. Traditional gardening tools can often lead to discomfort and long-term injuries due to their design, which may not align with the body’s natural movements. Ergonomic tools, on the other hand, are designed to fit comfortably in your hand, allowing you to work efficiently without excessive force or awkward postures.

    Key Features of Ergonomic Gardening Tools

    When selecting ergonomic gardening tools, consider the following features:

    • Cushioned Handles: These provide comfort and absorb shock, reducing strain on your hands and wrists.
    • Adjustable Handles: Customizable handles allow you to find the perfect fit for your height and reach, minimizing bending and stretching.
    • Lightweight Materials: Tools made from lightweight materials are easier to maneuver, reducing fatigue during extended gardening sessions.

    Benefits of Using Ergonomic Gardening Tools

    Ergonomic gardening tools offer numerous benefits, including:

    • Reduced Risk of Injury: By aligning with your body’s natural movements, these tools help prevent common gardening injuries such as tendonitis, carpal tunnel syndrome, and back pain.
    • Increased Efficiency: Ergonomic tools allow you to complete tasks more quickly and with less effort, enabling you to accomplish more in less time.
    • Enhanced Comfort: With features like cushioned grips and adjustable handles, ergonomic tools make gardening more comfortable, allowing you to enjoy your time in the garden without discomfort.

    Choosing the Right Ergonomic Tools for Your Garden

    Selecting the right ergonomic tools involves considering your specific gardening needs and physical capabilities. Here are some tips to help you choose the best tools:

    • Consider Your Gardening Tasks: Identify the tasks you perform most frequently and choose tools designed to make those tasks easier.
    • Test the Tools: Whenever possible, try out tools before purchasing to ensure they feel comfortable and natural in your hands.
    • Look for Quality Materials: Choose tools made from durable, weather-resistant materials to ensure they last for many gardening seasons.

    Top Ergonomic Gardening Tools to Consider

    Here are some of the best ergonomic gardening tools available, designed to make your gardening experience more enjoyable and pain-free:

    1. Pruner with Rotating Handle
    Pruner with Rotating Handle
    1. Description: This pruner is perfect for those suffering from wrist and hand pain. Its rotating handle allows fingers to move naturally along the non-slip grips, reducing strain on your wrists. The design ensures that you can prune for longer periods without discomfort, making it ideal for both amateur and professional gardeners.
    2. Pros and Cons:
    ProsCons
    Reduces wrist strainMay require an adjustment period for new users
    Comfortable gripSlightly higher cost
    Efficient cutting
    1. Radius Garden Weeder
    Radius Garden Weeder
    1. Description: This weeder is designed to minimize stress on the wrist while maximizing leverage, making it ideal for weeding tasks. Its unique design allows for easy removal of weeds with minimal effort, ensuring that your garden remains pristine without the usual strain on your hands and wrists.
    2. Pros and Cons:
    ProsCons
    Reduces wrist stressMay be heavier than traditional weeders
    Increases leverageHigher price point
    Durable design
    1. Padded Garden Kneeler
    1. Description: This lightweight kneeler provides support for your arms and eases back stress, making it perfect for planting and weeding. The padded surface ensures comfort during prolonged gardening sessions, while its foldable design allows for easy storage and transport. It’s an excellent choice for gardeners who spend a lot of time working close to the ground.
    2. Pros and Cons:
    ProsCons
    Provides excellent supportMay not be suitable for very tall individuals
    Lightweight and portableLimited color options
    Easy to store
    1. Bionic Relief Gloves
    Bionic Relief Gloves
    1. Description: Designed by a hand surgeon, these gloves improve comfort for achy hands and provide added grip without limiting motion. They are perfect for gardeners with arthritis or those who experience hand fatigue. The gloves’ ergonomic design ensures that you can maintain a firm grip on tools while protecting your hands from blisters and calluses.
    2. Pros and Cons:
    ProsCons
    Enhances grip strengthMay require sizing adjustments
    Reduces hand fatigueSlightly higher cost
    Durable and protective
    1. 4-Claw Weeder
    Claw Weeder
    1. Description: This 39-inch long-handled weeder allows you to remove weeds without bending or kneeling, saving your knees and back. Its four serrated stainless-steel claws grip weeds firmly, making removal quick and efficient. This tool is ideal for those who want to maintain a tidy garden without the physical strain of traditional weeding methods.
    2. Pros and Cons:
    ProsCons
    Reduces need for bendingMay be bulky for storage
    Easy to useHigher price point
    Durable construction
    1. Pro Ergonomic Lite Shovel
    1. Description: Featuring a patented O-handle, this lightweight shovel relieves arm, hand, and wrist stress, making digging tasks easier. Its ergonomic design allows for efficient transfer of power from your arms to the shovel, reducing fatigue and increasing productivity. This shovel is perfect for gardeners who need a reliable tool for digging and planting.
    2. Pros and Cons:
    ProsCons
    Lightweight designMay not be suitable for heavy-duty tasks
    Comfortable gripSlightly more expensive
    Reduces wrist strain
    1. Long Reach Garden Set
    1. Description: Perfect for those who have trouble reaching or bending over, these tools allow you to work from a standing position. The set includes various tools with extended handles, enabling you to perform a range of gardening tasks without straining your back. This set is ideal for gardeners with limited mobility or those who prefer to work while standing.
    2. Pros and Cons:
    ProsCons
    Reduces back strainMay require storage space
    Versatile useCan be heavier than standard tools
    Durable materials
    1. Deluxe Tractor Scoot
    1. Description: Featuring a bucket basket and a comfortable seat, this tool makes tasks requiring stooping or squatting easier on your knees and back. The scoot’s sturdy construction and maneuverability make it perfect for larger gardens where mobility is key. It’s an excellent choice for gardeners who need to transport tools and plants around their garden with ease.
    2. Pros and Cons:
    ProsCons
    Provides seating supportMay be cumbersome to move
    Includes storage basketHigher cost
    Durable and sturdy
    1. One Touch Rain Wand
    1. Description: This ergonomic water wand eliminates heavy lifting and bending, making watering tasks a breeze. Its one-touch valve allows for easy control of water flow, ensuring that your plants receive the right amount of water without waste. This tool is perfect for gardeners who want to water their plants efficiently and comfortably.
    2. Pros and Cons:
    ProsCons
    Easy to useMay require hose attachment
    Reduces physical strainLimited reach for large gardens
    Lightweight design
    1. Radius Garden Transporter
    1. Description: Lightweight yet strong, this transporter reduces strain while you work around your garden. Its ergonomic design allows you to move plants, soil, and tools with ease, minimizing the physical effort required. The transporter is ideal for gardeners who need to carry heavy loads without straining their back or arms.
    2. Pros and Cons:
    ProsCons
    Lightweight and strongMay not hold very large loads
    Easy to maneuverHigher price point
    Reduces physical strain
    See More 

    Conclusion: Embrace Comfort and Efficiency in Your Garden

    Ergonomic gardening tools are a game-changer for anyone who loves spending time in the garden but wants to avoid the physical strain that often accompanies it. By investing in tools that are designed with your comfort and safety in mind, you can enjoy gardening more fully and for longer periods. Whether you’re planting, weeding, or watering, ergonomic tools can make your gardening experience more enjoyable and less painful. So, equip yourself with the right tools, and let your garden thrive while you stay healthy and comfortable.

    By choosing ergonomic gardening tools, you not only enhance your gardening efficiency but also protect your body from unnecessary strain and injury. These tools are designed to fit naturally in your hands, allowing you to work longer and more comfortably. Whether you’re a seasoned gardener or just starting, investing in ergonomic tools is a wise decision that will pay off in the long run. So, get ready to transform your gardening experience and enjoy the beauty of your garden with ease and comfort.

  • How to Constructing a Raised Garden Bed for Small Spaces

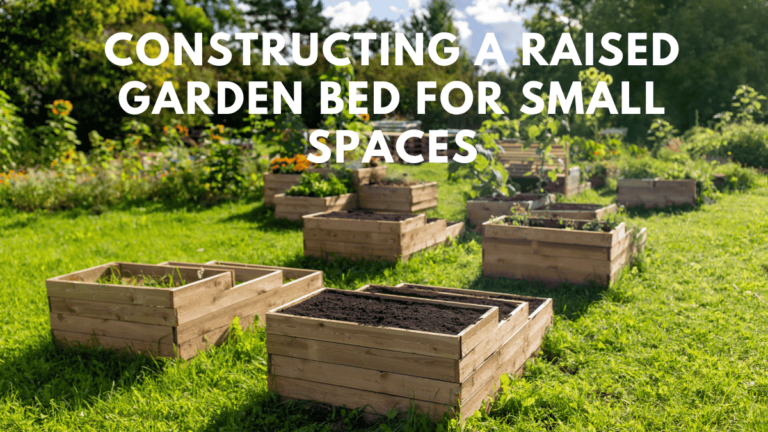
    How to Constructing a Raised Garden Bed for Small Spaces

    Introduction

    When it comes to enhancing your garden and growing your own food, building a raised garden bed is one of the most effective solutions. A raised garden bed allows you to grow a variety of plants in controlled conditions, even if you don’t have the ideal soil in your backyard. If you’ve ever wondered how to make a raised garden bed, this guide is for you.

    In this comprehensive article, we will explore everything you need to know about raised garden beds—why they are beneficial, how to build them, and what materials work best. Whether you’re a beginner or an experienced gardener, you will find valuable insights, tips, and step-by-step instructions that will guide you through creating the perfect DIY raised garden bed. We’ll also touch on the importance of using recycled materials, ensuring your project is not only efficient but also eco-friendly.

    Why Build a Raised Garden Bed?

    Raised garden beds, also known as planter boxes, are more than just a functional gardening solution—they are a beautiful addition to any garden space. When designed correctly, they offer various advantages over traditional gardening, particularly in urban settings or areas with poor soil conditions. Raised beds provide better drainage, easier access to your plants, and less stress on your back. Moreover, you have more control over the soil quality, which is crucial for ensuring healthy plant growth.

    One of the key benefits of using raised garden beds is the ability to create the perfect soil conditions. Instead of working with heavy, clay-like, or rocky soil, you can fill your raised bed with nutrient-rich compost, loamy soil, or a custom blend that is tailored to the plants you want to grow. Additionally, raised beds can help reduce weed growth and protect plants from pests, especially when combined with barriers like hardware cloth and landscape fabric.

    For those new to gardening, the ergonomics of raised beds make gardening more accessible and less physically demanding. Raised beds eliminate the need to bend down to ground level, making planting, weeding, and harvesting much more comfortable.

    The Cost of Building Raised Garden Beds

    The cost of building a raised garden bed can vary depending on the size of the bed, the materials you choose, and the tools required. On average, constructing a raised garden bed can cost anywhere between $100 to $300. This includes the cost of lumber, screws, soil, and optional features such as hardware cloth for pest prevention.

    The price fluctuates based on the materials you choose. For example, if you opt for high-quality, durable wood like cedar or redwood, the cost may be on the higher end. On the other hand, if you choose more affordable options like pine or fir, the cost will be significantly lower. Additionally, local soil delivery can also impact the cost, especially if you choose to fill multiple beds at once.

    Selecting the Right Location for Your Raised Garden Bed

    Choosing the right location for your raised garden bed is crucial to the success of your garden. Most vegetables thrive in full sun, so it’s essential to choose a spot that receives at least 6 to 8 hours of direct sunlight per day. Avoid placing your raised bed in areas shaded by trees, fences, or structures unless they face south and won’t block the sunlight.

    If you’re uncertain about the sunlight patterns, it can be helpful to observe the space for a full year. You can also use sun-tracking apps to plan the ideal placement for your garden. Keep in mind that the sun’s path changes with the seasons, so positioning your raised bed carefully is crucial for year-round gardening success.

    Planning Your Raised Garden Bed Layout

    The layout of your raised garden bed plays an important role in optimizing space and ensuring that your plants receive adequate sunlight. In the northern hemisphere, it’s ideal to orient the garden beds in a south-facing direction. This ensures maximum sunlight exposure throughout the year. In the southern hemisphere, the orientation should be reversed, with garden beds facing north.

    For best results, space your raised garden beds at least 28 to 36 inches apart. This spacing allows you to maneuver easily between beds with a wheelbarrow or garden cart, while also preventing overcrowding and shading between plants. If you’re working with limited space, it may be helpful to lay out the dimensions of your planned garden on the ground using ropes or sticks to get a better sense of how much room you need.

    Choosing the Best Wood for Your Raised Garden Bed

    When it comes to constructing a raised garden bed, choosing the right wood is vital for the durability and longevity of your bed. The most common wood options for raised garden beds are cedar and redwood. These woods are naturally resistant to rot and pests, making them excellent choices for building long-lasting beds. Redwood, in particular, is well-suited for areas with a risk of termite infestations.

    If you’re looking for a more budget-friendly option, softer woods like pine and Douglas fir can be used. However, these woods tend to have a shorter lifespan, typically lasting between 3 to 7 years, depending on the climate. It’s important to note that treated lumber, stained wood, or wood from railroad ties should be avoided due to potential toxicity to plants.

    For the best results, opt for wood that is certified by the Forest Stewardship Council (FSC), ensuring that it comes from sustainably managed forests.

    Determining the Size of Your Raised Garden Bed

    One of the main advantages of building your own raised garden bed is the flexibility in design. You can make the beds any size or shape to suit your available space. However, there are some key guidelines to keep in mind for optimal function.

    Width: It’s recommended that raised garden beds be no wider than 4 feet. This allows you to easily reach into the bed from both sides for planting, weeding, and harvesting. If the bed is against a wall or fence, it’s best to limit the width to 3 feet for easy access from the open sides.

    Length: Raised garden beds should generally not exceed 8 feet in length. Longer beds become heavier and more difficult to manage. If you need a larger bed, consider joining multiple smaller beds together to create the appearance of a single continuous bed.

    Depth: The depth of the raised bed should ideally be between 16 to 18 inches. This depth allows for sufficient root growth and water retention. For plants that require deeper soil, consider making the bed even taller.

    Step-by-Step Guide to Building Your Raised Garden Bed

    Now that you’ve selected the location and materials, it’s time to build your raised garden bed. Here’s a step-by-step guide to constructing your bed:

    Step 1: Choose Your Design and Materials
    First, decide on the size of your bed and the type of wood you’ll use. You may want to sketch a design to make sure you have accurate measurements.

    Step 2: Measure, Mark, and Cut the Lumber
    Once you have your materials, measure and cut the lumber to the desired lengths. Make sure to account for the overlap when joining the sides together.

    Step 3: Assemble the Frame
    Start by assembling the shorter sides of the bed and attach them to the corner posts. Use decking screws to ensure the structure is stable.

    Step 4: Add the Long Sides
    Once the short sides are in place, attach the long boards to complete the frame. Ensure everything is square and aligned before securing the boards with screws.

    Step 5: Install Support and Pest Barriers
    If necessary, add additional support beams for longer beds. For added protection, you can line the bottom of the bed with hardware cloth to prevent pests from burrowing.

    Step 6: Fill the Bed with Soil
    Fill the raised bed with a mixture of compost, soil, and other organic materials. Be sure to create a well-draining environment for your plants.

    Pros and Cons of Raised Garden Beds

    ProsCons
    Easier on your back due to elevated heightHigher upfront costs for materials and soil
    Better control over soil qualityMay require more maintenance than in-ground gardening
    Ideal for areas with poor or compacted soilTakes up space in your yard or garden
    Protects plants from pests and weedsPotentially more expensive if not using recycled materials
    Allows for customized plant spacingNeeds proper planning and space management

    Conclusion

    Building a raised garden bed is a fantastic way to start growing your own food, especially if you have limited space or poor soil conditions. By following this guide, you can create a durable and functional garden bed that not only enhances your gardening experience but also improves your yard’s aesthetic appeal.

    Using recycled materials can make the project even more rewarding, ensuring that your raised garden bed is not only sustainable but also eco-friendly. Whether you’re a seasoned gardener or a beginner, raised garden beds offer numerous benefits that can help you cultivate a thriving garden in any space.

    Frequently Asked Questions (FAQs)

    Q1: What is the best wood for a raised garden bed?
    The best wood for raised garden beds includes redwood, cedar, and pine. Redwood and cedar are the most durable, while pine is a budget-friendly option.

    Q2: Can I build a raised garden bed on grass?
    Yes, you can build a raised garden bed on grass. However, it’s recommended to remove the grass or lay down landscape fabric to prevent weeds from growing.

    Q3: How deep should my raised garden bed be?
    For optimal plant growth, your raised garden bed should be at least 16 to 18 inches deep. This allows for proper root growth and moisture retention.

    Q4: How much soil do I need to fill my raised garden bed?
    The amount of soil needed will depend on the size of your bed. A 4×8 foot bed will require approximately 2 cubic yards of soil to fill it to a depth of 16 inches.

    I hope you found this helpful and informative. If so, please leave a review below! Feel free to ask questions in the comments as well.

  • Building a Vertical Garden with Recycled Materials

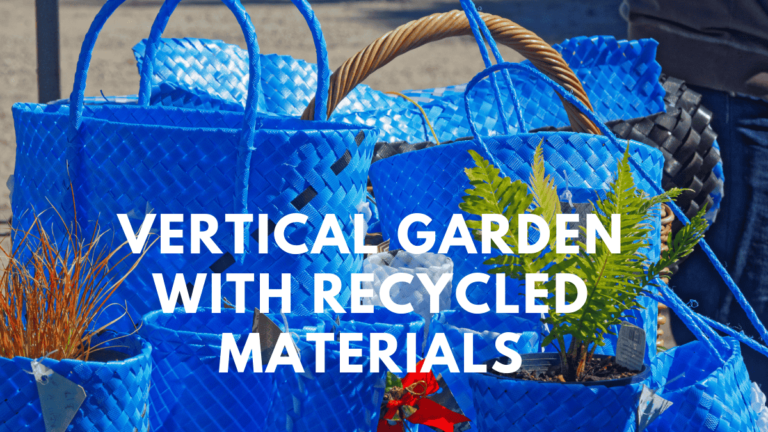
    Building a Vertical Garden with Recycled Materials

    Introduction to Vertical Gardening: A Sustainable Revolution

    Vertical gardening is rapidly becoming an essential practice for those looking to maximize their gardening space, especially in urban environments. This technique involves growing plants upwards, as opposed to the traditional sprawling approach, enabling gardeners to utilize their space more efficiently. Vertical gardens can be created using various methods, with a particular emphasis on DIY projects that are both cost-effective and sustainable. One of the most compelling aspects of vertical gardening is its ability to reduce the footprint of plants, expanding the number of crops you can grow within a limited area.

    Incorporating recycled materials into these vertical gardens not only reduces costs but also supports sustainability. For instance, using old wooden pallets, wire fencing, and discarded containers allows you to create functional and beautiful trellises, planters, and growing structures. In this article, we’ll explore the many benefits of vertical gardening, offer ideas for DIY projects, and guide you on how to incorporate recycled materials into your own garden to create a more productive and eco-friendly growing space.

    What Is Vertical Gardening? A Game-Changer for Urban Gardening

    At its core, vertical gardening is the practice of training plants to grow upwards rather than outwards, using structures like trellises, fences, and walls. This approach allows gardeners to increase their plant yield in confined spaces, such as small backyards or even balconies. Vertical gardening is especially advantageous in urban settings where outdoor space is limited. By growing plants vertically, you make the most of available space, turning unused vertical surfaces into valuable garden areas.

    Moreover, the use of recycled materials in vertical gardening projects is an excellent way to minimize waste. Items like old plastic bottles, scrap wood, and unused wire mesh can be repurposed to create functional, beautiful gardening solutions. This not only reduces costs but also contributes to a more sustainable way of gardening.

    The Numerous Benefits of Vertical Gardening

    1. Maximized Space Utilization

    One of the primary reasons gardeners choose vertical gardening is to save space. Growing plants vertically reduces the ground area needed, allowing for more plants in the same footprint. For instance, a squash plant, which typically requires about 20 square feet of space when grown on the ground, can be trained to grow upwards on a trellis, occupying just a fraction of the space. This makes it possible to share garden beds with a variety of other plants, effectively increasing your garden’s capacity.

    2. Simplified Harvesting Process

    Vertical gardening significantly eases the harvesting process. Instead of bending over or crawling on the ground to reach fruits or vegetables, plants grown vertically are positioned at a convenient height, making them easy to harvest without straining your back and knees. This accessibility is particularly beneficial for gardeners with physical limitations or those who simply want to make harvesting less of a chore.

    Moreover, vertical gardening reduces the chances of missing ripe produce. When fruits and vegetables are positioned at eye level, you are more likely to spot them and harvest them at the right time, ensuring that your crops are fresh and of the highest quality.

    3. Healthier Plants

    Plants grown vertically tend to be healthier than those left to sprawl on the ground. By keeping them off the soil, vertical gardening reduces the risk of fungal diseases, pests, and rot caused by damp, moist soil splashing onto plant leaves. Additionally, vertical growth allows for better air circulation around plants, which is crucial for reducing the spread of diseases.

    This method also prevents pests from easily reaching the plants, keeping your crops safe from small critters that might otherwise nibble on your tomatoes or cucumbers. As a result, vertical gardening can lead to healthier plants and a more successful harvest.

    4. Aesthetic Appeal

    Vertical gardens can significantly enhance the visual appeal of your garden space. These structures add depth, texture, and dimension to your outdoor area, creating an aesthetically pleasing environment. Arched trellises, in particular, provide an elegant and functional design element, offering both beauty and productivity. When properly arranged, vertical gardens can transform even the smallest garden into a lush, vibrant space.

    Vertical gardens also allow for the creative use of materials, making it easy to integrate personal style into the garden design. Whether you prefer rustic, DIY trellises made from reclaimed wood or sleek, modern wire structures, vertical gardening can be adapted to suit any aesthetic.

    Is Vertical Gardening Economical?

    When considering vertical gardening, cost is always a key factor. While pre-made trellises and vertical gardening kits can be expensive, there are many ways to build your own structures using recycled materials. For example, items like welded wire, T-posts, cattle panels, and even old chicken wire can be used to construct effective and affordable vertical gardens. The cost of buying these materials in bulk is often much lower than purchasing commercial trellises, making DIY vertical gardening a budget-friendly solution.

    Avoiding Expensive Pitfalls

    Many gardeners make the mistake of overspending on expensive pre-made gardening structures that may not provide the necessary functionality. For instance, a single trellis designed for one cucumber plant can cost around $35, which can quickly add up if you plan to grow multiple crops. Instead, consider using recycled materials that serve the same purpose without the hefty price tag.

    By being resourceful and creative with your materials, you can create a highly functional vertical garden that fits your budget. Simple DIY trellis ideas, such as using wooden pallets, recycled fencing, or old window frames, can be just as effective and much more affordable.

    DIY Vertical Gardening Projects Using Recycled Materials

    Creating a vertical garden with recycled materials is both easy and satisfying. Here are some DIY project ideas that can help you get started:

    1. Cattle Panel Trellises

    Cattle panels are an excellent material for building large arched trellises. They are sturdy and relatively inexpensive, and they can support a variety of climbing plants like beans, cucumbers, and tomatoes. You can purchase a cattle panel for around $30 and easily bend it into an arch shape to create a visually striking trellis for your garden.

    2. Plastic Bottle Vertical Planters

    Old plastic bottles can be repurposed into vertical planters by cutting holes in them and stacking them to create a cascading garden. This project is perfect for small spaces, as it utilizes vertical space efficiently and provides a unique, eco-friendly way to grow plants like herbs and strawberries.

    3. Recycled Fencing Trellises

    If you have any old fencing lying around, consider turning it into a vertical garden structure. You can repurpose broken dog kennels, old gates, or even scrap metal fencing to create custom trellises that will support climbing plants. This approach is both sustainable and cost-effective.

    4. Wooden Pallet Vertical Gardens

    Wooden pallets are a popular choice for vertical gardening because they are readily available and easy to convert into planters. By attaching a few pallets to a wall or fence, you can create a vertical garden that holds multiple rows of plants, such as lettuce, kale, and herbs.

    5. Dealing with Vertical Garden Maintenance

    Although vertical gardens are generally easier to maintain in terms of pest control and disease prevention, they do require consistent upkeep. For example, plants growing vertically need to be regularly checked to ensure they are properly trained on their support structures. As plants grow, they might need additional support, such as twine or clips, to keep them from falling over or getting tangled.

    Moreover, watering can be trickier with vertical gardens, especially if you’re growing a variety of plants. Unlike traditional gardening, where water is absorbed evenly throughout the soil, vertical gardens often need more targeted watering techniques. Drip irrigation systems or a watering can with a long spout can help ensure that each plant gets the water it needs.

    6. Addressing Potential Problems with Planting Materials

    While recycled materials are a cost-effective way to build vertical garden structures, they may not always last as long as purchased materials. For instance, chicken wire can be prone to rust over time, and wooden pallets may degrade under the weight of heavy plants or exposure to the elements. However, with proper care and maintenance, these materials can last for several seasons, and the environmental benefits of recycling far outweigh any potential drawbacks.

    If you are concerned about durability, consider applying protective coatings to your recycled materials. For example, you can treat wood with a weather-resistant sealant or use coated wire to prevent rust. This simple extra step can extend the lifespan of your vertical garden structures, ensuring that they continue to function well year after year.

    7. Choosing the Right Location for Your Vertical Garden

    Location is crucial when it comes to vertical gardening. Plants that thrive in vertical gardens, such as tomatoes and cucumbers, require plenty of sunlight to grow and produce fruit. Therefore, choosing the right spot with adequate sun exposure is vital for the success of your vertical garden.

    It’s important to assess your garden space and understand how sunlight moves throughout the day. If you’re growing plants indoors, position your vertical garden near a window that receives direct sunlight, or consider investing in grow lights to supplement natural light.

    Additionally, take into account wind exposure when selecting a location for your vertical garden. Strong winds can damage delicate plants or cause your vertical structures to collapse. Make sure your trellises or supports are sturdy enough to withstand gusty conditions, or position them in areas that are shielded from high winds.

    What Plants Are Best for Vertical Gardening?

    Vertical gardening is suitable for a wide range of plants, especially those that naturally climb or spread. Some of the best plants for vertical gardening include:

    • Climbing Beans: Beans are excellent for vertical gardening because they naturally climb, making them ideal candidates for trellises.
    • Cucumbers: Like beans, cucumbers can be trained to grow upwards on a trellis, saving space while producing high yields.
    • Melons: Many melon varieties can be grown vertically, allowing for easy harvesting and a more compact garden layout.
    • Squash: Vertical gardening helps squash plants grow upward, preventing them from sprawling and taking up too much space.
    • Tomatoes: Indeterminate tomato varieties benefit greatly from vertical gardening, as they can be trained to grow upwards, keeping the fruit off the ground.You can also experiment with mixing plants on different sides of the trellis. Just ensure that they have similar watering and sunlight requirements to prevent complications.

    Maximizing the Benefits of Vertical Gardening

    With a bit of effort and planning, vertical gardening can become a highly rewarding endeavor. Here are a few final tips to help you make the most of your vertical garden:

    1. Mix and Match Plants: As mentioned earlier, you can grow different types of plants on each side of a trellis, as long as they have similar water and sunlight needs. Be mindful of plant spacing to avoid overcrowding, and ensure that the plants do not shade each other out.
    2. Use Companion Planting: Vertical gardens are a perfect opportunity to implement companion planting, a technique that involves planting certain species together to benefit each other. For instance, growing basil near tomatoes can enhance the flavor of your tomatoes and help deter pests like aphids.
    3. Prune Regularly: As your vertical garden grows, be sure to prune plants to encourage healthy growth. Pruning helps plants to grow in the direction you want them to, and it prevents them from becoming too bushy or top-heavy, which can make them prone to falling over.
    4. Rotate Crops: To ensure the longevity of your vertical garden, practice crop rotation. This involves planting different types of crops in the same location each year to prevent soil depletion and reduce the risk of pest infestations.

    Frequently Asked Questions (FAQs)

    1. Can I grow flowers in a vertical garden? Yes, many flowers can thrive in vertical gardens, especially climbing varieties like morning glories, sweet peas, and clematis. Vertical gardening works great for both edible and ornamental plants.

    2. How often should I water my vertical garden? Watering frequency will depend on the types of plants you’re growing and the climate. Generally, vertical gardens require more frequent watering than traditional garden beds, as water drains faster in vertical structures. Consider using a drip irrigation system for more efficient watering.

    3. Are there any challenges with vertical gardening in cold climates? Yes, vertical gardens in colder climates may require additional protection during the winter months. You can cover plants with row covers or use a greenhouse structure to shield them from freezing temperatures.

    4. How do I prevent my vertical garden from toppling over? To ensure stability, use sturdy materials like T-posts, welded wire, or cattle panels. Secure your vertical structures firmly in the ground, and consider adding weight to the base if necessary.

    5. Can I grow trees vertically? While most trees require a lot of space and would not be suitable for vertical gardening, smaller fruit trees and dwarf varieties can be trained to grow upwards on trellises or arbors. This technique is ideal for those with limited space.

    The Future of Urban Gardening

    Vertical gardening is a revolutionary technique that allows gardeners to make the most of their space, whether they have a small balcony, a crowded backyard, or even just a tiny apartment. By growing plants upwards rather than outwards, vertical gardening provides a sustainable solution for city dwellers who wish to enjoy home-grown produce without sacrificing valuable space.

    By incorporating recycled materials into your vertical garden, you not only save money but also contribute to a more sustainable and eco-friendly way of gardening. From simple DIY planter projects to more elaborate trellis systems, the possibilities for creating a productive, space-saving garden are endless. Whether you’re looking to grow vegetables, fruits, or ornamental plants, vertical gardening can be adapted to suit your needs.

    With the right tools, materials, and a bit of creativity, you can easily transform your outdoor or indoor space into a thriving vertical garden. Not only will you have a visually appealing garden that’s easy to maintain, but you’ll also enjoy the many benefits of fresh, home-grown produce right at your fingertips.

    Final Thoughts: Vertical Gardening for Everyone

    Vertical gardening is more than just a trend; it’s a practical and sustainable solution for urban gardeners seeking to maximize their growing space. By using recycled materials and implementing DIY projects, you can create a functional and beautiful garden that not only saves space but also promotes sustainability. Whether you’re growing fruits, vegetables, or flowers, vertical gardening offers a creative way to cultivate a thriving garden in even the smallest of spaces.

  • How to Harvest Rainwater at home ?

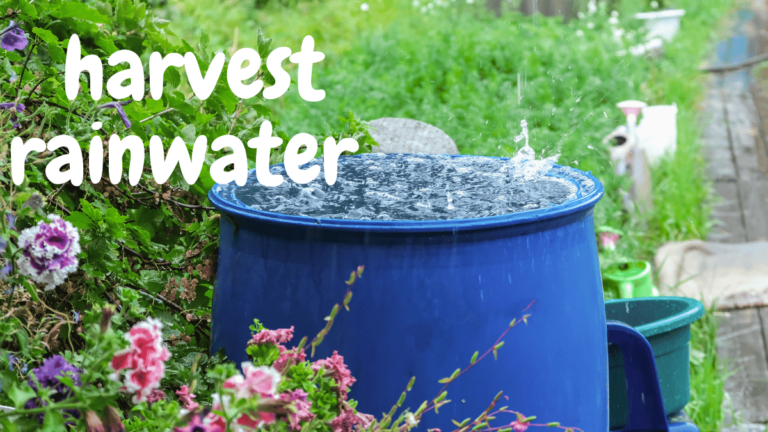
    How to Harvest Rainwater at home ?

    Introduction:

    In today’s world, where environmental consciousness is on the rise, learning how to harvest rainwater at home has become a pivotal step towards sustainable living. Not only does it help conserve precious water resources, but it also offers a practical way to reduce your monthly water bills. Whether you’re a homeowner aiming to cut down on water usage or someone passionate about eco-friendly practices, setting up a rainwater collection system can be both rewarding and beneficial.

    In this comprehensive guide, we’ll delve into the essentials of rainwater harvesting, explore its benefits, and provide a step-by-step approach to setting up your own system. We’ll also address common pitfalls and maintenance tips to ensure your system remains efficient. Let’s dive in!

    Understanding to harvest rainwater

    Rainwater harvesting involves collecting and storing rainwater that would otherwise flow off your roof and into storm drains. Instead of letting this valuable resource go to waste, you can capture, filter, and utilize it for various purposes, such as gardening, flushing toilets, and even drinking, provided it’s properly treated. While the concept might seem complex, it’s surprisingly straightforward once you grasp the basics.

    Why Consider to harvest rainwater?

    Before embarking on your rainwater harvesting journey, it’s essential to understand the compelling reasons behind it:

    1. Environmental Impact: By collecting rainwater, you reduce reliance on groundwater and municipal sources, which are often overused and can lead to droughts.
    2. Cost Savings: Utilizing rainwater for non-potable purposes like irrigation and toilet flushing can significantly lower your water bills.
    3. Self-Sufficiency: A rainwater system reduces dependence on public water supplies, especially in areas prone to water restrictions.
    4. Enhanced Garden Health: Rainwater is naturally soft and free from chemicals, making it ideal for nurturing plants and gardens.

    Types of to harvest rainwater Systems

    Choosing the right system depends on your water usage needs and preferences.

    Here are some common types:

    1. Simple Barrel System: This basic setup involves connecting a barrel to your gutters to collect rainwater. It’s cost-effective but may have limited storage capacity.
    2. Dry System: In this system, water is directed from the roof into a large storage tank, with pipes emptying after each rain. It’s suitable for larger storage needs.
    3. Wet System: Pipes remain full and transport water to a storage tank located away from the house. This setup is ideal for larger properties or when the tank isn’t adjacent to downspouts.

    Getting Started: Essential Components

    To set up a basic rainwater harvesting system, you’ll need the following components:

    • Catchment Area: Typically, your roof serves as the catchment area for collecting rainwater.
    • Gutters and Downspouts: These channel rainwater from the roof into the storage system.
    • First-Flush Diverter: This device diverts the initial, debris-laden rainwater away from the storage tank.
    • Storage Tank: Depending on your needs, this could be a barrel, tank, or cistern. Ensure it has adequate storage capacity.
    • Filter System: A basic mesh filter removes large debris, while advanced systems purify water for drinking.
    • Pump (Optional): If you plan to use the water for irrigation or household purposes, a pump may be necessary.

    Step-by-Step Guide to Setting Up Your Rainwater Harvesting System

    Let’s walk through the process of setting up a simple barrel-based rainwater harvesting system:

    1. Choose the Right Location for Your Barrel or TankPosition your storage tank or barrel near a downspout. Opt for a shaded area to keep the water cool and inhibit bacterial growth. Ensure the ground is level and stable to support the tank’s weight.
    2. Set Up Your Gutters and DownspoutsInstall gutters along the roof’s edge to collect rainwater and direct it to the downspouts. Regularly clear them of debris like leaves and twigs to maintain water flow. Consider adding gutter guards or leaf screens for easier maintenance.
    3. Install the First-Flush DiverterAttach a first-flush diverter to the downspout. This device diverts the initial, dirtier rainwater away from the storage tank. It’s readily available at most hardware stores and easy to install.
    4. Connect Your Downspout to the Storage TankSecurely connect the downspout to your barrel or tank to prevent leaks. For a barrel system, consider using a downspout diverter kit, which allows water to flow into the barrel when it rains and back into the drain when the barrel is full.
    5. Add a Filtration System Place a mesh filter on top of the barrel to keep out leaves, insects, and large debris.

    Certainly! Let’s continue with the setup and maintenance of your rainwater harvesting system, along with additional insights and a conclusion.

    1. Install a Spigot or Pump

    For easy access to the collected water, install a spigot near the bottom of the barrel. This allows you to fill watering cans or connect a hose. If your storage tank is larger or located far from where you need the water, consider installing a pump. Choose a pump size based on your intended water usage, whether for irrigation or household needs.

    Maintenance Tips for Your to harvest rainwater System

    To keep your system running efficiently, regular maintenance is crucial. Here’s a checklist to help you maintain your rainwater harvesting setup:

    • Clean Gutters Regularly: Every two months, clear gutters of leaves, twigs, and debris. This is especially important in the fall when leaves can quickly clog the system.
    • Inspect the First-Flush Diverter: Clean the diverter every couple of months to ensure it functions properly. It reduces the amount of debris entering your tank by diverting the first, dirtier water from your roof.
    • Check the Filter System: Regularly clean mesh screens to remove larger debris. For drinking water systems, replace filter cartridges as needed to maintain water quality.
    • Test for Algae: If your tank is exposed to sunlight, check for algae growth. If algae are present, clean the tank interior and consider relocating it to a shadier spot or covering it.
    • Flush the System: Every few months, completely empty the tank to remove sediment and contaminants. Many systems have a “tank drain” option to facilitate this process.

    Common Mistakes to Avoid

    While to harvest rainwater is relatively straightforward, beginners may encounter some common pitfalls. Avoid these to save time, money, and frustration:

    • Underestimating Tank Size: Many start with a small barrel only to find it fills quickly. Estimate your water needs carefully and opt for a larger tank if possible.
    • Ignoring Local Regulations: Check with local authorities to ensure there are no restrictions on rainwater harvesting in your area before setting up a system.
    • Neglecting Maintenance: Regular maintenance is essential to prevent system contamination or blockages. Keep your system in top shape with routine checks.
    • Placing the Tank in Direct Sunlight: Sunlight can promote algae growth, making the water unsuitable for use. Choose a shaded location or cover the tank to prevent this.

    Long-Term Benefits of to harvest rainwater

    While setting up a rainwater harvesting system requires some initial effort, the long-term benefits are substantial:

    • Eco-Friendly Living: Rainwater harvesting reduces the demand on natural resources, making it an excellent choice for environmentally conscious individuals.
    • Lower Water Bills: Over time, the savings on your water bills will accumulate, helping you reduce household expenses.
    • Improved Plant Growth: Rainwater is naturally soft, pH-balanced, and free of salts and chlorine, making it ideal for plants.
    • Emergency Backup: In case of water shortages or emergencies, having a reserve of collected rainwater can be invaluable.

    FAQs

    1. Is rainwater safe to drink?
      • Rainwater can be safe to drink if properly filtered and treated. Use a multi-stage filtration system and consider UV or chemical treatments for safety.
    2. How much rainwater can I collect?
      • The amount depends on your roof size and local rainfall. On average, a 1,000-square-foot roof can collect about 600 gallons of water per inch of rain.
    3. Do I need a permit for to harvest rainwater?
      • Regulations vary by location. Check with local authorities to determine if permits are required in your area.
    4. Can I use rainwater for all household needs?
      • Rainwater is suitable for non-potable uses like irrigation and toilet flushing. For potable uses, ensure proper filtration and treatment.
    5. How do I prevent mosquitoes in my rainwater tank?
      • Use fine mesh screens on tank openings and ensure all connections are sealed to prevent mosquito entry.

    Pros and Cons of to harvest rainwater

    ProsCons
    Reduces water billsInitial setup cost
    Environmentally friendlyRequires regular maintenance
    Improves plant healthLimited by local rainfall
    Provides emergency water supplyPotential for algae growth
    Promotes self-sufficiencyMay require permits or regulations

    Conclusion: A Step Towards Sustainable Living

    Implementing to harvest rainwater system at home is a significant step towards sustainable living. By capturing and utilizing rainwater, you not only contribute to environmental conservation but also enjoy practical benefits like reduced water bills and improved garden health. Whether you’re motivated by cost savings, environmental concerns, or a desire for self-sufficiency, rainwater harvesting offers a viable solution.As you embark on this journey, remember that the key to a successful to harvest rainwater system lies in careful planning, proper installation, and regular maintenance. By avoiding common pitfalls and adhering to best practices, you can ensure that your system remains efficient and effective for years to come.Moreover, rainwater harvesting fosters a sense of community sustainability. By setting an example, you can inspire neighbors and friends to adopt similar practices, collectively contributing to a more sustainable future. As more individuals embrace rainwater harvesting, the cumulative impact on water conservation and environmental preservation can be substantial.In conclusion, learning how to harvest rainwater at home is not just about saving money or water; it’s about making a conscious choice to live in harmony with our environment. By taking this step, you become part of a growing movement towards sustainable living, ensuring that future generations inherit a healthier planet. So, gather your materials, follow the steps outlined in this guide, and start reaping the benefits of rainwater harvesting today. Your garden, wallet, and the planet will thank you.

  • Best Fertilizers for Indoor and Urban Plants

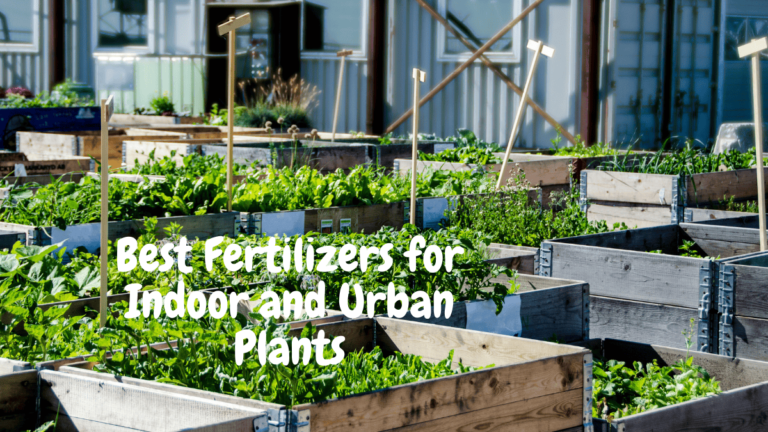
    Best Fertilizers for Indoor and Urban Plants

    Understanding Plant Fertilizer

    Plants absorb their nutrients from the soil or potting medium they grow in. Most plants arrive from the greenhouse with some fertilizer mixed in already, but as they grow, these nutrients are absorbed and depleted, requiring replenishment.In this article we will discuss the Best Fertilizers for Indoor Plants.Fertilizers come with an N-P-K ratio, representing the balance of Nitrogen, Phosphorus, and Potassium. Each element plays a crucial role in plant health:

    • Nitrogen (N): Fuels leafy growth and is essential for chlorophyll production.
    • Phosphorus (P): Supports root development, bud formation, and fruiting.
    • Potassium (K): Helps regulate water balance, prevents excessive moisture loss, and enhances overall plant health.

    Pro Tip: A balanced fertilizer with an equal N-P-K ratio (e.g., 10-10-10) is suitable for most houseplants. However, some plants may require more specific ratios, such as high-nitrogen for foliage plants or high-phosphorus for flowering plants.

    Choosing the Right Fertilizer

    With so many fertilizers on the market, selecting the right one can be daunting. Here are some factors to consider:

    • Plant type: Different plants have unique nutritional needs. For example, succulents require less fertilizer than flowering plants.
    • Growth stage: Plants in the active growing season (spring-summer) require more nutrients than those in dormancy (fall-winter).
    • Soil type: The type of potting mix used can affect fertilizer choice. For instance, organic potting mixes may require less fertilizer.

    Personal Experience: I once used a high-nitrogen fertilizer on my peace lily, thinking it would promote healthy growth. However, it ended up causing more harm than good, leading to weak and leggy stems. Now, I opt for a balanced fertilizer and monitor my plants’ responses to adjust as needed.

    Why Fertilizers Matter

    Indoor plants depend on you to replenish their soil’s nutrients. Over time, even premium potting mixes lose their vitality. Fertilizers restore essential elements like nitrogen (N), phosphorus (P), and potassium (K), ensuring robust growth and resilience.

    How to Fertilize Indoor Plants

    Fertilizing is beneficial during the active growing season, typically from spring to summer. During this time, plants are actively using resources and nutrients for new growth and reproduction. Here’s a step-by-step guide on how to fertilize:

    1. Choose the right fertilizer: Select a fertilizer that matches your plant’s needs, considering factors like N-P-K ratio and growth stage.
    2. Dilute the fertilizer: Follow the instructions on the label to dilute the fertilizer to the recommended strength.
    3. Water your plants: Water your plants as you normally would, using the diluted fertilizer solution.
    4. Monitor and adjust: Observe your plants’ responses to the fertilizer and adjust as needed.

    Pro Tip: Fertilize your plants in the morning, allowing them to absorb the nutrients throughout the day.

    When to Fertilize: Seasonal Timing

    • Spring-Summer: Feed every 4-6 weeks during active growth.
    • Fall-Winter: Pause unless your plant shows new growth (common in tropical species like fiddle leaf figs).

    Exception: My bird of parad

    3 Critical Signs Your Plant Needs Nutrients

    1. Yellow Leaves with Green Veins: Magnesium deficiency. Fix with Epsom salt spray (1 tsp/gallon water).
    2. Purple Undersides: Phosphorus shortage. Use bone meal or bloom booster.
    3. Leggy Growth: Low potassium. Try seaweed extract or banana peel tea.

    3 Signs Your Plant Needs Fertilizer

    Here are three common signs that your plant needs fertilizer:

    1. Yellowing leaves: If your plant’s leaves are turning yellow, it may be a sign of nitrogen deficiency.
    2. Slow growth: If your plant is not growing as quickly as expected, it may be due to a lack of phosphorus or potassium.
    3. Pale foliage: If your plant’s leaves are pale or washed out, it may indicate a magnesium deficiency.

    Pro Tip: Before fertilizing, ensure you’ve ruled out other potential causes of these symptoms, such as overwatering or underwatering.

    Organic vs. Synthetic Fertilizers

    The debate between organic and synthetic fertilizers is ongoing. Here’s a brief comparison:

    AspectOrganicSynthetic
    SpeedSlow-release (weeks)Fast-acting (days)
    Soil HealthImproves microbiomeCan harm beneficial microbes
    SafetyNon-toxic for ediblesRisk of salt buildup
    Eco-ImpactSustainableChemical runoff risks

    Expert Insight: Horticulturist Tim Flood notes, “Organic fertilizers are a better choice for the environment and can provide long-term benefits for soil health.”

    Soil pH and Fertilizer

    Soil pH plays a crucial role in nutrient availability. Most houseplants prefer a slightly acidic to neutral soil pH (6.0-7.0). However, some plants like acid-loving species (e.g., azaleas, blueberries) require a more acidic soil pH (5.5-6.5).

    • Soil testing: Regular soil testing can help determine the optimal fertilizer for your plants.
    • pH adjustment: If necessary, adjust the soil pH using lime or sulfur to create an optimal environment for your plants.

    Pro Tip: Use a soil test kit to determine your soil’s pH and nutrient levels before fertilizing.

    Fertilizers for Specific Plants

    Different plants have unique fertilizer requirements. Here are some examples:

    • Succulents: Use a low-nitrogen, water-soluble fertilizer (e.g., 2-7-7) during the growing season.
    • Orchids: Feed with a balanced, water-soluble fertilizer (e.g., 10-10-10) every 2-3 weeks.
    • Tomatoes: Use a high-phosphorus fertilizer (e.g., 5-10-5) to promote fruiting.

    Pro Tip: Research the specific fertilizer needs of your plants to ensure you’re providing the best nutrition.

    Special Cases: Edibles & Delicate Plants

    • Herbs (Basil, Mint): Use compost tea every 3 weeks.
    • Tomatoes: Opt for 5-10-5 fertilizer to prioritize fruit over leaves.
    • Orchids: Mist with diluted fish emulsion (1/4 strength) monthly.

    Eco-Hack: I use homemade worm castings

    FAQs

    Q: Can I use outdoor fertilizer for indoor plants?
    A: No, outdoor fertilizers are too concentrated and may harm indoor plants.
    Q: How often should I fertilize my indoor plants?
    A: Fertilize every 2-4 weeks during the growing season, depending on the plant’s needs.
    Q: Are organic fertilizers better than synthetic ones?
    A: Organic fertilizers are generally safer for the environment and can provide long-term benefits for soil health.

    Q: Can I use outdoor fertilizer indoors?
    A: No! They’re too concentrated and may burn roots.

    Q: How often should I fertilize succulents?
    A: Every 8-10 weeks in summer with a cactus-specific mix.

    Q: Are eggshells good fertilizer?
    A: Yes! Crush and steep in water for a calcium-rich brew.

    Pro Tip: Consider a balanced fertilizer as a starting point and adjust based on your plant’s response.

    Conclusion

    Fertilizing your indoor plants is an essential part of their care. By understanding the different types of fertilizers, their benefits, and how to use them, you can create a thriving indoor garden. Remember to choose the right fertilizer for your plants, follow the instructions, and monitor their responses. With the right nutrients, your plants will flourish, and you’ll enjoy the many benefits of indoor gardening.

  • How to Start an Urban Garden in Small Spaces?

    How to Start an Urban Garden in Small Spaces?

    Urban gardening has rapidly gained popularity in recent years as city dwellers are looking for ways to reconnect with nature, grow their food, and make the most of limited spaces. But what exactly is urban gardening? In short, it’s the practice of growing plants in an urban setting, whether on a rooftop, balcony or even in a small yard. But urban gardening isn’t just about plants. It’s about community, sustainability, and personal well-being. This comprehensive guide will walk you through the essentials of urban gardening and how to create your urban garden, no matter how much space you have.

    What is Urban Gardening?

    Urban gardening refers to cultivating plants in an urban environment, such as growing flowers, vegetables, or herbs in city spaces. With the growth of city populations and an increasing interest in sustainability, urban gardening has become a widespread practice. It helps individuals reconnect with nature, provides fresh produce, and offers benefits such as stress reduction and fostering a sense of community.

    Urban gardens can take many forms, including:

    • Container Gardens: Using pots, barrels, or any available containers to grow plants on balconies, windowsills, or even indoor spaces.
    • Community Gardens: Shared gardening spaces where neighbours or communities come together to grow food and connect.
    • Vertical Gardens: Utilizing vertical space on walls or trellises to maximize limited areas for plant growth.
    • Rooftop Gardens: A modern urban gardening trend where unused rooftop spaces are transformed into gardens.

    Urban gardening enhances the aesthetic appeal of urban spaces and reduces environmental impacts by lowering the carbon footprint. It helps combat food insecurity, especially in densely populated areas and promotes healthier living. Additionally, it allows individuals to grow their food, reducing dependency on store-bought produce.

    What is Urban Farming?

    While urban gardening and urban farming share similarities, they differ in scale. Urban farming involves growing food on a larger scale, often for commercial purposes and may include raising animals or growing crops such as fruits, vegetables, and herbs. Urban farming addresses the growing demand for locally sourced food in urban areas, aiming to reduce the reliance on long-distance transportation and increase food accessibility in cities.

    Cities like Tokyo, Hong Kong, Singapore, and major urban centres in the U.S., like Los Angeles and New York, have embraced urban farming in creative ways. From using rooftops to vacant lots, these cities are finding innovative ways to turn unused spaces into sources of fresh, local food.

    Why Urban Gardening Matters?

    Urban gardening is more than just growing plants; it is about creating a healthier and more sustainable urban environment. It can reduce environmental pollution, contribute to better air quality, and provide communities with fresh food. Moreover, it fosters well-being, as gardening has been shown to lower stress, improve mental health, and create strong community bonds.

    Benefits of Urban Gardening:

    • Improves Well-being: Spending time gardening has been shown to reduce stress levels and improve mental health.
    • Saves Money: Growing your food can cut down on grocery bills, especially for fresh produce.
    • Environmental Impact: Reduces food miles and the carbon footprint associated with transporting food long distances.
    • Enhances Community: Urban gardens help neighbours collaborate, share knowledge, and improve social connections.

    How to Get Started with Urban Gardening

    Starting an urban garden may seem intimidating, but it is easy to begin, even in small spaces. Whether you have a balcony, a small backyard, or a windowsill, urban gardening offers an opportunity to create a green space in your life. Here’s a step-by-step guide to help you get started.

    Step 1: Choose Your Space

    The first step in creating an urban garden is finding the right space. You don’t need a lot of room to get started; even a tiny balcony, windowsill, or shared community garden can be a perfect spot. Here are some space options:

    • Balcony or Patio: If you live in an apartment or condo, your balcony or patio can be a great place to start.
    • Rooftops: If you have access to a rooftop, it can be a prime space for a garden.
    • Shared Spaces: You can collaborate with neighbours to transform unused areas into a community garden.
    • Window Boxes: If you don’t have much outdoor space, window boxes are perfect for growing small plants or herbs.

    Be sure to measure your available space, as this will help you decide how much you can grow. If you’re in a shared space, it’s essential to ask for permission from building owners or local authorities before starting your garden.

    Step 2: Choose Your Containers

    Once you’ve chosen your space, it’s time to pick containers for your plants. While decorative pots are an option, they can often be expensive and not as practical. Here are some affordable alternatives:

    • Buckets and Plastic Containers: These can be bought cheaply at garden stores or repurposed from home.
    • Raised Beds: These can be purchased or made from wooden planks. Raised beds are ideal for growing plants in small spaces.
    • Upcycled Containers: Use old crates, wooden boxes, or even discarded toys to create creative containers for your garden.

    Tip: To maximize space, consider using vertical planters such as stackable planters, hanging baskets, or railing planters.

    Step 3: Choose Your Plants

    When selecting plants for your urban garden, think about the available sunlight, the type of plants, and the space constraints. Urban gardens often have limited space, so opt for plants that thrive in confined areas. Some great options include:

    • Vegetables: Leafy greens like lettuce, spinach, and kale thrive in smaller spaces. Tomatoes, peppers, and beans also do well in containers.
    • Herbs: Basil, mint, thyme, and parsley are perfect for container gardening and grow well in small spaces.
    • Flowers: Marigolds, petunias, and sunflowers are colourful additions to any garden and are easy to maintain.

    Ensure that your plants have the proper requirements for sunlight and water. Some plants may need more sunlight, while others might thrive in shadier spots.

    Step 4: Sow Seeds or Plant Seedlings

    After choosing your plants, you can either sow seeds or use seedlings for quicker results. If you decide to start from seeds, you can begin growing them indoors in small containers or egg cartons. Once the seedlings are ready, you can transplant them into larger pots or garden beds.

    If you opt for seedlings, you can buy them from a local nursery or garden centre. When planting, ensure your containers have drainage holes to avoid waterlogging. Fill the bottom with gravel or rocks to improve drainage, then add soil and plant your seedlings.

    Step 5: Water and Care for Your Garden

    Watering your garden is crucial, as plants in containers dry out faster than those planted directly in the ground. Water your plants regularly, but avoid overwatering, as this can lead to root rot. Depending on the weather and the type of plants, you may need to water once or twice a week.

    Consider investing in automatic watering systems or using self-watering containers if you’re often busy or away from home.

    Vertical Gardening: A Space-Saving Solution

    Urban spaces are often limited, but that doesn’t mean you can’t grow plenty of plants. Vertical gardening is an excellent option for maximizing your space and increasing plant yields. You can use various methods for vertical gardening:

    • Vertical Planters: These are stackable pots that allow you to grow plants on top of each other.
    • Wall Planters: Attach planters to your walls for an eye-catching display.
    • Trellises: Use trellises for climbing plants such as beans or tomatoes.

    By going vertical, you can use your walls, fences, and even window frames to grow plants efficiently.

    Urban Gardening Pros and Cons

    Urban Gardening Pros and Cons

    ProsCons
    Reduces food costsLimited space may restrict the number of plants
    Improves mental health and well-beingNeeds regular maintenance
    Helps reduce environmental impactRequires time and commitment
    Promotes sustainability and communitySome plants require specific conditions (sunlight, water)
    Enhances urban aestheticsPests may become a problem in small spaces

    Frequently Asked Questions (FAQs)

    1. Can I start an urban garden in an apartment? Yes! You can start an urban garden in small spaces like balconies, windowsills, or even indoors using containers.

    2. What plants are best for urban gardens? Vegetables like peppers, tomatoes, and salad greens, as well as herbs like basil and thyme, are great choices for urban gardening.

    3. How much time does urban gardening require? It depends on the plants and the setup. On average, expect to spend a few hours a week tending to your garden.

    4. Can I grow flowers in an urban garden? Yes! Flowers like sunflowers, petunias, and marigolds thrive in urban gardens and add vibrant color to your space.

    5. What is the difference between urban gardening and urban farming? Urban gardening is typically done on a smaller scale, often for personal use, while urban farming involves larger-scale food production, often for community consumption or commercial purposes.

    Conclusion

    Urban gardening is an excellent way to bring nature into your life, no matter where you live. Whether you’re looking to grow your own food, create a peaceful green space, or foster a sense of community, starting an urban garden is the perfect solution. With just a little planning, creativity, and dedication, you can turn any small space into a thriving garden that provides both beauty and fresh, homegrown food. So why wait? Start your urban garden today and watch your city space bloom with life!

  • 5 Garden Design ideas to Elevate Your Outdoor Space

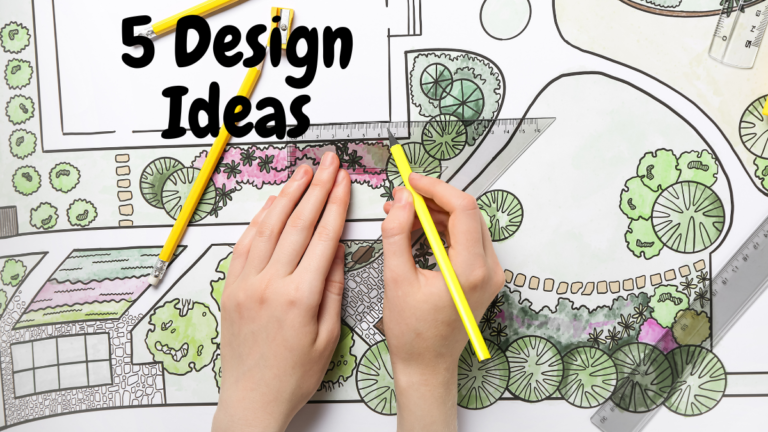
    5 Garden Design ideas to Elevate Your Outdoor Space

    Creating a garden design ideas that’s both functional and beautiful requires careful planning and consideration. Whether you’re looking to grow your vegetables, create a peaceful sanctuary, or enhance your landscape, understanding the core elements of garden design will help you build the garden of your dreams. In this article, we’ll explore five essential garden elements that I always incorporate into my designs and that you should consider for your garden.

    These elements will enhance your garden’s beauty, making it easier to maintain and improve your overall gardening experience. Let’s explore how each of these elements can take your garden to the next level.

    Top 5 Garden Design ideas

    1. Raised Garden Beds: Starting with the Right Foundation

    The raised garden bed is one of the most impactful elements in garden design. It serves as the foundation for many successful gardens, especially if you plan on growing vegetables, herbs, or other plants requiring specific soil conditions. Raised beds are fantastic for gardeners looking for a controlled, clean environment for their plants.

    Why Raised Garden Beds?

    • Better Soil Quality: Raised beds allow you to create the ideal soil for your plants. You can fill the beds with nutrient-rich compost or organic soil, which promotes healthy growth. Unlike traditional gardens, you won’t have to deal with poor soil quality or the constant need for soil amendments.
    • Improved Drainage: Raised beds are elevated, so water drains are more effective. This is especially important for plants like tomatoes, carrots, and lettuce, which need well-drained soil.
    • Increased Accessibility: Raised beds are perfect if you have mobility issues or just want to avoid back strain. The height of the beds minimizes bending over, making gardening more comfortable and less strenuous.
    • Pest Control: Raised beds are less prone to pests like slugs or weeds, especially when you add barriers to the base or use enclosed systems.

    Design Tips for Raised Beds:

    • Size and Shape: The width of your raised bed should allow easy access to all parts without bending or stretching too much. A width of about 2 to 3 feet is ideal for most gardeners.
    • Height: A bed 12 to 18 inches high is suitable for most plants, but for deeper-rooted plants like carrots or potatoes, choose a 2-foot-high raised bed.
    • Materials: Opt for natural, durable materials like cedar, stone, or brick. These materials blend seamlessly into most landscapes and ensure that your raised bed lasts through the seasons.

    2. Garden Trellises: Vertical Gardening for Better Space Management

    Trellises are the perfect solution for gardeners with limited space who want to grow vining plants such as tomatoes, cucumbers, or beans. They provide vertical support, allowing plants to grow upwards instead of sprawling across the ground.

    Why Use Trellises?

    • Maximizes Space: Vertical gardening allows more plants to be grown in smaller spaces. You save valuable ground space for other plants by training plants to climb trellises.
    • Healthier Plants: Trellises help improve airflow and sunlight exposure, which reduces the risk of plant diseases and helps them grow better.
    • Aesthetic Appeal: Trellises bring beauty to your garden, especially when covered with lush vines or flowers. They create a focal point and add dimension to your garden.

    Types of Trellises:

    • Panel Trellises: These flat trellises can be placed against walls, fences, or in the middle of garden beds. They are perfect for narrow spaces and allow plants to grow upward.
    • Obelisk Trellises: Shaped like pyramids or towers, obelisks add an architectural touch to your garden. They’re great for raised beds or smaller garden spaces.
    • Arch Trellises: Arch trellises create an elegant garden entrance or pathway. They allow plants like climbing roses or beans to thrive while providing a charming structure.

    Design Tips for Trellises:

    • Material: Consider using sturdy materials like powder-coated steel, which can withstand weather conditions and last many years. Wooden trellises (e.g., cedar or bamboo) are more affordable but may need to be replaced more frequently.
    • Placement: Ensure the trellis provides adequate support without blocking sunlight or airflow to other plants. If it’s a tall trellis, secure it well to prevent it from toppling in strong winds.

    3. Garden Borders: Structuring and Defining Your Garden Space

    Garden borders are crucial for visually separating your garden from the rest of your yard. They also play an important role in garden maintenance, keeping grass and weeds from creeping into your beds. Whether growing flowers, vegetables, or herbs, borders help structure your space, ensuring your garden looks neat and organized.

    Why Garden Borders Matter:

    • Create Boundaries: Borders define your garden space, separating it from the rest of your yard or landscaping.
    • Prevent Invasive Grass and Weeds: A well-installed border keeps grass and weeds from invading your garden beds, reducing maintenance efforts.
    • Add Visual Appeal: Borders give your garden a polished, professional, and well-maintained appearance.

    Types of Garden Borders:

    • Metal Edging: Provides a sleek, modern look and is durable enough to withstand weather conditions. Steel is a popular choice.
    • Stone or Brick: Adds a natural, rustic feel to your garden. Stone borders are perfect for creating a more natural aesthetic.
    • Plastic or Rubber: Budget-friendly and easy to install, though not as durable as metal or stone borders.

    Design Tips for Borders:

    • Durability: Choose materials that will withstand the elements in your region. Metal and stone offer the most longevity.
    • Installation: Dig a trench around the perimeter of your garden to secure the border in place. This will prevent it from shifting over time.

    4. Garden Pathways: Accessibility Meets Aesthetic Appeal

    Pathways are not just functional—they can also serve as an aesthetic element that enhances the beauty of your garden. They help with accessibility, allowing you to move easily between garden beds, and they protect your plants from damage.

    Why Garden Pathways?

    • Ease of Access: Pathways provide easy movement between garden areas, allowing you to tend your plants without stepping on them.
    • Enhance Aesthetics: A well-designed pathway can be a focal point in your garden. It guides the eye and creates visual interest.
    • Prevent Soil Compaction: Pathways help prevent soil compaction in areas where you frequently walk, ensuring that your garden beds remain fertile and well-drained.

    Pathway Materials:

    • Gravel: Gravel is durable, easy to install, and creates a natural look in the garden. It also helps with drainage.
    • Mulch: Mulch is affordable and provides a soft, natural look, though it degrades over time and requires replenishing.
    • Stone or Brick: These materials create a more formal, structured look and are long-lasting.

    Design Tips for Pathways:

    • Width: Pathways should be wide enough to comfortably accommodate foot traffic. A width of 2 to 3 feet is ideal.
    • Flow: Ensure the pathways lead naturally through your garden, creating smooth transitions from one area to another.

    5. Native Plant & Pollinator Garden Spaces: Eco-Friendly Design

    Native plants are essential for creating a garden that supports local wildlife, including pollinators like bees, butterflies, and birds. By incorporating a pollinator-friendly garden into your design, you’re helping to maintain biodiversity and improve the health of your entire garden ecosystem.

    Why Native Plants and Pollinator Gardens?

    • Support Local Wildlife: Native plants attract pollinators and beneficial insects, improving plant health and the overall balance of your garden.
    • Low Maintenance: Native plants are adapted to your local climate, require less water and fewer chemicals, and are more resistant to pests.
    • Eco-Friendly: Planting native species helps conserve local ecosystems and reduce the spread of invasive plants.

    Design Tips for Native Plants:

    • Research Local Plants: Learn about the native plants in your area and choose species that will thrive in your garden’s climate.
    • Pollinator Spaces: Include flowers, shrubs, and trees that provide nectar, shelter, and nesting spaces for pollinators.

    FAQs

    Q1: What are the benefits of raised garden beds? Raised garden beds provide better drainage, improve soil quality, and make gardening more accessible. They also offer easier maintenance and can help protect plants from pests.

    Q2: How do I choose the right trellis for my garden? Choose a trellis based on the types of plants you’re growing. For taller plants, go for obelisk or arch trellises. For smaller spaces, panel trellises are ideal.

    Q3: Can I create a pollinator garden if I don’t have a lot of space? Yes! Even a tiny pollinator garden with native plants and flowers can attract bees, butterflies, and birds. Focus on growing a mix of nectar-rich plants in any available space.

    Conclusion: Creating Your Dream Garden Design Ideas

    Incorporating these five key elements into your garden design ideas—raised garden beds, trellises, borders, pathways, and native plant spaces—will help you create a functional, beautiful, and eco-friendly garden. Each element works together to enhance the overall gardening experience, making it easier to maintain while supporting local wildlife. Whether you’re growing your vegetables, designing a peaceful retreat, or welcoming pollinators into your garden, these elements transform your outdoor space into the garden of your dreams. Happy gardening!